Thingiverse

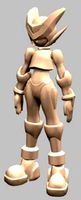
Mojo Raspberry Pi Zero W portable music streamer player by rumina
by Thingiverse
Last crawled date: 3 years, 1 month ago
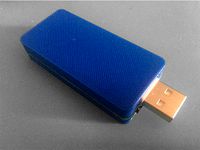
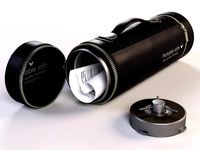
This is a Chord Mojo portable music streamer / player with a Raspberry Pi Zero W. Stream music / radio stations, play local stored files.
Hardware cost 21 usd + microsd card + printing cost ~30 usd :-).
It's a portable version of my Chord Mojo docking station, http://www.thingiverse.com/thing:1716990 .
A universal version with a 18650 battery is here: http://www.thingiverse.com/thing:2267531 .
I use a minimal linux version from RuneAudio (http://www.runeaudio.com/) to stream music from my nas/local storage to the Chord Mojo, using my phone with bubbleupnp/webbroser/rune app to control the dnla renderer/airplay/local media player.
Of course you can use any Linux version that works with the Raspberry Pi Zero W.
Soldering experience for small parts needed, experience with the Raspberry (flash sd card, setting up, config adjustments).
Look at http://www.runeaudio.com/forum/raspberry-pi-zero-support-in-0-4-t3711.html for RuneAudio and Raspberry Pi Zero.
Technical specification:
Size: 82mm x 60mm x 11mm
Weight: 55 gr
Battery: 1600ma
Boot time: ~30 sec
Runtime streaming: ~6 hours
needed Hardware:
1 micro usb cable - 2 usd
1 Raspberry Pi Zero W board - 10 usd
1 18650 powerbank - 2 usd
1 polymere lithium ion battery (max size 76mm x 27mm x 8mm) - 6 usd
1 Powerswitch - 1 usd
1 16gb/xx gb fast micro sd card with rune audio image - 8 usd - xx usd
Install the RuneAudio OS on the microsd card and test the installation, use a wall adapter and a mirco usb cable. If everything is fine expand the rune os partition to use the full space of your micro sd card (https://raspberry-hosting.com/en/faq/how-expand-arch-linux-root-partition). Use sftp to the /mnt/MPD/LocalStorage folder to transver your music files.
Print the case, test if the two case parts fits well, some afterwork may be needed (depends of the print quality). If everything fine glue the window in with superglue.
Remove the powerbank board and desolder the big usb connector and the two battery connectors. Solder two cable to the powerbank pcb - place of the big usb connector, pin 1 (positiv - orange cable) and 4 (ground/negativ - white cable) (power out to the Raspberry Pi Zero W), secure them with 2 component glue.
(Read this first and test the placment befor using the glue) - Take the Raspberry Pi Zero W and place it in the down case, should secure fit via the two micro usb ports cut outs. Use a small amount of 2 component glue and put a small ammount on the top of the camera connector. Now you take the powerbank pcb, put some glue on the ferrit part and place it so that it fit the charging micro sub cut of the case, use 2 clothes pegs, wait till the glue is cured. When the placment was right and fits well use hot glue between the Raspberry Pi Zero W and the powerbak board for a secure fit. You can now solder the two cabels to the Raspberry Pi Zero W board (google serach "raspberry pi zero pinout"), using a longer positiv cable and cut them later for connecting the power switch.
Take the Raspberry Pi Zero out and solder the micro usb cable to the underneath of the Raspberry Pi Zero W board, use the golden test points (test the lengt of the cable first). Secure the cabels with 2 component glue.
Solder the powerswitch to the positiv cable.
Solder the battery to the powerbank board and test your work, everything should work now.
Secure the powerswitch in the case with 2 component glue (only underneath). Put the battery, Raspberry Pi Zero W in the case and test if the case can be closed, if it's fine, secure the Raspberry Pi Zero W board with 4 drops hot glue in the case (so you can remove it easy if needed). Secure the micro usb cable with some hot glue. You can secure the battery with adhesive tape but it's not needed (depends on the battery size).
Close the case using superglue.
If you want to use the case for other projects/dacs, don't solder the micro usb cabel to the board, instead open the mirco usb out and/or hdmi port with a rasp, you see the size markin inside the case. Don't open the micro usb power port, you can only use this port if the power switch is off or (better) the battery is secured with a additional diode, DANGER OF FIRE DUE BATTERY OVERLOAD.
Similar models
thingiverse
free

Raspberry Pi Zero W portable 18650 case - media player / streamer by rumina
...t if the power switch is off or (better) the battery is secured with an additional diode, danger of fire due to battery overload.
thingiverse
free

Mojo Raspberry Pi Zero docking Station by rumina
...tments).
look at http://www.runeaudio.com/forum/raspberry-pi-zero-support-in-0-4-t3711.html for rune audio and raspberry pi zero.
grabcad
free

Raspberry Pi Zero W - Sleek Case
... pins, display port, micro usb ports, and sd card. uses standard 2mm dowels to secure. intended for 1 time assembly (using glue).
thingiverse
free

Adjustable Raspberry Pi Zero W Security Camera by Omidontop
...ts
raspberry pi zero w
raspberry pi camera v2.1
raspberry pi zero w 40mm camera cable
8gb micro sd card
raspberry pi power supply
thingiverse
free
USB Dongle Case for Raspberry Pi Zero W by kapakahi
...soldering wires to pads. use #4 3/8" screws or similar in...
thingiverse
free
Raspberry Pi Zero W with USB hat case by Hazzmatt
...raspberry pi zero w with usb hat case by hazzmatt
thingiverse
case for a raspberry pi zero w with a usb hat.
thingiverse
free

Raspberry Pi Zero W Case and Mount by clearchris
...amera cable, sd card and pins.
to use the case, you will need to drill the rpizw mount holes out to 3mm.
freecad source provided.
grabcad
free

Raspberry Pi Zero 2 W
...ypi.com/products/raspberry-pi-zero-2-w/
wish it used a usb c connection instead and micro hdmi connector like the raspberry pi 4
thingiverse
free

Raspberry Pi Zero W Case USB Dongle by joseigbv
...raspberry pi zero w case usb dongle by joseigbv
thingiverse
convert your raspberry pi zero into a usb dongle.
thingiverse
free

Case for Raspberry Pi Zero + Pi Zero USB Docking Hub by Xav987
... micro usb port from the raspberry pi zero are inaccessible with the case, because you have to use the port from the hub instead.
Rumina
thingiverse
free

Tube handler for ALO Continental Dual Mono and Continental V5 by rumina
... v5 by rumina
thingiverse
a small tool to make the change of tubes easy for the alo contiental dual mono and alo continental v5.
thingiverse
free

Mojo SD Card Adapter by rumina
...tout the sd card slot and the top whitout the micro usb holder/cut.
would be great to see other adapters for the mojo - share it.
thingiverse
free
Mojo Raspberry Pi Zero docking Station by rumina
...tments).
look at http://www.runeaudio.com/forum/raspberry-pi-zero-support-in-0-4-t3711.html for rune audio and raspberry pi zero.
thingiverse
free

Abyss AB-1266 (Phi) headphone - vented baseplate for the earpads by rumina
...se other earpads (audeeze, dekoni, angle pads etc).
i open 2-3 vents in the front of the ear, a lot of different settings to try.
thingiverse
free
Raspberry Pi Zero W portable 18650 case - media player / streamer by rumina
...t if the power switch is off or (better) the battery is secured with an additional diode, danger of fire due to battery overload.
Mojo
3ddd
$1
Mojo Candlesticks
... mojo , подсвечник
подсвечники ручной работы mojo candlesticks, okha
turbosquid
$19

Mojo Armchair
... available on turbo squid, the world's leading provider of digital 3d models for visualization, films, television, and games.
3ddd
$1

TON Armchair Mojo
...max 2012.
на сайте присутствуют все возможные решения по материалам.http://www.ton.eu/en/products/detail/armchair-mojo/
3d_ocean
$9

Ton Mojo Hi-Poly
...3d model made in c4d + vray it reflects the reall piece. and it use arroway textures, which are resized and part of the download.
turbosquid
$39

Suspended Armchair Mojo 001
...model suspended_armchair_mojo_001 for download as max and obj on turbosquid: 3d models for games, architecture, videos. (1232713)
3d_export
$49

Bike Frame Mojo HD 3D Model
...gles safety 3ds max
bike frame mojo hd 3d model download .c4d .max .obj .fbx .ma .lwo .3ds .3dm .stl digitallab3d 106790 3dexport
3d_export
$49
Bike Frame Mojo HD White 3D Model
...afety 3ds max
bike frame mojo hd white 3d model download .c4d .max .obj .fbx .ma .lwo .3ds .3dm .stl digitallab3d 106792 3dexport
3d_export
$49
Bike Frame Mojo HD VP 3D Model
...s safety 3ds max
bike frame mojo hd vp 3d model download .c4d .max .obj .fbx .ma .lwo .3ds .3dm .stl digitallab3d 106791 3dexport
3d_sky
free

Mojo Candlesticks
...mojo candlesticks
3dsky
okha candlestick
candlesticks handmade mojo candlesticks, okha
thingiverse
free

Crane for Mojo DIY robot
... diy robot
thingiverse
mojo crane
a crane for mojo diy robot
mojo making me a cup of tea with this crane
original tinkercad item
Streamer
3d_export
$10

streamer lowpoly
...streamer lowpoly
3dexport
you can also use for 3d printing.
turbosquid
$5

9t5 Low Poly Streamers
...alty free 3d model 9t5 low poly streamers for download as fbx on turbosquid: 3d models for games, architecture, videos. (1684386)
3d_export
$18
song dynasty-streamer house 01
...song dynasty-streamer house 01
3dexport
song dynasty-streamer house 01<br>3ds max 2015
3d_ocean
$4

Shave Streamers Celebration
...s can be used for small 3d projects, product commercial, personal projects. the purchase will include a .mel file, maya file a...
turbosquid
$50

Chinese dim sum bamboo streamer
...im sum bamboo streamer for download as max, obj, stl, and fbx on turbosquid: 3d models for games, architecture, videos. (1668057)
3d_export
$5

Party decoration 3D Model
...3dexport party decoration celebration holiday vacation color accesories ribbon streamer seasons birthday string happy vacations party decoration 3d model...
3d_export
$25

CGAxis Party Balloons 06 3D Model
...party kids children decoration textures materials realistic detailed ribbon streamer cgaxis party balloons 06 3d model cgaxis 37122...
3d_export
$25

CGAxis Party Balloons 07 3D Model
...party kids children decoration textures materials realistic detailed ribbon streamer cgaxis party balloons 07 3d model cgaxis 37123...
3d_ocean
$5

Flag
...burgee cloth colors emblem ensign flag jack pennon standard streamer wind general this is the model of a generic...
3d_export
$20

Chair gamer x
...a computer, playing games for hours on end attracted streamer to purchase gaming chairs. the first gaming chairs were...
Portable
3d_ocean
$4
Portable Shelves
...portable shelves
3docean
drawer furniture portable shelves wheel
portable shelves with wheels
3d_export
$5

portable generator
...portable generator
3dexport
3d model portable generator. videogames.
3d_export
$16
Portable Radio
...portable radio
3dexport
turbosquid
$30

Portable Generator
...
royalty free 3d model portable generator for download as obj on turbosquid: 3d models for games, architecture, videos. (1579389)
turbosquid
$5

Portable Radio
...uid
royalty free 3d model portable radio for download as fbx on turbosquid: 3d models for games, architecture, videos. (1402570)
turbosquid
$3

Portable Keyboard
...royalty free 3d model portable keyboard for download as blend on turbosquid: 3d models for games, architecture, videos. (1281917)
turbosquid
$49

Portable Office
...3d model portable office for download as max and unitypackage on turbosquid: 3d models for games, architecture, videos. (1470540)
turbosquid
$15

PORTABLE LIGHTS
...lty free 3d model portable lights for download as max and obj on turbosquid: 3d models for games, architecture, videos. (1679464)
3d_ocean
$12
Portable Sofa
...r table 2. minimalis sofa 3. sofa and mini sofa (can for foot) 4. mini sofa and table tertured with v-ray, and no material needed
turbosquid
$11
Safe portable
...free 3d model safe portable for download as max, obj, and fbx on turbosquid: 3d models for games, architecture, videos. (1410826)
Zero
3ddd
$1
ZERO, BEAM
...zero, beam
3ddd
zero
поворотная люстра zero , beam
design_connected
$9

Zero-in
...zero-in
designconnected
established & sons zero-in tables computer generated 3d model. designed by jay osgerby .
3ddd
free
Sub-Zero
...sub-zero
3ddd
sub-zero , голова
sub-zero corona render!
3ddd
$1
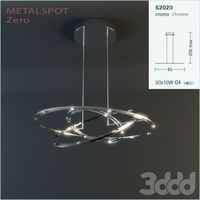
Metalspot / Zero
...metalspot / zero
3ddd
metalspot
metalspot zero
3ddd
$1
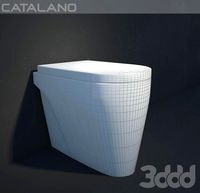
Catalano Zero
...catalano zero
3ddd
catalano , унитаз
catalano zero
3ddd
$1
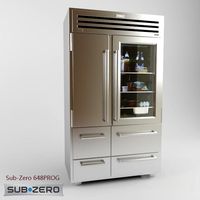
SUB ZERO
... sub zero
the first and only 3d model of sub zero refrigerator.
the model is very accurate.
turbosquid
free

Zero
... available on turbo squid, the world's leading provider of digital 3d models for visualization, films, television, and games.
turbosquid
free
Zero
... available on turbo squid, the world's leading provider of digital 3d models for visualization, films, television, and games.
turbosquid
free
Zero
... available on turbo squid, the world's leading provider of digital 3d models for visualization, films, television, and games.
3ddd
$1

ZERO / Hide
...zero / hide
3ddd
zero
polys: 25486
wire-spline
Raspberry
3d_export
free

raspberry
...raspberry
3dexport
3d model of a raspberry. i tried to make it realistic.
turbosquid
$27

Raspberries
...y free 3d model raspberries for download as max, obj, and stl on turbosquid: 3d models for games, architecture, videos. (1354176)
turbosquid
$14

Raspberries
...y free 3d model raspberries for download as max, obj, and fbx on turbosquid: 3d models for games, architecture, videos. (1364663)
3d_export
$5

raspberry pi
...raspberry pi
3dexport
carcasa para la raspberry pi
turbosquid
$99

Raspberry
... available on turbo squid, the world's leading provider of digital 3d models for visualization, films, television, and games.
turbosquid
$10

raspberries
... available on turbo squid, the world's leading provider of digital 3d models for visualization, films, television, and games.
archive3d
free

Raspberries 3D Model
...raspberries 3d model archive3d raspberries raspberry raspberries n300911 - 3d model (*.3ds) for interior 3d...
3d_export
$5

raspberry fruit
...raspberry fruit
3dexport
3d_export
$5

raspberry
...y different sizes. their color ranges from light burgundy to pink. there are formats: obj, 3ds, blend, dae, fbx, mtl.<br>:)
evermotion
$12

raspberries 23 am130
...evermotion raspberries 23 am130 evermotion key 23 food fruit raspberry fruits am130 raspberries highly detailed 3d model of raspberries...
Player
archibase_planet
free

Player
...player
archibase planet
player cd player cd
cd player - 3d model for interior 3d visualization.
archibase_planet
free
Player
...player
archibase planet
record-player vinyl player
dj vinyl player - 3d model (*.gsm+*.3ds) for interior 3d visualization.
archibase_planet
free
Player
...player
archibase planet
mp3 player equipment player
player mp3 alro n010511 - 3d model (*.3ds) for interior 3d visualization.
archibase_planet
free

Player
...player
archibase planet
mp3 player player equipment
player mp3 n270211 - 3d model (*.gsm+*.3ds) for interior 3d visualization.
archibase_planet
free

Player
...rtable media player
player portable pocket apple ipod nano 4g 8gb n170213 - 3d model (*.gsm+*.3ds) for interior 3d visualization.
archibase_planet
free
Player
...r
archibase planet
ipod player mp3 player
player ipod classic mp3 n280111 - 3d model (*.gsm+*.3ds) for interior 3d visualization.
archibase_planet
free
Player
...player
archibase planet
equipment player
player - 3d model (*.gsm+*.3ds) for interior 3d visualization.
archibase_planet
free
Player
...player
archibase planet
player equipment
v-player - 3d model (*.gsm+*.3ds) for interior 3d visualization.
archibase_planet
free
Player
...player
archibase planet
dvd player home equipment
player dvd - 3d model (*.gsm+*.3ds) for interior 3d visualization.
archibase_planet
free
Player
...player
archibase planet
player
phono1 - 3d model for interior 3d visualization.
Music
3d_export
$30
Music home
...music home
3dexport
music home
3d_export
$5

music room
...music room
3dexport
music room.
3d_export
$5
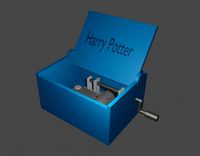
Music box
...music box
3dexport
music box (harry potter)
3ddd
free

Music clock
...music clock
3ddd
настенные , часы
music la la laa
3d_ocean
$10
Music Seismometer
...imate and visualize music example music file is included, but feel free to use anything you want. no plugins required thanks, tim
3d_ocean
$19
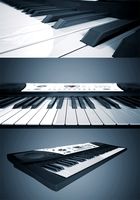
Musical Keyboard
...musical instrument notes piano piano keyboard power sound white keys
this is a model of a mq-6108 electronic keyboard. greetings.
3ddd
$1

Music center
...music center
3ddd
музыкальный центр
3ds max 2010.v-ray 2.40.03.file formats fbx,obj. music center.
3d_ocean
$15
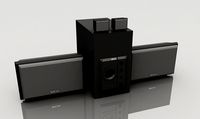
Music Surround System
...obj obj.obj blender.obj xsi.obj //////////////////////////////////////////////////////////////// collection of all diamond rings
turbosquid
$50

Music Center
...squid
royalty free 3d model music center for download as max on turbosquid: 3d models for games, architecture, videos. (1264551)
turbosquid
$20

Radio Music
...osquid
royalty free 3d model radio music for download as max on turbosquid: 3d models for games, architecture, videos. (1214126)
Pi
design_connected
$11

Pi
...pi
designconnected
ligne roset pi chairs computer generated 3d model. designed by thibault desombre.
3d_export
$5
raspberry pi
...raspberry pi
3dexport
carcasa para la raspberry pi
turbosquid
$18

pied
... available on turbo squid, the world's leading provider of digital 3d models for visualization, films, television, and games.
3ddd
$1

Emme pi light
...emme pi light
3ddd
emme pi light
люста emme pi light
3ddd
$1

Emme pi light
...emme pi light
3ddd
emme pi light
бра классическое emme pi light
3ddd
$1

Emme Pi Light
...emme pi light
3ddd
emme pi light
3ddd
$1

Emme Pi Light
...emme pi light
3ddd
emme pi light
design_connected
$16

Pi-Air
...pi-air
designconnected
living divani pi-air lounge chairs computer generated 3d model. designed by harry & camila.
3d_ocean
$15

Manneken Pis
...picting a naked little boy urinating into a fountain’s basin. (wikipedia) the model was sculpted in blender 2.70a rendered wit...
3ddd
$1

Emme pi light
...emme pi light
3ddd
emme pi light
люстра классическая фирма: emme pi light
артикул: 3595/5/cot/12/wh
W
3ddd
$1
chair W
...chair w
3ddd
chair w
3ddd
$1

кресло w
...кресло w
3ddd
капитоне
кресло w
3ddd
$1
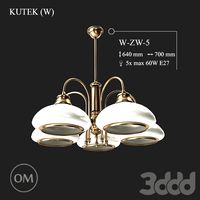
KUTEK (W) W-ZW-5
...kutek (w) w-zw-5
3ddd
kutek
3d модель люстри (w) w-zw-5 фабрики kutek. в архиве: max2012, obj, fbx, mat.(два варианта металла)
3ddd
$1
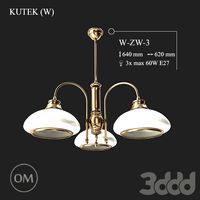
KUTEK (W) W-ZW-3
...kutek (w) w-zw-3
3ddd
kutek
3d модель люстри (w) w-zw-3 фабрики kutek. в архиве: max2012, obj, fbx, mat. (два варианта металла)
3ddd
$1
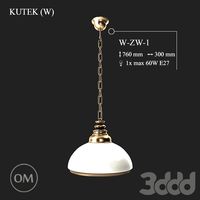
KUTEK (W) W-ZW-1
...kutek (w) w-zw-1
3ddd
kutek
3d модель люстри (w) w-zw-1 фабрики kutek. в архиве: max2012, obj, fbx, mat (два варианта металла).
3ddd
free
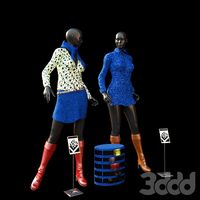
aneken W&W
...aneken w&w
3ddd
2 женских манекена, ценники и фолио. материалы и текстуры прилагаются.
design_connected
$9
KTribe W
...ktribe w
designconnected
ktribe w computer generated 3d model. designed by starck, philippe.
design_connected
$16

Troy W
...troy w
designconnected
magis troy w computer generated 3d model. designed by wanders, marcel.
turbosquid
$9
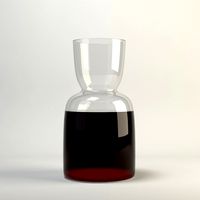
Menu - Benjamin Hubert - W W Carafe
... available on turbo squid, the world's leading provider of digital 3d models for visualization, films, television, and games.
turbosquid
$9
Menu - Benjamin Hubert - W W Carafe
... available on turbo squid, the world's leading provider of digital 3d models for visualization, films, television, and games.