Thingiverse
Modular Bar and Snap Covid Mask Ear Saver by largo8
by Thingiverse
Last crawled date: 3 years, 3 months ago
[My bad on the orientation of the parts; I'm electrical, not mechanical - but electrically speaking these work phenomenally.]
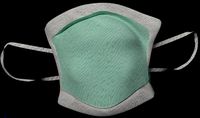
So now that everyone is wearing masks (or should be), I found all the other mask ear savers challenging for long term daily wear; they either pulled up, pulled down, pulled across the ear, weren't long enough, etc... - they just didn't work for me. I even bought some from the interwebs and had the same challenges. So I decided to make my own. And here it is - it's been about a month in the making and I keep finding things to tweak but I figured I would post what I have so far. Because really, is anything ever finished?
What we have here is a set of straps, snaps, and studs - whoa, whoa, whoa - slow your roll; it's nothing like that, actually quite counter to anything like that. IT'S TIME TO BRING BACK THE 80'S RETAINER HEAD GEAR!!! That's right, relive those fantastic days of being ostracized in middle school by bringing it all back again but this time with high tech plastic!
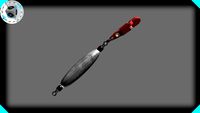
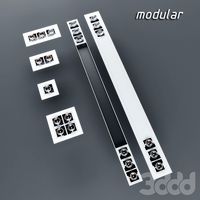
The basis is a 1mm thick, 14 mm wide bar with 10mm diameter holes spaced 15mm apart. There are a series of bars with different numbers of holes that you can mix and match to get desired lengths. The bars are named 14pbar XX where XX is the number of 10mm holes in the bar. To determine the overall length of a bar, you multiply the number of holes in the bar by 15mm (to determine the largest bar that will fit on your print bed).
To join the bars there is a series of connector snaps that fit in the 10mm holes so you can combine the bars to make different overall lengths. The connector snaps are sized so you can fit them through different stack ups of bars. There are fillets (rounded edges) at the top and bottom of the snap that take up 0.3mm of the snap. To size a snap to use for a particular stack of bars, add the total thickness of the number bars you want to connect and add 0.3mm. With that in mind, I want to connect two 1 mm thick bars (more on that later) together so 2 X 1 + 0.3 gives me 2.3 so I will look for the "snap connecting 2_3 bar" file to join these two bars together - you'll probably want a bunch of these. NOTE: be careful using an undersized snap to join your bars together - you can join two 1mm thick bars with a 1.8 connector but the sides of snap will be under load and it will potentially fail prematurely.
CAUTION - the connector snaps in the bars can be hair pullers so once you have your head gear sized the way you want it, I would recommend taping over the bottom of the bar/snap interface so your hair can't get caught in the gap.
So there are special snaps called 'snap stud' and 'snap anchor' - both with varying snap height options. The 'snap stud' is the most useful; you put it through a hole in the bar and it has a little nubbin you can put your mask strap over. The 'snap anchor' is similar to the stud but it has a hole through the center of the protruding stud so you can pinch the end of your mask strap together, feed it through the hole in the anchor stud, and then open the pinched part you pushed through the hole over the stud to act as a lock so you can let the mask hang from the anchor. I thought these would be pretty neat at first but then found the odds of locking it at the right length never worked out and just ended up using 4 snap studs to put my mask straps over. Bit the anchor is provided for your benefit.
FYI - all snaps are on a 14mm diameter base. The snap height is based on the working face height of the snap and is not the overall height of the snap (for those of you who want to play with scaling).
Okay. Then we come to the Special bars.They are listed below separately.
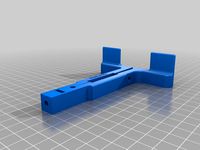
14mm T 3 - this is a T shape, 3 holes long x 3 holes high - handy if you want to make a perpendicular extension
14mm bar L 3 hole - this is an L shape, 3 holes long x 3 holes high - can also be used for perpendicular extensions.
14 centering T - this is a two hole bar base with a two hole high leg, however the leg is centered on the two hole base. I made this because the hanging strap (across the top of my head) had an odd number and I was able to bring a support bar out of the center of that but when I went to connected it to the band (going around my head) at the back of my head was an even number of holes so it wouldn't be centered and that strap sat off centered so I made this so my connector strap could be centered.
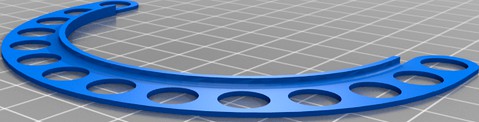
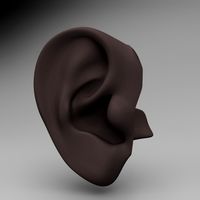
14mm C shape - any guesses? It's a c-shape. A big sucker - the ID is 90mm. I made this to fit around my ear so the mask straps could be captured above and below my ear (see What I've Tried below).
14mm C shape w edge - this is the same c shape with with a 2mm vertical edge around the ID of the C to make it less flexible/stiffer.
Oh - and one other thing. I originally started all of this in SolidWorks but as I went along I found I needed to revise my bars and I didn't use variables in my model so I had to make tweaks to the sketches. And I am inherently lazy. So to make a lot of different length bars with different widths, etc... I opted to play with Openscad and created a parametric bar maker - it is included for you free of charge. Want different center lines of the holes? No problem Different width? No problem. Different diameter holes? Eh... that could be problematic as I'm just learning Openscad and didn't attempt making a parametric snap - and I don't have a good feeling the snaps will work if you scale them. But feel free to try. Don't know how to use the Customizer, but the Openscad file is there for you to play with.
snap tool - this is a tool to help you with the snap connectors. It can be done by hand - it helps to get one side of the open part of the snap through the hole first and then press the rest of the bar over the sanp (one at at time is easiest) - but it isn't always easy, particularly with putting studs in the end hole of a bar. there are two variations of the snap tool. The first one has a center alignment pin (for the connector snaps); stack your bars over the snap, align the center pin with the center of the snap and press. The other snap tool doesn't have the center pin and is handy for working with the studs. It's a little harder to use; get the snap started through the hole, put the edge of the tool on the bar edge where the snap is starting to protrude and roll/rock the tool to press the bar over the snap.
Unfortunately the Special bars are only in SolidWorks. But I can post them if someone wants them.
Things to Try
1) Make the bars thinner by either using the parametric bar maker or just sink the bar into your printer bed using a Z offset in your slicer software (assuming Cura). The thinner bars are a little trickier to print but are much more pliable and comfortable. That is why the 0_8, 1_3, and 1_8 connector snaps exist. Do keep in mind the stiffer 1mm bars can be handier in places.
2) Thermoform the bars. The bars, depending on your print settings, will probably be solid PLA. Put them in hot water and they become pliable and can be shaped and will hol that shape somewhat when they cool. I tried this with some of my initial designs to bend the bars away from my face but the mask straps would pull them back onto my face - but maybe if I z-scaled a bar to 2mm it might be stiffer and be able to pull it off. ALSO - DO NOT LEAVE THIS STUFF IN YOUR CAR; I LEFT MINE IN THE CAR FOR 10 MINUTES ON A HOT DAY AND RETURNED TO A WARPED MESS. Thermoforming can also resize your snaps and bar hole sizes so play cautiously and experiment with extra parts.
Stuff I've Tried
1) Make a bar of appropriate length - this was the original attempt. So you have stud-bar-connector snap - bar [rinse and repeat for appropriate length] - stud. Put this across the crown of your head, slightly forward of your ears. Some slight issues; bars would slide off crown of your head occasionally, when you unhooked one side the bar assembly would catapult away, and having one (small) stud on each side made the mask loose-ish and angled the top and bottom of the mask to the point anchors on the side making a nice big gap on each side of your face for stuff to get in or out.
2) The brilliant! Take a T shape, pop out a couple of stitches in the head band on your least favorite ball cap so the leg of the T is slightly in front of your ears on each side, slip the leg of the T down through the the missing stitches so the top of the T is captured in the head band (add a dab of super glue to keep the remainder of the stitches from going), slap on your studs and bam - covid hat! Still had the individual point anchor on both sides, was a little loose, and made the side gap like 1) and made the mask gently cradle my chin (not a lot of stuff you want doing that) due to the severe angle the mask was being pulled up to to get to the studs.
3) Tried 2) with a 7 bar attached to the leg of the T and two studs on each side. This was okay but the bars kept pulling forward making the mask loose-ish. I only had the T's loosely stuck in the head band so they could wiggle (not good). Will re-approach this idea but sew the T's in to stiffen the mounting point up.
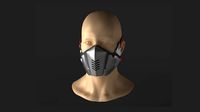
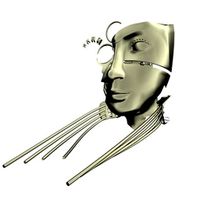
4) Is the half helm Tron-looking masterpiece which you see in the pictures. And I got a lot of crap from my co-workers when I first put it on to which I replied, "Assimilate or be destroyed." I work with a bunch of engineers -they got it. The C shape (with edge) around the ear works well to get good tension and the two studs (one at top and bottom of C) hold the mask strap on each side flat against the side of my face for a good seal.
My next iteration will be a return to the Covid Hat, with a T shape in front of the ear and an L shape at the back near the (ponytail?) arch on each side - all sewn in. This way I can mount the C from the T and put the bar on the back (like the Tron head gear) to fix the C shape in place. 'Cause even though the Tron head gear is dead sexy, Sometimes you have to go out in public. But then again - wouldn't you give someone a little extra space if they were wearing something like that at the grocery store? Hmmm....
If I get around to it - I've killed quite a lot of time on this already - I was thinking accessories next; snap on decorations - flowers, devil horns, lights... who knows.
If you're getting out there, be safe!
And support your local... whatever.
So now that everyone is wearing masks (or should be), I found all the other mask ear savers challenging for long term daily wear; they either pulled up, pulled down, pulled across the ear, weren't long enough, etc... - they just didn't work for me. I even bought some from the interwebs and had the same challenges. So I decided to make my own. And here it is - it's been about a month in the making and I keep finding things to tweak but I figured I would post what I have so far. Because really, is anything ever finished?
What we have here is a set of straps, snaps, and studs - whoa, whoa, whoa - slow your roll; it's nothing like that, actually quite counter to anything like that. IT'S TIME TO BRING BACK THE 80'S RETAINER HEAD GEAR!!! That's right, relive those fantastic days of being ostracized in middle school by bringing it all back again but this time with high tech plastic!
The basis is a 1mm thick, 14 mm wide bar with 10mm diameter holes spaced 15mm apart. There are a series of bars with different numbers of holes that you can mix and match to get desired lengths. The bars are named 14pbar XX where XX is the number of 10mm holes in the bar. To determine the overall length of a bar, you multiply the number of holes in the bar by 15mm (to determine the largest bar that will fit on your print bed).
To join the bars there is a series of connector snaps that fit in the 10mm holes so you can combine the bars to make different overall lengths. The connector snaps are sized so you can fit them through different stack ups of bars. There are fillets (rounded edges) at the top and bottom of the snap that take up 0.3mm of the snap. To size a snap to use for a particular stack of bars, add the total thickness of the number bars you want to connect and add 0.3mm. With that in mind, I want to connect two 1 mm thick bars (more on that later) together so 2 X 1 + 0.3 gives me 2.3 so I will look for the "snap connecting 2_3 bar" file to join these two bars together - you'll probably want a bunch of these. NOTE: be careful using an undersized snap to join your bars together - you can join two 1mm thick bars with a 1.8 connector but the sides of snap will be under load and it will potentially fail prematurely.
CAUTION - the connector snaps in the bars can be hair pullers so once you have your head gear sized the way you want it, I would recommend taping over the bottom of the bar/snap interface so your hair can't get caught in the gap.
So there are special snaps called 'snap stud' and 'snap anchor' - both with varying snap height options. The 'snap stud' is the most useful; you put it through a hole in the bar and it has a little nubbin you can put your mask strap over. The 'snap anchor' is similar to the stud but it has a hole through the center of the protruding stud so you can pinch the end of your mask strap together, feed it through the hole in the anchor stud, and then open the pinched part you pushed through the hole over the stud to act as a lock so you can let the mask hang from the anchor. I thought these would be pretty neat at first but then found the odds of locking it at the right length never worked out and just ended up using 4 snap studs to put my mask straps over. Bit the anchor is provided for your benefit.
FYI - all snaps are on a 14mm diameter base. The snap height is based on the working face height of the snap and is not the overall height of the snap (for those of you who want to play with scaling).
Okay. Then we come to the Special bars.They are listed below separately.
14mm T 3 - this is a T shape, 3 holes long x 3 holes high - handy if you want to make a perpendicular extension
14mm bar L 3 hole - this is an L shape, 3 holes long x 3 holes high - can also be used for perpendicular extensions.
14 centering T - this is a two hole bar base with a two hole high leg, however the leg is centered on the two hole base. I made this because the hanging strap (across the top of my head) had an odd number and I was able to bring a support bar out of the center of that but when I went to connected it to the band (going around my head) at the back of my head was an even number of holes so it wouldn't be centered and that strap sat off centered so I made this so my connector strap could be centered.
14mm C shape - any guesses? It's a c-shape. A big sucker - the ID is 90mm. I made this to fit around my ear so the mask straps could be captured above and below my ear (see What I've Tried below).
14mm C shape w edge - this is the same c shape with with a 2mm vertical edge around the ID of the C to make it less flexible/stiffer.
Oh - and one other thing. I originally started all of this in SolidWorks but as I went along I found I needed to revise my bars and I didn't use variables in my model so I had to make tweaks to the sketches. And I am inherently lazy. So to make a lot of different length bars with different widths, etc... I opted to play with Openscad and created a parametric bar maker - it is included for you free of charge. Want different center lines of the holes? No problem Different width? No problem. Different diameter holes? Eh... that could be problematic as I'm just learning Openscad and didn't attempt making a parametric snap - and I don't have a good feeling the snaps will work if you scale them. But feel free to try. Don't know how to use the Customizer, but the Openscad file is there for you to play with.
snap tool - this is a tool to help you with the snap connectors. It can be done by hand - it helps to get one side of the open part of the snap through the hole first and then press the rest of the bar over the sanp (one at at time is easiest) - but it isn't always easy, particularly with putting studs in the end hole of a bar. there are two variations of the snap tool. The first one has a center alignment pin (for the connector snaps); stack your bars over the snap, align the center pin with the center of the snap and press. The other snap tool doesn't have the center pin and is handy for working with the studs. It's a little harder to use; get the snap started through the hole, put the edge of the tool on the bar edge where the snap is starting to protrude and roll/rock the tool to press the bar over the snap.
Unfortunately the Special bars are only in SolidWorks. But I can post them if someone wants them.
Things to Try
1) Make the bars thinner by either using the parametric bar maker or just sink the bar into your printer bed using a Z offset in your slicer software (assuming Cura). The thinner bars are a little trickier to print but are much more pliable and comfortable. That is why the 0_8, 1_3, and 1_8 connector snaps exist. Do keep in mind the stiffer 1mm bars can be handier in places.
2) Thermoform the bars. The bars, depending on your print settings, will probably be solid PLA. Put them in hot water and they become pliable and can be shaped and will hol that shape somewhat when they cool. I tried this with some of my initial designs to bend the bars away from my face but the mask straps would pull them back onto my face - but maybe if I z-scaled a bar to 2mm it might be stiffer and be able to pull it off. ALSO - DO NOT LEAVE THIS STUFF IN YOUR CAR; I LEFT MINE IN THE CAR FOR 10 MINUTES ON A HOT DAY AND RETURNED TO A WARPED MESS. Thermoforming can also resize your snaps and bar hole sizes so play cautiously and experiment with extra parts.
Stuff I've Tried
1) Make a bar of appropriate length - this was the original attempt. So you have stud-bar-connector snap - bar [rinse and repeat for appropriate length] - stud. Put this across the crown of your head, slightly forward of your ears. Some slight issues; bars would slide off crown of your head occasionally, when you unhooked one side the bar assembly would catapult away, and having one (small) stud on each side made the mask loose-ish and angled the top and bottom of the mask to the point anchors on the side making a nice big gap on each side of your face for stuff to get in or out.
2) The brilliant! Take a T shape, pop out a couple of stitches in the head band on your least favorite ball cap so the leg of the T is slightly in front of your ears on each side, slip the leg of the T down through the the missing stitches so the top of the T is captured in the head band (add a dab of super glue to keep the remainder of the stitches from going), slap on your studs and bam - covid hat! Still had the individual point anchor on both sides, was a little loose, and made the side gap like 1) and made the mask gently cradle my chin (not a lot of stuff you want doing that) due to the severe angle the mask was being pulled up to to get to the studs.
3) Tried 2) with a 7 bar attached to the leg of the T and two studs on each side. This was okay but the bars kept pulling forward making the mask loose-ish. I only had the T's loosely stuck in the head band so they could wiggle (not good). Will re-approach this idea but sew the T's in to stiffen the mounting point up.
4) Is the half helm Tron-looking masterpiece which you see in the pictures. And I got a lot of crap from my co-workers when I first put it on to which I replied, "Assimilate or be destroyed." I work with a bunch of engineers -they got it. The C shape (with edge) around the ear works well to get good tension and the two studs (one at top and bottom of C) hold the mask strap on each side flat against the side of my face for a good seal.
My next iteration will be a return to the Covid Hat, with a T shape in front of the ear and an L shape at the back near the (ponytail?) arch on each side - all sewn in. This way I can mount the C from the T and put the bar on the back (like the Tron head gear) to fix the C shape in place. 'Cause even though the Tron head gear is dead sexy, Sometimes you have to go out in public. But then again - wouldn't you give someone a little extra space if they were wearing something like that at the grocery store? Hmmm....
If I get around to it - I've killed quite a lot of time on this already - I was thinking accessories next; snap on decorations - flowers, devil horns, lights... who knows.
If you're getting out there, be safe!
And support your local... whatever.
Similar models
thingiverse
free

Head strap for mask by Tom1024MB
... so your covid mask wont pull your ears.
printed in two pieces so it can fit on a smaller bed.
printed in petg
layer height 0.2mm
thingiverse
free

Grab handle for 3M reusable masks by JDS90
...erse
handle for 3m masks so you don't have to touch your head to pull the mask down. goes on the rear of the top head strap.
thingiverse
free

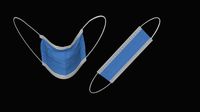
Compact surgical mask strap (easy to print in large quantities) by Maxdarkdog
...
4 : pull the loop
voila!
if the strap is too short feel free to change the scale in the length's axis
if you like my work
thingiverse
free

mask strap by Diggety07
...er, instead of trying to hold tension on one side, move it around your head and hook the other loop around a symmetrical feature.
thingiverse
free

Ears Saver by PeneloPPE
...d elasticity you can make it thicker and more durable i believe.
thank you!
made for you by p.p.e.
peneloppe products engineering
grabcad
free

Covid-19 Adjustable Mask Extender - Ear Saver
...sks and ffp2 masks.
it prints in about 20 minutes in my ender 3 with 30% infill and 0,15 mm steps.
hope it will be useful to you.
thingiverse
free

Nintendo Wii Sensor Bar Mount by Alessio
...nt is designed so that it fits the holes on my tv mount, you'll have to adjust the distances for yours if you want to use it.
3dwarehouse
free

neckstrap
... this is a prototype and work in progress v. 0.1 preferably use elastic material for printing. #protection #mask #corona #covid19
thingiverse
free

Mask strap ear tensioner by FeelingSaxo
...rochet or a pin, as seen in the images
since they print inmediatly i recomend to use low layer heights, they seem to be stronger.
thingiverse
free

Straps for Montana Mask Respirator by SodaPopin5ki
...this. you need to use tpu or some other similar flexible material. i'm using sainsmart tpu, which seems to...
Largo8
thingiverse
free
Paracord Weaver Arms by largo8
...t the holes.
the solidworks model is provided as well as a single arm and double arm stl files.
enjoy and support local scouting!
thingiverse
free

Dial Indicator Mount for Monoprice 13860 / Wanahao i3 by largo8
...y! please let me know if you would like to have the file in a different format and i will do my best to post the desired format.
thingiverse
free

LED String Mount for Monoprice 13860 / Wanahao i3 by largo8
...zon-lighting-theater-backlighting-increase/dp/b01gjfdn30/ref=sr_1_1?ie=utf8&qid=1494102115&sr=8-1&keywords=b01gjfdn30
Saver
turbosquid
$20

Robot-saver
...y free 3d model robot-saver for download as obj, c4d, and fbx on turbosquid: 3d models for games, architecture, videos. (1468253)
turbosquid
$15

Life Saver Ring
...id
royalty free 3d model life saver ring for download as c4d on turbosquid: 3d models for games, architecture, videos. (1625086)
turbosquid
$3

ROOM ENERGY SAVER
... 3d model room energy saver for download as max, obj, and fbx on turbosquid: 3d models for games, architecture, videos. (1370383)
turbosquid
$10

Parking Spot Saver
... available on turbo squid, the world's leading provider of digital 3d models for visualization, films, television, and games.
turbosquid
$30

Energy Saver Light Bulbs
... available on turbo squid, the world's leading provider of digital 3d models for visualization, films, television, and games.
turbosquid
$3

Sound And Light Saver Pack
... available on turbo squid, the world's leading provider of digital 3d models for visualization, films, television, and games.
3d_ocean
$15

Light bulb (Energy saver)
...hting lighting luminance zluminance
detailed light bulb with rendering studio included. rendered with vray. hq hdri map included!
3d_export
$30

Energy Saver Light Bulbs 3D Model
...hilips fluorescent energy saver architecture rhinoceros 3dm vray vismat
energy saver light bulbs 3d model blacks3d 35292 3dexport
turbosquid
$5

Energy Saver Classic Light Bulb
...r classic light bulb for download as obj, fbx, blend, and dae on turbosquid: 3d models for games, architecture, videos. (1428208)
3d_ocean
$6
Energy Saver Tubular Light Bulb
... nurbs setup
generic fluorescent light bulb in spiral, high precision model, render setup, textures and necessary files included.
Covid
turbosquid
$6

covid
...d
turbosquid
royalty free 3d model covid for download as max on turbosquid: 3d models for games, architecture, videos. (1667862)
3d_export
$50

covid-19
...covid-19
3dexport
3d obj model. covid-19
3d_export
$11

covid-19
...covid-19
3dexport
this is 3d model about covid-19 virus
3d_export
$10
covid 3d mask
...covid 3d mask
3dexport
3d covid mask for 3d avatars to implement in covid information projects
3d_export
$5
covid-19 korona
...covid-19 korona
3dexport
covid-19
3d_export
$8

coronavirus covid-19
...coronavirus covid-19
3dexport
coronavirus covid-19
3d_export
$5

covid mask black
...covid mask black
3dexport
black covid mask
3d_export
$5

coronavirus covid-19
...coronavirus covid-19
3dexport
coronavirus covid-19
turbosquid
$29

Covid Collection
...quid
royalty free 3d model covid collection for download as on turbosquid: 3d models for games, architecture, videos. (1682309)
3d_export
$5
mask covid-19
...mask covid-19
3dexport
covid-19 virus protection mask
Snap
turbosquid
$10

SNAP ACTION SWITCH
... available on turbo squid, the world's leading provider of digital 3d models for visualization, films, television, and games.
3d_export
$10
Trigger Snap Hook 3D Model
...ty climbing snap-hook snap-link link shackle holder latch swivel ring equipment
trigger snap hook 3d model firdz3d 88191 3dexport
3d_export
$15
Battery Snap 3D Model
...ial tool part electricity wire
battery snap 3d model download .c4d .max .obj .fbx .ma .lwo .3ds .3dm .stl firdz3d 106985 3dexport
turbosquid
$8
Pro Snap Weight Clip
... available on turbo squid, the world's leading provider of digital 3d models for visualization, films, television, and games.
3ddd
$1

Стул Snap chair by Karim Rashid
... snap chair
дизайнер карим рашид. пластик, металл. моделилось по фото с сайта дизайнера, материалы vray
turbosquid
$10

Stainless Steel Snap E Ring
... available on turbo squid, the world's leading provider of digital 3d models for visualization, films, television, and games.
3ddd
$1

Пуфы Porada Contract, пуф Porada Snap
...уф фабрика porada артикул snap
коллекция newwork the greatness
материал - кожа, отделка - капитоне.
высота -46, диаметр -52 .
3d_export
$25
press fit of automobile hub bearing and snap ring
...splacement curve is monitored during the pressing process. welcome to download and learn if you like. there are step files in it.
3d_export
free
Download free Clock Diamantini Domeniconi Snap 3D Model
...ccessory design home style modern living room decor free
clock diamantini domeniconi snap 3d model modelplusmodel 29252 3dexport
3d_export
$16
womennp2maxfbxobjmb
...womennp2maxfbxobjmb 3dexport polygonal model of a girl.<br>you can easily snap a skeleton for...
Mask
turbosquid
$1
Dust Mask Medical Mask Face Mask Surgical Mask
...k face mask surgical mask for download as blend, fbx, and obj on turbosquid: 3d models for games, architecture, videos. (1533329)
3d_export
$5

Mask
...mask
3dexport
african mask
turbosquid
$2
Riggged Surgical mask face mask dust mask medical mask
...sk dust mask medical mask for download as blend, fbx, and obj on turbosquid: 3d models for games, architecture, videos. (1536257)
archibase_planet
free
Mask
...mask
archibase planet
mask sculpture decor
mask - 3d model for interior 3d visualization.
3d_export
$19
masks tech metal masks wearable futuristic masks
... tech metal masks wearable futuristic masks
3dexport
masks, tech metal masks, wearable, futuristic masks zip contain fbx obj max
archibase_planet
free
Mask
...mask
archibase planet
mask sculpture decor
mask-decor - 3d model for interior 3d visualization.
archibase_planet
free

Mask
...mask
archibase planet
mask
swimming mask - 3d model (*.gsm+*.3ds) for interior 3d visualization.
archibase_planet
free
Mask
...mask
archibase planet
picturesque element mask
mask n050608 - 3d model (*.gsm+*.3ds) for interior 3d visualization.
archibase_planet
free

Mask
...mask
archibase planet
mask picturesque element
mask n230708 - 3d model (*.gsm+*.3ds) for interior 3d visualization.
archibase_planet
free
Mask
...mask
archibase planet
mask ornament decoration
mask decor n240211 - 3d model (*.gsm+*.3ds) for interior 3d visualization.
Modular
3ddd
$1
MODULAR
...modular
3ddd
modular , врезной свет
modular потолочные светильники
3ddd
$1
Modular Spock
...modular spock
3ddd
modular
modular spock
3ddd
$1
MODULAR / Spock
...modular / spock
3ddd
modular
modular/spock
design_connected
$7

Modular
...modular
designconnected
emmemobili modular shelves and storage computer generated 3d model. designed by ferruccio laviani.
3ddd
$1
Modular spock
...modular spock
3ddd
modular
spock wall led
turbosquid
$25
Modular sofa Angelo Cappellini Modular
...a angelo cappellini modular for download as max, fbx, and obj on turbosquid: 3d models for games, architecture, videos. (1570923)
turbosquid
$15
Modular sofa Angelo Cappellini Modular
...a angelo cappellini modular for download as max, fbx, and obj on turbosquid: 3d models for games, architecture, videos. (1570304)
3ddd
$1
Modular 2FLAT2C
...modular 2flat2c
3ddd
modular
modularhttp://www.supermodular.com/
3d_export
free
Modular walls
...modular walls
3dexport
modular walls for playing without materials and textures
3ddd
$1
Modular / Lighting Juliette
...modular / lighting juliette
3ddd
modular
modular lighting juliette
Ear
archibase_planet
free

Earrings
...earrings
archibase planet
earrings ear-rings ear-ring
earrings - 3d model (*.gsm+*.3ds) for interior 3d visualization.
3d_export
$5

an ear
...an ear
3dexport
an ear
turbosquid
$10

Ear ring Earring
...e 3d model earing earring for download as blend, fbx, and obj on turbosquid: 3d models for games, architecture, videos. (1532271)
turbosquid
$20

Earrings Ear Stud gold
... available on turbo squid, the world's leading provider of digital 3d models for visualization, films, television, and games.
3d_ocean
$3
Ear
...s in high poly. model is good and proper mesh flow. file formats available. 1. maya 2012 2. .obj 3. .fbx 4. .dae 5. .3ds 6. .max
3d_export
$5
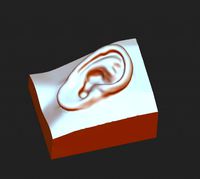
download 3d picture of ear picture of ear
...xport
download 3d picture of ear, 3d model picture of ear, model of ear, human biological ear no watermark hd ear image download
turbosquid
$25

earing
...ing
turbosquid
royalty free 3d model earing for download as on turbosquid: 3d models for games, architecture, videos. (1619608)
turbosquid
$25

earing
...ing
turbosquid
royalty free 3d model earing for download as on turbosquid: 3d models for games, architecture, videos. (1618816)
turbosquid
$25

earing
...ing
turbosquid
royalty free 3d model earing for download as on turbosquid: 3d models for games, architecture, videos. (1618807)
turbosquid
$25

earing
...ing
turbosquid
royalty free 3d model earing for download as on turbosquid: 3d models for games, architecture, videos. (1618643)
Bar
archibase_planet
free
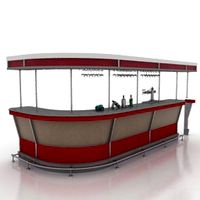
Bar
...bar
archibase planet
bar bar rack
bar 2 - 3d model for interior 3d visualization.
archibase_planet
free
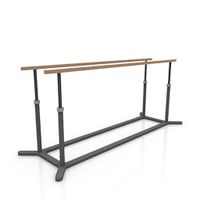
Bars
...bars
archibase planet
horizontal bar parallel bars
parallel bars - 3d model for interior 3d visualization.
3d_export
$10

bar
...bar
3dexport
modern bar
3d_export
$10

bar
...bar
3dexport
modern bar
3d_export
$10

bar
...bar
3dexport
modern bar
3d_export
$10

bar
...bar
3dexport
modern bar
3d_export
$10

bar
...bar
3dexport
modern bar
3d_export
$10

bar
...bar
3dexport
modern bar
3d_export
$10

bar
...bar
3dexport
modern bar
3d_export
$10

bar
...bar
3dexport
modern bar