Thingiverse
MiSTer USB Hub and Fan Plate Case by ToddsNerdCave
by Thingiverse
Last crawled date: 2 years, 11 months ago
I designed this as an alternative to expensive case's requiring the official USB hub and IO board.
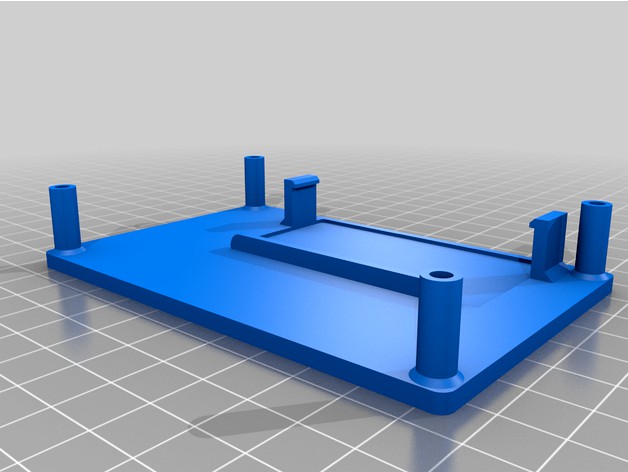
This case holds a 30mm fan in the top and the popular Makerspot micro USB OTG hub in the bottom.
The fan is a press fit. Simply press it in all the way as friction holds it in place. It will be a snug fit. The bottom plate has mounts to secure down the USB Hub. The hub will be installed upside down so the cable exits the correct direction.
To complete the build, you need:
30mm 5v fan such as this one: https://www.adafruit.com/product/3368
MakerSpot Micro USB OTG Hub: https://www.amazon.com/MakerSpot-Accessories-Charging-Extension-Raspberry/dp/B01JL837X8?crid=11O028CEHSHU1&dchild=1&keywords=makerspot+micro+usb+otg+hub+for+raspberry+pi+zero&qid=1619813496&sprefix=makerspot+,aps,184&sr=8-3&linkCode=sl1&tag=toddgill0a-20&linkId=1883fda878ac27890898775d8841f0a7&language=en_US&ref_=as_li_ss_tl
20mmx20mm heatsink for the FPGA on the DE10-nano: https://www.amazon.com/MakerSpot-Accessories-Charging-Extension-Raspberry/dp/B01JL837X8?crid=11O028CEHSHU1&dchild=1&keywords=makerspot+micro+usb+otg+hub+for+raspberry+pi+zero&qid=1619813496&sprefix=makerspot+,aps,184&sr=8-3&linkCode=sl1&tag=toddgill0a-20&linkId=1883fda878ac27890898775d8841f0a7&language=en_US&ref_=as_li_ss_tl
4 x m3x25mm screws
If you don't have the ability to print this, I also sell them at https://retrofrog.net/
Assembly:
Take off the clear acrylic plate and mounting hardware that ships on the DE10-Nano and put it aside as we won't use any of it. If you are using the optional SDram add-on for MiSTer make sure to install it now before proceeding. Next remove the protective film from the back of the heatsink exposing the sticky thermal tape and apply it to the large FPGA in the middle of the DE10-Nano. Make sure to center it on the chip with no overhangs.
Place the top plate on top of the DE10-nano board. There is a cut out to clear the ram board so the orientation is clear. The fan will come preinstalled in the top plate piece. Plug in the fan to the front IO pins for power. You have 2 options: 5v for high performance, but louder. 3.3v for lower cooling but virtually silent. Please see the pictures for details on where to plug it in. The red wire goes on the back row of pins closest to the fan.
Note: I have thermally tested this design for 24 hours continuously with both fan voltages and both are more than adequate to cool the DE10-Nano. I would choose the 3.3v option to reduce noise.
Add the bottom plate/Hub combo to the bottom of the DE10-Nano. Use the 4 supplied m3 x 25mm screws to secure the top and bottom plate together. Plug in the microUSB cable from the USB hub to the microUSB connector on the DE-10 Nano. This connector is on the same side as the ethernet jack. Apply the 4 rubber feet to the bottom of the case and you are done.
Similar models
thingiverse
free

MiSTer FPGA Top and Bottom Plate Case by ToddsNerdCave
... to print this out, i offer it for sale with hardware at my shop: https://retrofrog.net/products/mister-case-top-and-bottom-plate
thingiverse
free

Atari style MiSTer Case (de10-nano + USB Hub 2.1) by pjtonge
...12 screws as that was what i had lying around.
thanks to collingall for the de10 board model, and sorgelig for the usb hub model.
thingiverse
free

Case for Raspberry Pi Zero + Pi Zero USB Docking Hub by Xav987
... micro usb port from the raspberry pi zero are inaccessible with the case, because you have to use the port from the hub instead.
thingiverse
free

Case Mister FPGA
...contains space for the
terasic de10 nano board,
the i/o board and
the usb hub.
the stamp has to be printed 3 times.
have fun.
thingiverse
free

Foam Core Spray Paint Booth by BenE
...p;sr=8-1&linkcode=sl1&tag=beneadie-20&linkid=e738a5d873a60e3d7ac15b0a6311327a&language=en_us&ref_=as_li_ss_tl
thingiverse
free
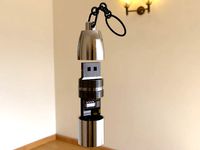
Halo Cortana Chip - Neopixel USB Remix by thatdecade
... an affiliate advertising program designed to provide a means for us to earn fees by linking to amazon.com and affiliated sites.
thingiverse
free

Spacecat - Launch pad v2 Case by jneubeck
...amp;psc=1&linkcode=sl1&tag=neubeck-20&linkid=5c1adcf1e26e86d2a2323754efe7a0b7&language=en_us&ref_=as_li_ss_tl
thingiverse
free

Radiomaster TX16s Gimbal Covers by Qrome
...;sr=8-1&linkcode=sl1&tag=blueskyrc-20&linkid=a3afbb66ebb82385d8132d857433479a&language=en_us&ref_=as_li_ss_tl
thingiverse
free

Celestron Telescope Hub Bracket by VermontOlympian
...sr_1_8?crid=bm56vjsj6mee&dchild=1&keywords=usb+hub+aukey&qid=1596979490&sprefix=usb+hub+au%2caps%2c149&sr=8-8
thingiverse
free

ESP8266 V3 BME680 Air Quality Monitor by isiks_tech
...=as_li_ss_tl)(https://s.click.aliexpress.com/e/_ak5w8m)
dupont wires (included w/ oled)(https://s.click.aliexpress.com/e/_axslsa)
Toddsnerdcave
thingiverse
free
MSDEXP Dust cover by ToddsNerdCave
... to buy the msdexp dust cover and don't have the ability to 3d print it, i offer them for sale in shop: https://retrofrog.net
thingiverse
free

PS1Digital HDMI cover by ToddsNerdCave
... different color.
in case you don't have the ability to print this yourself, i offer it on my webshop: https://retrofrog.net
thingiverse
free

PCEngine / CoreGrafx / SuperGrafx EXT Bus Cover by ToddsNerdCave
...ng them protected is important.
if you don't have the ability to print this, i sell them on my shop:
https://retrofrog.net/
thingiverse
free

OSSC replacement case (HDMI version) by ToddsNerdCave
...agento_en_us_products
if you are unable to print it, i sell them at my shop: https://retrofrog.net/products/ossc-replacement-case
thingiverse
free

RetroTINK 5X Pro Vertical Stand by ToddsNerdCave
...on the bottom of the stand to keep it from sliding around.
if you are unable to print this, i sell them at https://retrofrog.net/
thingiverse
free
Ultimate64 Breadbin Side Panel Remix! by ToddsNerdCave
...
added a support rib just above the ports to strengthen/reinforce the side piece.
rounded edges to make it look a little cleaner.
thingiverse
free

GameCube 40mm fan adapter by ToddsNerdCave
... please visit my webshop: http://retrofrog.net as i have them with a 3 pin to 2 pin fan cable adapter bundled with them for sale.
thingiverse
free
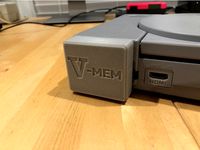
Interact/Datel V-MEM case for Playstation (Virtual Memory Card System) by ToddsNerdCave
...quest a replacement design, so i came up with this one.
this case uses the original screws included with the v-mem for assembly.
thingiverse
free
MiSTer FPGA Top and Bottom Plate Case by ToddsNerdCave
... to print this out, i offer it for sale with hardware at my shop: https://retrofrog.net/products/mister-case-top-and-bottom-plate
thingiverse
free

Original XBox 1.0 GPU 40mm Fan Adapter by ToddsNerdCave
... you don't have the ability to 3d print this yourself, please visit my webshop: http://retrofrog.net as i have them for sale.
Mister
3ddd
free
диван Cassina Mister
...диван cassina mister
3ddd
cassina , mister
диван с лампой cassina mister
turbosquid
$19

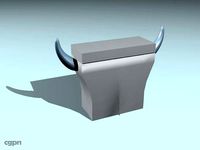
Mantellassi Mister
... available on turbo squid, the world's leading provider of digital 3d models for visualization, films, television, and games.
cg_studio
$1800
Mister menmeu3d model
...ior mister menmeu
professional 3d model mister menmeu - .max - , royalty free license available, instant download after purchase.
3ddd
free
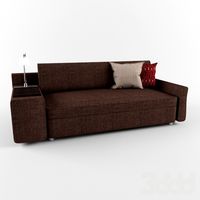
Mantellassi Mister
...й
размеры, мм: 2030 (длина); 1000 (ширина); 950 (высота)
описание: диван двухместный
страна: италия
сайт: www.mantellassi.com
3d_ocean
$19

Mister MAGOO RIGGED
...ed in max version only. the textures are used only for his shirt flowers pattern and his glasses. the hat and the glasses are ...
3ddd
$1
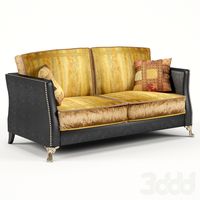
Cassina Mister
...мпой. обивка - ткань
габариты: w 290 х l 103 х h 68http://cassina.com/en/collection/sofas-and-armchairs/235-238-mister
3d_ocean
$15

Mister Timber
... character named mister timber. this model is also perfect for mobile applications as well, check out my profile for more models!
turbosquid
$29
Aquarium and Stand- mister
... available on turbo squid, the world's leading provider of digital 3d models for visualization, films, television, and games.
3d_export
$20

Mister Timber 3D Model
...dy low poly polygonanatomy base people boy child dude guy hero human male man
mister timber 3d model clutchtrigger 58670 3dexport
3ddd
$1

Mister P 305 SMANIA
... smania
фабрика: smania
артикул: dvmister01
коллекция: master collection
длина: 304
глубина: 120
высота: 78
Hub
3d_export
free

hub
...hub
3dexport
realistic 3d model of hub. you can use this model in your automotive or mechanical projects.
design_connected
$4

Hub 02
...hub 02
designconnected
glas italia hub 02 dining tables computer generated 3d model. designed by piero lissoni.
turbosquid
$8

Electricity Hub
...id
royalty free 3d model electricity hub for download as fbx on turbosquid: 3d models for games, architecture, videos. (1298030)
turbosquid
$2

Gokart Hub
...bosquid
royalty free 3d model gokart hub for download as ige on turbosquid: 3d models for games, architecture, videos. (1497617)
turbosquid
free
Desert hub
...squid
free 3d model desert hub for download as blend and fbx on turbosquid: 3d models for games, architecture, videos. (1634736)
design_connected
$18

UMBRA Hub Ladder
...umbra hub ladder
designconnected
umbra hub ladder computer generated 3d model.
turbosquid
$48

hub-dxf
... available on turbo squid, the world's leading provider of digital 3d models for visualization, films, television, and games.
turbosquid
$25

Shoulder Hub
... available on turbo squid, the world's leading provider of digital 3d models for visualization, films, television, and games.
turbosquid
$20

BMX Hub
... available on turbo squid, the world's leading provider of digital 3d models for visualization, films, television, and games.
3d_ocean
$5

Stairwell Hub
... is a low polygonal model. - poly count: 323 - formats: max /obj /fbx/3ds/dxf - high detail was preserved with 2048×2048 textu...
Usb
3d_ocean
$3
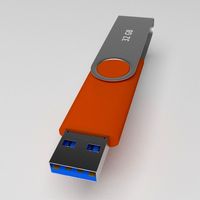
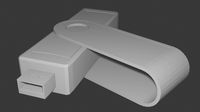
USB Thumbdrive
...usb thumbdrive
3docean
thumbdrive usb usb drive usb stick
this is a swivel type usb thumb drive.
3d_ocean
$5

Usb Stick
...usb stick
3docean
flash stick usb usb memory usb stick
usb stick created using 3ds max 2015 and rendered on mental ray.
3ddd
$1
USB cable
... кабель , провод
высокополигональные модели кабелей usb.
3d_ocean
$5
USB Stick
...usb stick
3docean
32gb computer memory plug plugin protection usb usb stick
an usb stick with built-in plug protection
3d_ocean
$6

USB Stick
...tick
3docean
32 gb flash ram gigabyte memory metal nand plug ram stick usb usb 3 usb stick
usb stick with texture and normal map.
turbosquid
$5

USBS
...bs
turbosquid
royalty free 3d model usbs for download as max on turbosquid: 3d models for games, architecture, videos. (1466594)
3d_export
$5
usb flash
...usb flash
3dexport
usb flash
3d_export
free
usb flash
...usb flash
3dexport
usb flash
3d_export
free
usb flash
...usb flash
3dexport
usb flash driver
3ddd
$1

usb
...usb
3ddd
флешка
флешка
Fan
3d_export
$5

fan
...fan
3dexport
fan 3d model, table fan, fan, electric fan, ventilator
archibase_planet
free

Fan
...fan
archibase planet
fan large fan
fan out n260707 - 3d model for interior 3d visualization.
archibase_planet
free

Fan
...fan
archibase planet
fan ceiling fan ventilator
fan stealth n300615 - 3d model (*.gsm+*.3ds) for interior 3d visualization.
3d_export
$15

fan
...fan
3dexport
is an ancient fan
3ddd
$1

Fan-C-Fan by marco gallegos
...n-c-fan by marco gallegos
3ddd
вентилятор , marco gallegos
fan-c-fan by marco gallegos
3d_export
$10

fan
...fan
3dexport
a detailed fan designed for home or space blowing is now available for only 19.99!
turbosquid
$1

Fan
...fan
turbosquid
free 3d model fan for download as on turbosquid: 3d models for games, architecture, videos. (1427865)
turbosquid
$14

Fan
...fan
turbosquid
royalty free 3d model fan for download as on turbosquid: 3d models for games, architecture, videos. (1415642)
3ddd
$1

Светильник Fan
...светильник fan
3ddd
fan , italamp
светильник fan, производитель italamp
turbosquid
$25

Fan
...fan
turbosquid
royalty free 3d model fan for download as c4d on turbosquid: 3d models for games, architecture, videos. (1483246)
Plate
archibase_planet
free
Plates
...plates
archibase planet
plates and dishes plate
plates - 3d model (*.gsm+*.3ds) for interior 3d visualization.
3d_export
$5

plate
...plate
3dexport
plate
archibase_planet
free
Plates
...plates
archibase planet
plates and dishes plate kitchen ware
plates - 3d model (*.gsm+*.3ds) for interior 3d visualization.
archibase_planet
free
Plates
...plates
archibase planet
plate plates and dishes crockery
plates 2 - 3d model (*.gsm+*.3ds) for interior 3d visualization.
archibase_planet
free
Plate
...plate
archibase planet
dinner-plate plate kitchen ware
plate n070808 - 3d model (*.gsm+*.3ds) for interior 3d visualization.
3d_export
$6

plate
...plate
3dexport
design of plate
3d_export
$5
plate
...plate
3dexport
plate lowpoly
archibase_planet
free
Plates
...plates
archibase planet
plate dish kitchen-ware
plate - 3d model for interior 3d visualization.
3ddd
$1
Plates
...plates
3ddd
полка , тарелка
african plates
archibase_planet
free
Plate
...plate
archibase planet
plate kitchen ware
plate - 3d model (*.gsm+*.3ds) for interior 3d visualization.
Case
3d_export
$1

case
...case
3dexport
case
archibase_planet
free

Case
...case
archibase planet
showcase show-case glass case
glass-case + cakes - 3d model for interior 3d visualization.
archibase_planet
free

Case
...case
archibase planet
showcase show-case glass case
glass-case for chips - 3d model for interior 3d visualization.
archibase_planet
free

Case
...case
archibase planet
case shelving drawer
case - 3d model for interior 3d visualization.
archibase_planet
free

Case
...case
archibase planet
case rack locker
case - 3d model for interior 3d visualization.
archibase_planet
free

Case
...case
archibase planet
case drawer kitchen furniture
case - 3d model for interior 3d visualization.
archibase_planet
free

Case
...case
archibase planet
case cupboard shelving
glass case - 3d model for interior 3d visualization.
archibase_planet
free

Case
...case
archibase planet
case handbag suitcase
case - 3d model (*.gsm+*.3ds) for interior 3d visualization.
archibase_planet
free

Case
...case
archibase planet
case suitcase
case 5 - 3d model (*.gsm+*.3ds) for interior 3d visualization.
archibase_planet
free

Case
...case
archibase planet
locker case dresser
case - 3d model (*.gsm+*.3ds) for interior 3d visualization.