Thingiverse
Minox Film Cutter by stenokit
by Thingiverse
Last crawled date: 3 years, 3 months ago
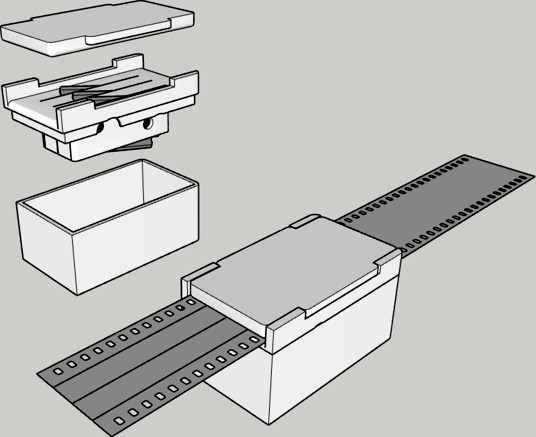
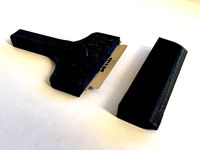
This three-part device enables you to slit a 35mm film in pieces that can be put in an empty Minox cartridge.
This process needs to be done in the dark.
I remixed the Minox Filmcutter V2 from cpmalek https://www.thingiverse.com/cpmalek/designs
https://www.thingiverse.com/thing:3222458
The ‘Blade’ piece holds three double-sided razor blades
The ‘Box’ piece covers the bottom of the blades and avoids injury
The ‘Cover’ piece keeps the film in place during the cutting process
Changes :
I removed the clips of the ‘Box’ (on my PLA model they broke at the first use). I don't need them, the ‘Box’ stays in place with the natural friction.
I reduced the height of the ’Blade’ piece so that the blades stick out on both sides and thus can be adjusted when they are put in place. The box prevents any possible injury on the bottom of the device once the blades are secured in place.
I reduced the height of the ‘Box’ (it prints a little quicker !). It is anyway big enough to accommodate normal double-sided razor blades.
I created two finishes on each side of the ‘Blade’ piece and of the ‘Box’. Rounded and sharp. Thus, in the dark you can tell which side is which (in my case : rounded is the side where the 35 mm film is fed).
I created the necessary cuts in order to use the nuts I had in my toolbox (large flat head). So it should now work for any type of M5 x 30 bolt.
Printing :
The ‘Blade’ piece needs supports. I tested 'line' supports and they where easy to remove. The piece must be placed with the four angle tabs facing up.
The two other pieces don't need support : the bottom of the ‘Box’ should be facing down and the top of the ‘Cover’ should be facing down.
On my 3D printer the ‘Blade’ piece took 3 hours to print (0.2mm layers, 20% infill) and the combined ‘Box’ and ‘Cover’ took also 3 hours (same settings).
Similar models
thingiverse
free

Custom Door Pull Covers For IKEA LILLÅNGEN by putersdcat
...ght fitting clip on handle cover that should help reduce accidental injury, from the 1mm razor blades that come from the factory.
thingiverse
free
Mini Razor Blade Scraper Cover by kameya
... snugly over the sharp blade. now i can put this scraper into my tool bag without worrying cutting my hand while reaching for it.
thingiverse
free
razor blade scraper by Mrcleanr6
...lace.
print this with no support
razor scraper mm.stl has been converted to mm scale.
razor scraper.stl is modeled in inches
thingiverse
free

Shaving SE Safety Razor by rogerquin
...e small indent (indent makes it easy to insert into the slot) and turn the handle to lock in place. please post your makes. enjoy
thingiverse
free
Razor blade holder & Cover by Nathan1305
...er.
supports needed for the centre section and not in the razor blade slot (as shown in picture)
already heavily used in pitures.
thingiverse
free

Razor Blade Cover by Mts5140
...razor blade cover by mts5140
thingiverse
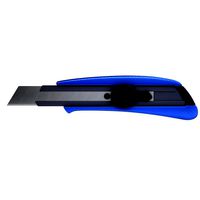
a cover for a razor blade box cutter
thingiverse
free

DE razor blade disposal box by tmccartney
...le to print this complete without support on my artillery sidewinder x1. i printed it with the slot face down on the build plate.
thingiverse
free

DE Safety Razor Blade Sharps Bin - Print In Place by alasdairj
...ise it will not work.
inside the box a wedge shaped extrusion either side of the slot prevents used blades from falling back out.
thingiverse
free

Mühle Grande Razor Box by Ferlin
...azor box by ferlin
thingiverse
designed this box for the mühle r89 grande 3 piece razor and extra blades.
printing:
no supports
thingiverse
free
Razor blade scraper with cover by jsc
...naps on top, cap slides into the groove on the bottom side of the handle.
be careful when removing the lid to change the blade.
Stenokit
thingiverse
free

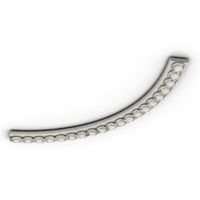
Nuts and bolts jig (remix) by stenokit
...pe to easyer accommodate any diameter of bolt.
i kept all the rest the same as i very much like the overall design of lobrico ;-)
thingiverse
free

Bolt and Nut sorter (remix) by stenokit
...t of changing the filament color for the few upper layers.
i left just one of the four hanging holes as i believe that is enough.
thingiverse
free

Modular Folding Tripod by stenokit
...ht models.
the two parts of the sliding leg might need some sanding in order to slide smoothly with the right amount of friction.
thingiverse
free

Stackable Boxes (Remix) by erdnaskram
...erdnaskram thingiverse deutsch: das hier ist ein remix von: stenokit -> https://www.thingiverse.com/thing:4741908 ich habe die frontwand von "big_box_one.stl" hochgezogen...
Minox
turbosquid
$19

Minox Binoculars
...d
royalty free 3d model minox binoculars for download as fbx on turbosquid: 3d models for games, architecture, videos. (1600046)
3ddd
$1

лампа настольная SMANIA MINOX
... smania
3dsmax 2009 sp1 + vray 1.5 sp2
текстуры в комплекте, материалы настроены... (gamma 2.2)
3d_sky
free

lamp SMANIA MINOX
...lamp smania minox
3dsky
3dsmax 2009 sp1 + vray 1.5 sp2
texture in the set, materials are ... (gamma 2.2)
thingiverse
free

Minox Adapter to regular photo holder by mziegler
...ing this with a epson v350 photo scanner but it should probably work for others as well as long as they can fit its 14 cm length.
thingiverse
free

Minox Color Minotar to Leica M conversion by rodgsilva
... need the 3 screws to fix
if you planing to use on leica m body check with careful to see if the rangefinder arm is not catching.
thingiverse
free

Minox Filmcutter (for 35mm film) by cpmalek
... diameter. two screw nuts of course.
if you do not build this by yourself, send me a message. i can print and build this for you.
thingiverse
free

Minox Lens to M39 Minotar by jiyongraphic
... used this on an sony a7 using an adapter, works fine!, no idea if the flange distance is safe for an actual leica camera system.
thingiverse
free

MINOX (9.2mm) Development Reel (Nikor Tank) by michaelfowler
...
other sizes are here
110/16mm - https://www.thingiverse.com/thing:4831133
17.5mm hit - https://www.thingiverse.com/thing:4831135
thingiverse
free

110/16MM Development Reel (Nikor Tank) by michaelfowler
...taper film of feed end other sizes are here minox - https://www.thingiverse.com/thing:4831142 17.5mm hit -...
Cutter
archibase_planet
free
Cutter
...cutter
archibase planet
cutter mill milling cutter
cutter 2 n050712 - 3d model (*.gsm+*.3ds) for interior 3d visualization.
3d_export
$10

pipe cutter
...pipe cutter
3dexport
pipe cutter
3d_export
$8

Grass Cutter
...grass cutter
3dexport
grass cutter
turbosquid
$5

Cutter
...alty free 3d model cutter for download as ige, stl, and sldpr on turbosquid: 3d models for games, architecture, videos. (1505202)
turbosquid
$29
Cutter
... available on turbo squid, the world's leading provider of digital 3d models for visualization, films, television, and games.
turbosquid
$9

Cutter
... available on turbo squid, the world's leading provider of digital 3d models for visualization, films, television, and games.
turbosquid
$3

cutter
... available on turbo squid, the world's leading provider of digital 3d models for visualization, films, television, and games.
turbosquid
$1

cutter
... available on turbo squid, the world's leading provider of digital 3d models for visualization, films, television, and games.
3d_export
free
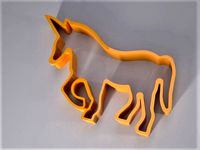
unicorn cookie cutter
...unicorn cookie cutter
3dexport
unicorn cookie cutter, more cookie cutters here:
archive3d
free

Cutter 3D Model
...r mill milling cutter
cutter 2 n050712 - 3d model (*.gsm+*.3ds) for interior 3d visualization.
Film
3d_export
$65

filming
...filming
3dexport
simple rendering of the scene file
design_connected
$16

Oka Film
...oka film
designconnected
nkuku oka film computer generated 3d model.
turbosquid
$80

Film Actress2
... available on turbo squid, the world's leading provider of digital 3d models for visualization, films, television, and games.
turbosquid
$30

Film Reel
... available on turbo squid, the world's leading provider of digital 3d models for visualization, films, television, and games.
turbosquid
$10

Film Projector
... available on turbo squid, the world's leading provider of digital 3d models for visualization, films, television, and games.
turbosquid
$8

Film Strip
... available on turbo squid, the world's leading provider of digital 3d models for visualization, films, television, and games.
turbosquid
free

Film clapper
... available on turbo squid, the world's leading provider of digital 3d models for visualization, films, television, and games.
3d_ocean
$8

Photographic Film
...n texture
- realistic highly detailed and animation ready photographic film - adjustable photographic tape (by curve) - textured
turbosquid
$4

film reel
...rbosquid
royalty free 3d model film reel for download as c4d on turbosquid: 3d models for games, architecture, videos. (1212542)
3d_export
$65

film base
...film base
3dexport
simple rendering of the scene file