Thingiverse
Mini Drak Nose Camera Mount by billyd
by Thingiverse
Last crawled date: 3 years ago
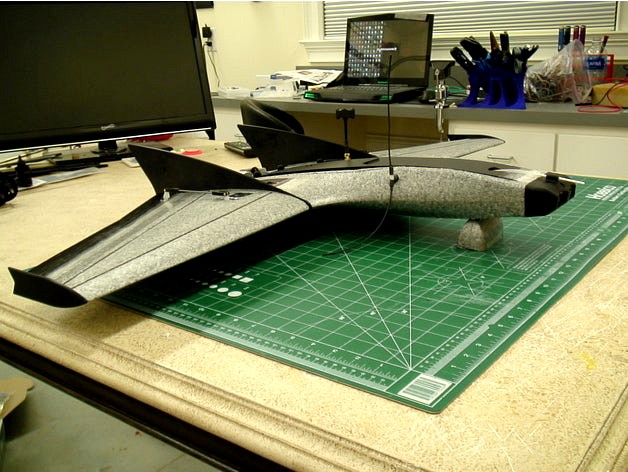
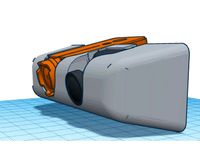
This version splits the mount into a base and cover. The base is glued with goop to the mini drak after cutting off the nose. The cover screws to the base with 3x m2.5 screws (about 10-12mm long is plenty. The hex nuts are captured in the base and should be glued in place to they don't slide away from the hole. I use nylon screws and nuts to minimize weight. Rev B moves the location of the split closer to the rear of the aircraft allowing both cameras to be removed through the front when the cover is unbolted from the base. You no longer need a large hole behind the foxeer camera, just a tunnel for the camera cable into the bay.
This mount is designed for the foxeer 1177 with 2.5 or 2.1mm lens (or any narrower lens will work too) and the runcam2.
The reversed files switch the orientation of the cameras (from the original design shown in the photos Edit: First two photos show the reversed prints as of 4-21-17) and puts the runcam2 on the right side of the plane. This makes it possible to remove the runcam2 rear cover without removing the runcam2 from the mount since the rear cover will slide towards the center of the bay to unlock.
Update 4/4/2017 Added cover with top support hole for airspeed sensor. It's designed for the MFD airspeed sensor which is just a single small 2.5mm dia tube (the static port is uncovered inside the aircraft in the new MFD airspeed sensor). But I left enough room that this hole can be drilled out for any diameter pitot and plenty of space for it to protrude so the side holes remain uncovered and still be ahead of the cover for uninterrupted airflow.
Update 4-26-17 Added 1pc file back for those that don't mind cutting enough foam to remove the cameras through the bay instead of having the bolted on front cover.
Update 5-3-17 Added 1pc file with 18mm hole for FPV cams such as the runcam swift.
Installation:
The foam cut is 17mm forward of the leading edge of the center bay cover indentation. Or 7mm forward of the leading end of the top fiberglass spar grooves. Be sure to cut perpendicular to the seam in the side of the fuse top to bottom. And keep it square when looking from the top or your cameras will be looking left or right.
Then you'll have to hog out a big square all the way into the bay to provide clearance for the runcam2 best to use a flat razor for this and be sure to keep the 7 degree angle (by eye is good enough) You can also put a hole through the top of the bay lip (just under the cover) on the forward right side to access the runcam2 power button. You'll be able to figure the location when you have it assembled. Use the base print to act as a template for the runcam2 hole into the foam through to the bay and also to locate the camera cable tunnel for the foxeer.
You will want to put a small drop of goop or hot glue on the foxeer at the front to hold it to the base print prior to putting on the cover, since the foxeer could move backwards which would not be desired. A drop on each side flush with the face of the base print and just touching the camera body will be enough and easily removable if you have to take out the foxeer for some reason.
Update 04-14-2018 Added cover file with 18.4mm dia lens hole
Update 04-23-2018 Added cover and base file for split version of 1177 camera only, no HD. Note it's important to print base in orientation as saved with supports. You can clean up the supported area until the camera fits well. This way the seam will be cleaner.
Update 10-12-2018 Added 1pc version of 1177 camera only mount
Similar models
thingiverse
free
Ritewing Drak camera nose by Havardsa
...s a version for runcam2 and foxeer 1177, and a version for runcam2 and swift/eagle.
its not been printed and tested yet.
enjoy:-)
thingiverse
free

Ritewing Nano Drak side bay covers
...at is cut into the foam and gooped, also there is a cutout for a magnet that can also be glued in to ensure closure of the cover.
thingiverse
free

Z3 Camera mount for Runcam3 (or 2) and Foxeer 1177 or Arrow by billyd
...a runcam3 (or session) and 1177 or arrow (or similar cameras for the ritewing z3. this is a fairly...
thingiverse
free

Mini Drak Camera Mount for Session (or Runcam3) and 1177 Cameras by billyd
...side is designed for an hs1177 camera. installation is similar to my other mini drak camera mount, except no...
thingiverse
free

Ritewing Drak GoPro Hero 7 nose aero mount
...ni cam mount & nano predator mount
--- choose corresponding filler pieces
--- template for cutting added, not tried it myself
grabcad
free

Ritewing Nano Drak v3 RAM-AIR Kit
...ack side hole and motor magnets embedded in the foam to ensure the bay stays closed.
https://www.youtube.com/watch?v=nkjqgb9icn8
thingiverse
free

MIni Drak Bundle Kit by robsloco
...ws the best results that i have seen. i use simplify 3d for these prints please refer to pics for my support setup in the slicer.
thingiverse
free
ASLCertified HIRO 180-X FPV Foxeer 1177 camera mount by ASLCertified
...o 180-x fpv foxeer 1177 camera mount by aslcertified
thingiverse
foxeer style fpv camera mount for the hiro 180 racing airframe.
cg_trader
$3

nano drak side bay covers | 3D
...
cg trader
made for nano drak side bay covers nano drak minidrak nanodrak ritewing the fpv wing rcwing hobby diy hobby diy other
thingiverse
free
foxeer camera hood by kosuyoung
...camera hood by kosuyoung
thingiverse
test for foxeer 1177s 2.8mm lens only!
qura scale for "10"
2mm bolt & 2mm nut
Billyd
thingiverse
free

Golf Box by billyd
...plify printing.
the lid should be dropped about 1mm into the bed before slicing. the lid will need supports around the perimeter.
thingiverse
free

Nerdcam3D MK2 Mount by billyd
... camera and tricopter!
enjoy
update added file nerdcam3d-mk2_cover_mobius which is a cover with a mount for the mobius hd camera.
thingiverse
free

Filament Saver by billyd
... when not in use. it saves filament because the device does not damage or require bending the filament to keep it from unspooling
thingiverse
free

Facehugger by billyd
...actice with my scanner, i am learning quite a bit. so i've just uploaded a much better quality scan of the facehugger. enjoy!
thingiverse
free

Christmas Tree Star Topper by billyd
...revised it so it could be printed in two halves and glued together to make a whole. note this is a small tree topper. 118mm wide.
thingiverse
free

Exhaust Fitting, Wall Mount by billyd
...t is meant as a means to mount the exhaust tube to a dryer vent or similar on a wall, to carry the printed exhaust fumes outside.
thingiverse
free

Earring Stand by billyd
...would advise using pla or petg for this print.
i also supply the stand with just holes instead of slots for stud earrings.
enjoy!
thingiverse
free

Nerdcam3D Mount for Cinetank MK2 by billyd
...locations on the forward top of the cinetank mk2 upper plate. nerdcam3d with cinetank mk2 frame is an amazing experience. enjoy!!
thingiverse
free
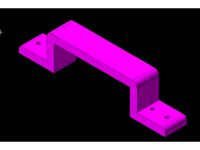
Handle for Lulzbot Taz 4 or 5 enclosure by billyd
...h side of my lulzbot enclosure for taz 4 or 5 (found here: http://www.thingiverse.com/thing:746922 ) for easy lifting and moving.
thingiverse
free

Hero2 mount for the Firefly 6 by billyd
...pt a single "one-wrap" style velcro tie 8x1/2". you can typically find them in retail stores in the craft section.
Drak
turbosquid
free
drak
... available on turbo squid, the world's leading provider of digital 3d models for visualization, films, television, and games.
thingiverse
free

Ritewing Drak Parts
...ritewing drak parts
thingiverse
various parts i used on my big drak build
thingiverse
free
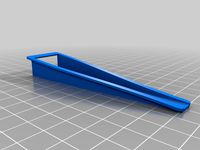
Drak esc scoop
...ingiverse
just adjusted the size of the original design in order to make it applicable to the component bay of the ritewing drak
thingiverse
free

Drak the Barbarian by NinjaMMA1
...n by ninjamma1
thingiverse
drak the barbarian is a gladiator in the arena. if you want to see more gladiators, please follow me.
thingiverse
free
mini drak esc clamp by clevis41
...mini drak esc clamp by clevis41
thingiverse
clamps for mini drak esc
thingiverse
free
Mini Drak wing tips by scottyh72
...mini drak wing tips by scottyh72
thingiverse
wing tip protectors for the ritewing mini drak.
thingiverse
free
Drak Saddle scoop
...drak saddle scoop
thingiverse
part one of a compartment scoop
thingiverse
free

Nano Drak wingtips
...nano drak wingtips
thingiverse
scaled version of the winglets by norcot.
thingiverse
free
Drak scoop cover latch
...drak scoop cover latch
thingiverse
thingiverse
free

FC mount for Mini Drak by curlypaul
...size flight controllers for mini drak
just a simple mount that tilts fc up 3.5°, which is what i measured the mini-drak bay to be
Nose
3d_export
$5

By noses
...by noses
3dexport
the package includes 6 models of noses with their textures and bones ready to animate
3d_export
free

Nose Drops
...nose drops
3dexport
nose drops)
3d_export
$5

Nose 3D Model
...nose 3d model
3dexport
nose human realistic
nose 3d model annu001 79678 3dexport
turbosquid
$8

N for Nose
...bosquid
royalty free 3d model n for nose for download as max on turbosquid: 3d models for games, architecture, videos. (1693062)
turbosquid
$2

Male Nose
...lty free 3d model male nose for download as ztl, obj, and stl on turbosquid: 3d models for games, architecture, videos. (1685205)
turbosquid
$99

Nose Man
... available on turbo squid, the world's leading provider of digital 3d models for visualization, films, television, and games.
turbosquid
$19

nose art
... available on turbo squid, the world's leading provider of digital 3d models for visualization, films, television, and games.
turbosquid
free
Nose Mouth
... available on turbo squid, the world's leading provider of digital 3d models for visualization, films, television, and games.
3d_export
$5
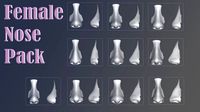
female nose pack
... poly )<br>*10 obj female noses ( low poly )<br>*1 ztl file of 10 female noses<br>*1 zbp female noses imm brush
3d_export
free

nose aspirator
...nose aspirator
3dexport
more info and files here:
Mini
turbosquid
$10

Mini Mini Luceplan
...
royalty free 3d model mini mini luceplan for download as max on turbosquid: 3d models for games, architecture, videos. (1227359)
3d_ocean
$39

Mini Cooper
...mini cooper
3docean
cabrioler cooper mini
mini cooper cabrioler
3d_export
$30

Mini lathe
...mini lathe
3dexport
mini lathe
3d_export
$5

mini mouse
...mini mouse
3dexport
mini mouse
3d_export
$5

mini house
...mini house
3dexport
mini house
3d_export
free

Mini Mecha
...mini mecha
3dexport
concept of mini mecha
3d_ocean
$20

Mini Gun
...mini gun
3docean
gatling gun gun machine gun mini gun weapon
model of a mini gatling gun.
3ddd
free

Herve mini
... кофейный , herve
http://www.mobiliavenanti.it/ru/products/hervè-mini
3d_export
$5

mini wall
...mini wall
3dexport
mini wall for living room
3d_export
$5

mini bank
...mini bank
3dexport
mini bank 3d model
Camera
archibase_planet
free
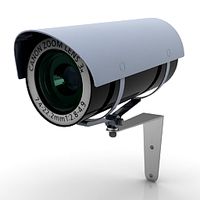
Camera
...base planet
camera surveillance camera video camera
camera surveillance n090211 - 3d model (*.3ds) for interior 3d visualization.
archibase_planet
free

Camera
...hibase planet
camera security camera video camera
camera security n210515 - 3d model (*.gsm+*.3ds) for exterior 3d visualization.
archibase_planet
free
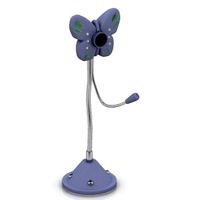
Camera
...se planet
camera web camera webcam
camera butterfly usb pc camera n090713 - 3d model (*.gsm+*.3ds) for interior 3d visualization.
archibase_planet
free
Camera
...mera
archibase planet
surveillance camera video camera camcorder
camera n011211 - 3d model (*.3ds) for exterior 3d visualization.
archibase_planet
free
Camera
...camera
archibase planet
camera digital camera
camera canon digital n041211 - 3d model (*.3ds) for interior 3d visualization.
archibase_planet
free
Camera
...camera
archibase planet
camera film camera phototechnique
camera n100214 - 3d model (*.gsm+*.3ds) for interior 3d visualization.
archibase_planet
free

Camera
...amera
archibase planet
camera video camera camcorder
camera video n070315 - 3d model (*.gsm+*.3ds) for interior 3d visualization.
archibase_planet
free

Camera
...rchibase planet
camera video camera camcorder
camera studio n101213 - 3d model (*.gsm+*.3ds+*.max) for interior 3d visualization.
archibase_planet
free
Camera
...ibase planet
digital camera camera phototechnique
camera canon ixus 400 n310311 - 3d model (*.3ds) for interior 3d visualization.
archibase_planet
free
Camera
...ase planet
photocamera video camera camera
camera sony t300 black n291010 - 3d model (*.gsm+*.3ds) for interior 3d visualization.
Mount
3d_export
free

mounting bracket
...mounting plate is the portion of a hinge that attaches to the wood. mounting plates can be used indoors, cabinetry and furniture.
turbosquid
$2

MOUNTING
... available on turbo squid, the world's leading provider of digital 3d models for visualization, films, television, and games.
turbosquid
free

Mounts
... available on turbo squid, the world's leading provider of digital 3d models for visualization, films, television, and games.
turbosquid
free

Mount Fuji
...fuji
turbosquid
free 3d model mount fuji for download as obj on turbosquid: 3d models for games, architecture, videos. (1579977)
3d_export
$5

Headphone mount LR
...headphone mount lr
3dexport
headphone mount l+r
turbosquid
$39

Mount rainier
...quid
royalty free 3d model mount rainier for download as fbx on turbosquid: 3d models for games, architecture, videos. (1492586)
turbosquid
$5

pipe mounting
...quid
royalty free 3d model pipe mounting for download as obj on turbosquid: 3d models for games, architecture, videos. (1293744)
turbosquid
$3

Mounting Tires
...uid
royalty free 3d model mounting tires for download as fbx on turbosquid: 3d models for games, architecture, videos. (1708511)
3d_export
$5

Magnetic GoPro Mount
...pro mount
3dexport
cool magnetic mount for gopro. allows you to mount the camera on flat metal surfaces and get exclusive shots.
turbosquid
$5

Stone Mount
...ty free 3d model stone mount for download as ma, obj, and fbx on turbosquid: 3d models for games, architecture, videos. (1370306)