Thingiverse
Mini Battery Tester by rthoma82
by Thingiverse
Last crawled date: 3 years, 1 month ago
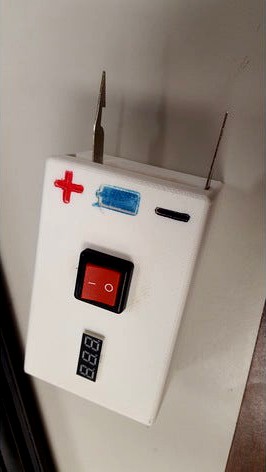
Easy to make, DIY battery tester.
Printed parts are ABS on Stratasys 200mc. Sparse high density infill setting. Used rafts and support, especially for the bottom panel.
Other than the printed parts, you will need:
a power switch. I used a SPST rocker switch from Radioshack https://www.radioshack.com/products/spst-red-rocker-switch
The box is designed to fit this switch, but any switch can be used. You will probably have to modify the box to fit a different switch.
x2 Soldering heat clipshttps://www.radioshack.com/products/soldering-heat-sink-clip-tool
Any piece of thin metal will work. I used these because they were cheap, on sale, and easy to work with.
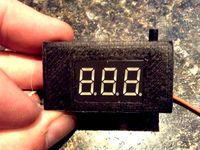
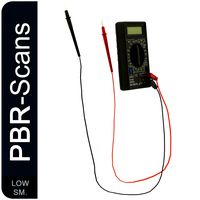
a mini volt meter. There are lots that can be found on Amazon pretty cheap.https://www.amazon.com/SMAKN%C2%AE-Voltmeter-Digital-Display-Detector/dp/B00N71QLCK/ref=sr_1_33?ie=UTF8&qid=1529679939&sr=8-33&keywords=mini+volt+meter
I made sure to get one that had 3 wires already attached so I wouldn't have to worry about adding to it later.
a 9v battery snap connector. Already had one but I know Radioshack has them.https://www.radioshack.com/products/radioshack-fully-insulated-9v-battery-snap-connectors
some heat shrink, a ring tongue, a small screw (got one from old computer I had disassembled), and x4 M3 20mm capscrew bolts with matching locknuts. (you could probably go shorter with the bolts, it's what I had lying around.)
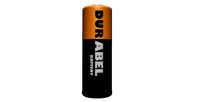
a 9v battery
Tools:
Soldering iron, Glue gun, Phillips head screwdriver, pliers, drill, wire cutters, hammer, vise/anvil, markers (optional)
Assembly:
If you are using the heat clips from Radioshack as the leads, first remove the rubber covering then straighten them with pliers. To fully straighten them, use a hammer and anvil to get them nice and flat. I cut one end of the clip off and rounded the edge with a grinder.
On one lead, I drilled a small hole for my wire to attach to. On the second, I drilled two holes for the bolts and ring tongue.
The volt meter display should fit nice and snug in the hole. I did not need glue or anything to make it stay.
After attaching the display and power switch, I wired everything up (just follow the diagram and pics), and glued the negative lead into it's little slot.
attached the hinge and second lead, then hooked up the battery which fits nicely in the box on the bottom panel. Add the screw to attach the bottom panel and it was done.
UPDATE:
First version of hinge did not work. It was too small for the printer to print correctly.
I changed the design to a "stiff hinge" which is not a hinge at all really, but it works. I printed it with Nylon Bridge with 50% rectilinear infill.
Printed parts are ABS on Stratasys 200mc. Sparse high density infill setting. Used rafts and support, especially for the bottom panel.
Other than the printed parts, you will need:
a power switch. I used a SPST rocker switch from Radioshack https://www.radioshack.com/products/spst-red-rocker-switch
The box is designed to fit this switch, but any switch can be used. You will probably have to modify the box to fit a different switch.
x2 Soldering heat clipshttps://www.radioshack.com/products/soldering-heat-sink-clip-tool
Any piece of thin metal will work. I used these because they were cheap, on sale, and easy to work with.
a mini volt meter. There are lots that can be found on Amazon pretty cheap.https://www.amazon.com/SMAKN%C2%AE-Voltmeter-Digital-Display-Detector/dp/B00N71QLCK/ref=sr_1_33?ie=UTF8&qid=1529679939&sr=8-33&keywords=mini+volt+meter
I made sure to get one that had 3 wires already attached so I wouldn't have to worry about adding to it later.
a 9v battery snap connector. Already had one but I know Radioshack has them.https://www.radioshack.com/products/radioshack-fully-insulated-9v-battery-snap-connectors
some heat shrink, a ring tongue, a small screw (got one from old computer I had disassembled), and x4 M3 20mm capscrew bolts with matching locknuts. (you could probably go shorter with the bolts, it's what I had lying around.)
a 9v battery
Tools:
Soldering iron, Glue gun, Phillips head screwdriver, pliers, drill, wire cutters, hammer, vise/anvil, markers (optional)
Assembly:
If you are using the heat clips from Radioshack as the leads, first remove the rubber covering then straighten them with pliers. To fully straighten them, use a hammer and anvil to get them nice and flat. I cut one end of the clip off and rounded the edge with a grinder.
On one lead, I drilled a small hole for my wire to attach to. On the second, I drilled two holes for the bolts and ring tongue.
The volt meter display should fit nice and snug in the hole. I did not need glue or anything to make it stay.
After attaching the display and power switch, I wired everything up (just follow the diagram and pics), and glued the negative lead into it's little slot.
attached the hinge and second lead, then hooked up the battery which fits nicely in the box on the bottom panel. Add the screw to attach the bottom panel and it was done.
UPDATE:
First version of hinge did not work. It was too small for the printer to print correctly.
I changed the design to a "stiff hinge" which is not a hinge at all really, but it works. I printed it with Nylon Bridge with 50% rectilinear infill.
Similar models
thingiverse
free
Battery Voltage Tester by DaveGun
... by zip ties to a tube
handle on the motorcycle. pressing the button on the top of the case
displays the voltage of the battery.
thingiverse
free

Mini LED Desk Lamp by djminnesota
...or is up to you
a foot or two of insulated wire
one rocker switch. the one i used was 1x1.5x1 inches
two 9v battery holders
thingiverse
free

Anet A8 switch holder for LED lights by x9x9x9x9x9
...ack switches https://www.radioshack.com/collections/switches/products/pk2-slide-spst-sw this should fit the anet a8 and anet a6.
thingiverse
free

LED Lamp Base by Jaycar_Electronics_Maker_Hub
...ring and 9v or 2x aa batteries.
includes cut-out sized to hold spst ultra mini rocker switch without the need for any adhesives.
grabcad
free

9v Volt Battery Cell Button w/ wires
...9v volt battery cell button w/ wires
grabcad
9v battery button
thingiverse
free

9v Model Rocket Igniter by jburkhardt0
...rills) with support underneath
case top - printed sitting flat on it's top with clips sticking up
***sized in slicer at 2540%
thingiverse
free

LED, battery, switch clip-on light by kpaulsen
...just slide it onto the end of the z-axis arm, and switch it on. using a battery, there's no need to tap into any other wires.
thingiverse
free

Cap for DIY 9V battery clip by egil
... one for the typical plastic body battery. the clip from the metal body battery is the best, i think, but you take what you have.
thingiverse
free

Lorei PSU cover by tuxcat
... is radio shack part # 2750021 - radioshack spst 110-volt ac illuminated switch
** this fits a psu that's about 98mm x 42.5mm
thingiverse
free

DSO138 Case Remix with 9V Battery by SteakSndwich
... they get a better fit, but that depends on the printer i guess. also the slidesw will need a small drill to fit on the switches)

Tester
turbosquid
$2

tester
... available on turbo squid, the world's leading provider of digital 3d models for visualization, films, television, and games.
turbosquid
$10

Virus tester
... free 3d model virus tester for download as max, fbx, and obj on turbosquid: 3d models for games, architecture, videos. (1526983)
turbosquid
$24
Hipot Tester
...odel hipot tester for download as skp, 3ds, dae, fbx, and obj on turbosquid: 3d models for games, architecture, videos. (1651595)
turbosquid
$10
Tester Cube
... available on turbo squid, the world's leading provider of digital 3d models for visualization, films, television, and games.
turbosquid
free

BIPED tester
... available on turbo squid, the world's leading provider of digital 3d models for visualization, films, television, and games.
turbosquid
$30
99 Tester SM
...e 3d model 99 tester sm for download as ma, max, obj, and fbx on turbosquid: 3d models for games, architecture, videos. (1258979)
turbosquid
$19

Concrete Compression Tester
... available on turbo squid, the world's leading provider of digital 3d models for visualization, films, television, and games.
turbosquid
$15

AC Electric Tester 2
...ectric tester 2 for download as max, ige, obj, stl, and sldpr on turbosquid: 3d models for games, architecture, videos. (1464810)
turbosquid
$14

Digital Electric Tester Pen
...tric tester pen for download as max, ige, obj, stl, and sldpr on turbosquid: 3d models for games, architecture, videos. (1416100)
3d_export
$15
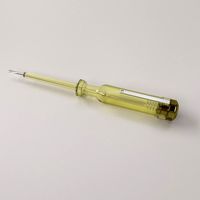
Probe Screwdriver 3D Model
...screw driver voltage volt electronic equipment tool electric contact tester detector flat head electrician electrical probe screwdriver 3d model...
Battery
3d_ocean
$2
Battery
...battery
3docean
battery electronic
a high quality battery .
3d_export
free

battery
...battery
3dexport
battery
3d_ocean
$5
Battery
...battery
3docean
battery electronics
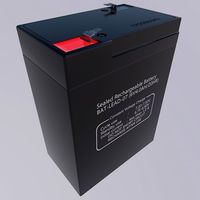
a classic 6 v battery, high poly with materials
3d_ocean
$3
Batteries
...batteries 3docean aa aaa batteries battery d electronics energy materials power subdivision uv unwrapped aa,...
3d_export
$19
Lead-acid battery storage battery lithium battery
...ttery storage battery lithium battery
3dexport
1.lead-acid battery storage battery lithium battery 2.files include 3dmax obj fbx
3d_ocean
$7
Battery Model
...battery model
3docean
big battery car battery vehicle battery
car battery, big battery, vehicle battery.
3ddd
free
battery energier
...battery energier
3ddd
battery energier , батарейка
battery energier
turbosquid
free
battery
...battery
turbosquid
free 3d model battery for download as obj on turbosquid: 3d models for games, architecture, videos. (1151676)
3d_ocean
$1
Battery Model
...lack minus plus white yellow
this is battery model is about 1000 triangles. turntable preview is smoothed version of the battery.
3d_export
$10
battery 18650
...battery 18650
3dexport
battery 18650
Mini
turbosquid
$10

Mini Mini Luceplan
...
royalty free 3d model mini mini luceplan for download as max on turbosquid: 3d models for games, architecture, videos. (1227359)
3d_ocean
$39

Mini Cooper
...mini cooper
3docean
cabrioler cooper mini
mini cooper cabrioler
3d_export
$30

Mini lathe
...mini lathe
3dexport
mini lathe
3d_export
$5

mini mouse
...mini mouse
3dexport
mini mouse
3d_export
$5

mini house
...mini house
3dexport
mini house
3d_export
free

Mini Mecha
...mini mecha
3dexport
concept of mini mecha
3d_ocean
$20

Mini Gun
...mini gun
3docean
gatling gun gun machine gun mini gun weapon
model of a mini gatling gun.
3ddd
free

Herve mini
... кофейный , herve
http://www.mobiliavenanti.it/ru/products/hervè-mini
3d_export
$5

mini wall
...mini wall
3dexport
mini wall for living room
3d_export
$5

mini bank
...mini bank
3dexport
mini bank 3d model