Thingiverse
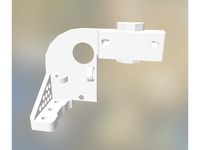
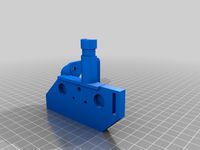
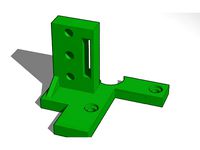
Mingda D2 D3 BLTouch Install Simplified by wetwilly76
by Thingiverse
Last crawled date: 2 years, 11 months ago
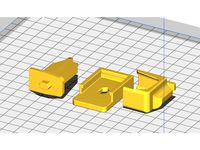
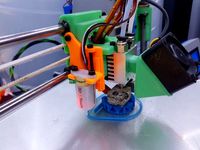
Install Summary for Mingda D Series BLTouch
Download BLTouch firmware from: https://www.3dmingda.com/download/firmware.html
(Ex: D2 Firmware for add BL Touch)
Format SD card for FAT32
Add Mingda download "Firmware.bin" to formated SD card
Turn off power to printer, unplug power.
Insert SD card
Plug in power, turn on printer.
Printer will auto update to firmware placed on SD Card. Touch screen should now show option of Auto Bed Level.
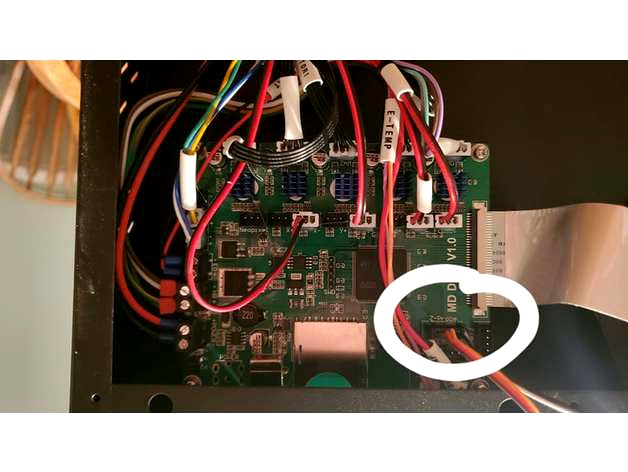
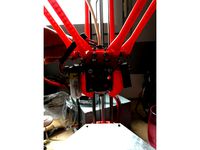
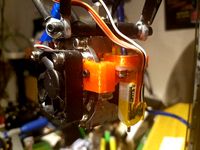
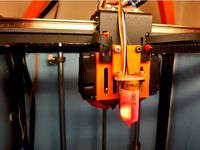
Proceed to install BL Touch. Refer to pictures of motherboard
Install BL Touch connectors on motherboard header marked "Z-Probe"
Wire colors from left to right (wire colors correspond with those coming off BL Touch)
Brown, Red, Orange, Black, White
All done. Proceed to Auto Bed Level. ABL settings vary from mount to mount.
Note: Go ahead and get the BL Touch w/ 2m extension cable
Download BLTouch firmware from: https://www.3dmingda.com/download/firmware.html
(Ex: D2 Firmware for add BL Touch)
Format SD card for FAT32
Add Mingda download "Firmware.bin" to formated SD card
Turn off power to printer, unplug power.
Insert SD card
Plug in power, turn on printer.
Printer will auto update to firmware placed on SD Card. Touch screen should now show option of Auto Bed Level.
Proceed to install BL Touch. Refer to pictures of motherboard
Install BL Touch connectors on motherboard header marked "Z-Probe"
Wire colors from left to right (wire colors correspond with those coming off BL Touch)
Brown, Red, Orange, Black, White
All done. Proceed to Auto Bed Level. ABL settings vary from mount to mount.
Note: Go ahead and get the BL Touch w/ 2m extension cable
Similar models
thingiverse
free

Bl touch Protective Cover by 3dcauldron
...nto a print.
we designed this thing around the bltouch, not around a specific printer or mount. it should fit most installations.
thingiverse
free
X301/X201 BL touch/3D touch mount by Brezaeon
...x301/x201 bl touch/3d touch mount by brezaeon
thingiverse
auto bed leveling mount for the x301 or x201 printer.
thingiverse
free

CR10S5 Marlin 2.0 BLtouch firmware by SergeyWilliams
...continuation of printing after turning off the printer and makes a triple level sensor measurement.
firmware basis marlin 2.0.7.2
thingiverse
free

ORTUR Obsidian - Marlin Firmware by FiveNights
...ract all files from zip folder to your sd card, insert sd card into printer
start printer & wait for the printer to update...
thingiverse
free
Creativity CoreXY ELF 3D Printer auto Leveling BL-touch/3D-touch Mounting brackets
...ing brackets
elf buy link:https://bit.ly/2mi5py7https://bit.ly/2ltgiiphttps://bit.ly/2ltgsgxhttps://www.amazon.com/dp/b07vndpd1g
thingiverse
free

Ender-2 Fan Duct with LED and BL-touch by idotic
...ch and still testing and configuring. i will update with a capture of the autoleveling when everything works.
have fun!!!
simon
thingiverse
free

Artillery Genius Firmware 2.0.9. hex file by Tom188
...n the prepared micro sd card.
7.) power on your printer
8.) now the tft should auto update the firmware from the sd card
9.) done
thingiverse
free

Tronxy X5SA Pro bed level helpers by FotoFieber
...uot;abstand_carve.stl" in the bottom the printer. you can then level the bed manually, as long as the printer is turned off.
thingiverse
free
Installing the BLtouch on Anet A6 by wenzej
... should step you through installing the bltouch on the a6 and setting up auto level. it also goes over the install of the mounts.
thingiverse
free

Cobblebot Little Monster X-gantry with BLTouch by blanius
...uch-auto-bed-leveling-sensor-for-3d-printers/x/5685841#/
bed level sensor
i've included a step file if you need to edit this.
Wetwilly76
thingiverse
free
Reworked Stribog Magazine by wetwilly76
...6
thingiverse
reworked stribog curved magazine
re-designed follower, spring lock, magazine feed lips.
uses awcy cz evo baseplate
thingiverse
free

Stribog Picatinny Backplate w/Revised Geo by wetwilly76
...try for ease of installation. no sanding work required.
5 to 10 wall thickness with .16 for maximum strength/redigity
50%+ infill
Mingda
thingiverse
free
Mingda D2 Hot end Cover by OctagonalVector
...mingda d2 hot end cover by octagonalvector
thingiverse
mingda d2 hot end cover
thingiverse
free
fan duct for Mingda MD-6L by mdatom
...fan duct for mingda md-6l by mdatom
thingiverse
this is a ring fan duct for mingda md-6l.
thingiverse
free

Mingda Filament Spool Collar by andyhill
...ool collar by andyhill
thingiverse
the mingda glitar 6s 3d printer filament spool holder requires this collar to spool corectly.
thingiverse
free
Mingda D2 Raspberry Bracket by El_A_lex
...g raspberry on the mingda d2.
i took the unused screwholes on the right side of the printer and designed a bracket fitting there.
thingiverse
free
Mingda d2 d3 Druckbett Kabel Entlastung /Halter by BadMansGeheimLabor3D
...mingda d2 d3 druckbett kabel entlastung /halter by badmansgeheimlabor3d
thingiverse
mingda d2 d3 kabelbruch stop
thingiverse
free
Mingda X-Axis Tensionner by tilange
...mingda x-axis tensionner by tilange
thingiverse
2 or 4 m3 bolt needed .. !
thingiverse
free

Mingda D2 fan for 5015 by matatt
...mingda d2 fan for 5015 by matatt
thingiverse
fan 5015 24v
infill 40%
petg
no support
thingiverse
free

Mingda D-2 Extruder cover with cable Chain adapter by fluxcore
...d-2 extruder cover with cable chain adapter by fluxcore
thingiverse
mingda d-2 extruder cover with integrated cablechain adapter
thingiverse
free

Mingda D2 Cura Profile (PLA) + Printer Settings + StartEnd Gcode by fabiofilippini
... + startend gcode by fabiofilippini
thingiverse
some mods i designed for the mingda d2:https://www.thingiverse.com/thing:4659128
thingiverse
free
Mingda D2 Fan Assembly Housing by Kevins3DCreations
...upports are needed.
overview video can be found here - https://youtu.be/ywhupdg_9si
twitter @k3dc_
instagram at kevins3dcreations
D3
turbosquid
$60
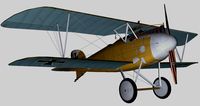
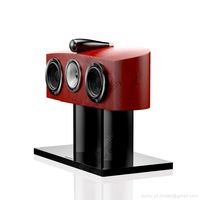
Albatros D3
...osquid
royalty free 3d model albatros d3 for download as 3ds on turbosquid: 3d models for games, architecture, videos. (1206830)
turbosquid
$110

Albatros D3
... available on turbo squid, the world's leading provider of digital 3d models for visualization, films, television, and games.
turbosquid
$8
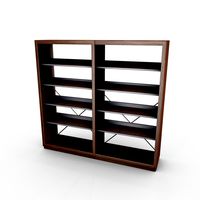
D3 Bookcase
...d3 bookcase for download as ma, 3ds, max, obj, fbx, and blend on turbosquid: 3d models for games, architecture, videos. (1339364)
3ddd
free

ODESD2 D3
...м шпонированная дубом фанера, мдф, фурнитура blum
размеры: ширина: 425мм, длина: 1200мм, высота: 800ммhttp://odesd2.com
3d_export
$5

Buggy d3 3D Model
...buggy d3 3d model
3dexport
buggy
buggy d3 3d model 1201314354 62357 3dexport
turbosquid
$20
Bowers & Wilkins HTM2 D3 Rosenut on FS HTM D3 Black
... available on turbo squid, the world's leading provider of digital 3d models for visualization, films, television, and games.
turbosquid
$100

Motorola RAZR D3
... available on turbo squid, the world's leading provider of digital 3d models for visualization, films, television, and games.
turbosquid
$20
Bowers & Wilkins HTM2 D3 Satin White on FS HTM D3 Silver
... available on turbo squid, the world's leading provider of digital 3d models for visualization, films, television, and games.
turbosquid
$20
Bowers & Wilkins HTM2 D3 Gloss Black on FS HTM D3 Black
... available on turbo squid, the world's leading provider of digital 3d models for visualization, films, television, and games.
turbosquid
$99

Osiris D3 Skate shoe
...ree 3d model osiris d3 skate shoe for download as obj and fbx on turbosquid: 3d models for games, architecture, videos. (1403308)
D2
3d_export
$17

Albatros d2
...albatros d2
3dexport
albatros d2
3ddd
$1
Hulsta D2
...hulsta d2
3ddd
hulsta
кресло hulsta d2
3ddd
$1
Albotros D2
...albotros d2
3ddd
самолет
модель самолета первой мировой albotros d2 материалы+текстуры
3dsmax2009 vray-1.50
turbosquid
$15
Cowon D2
... available on turbo squid, the world's leading provider of digital 3d models for visualization, films, television, and games.
turbosquid
$5

d2.max
... available on turbo squid, the world's leading provider of digital 3d models for visualization, films, television, and games.
3ddd
$1
ODESD2 D2
...м шпонированная дубом фанера, мдф, фурнитура blum
размеры: ширина: 425мм, длина: 1800мм, высота: 800ммhttp://odesd2.com
turbosquid
$26

Ship screw D2
...quid
royalty free 3d model ship screw d2 for download as fbx on turbosquid: 3d models for games, architecture, videos. (1479420)
turbosquid
$19

Sofa Tuxedo D2
...uid
royalty free 3d model sofa tuxedo d2 for download as max on turbosquid: 3d models for games, architecture, videos. (1711805)
turbosquid
$19

Sofa Tuxedo D2
...uid
royalty free 3d model sofa tuxedo d2 for download as max on turbosquid: 3d models for games, architecture, videos. (1711800)
3ddd
free
Vistosi | Cocumis SP G D2
...vistosi | cocumis sp g d2
3ddd
vistosi
cocumis sp g d2
Bltouch
thingiverse
free
Support bltouch by TonyJ
...support bltouch by tonyj
thingiverse
support bltouch
thingiverse
free
BLTOUCH for MICRON3DP by lamerhouse
...bltouch for micron3dp by lamerhouse
thingiverse
bltouch for micron3dp
thingiverse
free
SapphirePro mount for Bltouch
...sapphirepro mount for bltouch
thingiverse
sapphirepro mount for bltouch
thingiverse
free
ender6 BLtouch by chimaer
...ender6 bltouch by chimaer
thingiverse
ender6 bltouch
this is an external bracket
thingiverse
free
BLTouch KP3s by 1devilman1
...bltouch kp3s by 1devilman1
thingiverse
bltouch mount for kingroon kp3s
thingiverse
free
Bltouch support adjustable
...bltouch support adjustable
thingiverse
adjustable support for bltouch, p3steel.
thingiverse
free
BMG NEREUS BLTOUCH
...bmg nereus bltouch
thingiverse
petg
m3 screws and nuts for the bltouch
thingiverse
free

BLTouch Bracket by tidh666
...bltouch bracket by tidh666
thingiverse
serves to attach the bltouch sensor to the extruders
thingiverse
free
bltouch mount by wars
...bltouch mount by wars
thingiverse
reinforced bracket for bltouch cooperates with high_clearance_cr10_oem_fang_mod
thingiverse
free

BLTouch Holder by Jonthan06
...bltouch holder by jonthan06
thingiverse
support bltouch pour wanhao d12
Simplified
turbosquid
$5

Simplified Trumpet
... available on turbo squid, the world's leading provider of digital 3d models for visualization, films, television, and games.
turbosquid
free

Simplified Bike
... available on turbo squid, the world's leading provider of digital 3d models for visualization, films, television, and games.
3d_export
$5

simplified model of a bundle of dollars
...simplified model of a bundle of dollars
3dexport
a simplified model of a bundle of dollars. models for subdiv
turbosquid
$19

The Simplified model of a telescope
... available on turbo squid, the world's leading provider of digital 3d models for visualization, films, television, and games.
turbosquid
$1

Simplified sports car
... available on turbo squid, the world's leading provider of digital 3d models for visualization, films, television, and games.
3d_export
$5

Simplified male-female base mesh
...simplified male-female base mesh
3dexport
simplified male/female character base mesh in .ztl and .fbx
3ddd
$1

Soane - Simplified quiver klismos chair
...
3ddd
капитоне
модель кресла soane - simplified quiver klismos chair.
- лоуполи геометрия
- мультисаб материал
- fbx + obj + 3ds
turbosquid
$24

Coronavirus 2 COVID-19 simplified model
...irus 2 covid-19 simplified model. for download as c4d and obj on turbosquid: 3d models for games, architecture, videos. (1534962)
3d_export
free
g17
...g17 3dexport glock 17 simplified style,little...
3d_export
$10
biblical altar
...biblical altar 3dexport a simplified model of the altar spoken of in the bible,...
Install
3ddd
$1

electrical installation
...electrical installation
3ddd
electrical installation , розетка
electrical installation
turbosquid
$10

Nuclear installation
...l nuclear installation for download as 3ds, obj, c4d, and fbx on turbosquid: 3d models for games, architecture, videos. (1152514)
turbosquid
$2

electrical installation
...lectrical installation for download as 3ds, obj, fbx, and dae on turbosquid: 3d models for games, architecture, videos. (1196387)
turbosquid
free

Heating installation
... available on turbo squid, the world's leading provider of digital 3d models for visualization, films, television, and games.
3d_export
$5

Flange fixer for installation
...lange fixer for installation
3dexport
flange fixer for installation with diameter 3000. for chimney for wind generator tubes etc
turbosquid
$20

Hand Art Installation
...yalty free 3d model hand art installation for download as obj on turbosquid: 3d models for games, architecture, videos. (1671299)
turbosquid
$40

Hand butterfly Art installation
... 3d model hand butterfly art installation for download as obj on turbosquid: 3d models for games, architecture, videos. (1671304)
turbosquid
$10

Chinese atmosphere installations umbrella
...mosphere installations umbrella for download as fbx and blend on turbosquid: 3d models for games, architecture, videos. (1481622)
turbosquid
free

Sci Fi external installation
...el sci fi external installation for download as obj and blend on turbosquid: 3d models for games, architecture, videos. (1438747)
turbosquid
$20

Sink With Hob Installation And Hood
... available on turbo squid, the world's leading provider of digital 3d models for visualization, films, television, and games.