Thingiverse
Milk Bottle Locking Cap "Milkey" by peaberry
by Thingiverse
Last crawled date: 3 years, 1 month ago
Picture the scene... you arrive at work and, while your PC is booting up, decide to make yourself a nice cup of tea. So you wander to the kitchen, and open the fridge, only to discover that someone has used all your milk again - oh no! With a look of despondency, you return to your office, and resolve to find a solution to this problem...
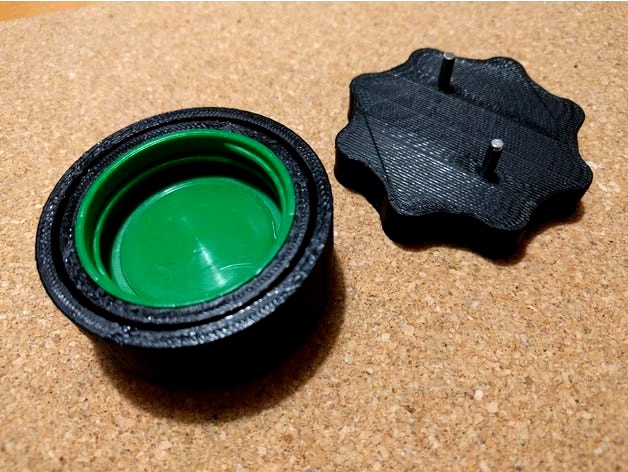
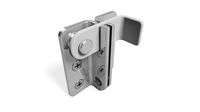
This is a locking milk bottle cap, which requires a removable "key" to be able to open. The idea is that the cap rotates freely without the key, making it difficult to open the bottle. When the key is inserted, the cap locks and can be removed or refitted easily.
Now your milk is a little bit safer in the communal fridge at work...
For food safety, this is designed to accept a standard milk bottle cap which needs to be glued into the 3D printed cap after assembly.
Other parts required:
1x countersunk screw M3x10 (to secure the central hub)
2x metal shafts 3x18mm (these form the pins in the "key")
Drill through part 3 with a 3mm drill, and drill through the two outer holes in part 1 with a 3mm drill.
Test fit the milk bottle cap in part 2 (while it is still easy to remove by pushing a pen through the central hole). This is designed to fit caps with 40mm outside diameter, and 11.5mm height. These seem to be fairly standard in the UK at least.
Assemble parts 1,2,3 together, filing as needed so that part 2 rotates very freely in part 1. Assuming it does, secure part 3 with M3x10 screw (do not overtighten). If everything still rotates freely, fix part 3 permanently with a small amount of glue and the M3x10 screw. Spread glue around the inside of part 2, keeping well away from the central hub. Insert the milk bottle cap firmly and leave the glue to set.
Take the two 3mm by 18mm shafts, and gently tap them into the key (knurled handwheel), which should leave 10mm projecting out of the handle.
To loosen or tighten the cap, the two pins in the key (knurled handwheel) are pushed through the holes in the upper cap (part 1), to engage with the two channels in lower section (part 2).
Update 11/07/18: added two different versions of part 1 (the outer body) which are 5mm and 10mm taller than the original. This was a suggestion from slarti42uk, to make it harder for people to get their fingers underneath!
Similar models
thingiverse
free

Meccano SG90 Cap by Opium
...m long
i also have a model "sg90 cap" which is just the central hub (without the extrusion to allow for meccano bolts)
thingiverse
free

Pill Bottle Screw Organizer by Jeff5263
... with 3/8".
i suggest using white or other bright color of filament to help make the screws more visible through the bottle.
grabcad
free

Bicycle hub
...e wheel's rim via the spokes and through which the axle is fitted, enabling the wheel to freely spin on two sets of bearings.
thingiverse
free

32mm Axle & Non-Knurled end-caps (with 3mm screw holes) for Math Spinner Enhanced by noimjosh
...w holes in the axle, you'll have to drill those out, i find that this generally works better which is why i made it this way.
thingiverse
free

GU10_Socket_Adapter/Extension by m5pseudo
...our own risk
only use this with lightbulps/spots that wont get hot and dont draw high current !!!!!
i use them with 3.5w led spot
grabcad
free

Bicycle Wheel Hub
...e wheel's rim via the spokes and through which the axle is fitted, enabling the wheel to freely spin on two sets of bearings.
thingiverse
free

Hydroponics - Drain and Divider by Acardoso
...lain and simple.
the smaller part is a bottle cap adapter. just drill a hole in the bottle cap and glue the adapter from inside.
thingiverse
free

Dometic fridge door lock
...e unlock position.
you should be able to close the freezer door, slide the lock to the lock position and insert the new pla lock.
grabcad
free

auger
...conveyor to remove the drilled out material. the rotation of the blade causes the material to move out of the hole being drilled.
thingiverse
free

Screw cap for milk bottle 1.6L by avanhanegem
...omes in two versions: one with grip and one without grip pattern.
the screw cap inner size is 38.8mm with 3 helix screw sections.
Milkey
3dwarehouse
free

milkey way
...milkey way
3dwarehouse
only a small part just the sun earth mercury and saturn #earth #mercury #saturn #sun
3dwarehouse
free

saturn
...saturn 3dwarehouse a planet in the milkey ...
3dwarehouse
free

uranus.1
...uranus.1 3dwarehouse light blue planet in the milkey ...
3dwarehouse
free

neptune
...3dwarehouse neptune is the dark blue planet of the milkey way...
Peaberry
thingiverse
free

595 Abarth Logo by peaberry
...595 abarth logo by peaberry
thingiverse
595 abarth logo
thingiverse
free

Turismo Abarth Logo by peaberry
...turismo abarth logo by peaberry
thingiverse
turismo abarth logo
thingiverse
free

20x20 Extrusion 100mm Length by peaberry
...20x20 extrusion 100mm length by peaberry
thingiverse
basic length of 2020 extrusion, mainly for use as a reference in modelling.
thingiverse
free
2020 Cable Clip by peaberry
...ple cable clip for 2020 extrusion, intended for cable which lies in the channel. two different widths are provided, 5mm and 10mm.
thingiverse
free

DIN Rail Spring Clip by peaberry
... mounting clip for 35mm din rails. it includes mounting holes on 35mm and 40mm centres, which have an internal diameter of 2.5mm.
thingiverse
free

2020 Flat Cable Clip 10mm length by peaberry
...lat cable clip 10mm length by peaberry
thingiverse
simple and discreet flat clip for securing cables in 2020 extrusion channels.
thingiverse
free

LM2596 Module Support by peaberry
...s with 3mm internal diameter, and two additional pins to ensure the board has support at all four corners. overall height is 3mm.
thingiverse
free
Replacement Knob for Extension Lead (Masterplug 20m) by peaberry
...lead (masterplug 20m) by peaberry
thingiverse
replacement for a broken knob on the masterplug 20m 4 socket mains extension lead.
thingiverse
free

Canon LP-E10 Battery Cover by peaberry
...mple battery cover for canon lp-e10 camera batteries. protects the battery contacts and reduces the risk of shorting the battery.
thingiverse
free

AA / AAA Battery Holder / Box by peaberry
...ngiverse
battery box for eight aa or aaa batteries.
internal diameters are 15mm for aa and 11mm for aaa. overall height is 14mm.
Milk
3d_export
$5

condensed milk
...condensed milk
3dexport
condensed milk, real russian condensed milk, v ray is present
3d_ocean
$5
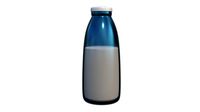
Milk Boxes
...design. 2048×2048 uv templare for your design included. blend, obj formats. ready to render in blender cycles. vinrax arts (2015)
turbosquid
$5
milk
...
royalty free 3d model milk for download as max, obj, and fbx on turbosquid: 3d models for games, architecture, videos. (1367595)
3d_export
$5
milk bottle
...milk bottle
3dexport
milk bottle 3d model
turbosquid
$10

milk
...model milk for download as max, ige, obj, 3dm, blend, and stl on turbosquid: 3d models for games, architecture, videos. (1197382)
3d_ocean
$6

Milk Bottles
... bottle model quality realistic
high quality 3d models of milk bottles. pack contains 2 models of bottles, sealed and opened one.
3d_ocean
$5
Milk Can
...lk can modelled in cinema 4d incl. texture and material one can has 1682 polygons includes format c4d, fbx, obj and 3ds enjoy it
3d_ocean
$5

Milk Can
...int
3d high-quality model milk can - included .ma, obj, fbx format files - lighting, uv, materials, texture are ready for render.
3d_export
$10

milk pack
...milk pack
3dexport
3d_export
$6
milk carton
...milk carton
3dexport
Locking
turbosquid
$1

Lock
...ck
turbosquid
royalty free 3d model lock for download as fbx on turbosquid: 3d models for games, architecture, videos. (1286851)
3d_export
$5

lock handle
...lock handle
3dexport
lock handle
3d_export
$5
hinged lock
...hinged lock
3dexport
hinged lock
turbosquid
$1
Lock Box with combination lock
...ee 3d model lock box for download as 3ds, obj, fbx, and blend on turbosquid: 3d models for games, architecture, videos. (1215494)
turbosquid
$2
Lock
...
royalty free 3d model lock for download as max, obj, and fbx on turbosquid: 3d models for games, architecture, videos. (1452660)
turbosquid
$35

Lock
... available on turbo squid, the world's leading provider of digital 3d models for visualization, films, television, and games.
turbosquid
$24

lock
... available on turbo squid, the world's leading provider of digital 3d models for visualization, films, television, and games.
turbosquid
$10

Lock
... available on turbo squid, the world's leading provider of digital 3d models for visualization, films, television, and games.
turbosquid
$6
Lock
... available on turbo squid, the world's leading provider of digital 3d models for visualization, films, television, and games.
turbosquid
$4

Lock
... available on turbo squid, the world's leading provider of digital 3d models for visualization, films, television, and games.
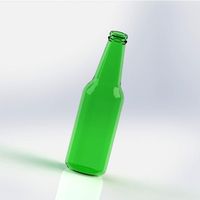
Bottle
3d_ocean
$2
Bottle
...bottle
3docean
bottle glass bottle
so realistic glass bottle
archibase_planet
free
Bottle
...bottle
archibase planet
bottle litre bottle glass-ware
bottle - 3d model for interior 3d visualization.
archibase_planet
free
Bottle
...bottle
archibase planet
bottle glass bottle flask
bottle - 3d model (*.gsm+*.3ds) for interior 3d visualization.
3d_export
$5
bottles
...bottles
3dexport
bottles
archibase_planet
free
Bottle
...bottle
archibase planet
bottle wine bottle of wine
bottle n121211 - 3d model (*.gsm+*.3ds) for interior 3d visualization.
archibase_planet
free
Bottle
...bottle
archibase planet
bottle bottles kitchen ware
bottle n120213 - 3d model (*.gsm+*.3ds) for interior 3d visualization.
archibase_planet
free
Bottle
...bottle
archibase planet
small bottle bottle vial phial
bottle n060411 - 3d model (*.3ds) for interior 3d visualization.
3d_export
$5
bottle
...bottle
3dexport
bottle with liquid.
archibase_planet
free
Bottle
...bottle
archibase planet
bottle glass
bottle - 3d model for interior 3d visualization.
archibase_planet
free
Bottle
...ibase planet
bottle bottle of port alcohol
bottle of crimean port n090211 - 3d model (*.gsm+*.3ds) for interior 3d visualization.
Cap
3ddd
$1
cap
...cap
3ddd
cap
cap
3d_export
$10
cap
...cap
3dexport
cap
archibase_planet
free

Cap
...cap
archibase planet
cloth cap clothes clothing
cap - 3d model (*.gsm+*.3ds) for interior 3d visualization.
3ddd
free
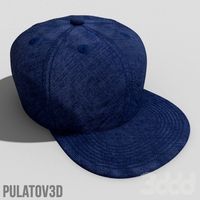
Cap
...cap
3ddd
cap , кепка. бейсболка
реалистичная кепка
archibase_planet
free
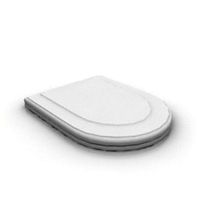
Cap
...cap
archibase planet
cap water-closet lid sanitary ware
cap 880961 - 3d model for interior 3d visualization.
archibase_planet
free
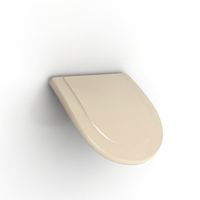
Cap
...cap
archibase planet
cap sanitary ware water-closet lid
cap 991861 - 3d model for interior 3d visualization.
archibase_planet
free

Cap
...cap
archibase planet
cloth cap head-dress hat
cap n110708 - 3d model (*.gsm+*.3ds) for interior 3d visualization.
archibase_planet
free
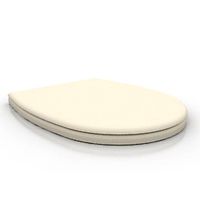
Cap
...cap
archibase planet
wc cap water-closet lid
wc cap p5114 - 3d model (*.gsm+*.3ds) for interior 3d visualization.
archibase_planet
free
Cap
...cap
archibase planet
wc cap water-closet lid
wc cap r3901 - 3d model (*.gsm+*.3ds) for interior 3d visualization.
archibase_planet
free
Capping
...
archibase planet
chimney capping flue smoke-stack
chimney capping n020108- 3d model (*.gsm+*.3ds) for interior 3d visualization.