Thingiverse
MIDI Controller by Staal3D
by Thingiverse
Last crawled date: 4 years, 1 month ago
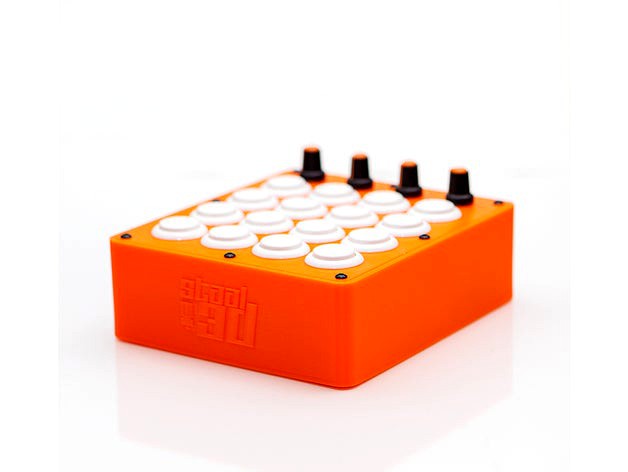
MIDI Controller for various DAW and music programs. This is a MIDI Fighter styled unit and is really fun to play with. Has been tested it in Ableton Live, Reason, Garage Band, and Traktor. Works like a charm. MIDI Map it to what ever you want. It has 4 Analog and 16 Digital output.
What hardware you need to make one:
On/off switch size 12.9mmx19.4mm
16 Sanwa 24mm Arcade buttons (or clones)
4 Knobs size: 15mm x 17mm (KN-11/WS)
4 10k potentiometers
8 4-6mm M3 button head screws
Arduino Mega (mounting screws or glue gun)
Dupont wires for the arduino
Wires for the buttons and potentiometers
For the software use the MocoLufa boot loader and you are able to program the Arduino again without needing to flash the boot loader. This is what the ON/OFF switch is for. READ THE MocoLUFA instructions on the link. And as a bonus the Arduino shows up and work as a normal Native USB MIDI device without the need for a emulator such as hairless MIDI etc.
https://github.com/kuwatay/mocolufa
How to DFU on Mac: https://www.youtube.com/watch?v=pHOSCIRoJG8
The Arduino sketch is provided by Gustavo Silveira
The Musico Nerd: https://www.youtube.com/channel/UCyqCwyBJ98fR-CPoyXUxY5w Watch his youtube channel for a lot of info about making MIDI controllers with the Arduino.
Link to the sketch file: https://www.dropbox.com/s/kgv656eeefdujr4/Staal3D-Midi-Controller.zip?dl=0
Change the Sketch as you need. Be aware of Digital Pin 13, it can make some really funky unwanted triggering. It has been disabled in the sketch.
This should be very easy to make, so I have not provided the diagram for it since this is really basic knowledge wiring it up and maybe you dont want to use the same Digital Pins as I do. The Mega has more than enough analog and digital pints for this controller.