Thingiverse
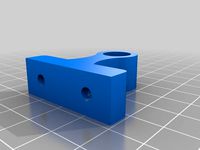
Metabo 18v Lamp by 3dbend
by Thingiverse
Last crawled date: 3 years, 4 months ago
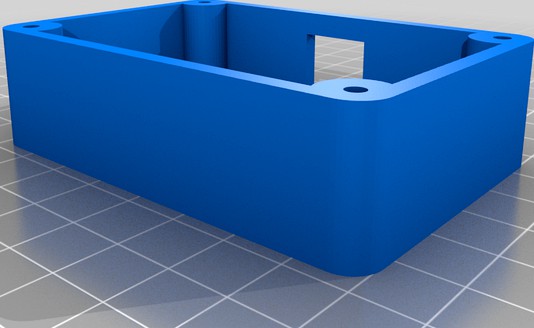
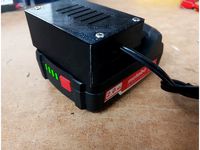
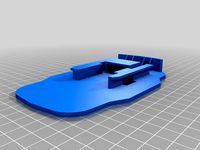
Simple workshop lamp for battery form 18v metabo drill.
To assemble this project you need:
M3 x 20 - 4pcs (for bottom part)
M3 x 10 - 4pcs (for top part)
Adjustable step down module (I use LM2596)
Male wire connector 6.3mm - 2pcs https://www.amazon.com/Baomain-disconnects-Insulated-Connector-Electrical/dp/B01G51ELT8/ref=sr_1_13?dchild=1&keywords=male+crimp+6.3mm&qid=1606804924&sr=8-13
Power switch (I use switch from old machine so the hole might be to tight for your switches but you can grind a little bit)
Led Lamp for example this one: https://www.amazon.com/Liteway-2Pcs-LED-Work-Light/dp/B07D8P6914/ref=sr_1_23?dchild=1&keywords=12v+led+lamp&qid=1606803700&sr=8-23
some wires, hot glue and 2 part epoxy glue.
ATTENTION:
Some of led lamp work only in specyfic voltage. I used a 12V lamp so I need step-down module. If you buy lamp with voltage range you probably don't need to use this module.
When you use step-down module check twice output voltage. If you set it wrong you can broke the lamp.
ASSEMBLY:
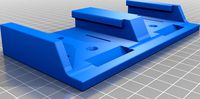
Print all three parts and check if bottom part fits
Put the two connectors on the two wires and squeeze. I suggest to use red and black wire to do not mix up the polarity.
Put wires in to the hole. Connectors should protrude about 6mm from the hole.
Put the bottom part on the battery and check is there voltage on the wires
Mix epoxy glue, prime the hole and let it dry.
Connect the cables to the conventer and switch. Don't forget to put the wires through the hole for the switch.
Check voltage output in step-down module.
Pass the lamp cable through the hole on the top part and solder lamp wires to module.
Check if everything works and glue the converters inside the housing.
To assemble this project you need:
M3 x 20 - 4pcs (for bottom part)
M3 x 10 - 4pcs (for top part)
Adjustable step down module (I use LM2596)
Male wire connector 6.3mm - 2pcs https://www.amazon.com/Baomain-disconnects-Insulated-Connector-Electrical/dp/B01G51ELT8/ref=sr_1_13?dchild=1&keywords=male+crimp+6.3mm&qid=1606804924&sr=8-13
Power switch (I use switch from old machine so the hole might be to tight for your switches but you can grind a little bit)
Led Lamp for example this one: https://www.amazon.com/Liteway-2Pcs-LED-Work-Light/dp/B07D8P6914/ref=sr_1_23?dchild=1&keywords=12v+led+lamp&qid=1606803700&sr=8-23
some wires, hot glue and 2 part epoxy glue.
ATTENTION:
Some of led lamp work only in specyfic voltage. I used a 12V lamp so I need step-down module. If you buy lamp with voltage range you probably don't need to use this module.
When you use step-down module check twice output voltage. If you set it wrong you can broke the lamp.
ASSEMBLY:
Print all three parts and check if bottom part fits
Put the two connectors on the two wires and squeeze. I suggest to use red and black wire to do not mix up the polarity.
Put wires in to the hole. Connectors should protrude about 6mm from the hole.
Put the bottom part on the battery and check is there voltage on the wires
Mix epoxy glue, prime the hole and let it dry.
Connect the cables to the conventer and switch. Don't forget to put the wires through the hole for the switch.
Check voltage output in step-down module.
Pass the lamp cable through the hole on the top part and solder lamp wires to module.
Check if everything works and glue the converters inside the housing.
Similar models
thingiverse
free
Metabo 14.4V Battery Powerbank / Connector
...to convert the voltage and can also act as a contact cover (without connectors) for safe transportation of unconnected batteries.
thingiverse
free

Metabo 18V LiHD Worklight / Battery Adapter by CG-Manufaktur
...ll it. use an led floodlight that shuts down at 15-16 volts or shut the light off if the battery indicater only has one bar left.
thingiverse
free
Milwaukee M12 lantern/torch by ksuszka
...led strip with dc-dc step-up converter. there should be plenty of space inside the led strip holder to put such converter inside.
thingiverse
free
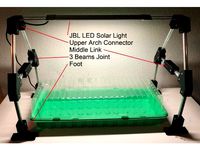
JBL LED Solar Natur Light Frame by Andnyl
...-tip diameter ~3mm). holes are ~2mm.
jbl led solar light:http://www.jbl.de/en/products/detail/8297/jbl-led-solar-natur?country=us
thingiverse
free

Shoe Mount Video Light by BudgetFlex
...u have! and finally, you need 1x m3 screw and nut and 4x m2 screws for the faceplate.
https://www.youtube.com/watch?v=s1hdi0m4088
thingiverse
free

Step-down DC-DC MOD-04871 enclosure
...amp;sr=8-15
orhttps://botland.com.pl/en/step-down-converters/4871-step-down-voltage-regulator-with-display-lm2596-32v-35v-3a.html
3d_export
$5

star light
...n there and there is a bigger hole with 20 mm diameter on this part , so you can easily pass the wire from this. happy new year!!
cg_trader
$4

star light
...n there and there is a bigger hole with 20 mm diameter on this part , so you can easily pass the wire from this.
happy new year!!
grabcad
free

C14 Inlet Module
...c320/dp/b00me5yapk/ref=sr_1_1?dchild=1&keywords=urbest+inlet+module&qid=1612365861&sr=8-1
c14+illuminated switch+fuse
thingiverse
free

9v battery holder by Cegeness
...p;qid=1625340990&sr=8-1
can be merged with models to create a solid mount or glued to a surface after printing it on its own.
3Dbend
thingiverse
free

Dual PlayStation Controller Stand by 3dbend
...dual playstation controller stand by 3dbend
thingiverse
remix of this design: https://www.thingiverse.com/thing:3077708
thingiverse
free
10mm Pipe Holder and 40 degree connector by 3dbend
...d 40 degree connector by 3dbend
thingiverse
designed to hang a curtain in the attic, but you can also use it for other purposes.
thingiverse
free

Office USB, SD holder with cable clip by 3dbend
...h cable clip by 3dbend
thingiverse
designed to keep order on the desk.
if you print it, please share the photo and your opinion.
Metabo
3d_export
$10

metabo cordless drill screwdriver clean
...r>please contact me in case of any questions or difficulties, i will help you) contact us, i will make you a 3d model to order
thingiverse
free

Battery cover Metabo
...battery cover metabo
thingiverse
for metabo battery
sketchfab
$15

Metabo Accuboor
... base was sprayed with scanning spray after the initial scanning. - metabo accuboor - buy royalty free 3d model by 4visualization
thingiverse
free

Clamp for a metabo by sdiplo
...clamp for a metabo by sdiplo
thingiverse
i was missing one the the clips of my metabo case.
thingiverse
free

Metabo Akku Adapter by Pajul
...metabo akku adapter by pajul
thingiverse
metabo akku adapter
thingiverse
free

Latch of the case Metabo by Simirinojka
...latch of the case metabo by simirinojka
thingiverse
latch of the case metabo
thingiverse
free

Metabo Bit holder by AprintaPro
...metabo bit holder by aprintapro
thingiverse
this little helper fits in a metabo bit set and is useful for on the go repairs.
thingiverse
free
Metabo MetaLoc Holder
...le for metaloc ii systeyner.
source: https://nvwoodcraft.ru/3d-pechat/models/ruchka-dlya-kontejnera-sistejnera-metabo-metaloc-ii/
thingiverse
free

Metabo akku adapter by OE2SWM
...metabo akku adapter by oe2swm
thingiverse
with this adapter you can use metabo akku as a power-bank...
i load my laptop with...
thingiverse
free

Metabo Plateau scie sauteuse
...metabo plateau scie sauteuse
thingiverse
bonjour.
le plateau d'une scie sauteuse metabo ste 100 quick
tchotcho
18V
thingiverse
free
18V drill holder by Sautech
...18v drill holder by sautech
thingiverse
18v drill holder
thingiverse
free

HITACHI to PARKSIDE 18v by Gurdil121
...side 18v by gurdil121
thingiverse
adaptator battery hitachi 18v to parkside 18v
adaptateur de batterie parkside vers hitachi x18
thingiverse
free

Bosch Akkuschrauber 18V by dx55
...bosch akkuschrauber 18v by dx55
thingiverse
ein halter für ein 18v akkuschrauber von bosch..
thingiverse
free
Einhell 18V Akkuhalter by DaBruenni
...einhell 18v akkuhalter by dabruenni
thingiverse
wandhalter für die 18v einhell akkus
am besten aufrecht stehend drucken.
thingiverse
free

Dewalt 18v TEST!
...dewalt 18v test!
thingiverse
test version 1.0
thingiverse
free

Bosch-18V-Akkuhalter-Modul-verriegelt.stl
...bosch-18v-akkuhalter-modul-verriegelt.stl
thingiverse
bosch-18v-akkuhalter-modul-verriegelt
thingiverse
free

Bosch 18V battery wallmount
...ngiverse
wallmount for bosch proffesional 18v battery. print standing for no support...
update: smaller mount for less material.
thingiverse
free

Ryobi 18v adapter
...ryobi 18v adapter
thingiverse
to fit with https://www.thingiverse.com/thing:3822673
thingiverse
free
Battery model for GMC 18V by _mage_
...battery model for gmc 18v by _mage_
thingiverse
docking section of a gmc 18v battery for eventual use as a battery adapter.
thingiverse
free
Makita 18V battery connector (1x 18v, 2x 18v) single and dual by emielbeus
... i ain't fancy to make another one just for the picture.
the file package also contains a fillet free model for modification.
Lamp
archibase_planet
free
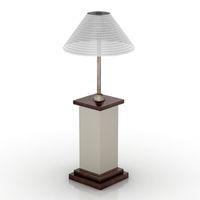
Lamp
...lamp
archibase planet
lamp reading lamp table lamp
lamp - 3d model (*.gsm+*.3ds) for interior 3d visualization.
archibase_planet
free
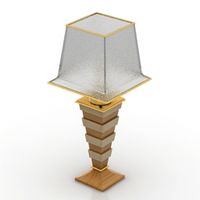
Lamp
...lamp
archibase planet
lamp reading lamp table lamp
lamp - 3d model (*.gsm+*.3ds) for interior 3d visualization.
archibase_planet
free

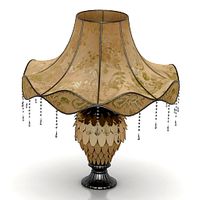
Lamp
...lamp
archibase planet
lamp table lamp reading lamp
lamp - 3d model (*.gsm+*.3ds) for interior 3d visualization.
archibase_planet
free

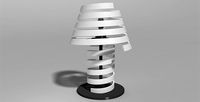
Lamp
...lamp
archibase planet
lamp table lamp reading lamp
lamp - 3d model (*.gsm+*.3ds) for interior 3d visualization.
archibase_planet
free

Lamp
...lamp
archibase planet
lamp reading lamp table lamp
lamp - 3d model (*.gsm+*.3ds) for interior 3d visualization.
archibase_planet
free
Lamp
...lamp
archibase planet
lamp reading lamp table lamp
lamp - 3d model (*.gsm+*.3ds) for interior 3d visualization.
archibase_planet
free
Lamp
...lamp
archibase planet
lamp table lamp reading lamp
lamp - 3d model (*.gsm+*.3ds) for interior 3d visualization.
archibase_planet
free

Lamp
...lamp
archibase planet
lamp table lamp reading lamp
lamp - 3d model (*.gsm+*.3ds) for interior 3d visualization.
archibase_planet
free
Lamp
...lamp
archibase planet
lamp reading lamp table lamp lantern
lamp - 3d model (*.3ds) for interior 3d visualization.
3d_ocean
$6
Lamp
...lamp
3docean
lamp
a high quality lamp.