Thingiverse
Meta Knight by lordgarth6
by Thingiverse
Last crawled date: 2 years, 11 months ago
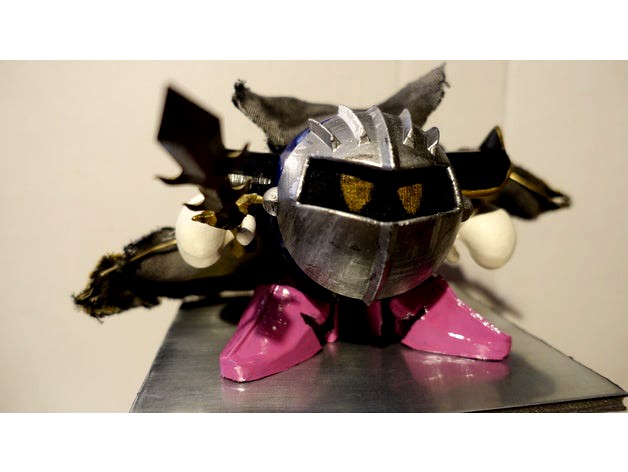
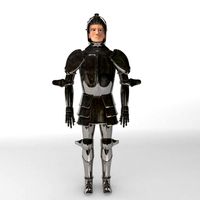
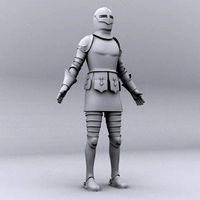
This is hopefully a rocking meta knight, has the ability to move (discussed below). it also was designed to have either the cape or the wings (using magnets allows ease to change between the two).
until I implement something, a small drill or heated pin/needle to make holes in the relevant places, allows the arms move and the shoulder guards.
a bit of clean up where the magnets should go to ensure a flush fit is needed.
4mm diameter by 1mm deep magnets were used, the more powerful the better, i used N42 neodymium magnets with 0.25kg pull they work fine when coupled but the paint reduces the strength a bit, they work fine but the whole thing easily crumbles. so the stronger the better
Heres the blubs i gave to the 3D printing society i am a part of.
Ever since the metaknight amiboo figure from Nintendo was released I wanted one, but it sold out far too quickly and the price inflated beyond its value, so I decided I would get round to making my own.
I eventually got round to it, pulling from a single reference heavily, which was a sculpt from a popular art sharing website deviantart.
Designed in solidworks from the ground up was rewarding, as it isn’t 100% made to do this sort of thing. I should learn a better tool that would allow me to warp things in a freer manor rather than a strict, calculated way. However I overcame those struggles and got a result worth printing, and sharing on thingiverse.
Owning my own 3D printer (very out of shape) put me in a mind-set of the rules come with the process, to reduce supports required. With this sort of project it would be hard to avoid supports, so the printer at the society was used, as it has made some good impressions of its ability and the ease of the service (on my end, I bet those rafts and warping are a nightmare to handle).
Once I got my parts, drilled into it to make places for more magnets (this whole thing builds easier than lego), and places to make the figure pivot. It was the easier way to achieve the best result for me as I could tell if parts we even or sat in the right place and looked right as a whole, so I could go back and edit the files knowing where to place the edits.
Once all this was done it was down to the usual sanding, primer, more sanding and top layer colour painting process.
Similar models
thingiverse
free

Lipo balance plug protector 3S + 4S by Zaniix
...from the bottom so it locks in place, if you put it in from the top the tabs willl not lock and it will not stay in place as well
thingiverse
free

Knight Eureka by Farmerjohn
... now that i know how to use the software better which is really easy, it would only take me 10 minutes or so to make this object.
thingiverse
free

Spool Tri-Holder by SirBruter
...7cm
y- 19.2cm
z- 20.2cm
the whole print took me 23 hours.
for the holders i used these: https://www.thingiverse.com/thing:2303349
thingiverse
free

GoPro Magnet Mount by taterstem
...want to get the camera far away from the magnet, so i would suggest extensions.
got my magnets from http://www.magnet4less.com/
thingiverse
free

Bits holder
... i needed something particular, so i thought i would make a curvy rack to hold them all. it's not fancy, but it does the job.
thingiverse
free

Makita magnetic bit holder by clemensborst
...e f3d file to emboss your own name and adjust the holes to the size of your magnets. my magnets are 10x3x2 mm and work just fine.
thingiverse
free

Drill Bit Case by Endlessly_Iterating
...i uploaded the fusion 360 files if anyone wants to customize it.
i designed for ø6mm x 2mm magnets. 4 for the base, 4 for the lid
3dwarehouse
free

Meta Knight without mask
... knight without mask
3dwarehouse
in this model meta knight havent got a mask in this model. this is meta knight's real face!
thingiverse
free

Palm Rest for Bicycle by rezat
... rotate the palm my hand forward and down to reduce the strain on my wrists. printed in iprint 3d petg
https://www.iprint-3d.com/
thingiverse
free

Tile Puzzle Game
...rom my bank.
it got lost in time but i remembered the shapes. i wanted to play it once more so i printed my own, smaller version.
Lordgarth6
thingiverse
free

bulbasaur laying down by lordgarth6
...asaur laying down by lordgarth6
thingiverse
bulbasaur laying down, both full version and one with a flat bottom to print nicely.
thingiverse
free

bulbasaur storage by lordgarth6
...om to print nicely, and the bulb comes off to a small space to put things in. the fit is a little snug and im working to fix that
thingiverse
free

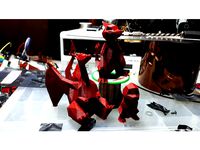
Red Skull by lordgarth6
...r then smoothed in meshmixer. i personally haven't printed this yet but thought id share the file as there isnt many on here.
thingiverse
free

Buster Tortoise Zoids HMM Canopy and armour by lordgarth6
...oise zoids hmm canopy and armour by lordgarth6
thingiverse
just a armour and canopy models for the zoids hmm buster tortoise kit
thingiverse
free

Cardcaptor Sakura Star Wand by lordgarth6
...a 3/4th inch pvc pipe as the main shaft.
you'll need to print 2 of ring whole (or ring split 1 and 2), star, wingl, and wingr
thingiverse
free
charizard low poly no supports by lordgarth6
...be a little too think) but i issues arise that the wings get knocked off the build plate then this version should work out better
thingiverse
free

Kanto Pokemon Badges by lordgarth6
...er magnets and i found most fit flush with a little bit of force and no need for glue but thats all down to each persons printer.
thingiverse
free

Pokemon Trainer Red 's Hat Emblem by lordgarth6
...ns printer.
i sanded the surfaces down a little and then put some enamel gloss on it so it feels smooth but keeps the layer look.
thingiverse
free

Metaknight Arsene
...metaknight arsene thingiverse a simple modification to lordgarth6#39;s metaknight to transform him into arsene from persona 5....
Meta
3ddd
$1
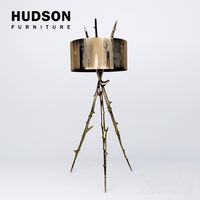
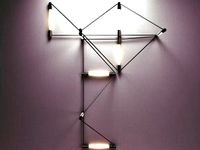
Meta Lamp
...on furniture , meta
floor lighting
meta lamp 2014
bronze
size approx.
38”dia x 84” oah
design_connected
$16
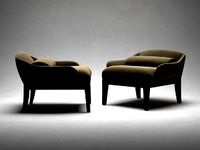
Meta Brisee
...meta brisee
designconnected
bottega veneta meta brisee computer generated 3d model.
design_connected
free
Meta Wall Lamp
...meta wall lamp
designconnected
free 3d model of meta wall lamp designed by dieter, james.
3ddd
$1

Hudson Meta Credenza
...console tables
meta credenza
dimensions approx:
96" l x 20" w x 28" h
black laquer cabinet
polished bronze base
3ddd
$1
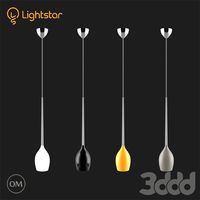
80711x META D UOVO Lightstar
...o lightstar - серая
807113 meta d uovo lightstar - желтая
807117 meta d uovo lightstar - чернаяhttp://www.lightstar.ru/
3ddd
$1

807130 META D UOVO Lightstar
...d
meta d uovo , lightstar
807130 meta d uovo lightstarhttp://www.lightstar.ru/
3ddd
free
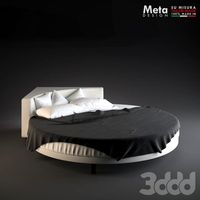
Круглая кровать Meta Design коллекция Globe
...овать итальянской фабрики meta design коллекция globe.
диаметр 2200мм.
высота 450мм.
высота спинки 730мм.
max2015, max2014, fbx.
3ddd
$1
DornBracht Meta.02
.../2" screw-in high pressure hose
3x m 10 x 1 screw-in high pressure hose
1 1/4" pop-up waste
max. flow 7 l/min
lead-free
3ddd
$1

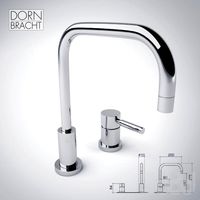
Dornbracht Meta.02 mixer (x4) single-lever
...lever washbasin mixer.
two type of heights (130mm,260mm) and water projection (105mm, 130mm).
company: dornbracht name: meta.02
3ddd
free

Dornbracht Meta.02 mixer (x3) wall-mounted
...ree models of wall-mounted single-lever washbasin mixer.
company: dornbracht
name: meta.02
model:
36838625
36826625
36816625
Knight
3d_export
$16

The Knight
...the knight
3dexport
3d model the knight possible for animation, for games, for unity and unreal
3d_export
$13

female knight
...female knight
3dexport
female knight
3d_export
$8

Moon Knight
...moon knight
3dexport
moon knight
turbosquid
$15

Knight
...quid
royalty free 3d model knight for download as ma and fbx on turbosquid: 3d models for games, architecture, videos. (1479728)
3d_export
$5

Knight 3D
...knight 3d
3dexport
knight for your project
turbosquid
$80
knight
... available on turbo squid, the world's leading provider of digital 3d models for visualization, films, television, and games.
turbosquid
$40

knight
... available on turbo squid, the world's leading provider of digital 3d models for visualization, films, television, and games.
turbosquid
$35
Knight
... available on turbo squid, the world's leading provider of digital 3d models for visualization, films, television, and games.
turbosquid
$30

knight
... available on turbo squid, the world's leading provider of digital 3d models for visualization, films, television, and games.
turbosquid
$30

Knight
... available on turbo squid, the world's leading provider of digital 3d models for visualization, films, television, and games.