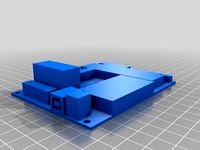
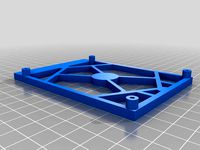
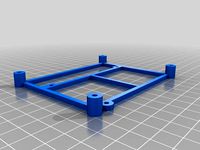
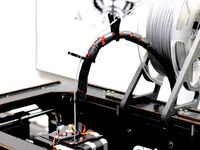
Thingiverse
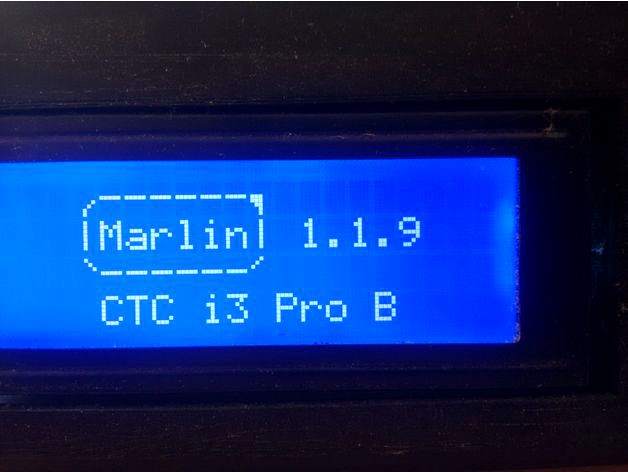
Marlin 1.1.9 on CTC prusa i3 DIY (GT2560 rev a) by maxlinux2000
by Thingiverse
Last crawled date: 3 years ago
I added a Marlin 2.0 features in Malin 1.1.9. beta4.
Manual bed leveling.
You can also activate the Power_loss_recovery by switching to line 595 from// # define POWER_LOSS_RECOVERY
to#define POWER_LOSS_RECOVERY
It does not work perfectly well, but something is something.
NEW!! Marlin 2.0 here: https://www.thingiverse.com/thing:3477719
Power loss recovery, manual bed leveling....
...Español e Italiano a bajo / sotto....
MARLIN 1.1.9 on CTC Prusa i3 DYI *
Hello everyone,
in this hollidays I'm fiddling with the new stable version of Marlin 1.1.9 on my ctc prusa i3.
Here I leave the first version and I hope you can use.
WARNING!!
My printer have 16 tooth pulleys, while the original have 20 tooth pulleys.
If your printer has 20 teeth, you need to modify the Configuration.h file, as below
// ctc prusa i3 with pulleys 20 theet
#define DEFAULT_AXIS_STEPS_PER_UNIT {80.10, 80.10, 2580.64, 105.0}
// ctc prusa i3 with pulleys 16 theet
// # define DEFAULT_AXIS_STEPS_PER_UNIT {100.07, 100.07, 2580.64, 105.0}
I have not yet sufficently tested this firmware, so try it at your risk
regards
MaX
old version
(Note: this tutorial works with any 3D printer, with GT2650 card)
Hello everyone
for Christmas the child Jesus has brought me a 3D printer CTC DIY PRUSA :)
It is a cheap printer and entry level, but enough to make contact with the world of 3D printing.
I am a programmer and I like DIY, so the 3D printer is ideal for me ... but because of this I immediately wanted to update the Firmware and there the first problem. Apparently it can not be done.
Other people have found a way to update the firmware by using another arduino as a programmer on the GT2560 board, but I did not like it at all. Too complicated and I do not have another Arduino board.
So I tried synonymous with the Arduino IDE, to update the firmware via usb, and effectively you can not.
But the error is a "timeout", that is, the computer connects to the gt2560 and recognizes it, but when it sends the data, it does not receive a response.
The error is: "stk500v2_receivemessage timeouts"
investigating the error message, in the end I found that the problem is in the transmission speed, which by default is too high for our gt2560 rev.A.
To lower the transmission speed you have to edit a text file "boards.txt" in our Arduino IDE, restart the IDE, reload the firmware and send it to the printer via usb.
Here is a video that explains perfectly how to modify the "boards.txt" file of the arduino IDE to work with our gt2560
EDIT: see below, I wrote how to do it
https://www.youtube.com/watch?v=HIu8_wYG0Y4
The video is for OSX, but it works also for linux and windows, since the Arduino IDE is multi platform.
The route of the file may vary a bit, but the "boards.txt" file is the same for every OS.
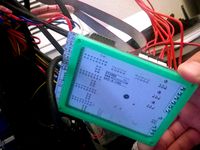
I leave my version of Marlin 1.1.8 (the last stable at the time I write these notes), so you do not have to fight with the configuration of the LCD, the measurements in mm, the extruder and several other things.
In this version of Marlin:
Save / Read the configuration in the EEPROM
Fixed the STEPS / mm, so if you tell him to print a piece of 100mm, it comes out of 100mm without having to modify the size in the mesh or increase in CURA to 102% the proportions.
Change Automatic filament, so you can insert a color change (M600) at a certain height in the gcode, also from the control panel.
Progress bar
scrolling file name, when long
I do not have a decent noise meter, but it seems to me that the 3d printer makes less noise with the marlin 1.1.8 compared to 1.1.6.
ciao
MaX
EDIT (pasted from comment)
How to install this firmware on our 3D printer:
go to download the last Arduino IDE from here: https://www.arduino.cc/en/Main/Software
Once installed or unzipped, modify this file with a simple text editor:
ArduinoIDE/hardware/arduino/avr/boards.txt
The route may vary a bit depending on the operating system. In any case, look for the file "boards.txt"
edit the boards.txt file to this line from:
mega.menu.cpu.atmega2560.upload.speed = 115200
to
mega.menu.cpu.atmega2560.upload.speed = 57600
Connect your printer to the USB door and turn it on
Launch the Arduino IDE and change in the Tools menu, selecting
Board: Arduino / Mega Genuino or Mega 2560
Processor: ATMega 2560
Then load firmware 1.1.8 from the File / Open menu and look in the folder you just unzipped (it's a tar.gz that is decompressed as a .zip), the file "Marlin.ino"
Almost there!
Click on the icon "Arrow" (right under the Edit menu) and if everything went well in a minute you will have the new firmware running on your printer.
Notes:
In windows it will be necessary to also select which USB port to use and possibly install some drivers. Search on the internet how to fix this typical windows problem.
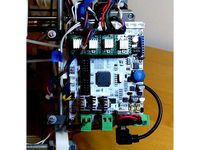
geeetech GT2560: https://www.geeetech.com/wiki/index.php/GT2560
Español
MARLIN 1.1.9 en CTC Prusa i3 DYI
Hola a todos,
en este tiempo de vacaciones estoy trasteando con la nueva versión estable de Marlin 1.1.9.
Aquí os dejo la primera versión y espero os sirva.
QUIDADO!!
Mi impresora lleva poleas de 16 dientes, mientras que la original llevaba poleas de 20 dientes.
Si tu impresora tiene las de 20 dientes, entonces tienes que modificar el fichero Configuration.h
// ctc prusa i3 with pulleys 20 theet
#define DEFAULT_AXIS_STEPS_PER_UNIT {80.10, 80.10, 2580.64, 105.0} // quita las dos barras de esta línea
// ctc prusa i3 with pulleys 16 theet
//#define DEFAULT_AXIS_STEPS_PER_UNIT {100.07, 100.07, 2580.64, 105.0} // y añade dos barras a esta línea
Por el resto no he tenido otro problema, pero aún no he testeado a fondo este firmware, así que probarlo a vuestro riesgo
saludos
MaX
Nota: este tutorial funciona con cualquier impresora 3D, con tarjeta GT2650
Hola a todos
por Navidad el niño Jesús me ha traido una impresora 3D CTC DIY PRUSA :)
Es una impresora barata y entry level, pero suficiente para tomar contacto con el mundo de la impresión 3D.
Soy programador y me gusta el bricolage, así que la impresora 3D es lo ideal para mi... pero proprio por esto en seguida he quierido actualizar el Firmware y allí el primer problema. Al parecer no se puede hacer.
Otras personas han encontrado la forma de actualizar el firmware utulizando otro arduino como programador de la placa GT2560 de mi impresora, pero no me gustaba nada. Demasiado complicado y no tengo otra placa de arduino.
Así que he intentado igualmente con el IDE de arduino actualizar el firmware via usb, y efectivamente no se puede, pero el error es un timeout, o sea el ordenador se conecta con la gt2560 y la reconoce, pero cuando le invia los datos, no recibe respuesta de recibido.
el error es: "stk500v2_receivemessage timeouts"
investigando el mensaje de error, al final he encontrado que el problema está en la velocidad de transmisión, que por defecto es demasiado elevada para nuestra gt2560 rev.A.
Para bajar la velocidad de transmisión hay que editar un fichero de texto "boards.txt" en nuestro IDE de Arduino, reiniciar el IDE, volver a cargar el firmware y enviarlo a la impresora via usb.
Aquí hay un video que explica perfectamente como modificar el fichero "boards.txt" del IDE de arduino para que funcione con nuestra gt2560
EDIT: Mira a bajo donde explico como hacerlo
https://www.youtube.com/watch?v=HIu8_wYG0Y4
El vídeo es para OSX, pero funciona también para linux y windows, puesto que el IDE de Arduino es multi plataforma.
Puede variar un poco el recorrido del fichero, pero el fichero "boards.txt" es igual para todos.
Os dejo junto mi versión de Marlin 1.1.8 (la última estable en el momento que escribo estas notas), así que no teneis que pelearos con la configuración del LCD, de las medidas en mm, del extrusor y varias otras cosas.
En esta versión de Marlin:
Guardar y Leer La confguración desde la EEPROM
Arreglado los STEPS por mm, así que cuando imprimes una pieza de por ejempo 100mm, te sale de 100mm, sin tener que modificar el diseño o poner en CURA las proporciones al 102%
Cambio Automático del filamento, así puedes insertar un cambio de color dentro del gcode (M600) a una determinada altura y también cambiar el filamento desde el panel de control
Barra de progreso
Nombre del archivo desplazable, cuando es largo
no tengo un medidor de ruido decente, pero me parece que la impresora 3d, hace menos ruido con el marlin 1.1.8 respecto al 1.1.6.
ciao
MaX
Añadido desde un comentario:
Como instalar este firmware en nuestra impresora 3D:
ir a descargar el Arduino IDE más recién desde aquí: https://www.arduino.cc/en/Main/Software
una vez instalado o descomprimido modificar con un editor de texto simple este fichero:
ArduinoIDE/hardware/arduino/avr/boards.txt
El recorrido puede variar un poco según el sistema operativo. De todas forma busca el fichero "boards.txt"
edita el fichero boards.txt a esta linea desde:
mega.menu.cpu.atmega2560.upload.speed=115200
a
mega.menu.cpu.atmega2560.upload.speed=57600
Conecta tu impresora a la puerta USB y enciendela
Lanza el Arduino IDE y cambia en el menu Tools, seleccionando:
Board: Arduino/Mega Genuino o Mega 2560
Processor: ATMega 2560
Luego carga el firmware 1.1.8 desde el menu File/Open y busca en la carpeta que acaba de descomprimir (es un tar.gz que se descomprime como un .zip), el fichero "Marlin.ino"
¡Ya falta poco!
Pulsa el icono "Flecia" (justo a bajo del menu Edit) y si todo ha ido bien en un minuto ya tendrás el firmware nuevo corriendo en tu impresora.
Notas:
En windows habrá que seleccionar también que puerto usb hay que usar y posiblemente habrá que instalar unos drivers. Busca en internet como arreglar este tipico problema de windows.
geeetech GT2560: https://www.geeetech.com/wiki/index.php/GT2560
Italiano
MARLIN 1.1.9 nella CTC Prusa i3 DYI
Ciao a tutti,
in questo periodo di ferie sto giocando con la nuova versione stabile di Marlin 1.1.9.
Qui trovi la prima versione e spero che ti serva.
ATTENZIONE!!
La mia stampante usa pulegge da 16 denti, mentre quella originale usa pulegge da 20 denti.
Se la tua stampante ha pulegge da 20 denti, devi modificare il file Configuration.h come qui sotto
// ctc prusa i3 with pulleys 20 theet
#define DEFAULT_AXIS_STEPS_PER_UNIT {80.10, 80.10, 2580.64, 105.0}
// ctc prusa i3 with pulleys 16 theet
//#define DEFAULT_AXIS_STEPS_PER_UNIT {100.07, 100.07, 2580.64, 105.0}
Per il resto non ho avuto un altri problemi, ma ancora non ho testato a fondo questo firmware, quindi provalo a tuo rischio
ciao
MaX
Nota: questo tutorial funziona con qualsiasi stampante 3D, con scheda GT2650
Ciao a tutti
per Natale il bambino Gesù mi ha portato una stampante 3D CTC DIY PRUSA :)
È una stampante economica e di fascia bassa, ma è sufficiente per entrare in contatto con il mondo della stampa 3D.
Sono un programmatore e mi piace il fai-da-te, quindi la stampante 3D è l'ideale per me ... ma proprio per deformazione professionale ho immediatamente voluto aggiornare il firmware... e lì il primo problema. Apparentemente non si può!
Altre persone hanno trovato un modo per aggiornare il firmware usando un altro arduino come programmer collegato alla scheda GT2560, ma non mi piaceva affatto. Troppo complicato ed inoltre non ho un'altra scheda Arduino da usare.
Così ho provato anche io con l'IDE di Arduino, ad aggiornare il firmware via USB, e in effetti non è possibile farlo.
Ma l'errore è un "timeout", cioè il computer si connette al gt2560 e la riconosce, ma quando invia i dati, non riceve una risposta.
L'errore è: "stk500v2_receivemessage timeouts"
indagando sul messaggio di errore, alla fine ho scoperto che il problema è nella velocità di trasmissione, che di default è troppo alta per il nostro gt2560 rev.A.
Per ridurre la velocità di trasmissione è necessario modificare un file di testo "boards.txt" nel nostro IDE di Arduino, riavviare l'IDE, ricaricare il firmware e inviarlo alla stampante tramite USB.
Ecco un video che spiega perfettamente come modificare il file "boards.txt" dell'IDE di arduino per funzionare con il nostro gt2560
EDIT: Più in basso ho aggiunto come fare
https://www.youtube.com/watch?v=HIu8_wYG0Y4
Il video è per OSX, ma funziona anche per linux e windows, dal momento che l'IDE di Arduino è multipiattaforma.
Il percorso del file può variare un po', ma il file "boards.txt" è uguale per tutti.
Lascio la mia versione di Marlin 1.1.8 (l'ultima stabile al momento in cui scrivo queste note), quindi non occorre litigare con la configurazione del display LCD, le misure in mm, l'estrusore e molte altre cose.
In questa versione di Marlin:
Salvare e leggere la configurazione dalla EEPROM
regolato gli STEPS per mm, in modo che quando stampi un pezzo da per esempio 100mm, ti esce da 100mm senza dover modificare il disegno o aumentare le proporzione al 102% in CURA
Cambio Automatico del filamento, cosí puoi forzare un cambio di colore direttamente dal gcode (M600), oppure dal pannello di controllo
Barra di progresso
nome del file scorrevole, quando è troppo lungo
Non ho un misuratore di rumore decete, ma a orecchio mi sembra che la stampate faccia meno rumore con questo ultimo marlin 1.1.8 rispetto al vecchio 1.1.6
ciao
MaX
Aggiunto da un commento
Come installare questo firmware sulla nostra stampante 3D:
vai a scaricare l'IDE Arduino piú reciente da qui: https://www.arduino.cc/en/Main/Software
Una volta installato o decompresso, modifica questo file con un semplice editor di testo:
ArduinoIDE / hardware / arduino / avr / boards.txt
Il percorso può variare leggermente a seconda del sistema operativo. In ogni caso, cerca il file "boards.txt"
modifica il file boards.txt in questa riga da:
mega.menu.cpu.atmega2560.upload.speed = 115200
a
mega.menu.cpu.atmega2560.upload.speed = 57600
Collega la stampante alla porta USB e accendila
Avvia l'IDE Arduino e imposta nel menu Tools, selezionando
Scheda: Arduino / Mega Genuino o Mega 2560
Processore: ATMega 2560
Quindi carica il firmware 1.1.8 dal menu File / Apri e cerca nella cartella appena decompressa (è un tar.gz che è decompresso come .zip), il file "Marlin.ino"
Manca poco!
Fare clic sull'icona "Freccia" (proprio sotto il menu Modifica) e se tutto è andato bene in un minuto, il nuovo firmware verrà eseguito sulla tua stampante 3D.
note:
In Windows sarà necessario anche selezionare quale porta USB usare e possibilmente installare alcuni driver. Cerca su internet come risolvere questo tipico problema di Windows.
geeetech GT2560: https://www.geeetech.com/wiki/index.php/GT2560
Manual bed leveling.
You can also activate the Power_loss_recovery by switching to line 595 from// # define POWER_LOSS_RECOVERY
to#define POWER_LOSS_RECOVERY
It does not work perfectly well, but something is something.
NEW!! Marlin 2.0 here: https://www.thingiverse.com/thing:3477719
Power loss recovery, manual bed leveling....
...Español e Italiano a bajo / sotto....
MARLIN 1.1.9 on CTC Prusa i3 DYI *
Hello everyone,
in this hollidays I'm fiddling with the new stable version of Marlin 1.1.9 on my ctc prusa i3.
Here I leave the first version and I hope you can use.
WARNING!!
My printer have 16 tooth pulleys, while the original have 20 tooth pulleys.
If your printer has 20 teeth, you need to modify the Configuration.h file, as below
// ctc prusa i3 with pulleys 20 theet
#define DEFAULT_AXIS_STEPS_PER_UNIT {80.10, 80.10, 2580.64, 105.0}
// ctc prusa i3 with pulleys 16 theet
// # define DEFAULT_AXIS_STEPS_PER_UNIT {100.07, 100.07, 2580.64, 105.0}
I have not yet sufficently tested this firmware, so try it at your risk
regards
MaX
old version
(Note: this tutorial works with any 3D printer, with GT2650 card)
Hello everyone
for Christmas the child Jesus has brought me a 3D printer CTC DIY PRUSA :)
It is a cheap printer and entry level, but enough to make contact with the world of 3D printing.
I am a programmer and I like DIY, so the 3D printer is ideal for me ... but because of this I immediately wanted to update the Firmware and there the first problem. Apparently it can not be done.
Other people have found a way to update the firmware by using another arduino as a programmer on the GT2560 board, but I did not like it at all. Too complicated and I do not have another Arduino board.
So I tried synonymous with the Arduino IDE, to update the firmware via usb, and effectively you can not.
But the error is a "timeout", that is, the computer connects to the gt2560 and recognizes it, but when it sends the data, it does not receive a response.
The error is: "stk500v2_receivemessage timeouts"
investigating the error message, in the end I found that the problem is in the transmission speed, which by default is too high for our gt2560 rev.A.
To lower the transmission speed you have to edit a text file "boards.txt" in our Arduino IDE, restart the IDE, reload the firmware and send it to the printer via usb.
Here is a video that explains perfectly how to modify the "boards.txt" file of the arduino IDE to work with our gt2560
EDIT: see below, I wrote how to do it
https://www.youtube.com/watch?v=HIu8_wYG0Y4
The video is for OSX, but it works also for linux and windows, since the Arduino IDE is multi platform.
The route of the file may vary a bit, but the "boards.txt" file is the same for every OS.
I leave my version of Marlin 1.1.8 (the last stable at the time I write these notes), so you do not have to fight with the configuration of the LCD, the measurements in mm, the extruder and several other things.
In this version of Marlin:
Save / Read the configuration in the EEPROM
Fixed the STEPS / mm, so if you tell him to print a piece of 100mm, it comes out of 100mm without having to modify the size in the mesh or increase in CURA to 102% the proportions.
Change Automatic filament, so you can insert a color change (M600) at a certain height in the gcode, also from the control panel.
Progress bar
scrolling file name, when long
I do not have a decent noise meter, but it seems to me that the 3d printer makes less noise with the marlin 1.1.8 compared to 1.1.6.
ciao
MaX
EDIT (pasted from comment)
How to install this firmware on our 3D printer:
go to download the last Arduino IDE from here: https://www.arduino.cc/en/Main/Software
Once installed or unzipped, modify this file with a simple text editor:
ArduinoIDE/hardware/arduino/avr/boards.txt
The route may vary a bit depending on the operating system. In any case, look for the file "boards.txt"
edit the boards.txt file to this line from:
mega.menu.cpu.atmega2560.upload.speed = 115200
to
mega.menu.cpu.atmega2560.upload.speed = 57600
Connect your printer to the USB door and turn it on
Launch the Arduino IDE and change in the Tools menu, selecting
Board: Arduino / Mega Genuino or Mega 2560
Processor: ATMega 2560
Then load firmware 1.1.8 from the File / Open menu and look in the folder you just unzipped (it's a tar.gz that is decompressed as a .zip), the file "Marlin.ino"
Almost there!
Click on the icon "Arrow" (right under the Edit menu) and if everything went well in a minute you will have the new firmware running on your printer.
Notes:
In windows it will be necessary to also select which USB port to use and possibly install some drivers. Search on the internet how to fix this typical windows problem.
geeetech GT2560: https://www.geeetech.com/wiki/index.php/GT2560
Español
MARLIN 1.1.9 en CTC Prusa i3 DYI
Hola a todos,
en este tiempo de vacaciones estoy trasteando con la nueva versión estable de Marlin 1.1.9.
Aquí os dejo la primera versión y espero os sirva.
QUIDADO!!
Mi impresora lleva poleas de 16 dientes, mientras que la original llevaba poleas de 20 dientes.
Si tu impresora tiene las de 20 dientes, entonces tienes que modificar el fichero Configuration.h
// ctc prusa i3 with pulleys 20 theet
#define DEFAULT_AXIS_STEPS_PER_UNIT {80.10, 80.10, 2580.64, 105.0} // quita las dos barras de esta línea
// ctc prusa i3 with pulleys 16 theet
//#define DEFAULT_AXIS_STEPS_PER_UNIT {100.07, 100.07, 2580.64, 105.0} // y añade dos barras a esta línea
Por el resto no he tenido otro problema, pero aún no he testeado a fondo este firmware, así que probarlo a vuestro riesgo
saludos
MaX
Nota: este tutorial funciona con cualquier impresora 3D, con tarjeta GT2650
Hola a todos
por Navidad el niño Jesús me ha traido una impresora 3D CTC DIY PRUSA :)
Es una impresora barata y entry level, pero suficiente para tomar contacto con el mundo de la impresión 3D.
Soy programador y me gusta el bricolage, así que la impresora 3D es lo ideal para mi... pero proprio por esto en seguida he quierido actualizar el Firmware y allí el primer problema. Al parecer no se puede hacer.
Otras personas han encontrado la forma de actualizar el firmware utulizando otro arduino como programador de la placa GT2560 de mi impresora, pero no me gustaba nada. Demasiado complicado y no tengo otra placa de arduino.
Así que he intentado igualmente con el IDE de arduino actualizar el firmware via usb, y efectivamente no se puede, pero el error es un timeout, o sea el ordenador se conecta con la gt2560 y la reconoce, pero cuando le invia los datos, no recibe respuesta de recibido.
el error es: "stk500v2_receivemessage timeouts"
investigando el mensaje de error, al final he encontrado que el problema está en la velocidad de transmisión, que por defecto es demasiado elevada para nuestra gt2560 rev.A.
Para bajar la velocidad de transmisión hay que editar un fichero de texto "boards.txt" en nuestro IDE de Arduino, reiniciar el IDE, volver a cargar el firmware y enviarlo a la impresora via usb.
Aquí hay un video que explica perfectamente como modificar el fichero "boards.txt" del IDE de arduino para que funcione con nuestra gt2560
EDIT: Mira a bajo donde explico como hacerlo
https://www.youtube.com/watch?v=HIu8_wYG0Y4
El vídeo es para OSX, pero funciona también para linux y windows, puesto que el IDE de Arduino es multi plataforma.
Puede variar un poco el recorrido del fichero, pero el fichero "boards.txt" es igual para todos.
Os dejo junto mi versión de Marlin 1.1.8 (la última estable en el momento que escribo estas notas), así que no teneis que pelearos con la configuración del LCD, de las medidas en mm, del extrusor y varias otras cosas.
En esta versión de Marlin:
Guardar y Leer La confguración desde la EEPROM
Arreglado los STEPS por mm, así que cuando imprimes una pieza de por ejempo 100mm, te sale de 100mm, sin tener que modificar el diseño o poner en CURA las proporciones al 102%
Cambio Automático del filamento, así puedes insertar un cambio de color dentro del gcode (M600) a una determinada altura y también cambiar el filamento desde el panel de control
Barra de progreso
Nombre del archivo desplazable, cuando es largo
no tengo un medidor de ruido decente, pero me parece que la impresora 3d, hace menos ruido con el marlin 1.1.8 respecto al 1.1.6.
ciao
MaX
Añadido desde un comentario:
Como instalar este firmware en nuestra impresora 3D:
ir a descargar el Arduino IDE más recién desde aquí: https://www.arduino.cc/en/Main/Software
una vez instalado o descomprimido modificar con un editor de texto simple este fichero:
ArduinoIDE/hardware/arduino/avr/boards.txt
El recorrido puede variar un poco según el sistema operativo. De todas forma busca el fichero "boards.txt"
edita el fichero boards.txt a esta linea desde:
mega.menu.cpu.atmega2560.upload.speed=115200
a
mega.menu.cpu.atmega2560.upload.speed=57600
Conecta tu impresora a la puerta USB y enciendela
Lanza el Arduino IDE y cambia en el menu Tools, seleccionando:
Board: Arduino/Mega Genuino o Mega 2560
Processor: ATMega 2560
Luego carga el firmware 1.1.8 desde el menu File/Open y busca en la carpeta que acaba de descomprimir (es un tar.gz que se descomprime como un .zip), el fichero "Marlin.ino"
¡Ya falta poco!
Pulsa el icono "Flecia" (justo a bajo del menu Edit) y si todo ha ido bien en un minuto ya tendrás el firmware nuevo corriendo en tu impresora.
Notas:
En windows habrá que seleccionar también que puerto usb hay que usar y posiblemente habrá que instalar unos drivers. Busca en internet como arreglar este tipico problema de windows.
geeetech GT2560: https://www.geeetech.com/wiki/index.php/GT2560
Italiano
MARLIN 1.1.9 nella CTC Prusa i3 DYI
Ciao a tutti,
in questo periodo di ferie sto giocando con la nuova versione stabile di Marlin 1.1.9.
Qui trovi la prima versione e spero che ti serva.
ATTENZIONE!!
La mia stampante usa pulegge da 16 denti, mentre quella originale usa pulegge da 20 denti.
Se la tua stampante ha pulegge da 20 denti, devi modificare il file Configuration.h come qui sotto
// ctc prusa i3 with pulleys 20 theet
#define DEFAULT_AXIS_STEPS_PER_UNIT {80.10, 80.10, 2580.64, 105.0}
// ctc prusa i3 with pulleys 16 theet
//#define DEFAULT_AXIS_STEPS_PER_UNIT {100.07, 100.07, 2580.64, 105.0}
Per il resto non ho avuto un altri problemi, ma ancora non ho testato a fondo questo firmware, quindi provalo a tuo rischio
ciao
MaX
Nota: questo tutorial funziona con qualsiasi stampante 3D, con scheda GT2650
Ciao a tutti
per Natale il bambino Gesù mi ha portato una stampante 3D CTC DIY PRUSA :)
È una stampante economica e di fascia bassa, ma è sufficiente per entrare in contatto con il mondo della stampa 3D.
Sono un programmatore e mi piace il fai-da-te, quindi la stampante 3D è l'ideale per me ... ma proprio per deformazione professionale ho immediatamente voluto aggiornare il firmware... e lì il primo problema. Apparentemente non si può!
Altre persone hanno trovato un modo per aggiornare il firmware usando un altro arduino come programmer collegato alla scheda GT2560, ma non mi piaceva affatto. Troppo complicato ed inoltre non ho un'altra scheda Arduino da usare.
Così ho provato anche io con l'IDE di Arduino, ad aggiornare il firmware via USB, e in effetti non è possibile farlo.
Ma l'errore è un "timeout", cioè il computer si connette al gt2560 e la riconosce, ma quando invia i dati, non riceve una risposta.
L'errore è: "stk500v2_receivemessage timeouts"
indagando sul messaggio di errore, alla fine ho scoperto che il problema è nella velocità di trasmissione, che di default è troppo alta per il nostro gt2560 rev.A.
Per ridurre la velocità di trasmissione è necessario modificare un file di testo "boards.txt" nel nostro IDE di Arduino, riavviare l'IDE, ricaricare il firmware e inviarlo alla stampante tramite USB.
Ecco un video che spiega perfettamente come modificare il file "boards.txt" dell'IDE di arduino per funzionare con il nostro gt2560
EDIT: Più in basso ho aggiunto come fare
https://www.youtube.com/watch?v=HIu8_wYG0Y4
Il video è per OSX, ma funziona anche per linux e windows, dal momento che l'IDE di Arduino è multipiattaforma.
Il percorso del file può variare un po', ma il file "boards.txt" è uguale per tutti.
Lascio la mia versione di Marlin 1.1.8 (l'ultima stabile al momento in cui scrivo queste note), quindi non occorre litigare con la configurazione del display LCD, le misure in mm, l'estrusore e molte altre cose.
In questa versione di Marlin:
Salvare e leggere la configurazione dalla EEPROM
regolato gli STEPS per mm, in modo che quando stampi un pezzo da per esempio 100mm, ti esce da 100mm senza dover modificare il disegno o aumentare le proporzione al 102% in CURA
Cambio Automatico del filamento, cosí puoi forzare un cambio di colore direttamente dal gcode (M600), oppure dal pannello di controllo
Barra di progresso
nome del file scorrevole, quando è troppo lungo
Non ho un misuratore di rumore decete, ma a orecchio mi sembra che la stampate faccia meno rumore con questo ultimo marlin 1.1.8 rispetto al vecchio 1.1.6
ciao
MaX
Aggiunto da un commento
Come installare questo firmware sulla nostra stampante 3D:
vai a scaricare l'IDE Arduino piú reciente da qui: https://www.arduino.cc/en/Main/Software
Una volta installato o decompresso, modifica questo file con un semplice editor di testo:
ArduinoIDE / hardware / arduino / avr / boards.txt
Il percorso può variare leggermente a seconda del sistema operativo. In ogni caso, cerca il file "boards.txt"
modifica il file boards.txt in questa riga da:
mega.menu.cpu.atmega2560.upload.speed = 115200
a
mega.menu.cpu.atmega2560.upload.speed = 57600
Collega la stampante alla porta USB e accendila
Avvia l'IDE Arduino e imposta nel menu Tools, selezionando
Scheda: Arduino / Mega Genuino o Mega 2560
Processore: ATMega 2560
Quindi carica il firmware 1.1.8 dal menu File / Apri e cerca nella cartella appena decompressa (è un tar.gz che è decompresso come .zip), il file "Marlin.ino"
Manca poco!
Fare clic sull'icona "Freccia" (proprio sotto il menu Modifica) e se tutto è andato bene in un minuto, il nuovo firmware verrà eseguito sulla tua stampante 3D.
note:
In Windows sarà necessario anche selezionare quale porta USB usare e possibilmente installare alcuni driver. Cerca su internet come risolvere questo tipico problema di Windows.
geeetech GT2560: https://www.geeetech.com/wiki/index.php/GT2560
Similar models
thingiverse
free

CTC prusa i3 DIY (ATMEGA 1284p) 2mm pitch lead screw replace and firmware update (marlin 1.1.8) by NoboruKato
....1.8) by noborukato
thingiverse
ctc prusa i3 diy (atmega 1284p) 2mm pitch lead screw replace and firmware update (marlin 1.1.8)
thingiverse
free

P802MA Marlin 1.1.8 by fregoe85
...verse
marlin 1.1.8 for tronxy p802ma. will need an arduino uno to update boot loader. use arduino 1.8.5
upgraded to marlin 1.1.9
thingiverse
free

Tronxy x5s Marlin 1.1.9 firmware for gt2560 board. by MWDSONNY
...mware for gt2560 main board.
had to flip lcd connection to lcd work. board doesn't have an sd card spot, but i use octoprint.
thingiverse
free
Stampante 3D "SeraMaker" by sebasera94
... del progetto:http://www.sebastianoserafini.it/stampante-3d-seramaker/
video dedicato:https://www.youtube.com/watch?v=lipi5zecktq
thingiverse
free

Progetto piano riscaldato per stampante POWER WASP EVO by tecnicotibetano
...asp. occorre intervenire sulla scheda della stampante e aggiornare il firmware. il piano 㨠gestito direttamente dalla stampante.
thingiverse
free
PIANO RISCALDATO PLUG AND PRINT by tecnicotibetano
...a. se siete interessati all'acquisto del kit completo oppure solo alla scheda con display scrivetemi. vannini.marco@inwind.it
thingiverse
free

Geeetech A10 Marlin 1.1.8 Firmware (old Version!) by runUNDfun
...ranty
source code included!
marlin 1.1.9 with new features for the a10 you found here:https://www.thingiverse.com/thing:3063754
thingiverse
free
Soporte final de carrera by rober
...s por el extremo de la barra, sólo utilizan un tornillo para el apriete y el soporte queda fijado con bastante fuerza a la barra.
thingiverse
free
Prusa i3 Y-motor stabilizzatore by Giovannicmr
...pendendo di allentare la cinghia del carrello.
il blocco è facilmente chiedibile con un dado m3 e un vite m3 circa lunghezza 15mm
thingiverse
free

Tronxy X5S Marlin 1.1.9 by kajiab
... than previous 1.1.8 as they claim
trying to add auto bed leveling but still not success with melzi board due to not enought rom.
Gt2560
thingiverse
free

GT2560 Holder by SpatenWerni
...gt2560 holder by spatenwerni
thingiverse
gt2560 holder
fan = 70mm
thingiverse
free
Mount for Geeetech GT2560 by rmoro
... of my prusa i2 to the geeetech gt2560. i extended the mounts for the sanguinololu a bit to make them fit the gt2560. print two.
thingiverse
free
MULTIPART CASE GT2560 by Pizzu_NOART3D
...rse
this is a multipart case for gt2560 motherboard.
this project is printable with all 3dprint.
print and reassemble with glue.
thingiverse
free
GT2560 board cradle by gmoneyv
... cradle by gmoneyv
thingiverse
cradle spacer to hold gt2560 board on geeetech i3 pro c printer without needing separate spacers
thingiverse
free

Geeetech GT2560 REV A+ driver cooler
...geeetech gt2560 rev a+ driver cooler
thingiverse
cooler duct for geeetech gt2560 rev a+ updated with tmc drivers.
thingiverse
free
GT2560 Mockup by revolvermann76
...gt2560 mockup by revolvermann76
thingiverse
not to be printed. just a mockup for creating housings and whatever else ...
thingiverse
free

GT2560 with MOSFET Housing by saipanda8801
...unting screw.
it is created in.
fan grill coverhttps://www.thingiverse.com/thing:2802474
i pray that i can be of service to you.
thingiverse
free

gt2560 pin connector for Endstops by Muthinor
...verse
this is a quick model i did for the 2 pin connectors the gt2560 needs for the endstops.
(recommend to print it 10% bigger)
thingiverse
free
GT2560 Holder by SpatenWerni
...gt2560 holder by spatenwerni
thingiverse
not realy perfekt! buy if fits for my printer. this is my first selfdrawing thing!!!
thingiverse
free
Adapter GT2560 to Arduino Holes P3Steel by neogeo78
...60 to arduino holes p3steel by neogeo78
thingiverse
a simple adapter to fit my gt2560 to the arduino holes on my orballo p3steel
Ctc
turbosquid
$4

CTC Railroad Telephone
... available on turbo squid, the world's leading provider of digital 3d models for visualization, films, television, and games.
3dfindit
free
CTC
...ctc
3dfind.it
catalog: rcm
thingiverse
free

CTC by apone4
...ctc by apone4
thingiverse
modifica per ctc montaggio e3d
thingiverse
free
Filiamenthalter CTC by e2mars
...filiamenthalter ctc by e2mars
thingiverse
filiamenthalter ctc makebot
thingiverse
free
CTC's Feet by zion_taron
...ctc's feet by zion_taron
thingiverse
feet to ctc printers
thingiverse
free
CTC Abdeckung by Einstein77
...ctc abdeckung by einstein77
thingiverse
abdeckung für die hinteren bohrungen im gehäuse des ctc
thingiverse
free
CTC Corner caps by KyoFR
...ctc corner caps by kyofr
thingiverse
corner caps ctc
thingiverse
free
FILAMENT GUIDE CTC by HugoNogier
...filament guide ctc by hugonogier
thingiverse
filament guide ctc
thingiverse
free
CTC Bizer Fusshalter by FPV57
...ctc bizer fusshalter by fpv57
thingiverse
haltewinkel für gummifüsse ctc
thingiverse
free

CTC Cache motor by KyoFR
...ctc cache motor by kyofr
thingiverse
cache moteur pour imprimante ctc.
Marlin
3d_export
$35

Marlin
...s : zbrush 3ds max ztool obj fbx dae 3ds stl properties : 8*14*6 production time : 15 hours 52 gram models are drawn with zbrush.
3ddd
$1

Faro Marlin pendant
...mpara colgante blancohttp://www.faro.es/es/productos/marlin-lampara-colgante-blanco/
polyrate: 14107
в архиве fbx+obj
3ddd
$1

Faro Marlin bra
...
marlin black wall lamphttp://www.faro.es/en/productos/marlin-lampara-aplique-negro/
polyrate: 15491
в архиве fbx+obj
turbosquid
$19
Blue marlin
...e 3d model blue marlin for download as max, obj, fbx, and dae on turbosquid: 3d models for games, architecture, videos. (1341037)
3d_export
$60

Marlin Blue 3D Model
...marlin blue 3d model
3dexport
fish sea 3ds marlin mental ray textured animals
marlin blue 3d model ojoalperro 57644 3dexport
3ddd
free

Brass Marlin
... винтаж , марлин
статуэтка марлина из латуни. винтаж.
3d_export
$60

martin p5m marlin
...d states navy performing naval patrols. it also served with the united states coast guard and the french navy. 285 were produced.
humster3d
$15

AMC Marlin 1965 Blueprint
...65 blueprint 3d model in the format you need. all our 3d models was created on real car base and maximally close to the original.
humster3d
$75

3D model of AMC Marlin 1965
...y a detailed 3d model of amc marlin 1965 in various file formats. all our 3d models were created maximally close to the original.
3d_export
$5

Blue marlin toon fish 3D 3D Model
...s 3d 3ds max obj lwo monster creature cartoon espadon animal aquatic
blue marlin toon fish 3d 3d model supercigale 26567 3dexport
Rev
3d_export
$5

Rev Gun 3D Model
...rev gun 3d model
3dexport
rev gun
rev gun 3d model sone93 52014 3dexport
3d_export
$15

Maverick REV-6
...n act as the main blaster of a nerfer, but due to the short range, it is recommended to use it as a secondary, additional weapon.
turbosquid
$84

Euro Pallet rev 2009
... available on turbo squid, the world's leading provider of digital 3d models for visualization, films, television, and games.
turbosquid
$9

Chandra rugs REV-15802
... available on turbo squid, the world's leading provider of digital 3d models for visualization, films, television, and games.
turbosquid
$60

rev"s drum set
... available on turbo squid, the world's leading provider of digital 3d models for visualization, films, television, and games.
3ddd
$1
Sova Design/Rev coffee table
... table
3ddd
журнальный
https://www.facebook.com/media/set/?set=a.514295972031044.1073741841.343660145761295&type;=3
turbosquid
$30
An-71 Madcap (Rev) AEW Aircraft Solid Assembly Model
... available on turbo squid, the world's leading provider of digital 3d models for visualization, films, television, and games.
turbosquid
$30

Yak-44 (Rev) AEW Aircraft Solid Assembly Model
... available on turbo squid, the world's leading provider of digital 3d models for visualization, films, television, and games.
turbosquid
$30

Mitsubishi Mu-2 Aircraft Solid Assembly Model(Rev)
... available on turbo squid, the world's leading provider of digital 3d models for visualization, films, television, and games.
turbosquid
$30

Antonov An-74 (Rev} STOL Transport Aircraft Solid Assembly Model
... available on turbo squid, the world's leading provider of digital 3d models for visualization, films, television, and games.
Diy
3d_export
free
DIY 3D Printer
...diy 3d printer
3dexport
diy 3d printer model
turbosquid
$3
Diy Desk to Bench
...odel diy desk to bench for download as 3ds, max, obj, and fbx on turbosquid: 3d models for games, architecture, videos. (1506589)
turbosquid
$2

DIY Moon Light
...model diy moon light for download as obj, fbx, blend, and dae on turbosquid: 3d models for games, architecture, videos. (1501170)
3d_export
$8
DIY CNC Router 3D Model
...diy cnc router 3d model
3dexport
cnc; router; diy; homemade
diy cnc router 3d model maikeru86 58463 3dexport
3d_export
free

Download free Diying Plant 3D Model
...download free diying plant 3d model
3dexport
diying plant blender
diying plant 3d model visitorsama 98607 3dexport
3ddd
$1

DIY coffee table + decor
... рамка для фото
кофейный столик diy 400х350х600(h) мм. моделился по фото. внимание: материалы - corona.
turbosquid
$3
Diy Wire Lamp Shade
...free 3d model diy wire lamp shade for download as 3ds and fbx on turbosquid: 3d models for games, architecture, videos. (1347605)
cg_studio
$12

DIY MONGOLIAN LAMB STOOLS3d model
... hair soft pile white
.max - diy mongolian lamb stools 3d model, royalty free license available, instant download after purchase.
cg_studio
$10

DIY MONGOLIAN LAMB STOOLS3d model
...ol goat ewe furniture
.max - diy mongolian lamb stools 3d model, royalty free license available, instant download after purchase.
turbosquid
$3
DIY Hanging Hot Air Balloon
...ty free 3d model diy hanging hot air balloon for download as on turbosquid: 3d models for games, architecture, videos. (1701544)
I3
3d_export
$10

suv i3
...suv i3
3dexport
suv i3 2013 series
3d_ocean
$89

BMW i3 2012
...y, in real units of measurement, qualitatively and maximally close to the original. model formats: - *.max (3ds max 2008 scanl...
cg_studio
$99

BMW i3 20143d model
...
cgstudio
.3ds .c4d .fbx .lwo .max .obj - bmw i3 2014 3d model, royalty free license available, instant download after purchase.
cg_studio
$99

BMW i3 20123d model
...tudio
.3ds .c4d .fbx .lwo .max .mb .obj - bmw i3 2012 3d model, royalty free license available, instant download after purchase.
cg_studio
$99

BMW i3 20143d model
...tudio
.3ds .c4d .fbx .lwo .max .mb .obj - bmw i3 2014 3d model, royalty free license available, instant download after purchase.
humster3d
$75

3D model of BMW i3 2014
...
buy a detailed 3d model of bmw i3 2014 in various file formats. all our 3d models were created maximally close to the original.
humster3d
$40

3D model of Kitchen Set I3
...uy a detailed 3d model of kitchen set i3 in various file formats. all our 3d models were created maximally close to the original.
3d_ocean
$30

Kitchen set i3
...ensils oven plates shelves sink table ware
kitchen set i3 include 3d models: cooker, oven, sink, cupboards, table, chair, plates.
3d_ocean
$89

BMW i3 2014
...y, in real units of measurement, qualitatively and maximally close to the original. model formats: - *.max (3ds max 2008 scanl...
cg_studio
$99

BMW i3 Concept 20113d model
...i3
.3ds .c4d .fbx .lwo .max .obj - bmw i3 concept 2011 3d model, royalty free license available, instant download after purchase.
Prusa
turbosquid
$2

Frame Filament Guide Clip-On for Prusa Mk3
...rame filament guide clip-on for prusa mk3 for download as stl on turbosquid: 3d models for games, architecture, videos. (1634730)
3d_export
free

prusa i3 mk3s laser mount for opt lasers
...to learn more about the blue laser technology that conceived the cutting and engraving laser heads from opt lasers, please visit:
turbosquid
free

Prusa small printer adapter holder
...er for download as ipt, skp, dwg, dxf, fbx, ige, obj, and stl on turbosquid: 3d models for games, architecture, videos. (1642936)
3d_export
$30

geisha by jonathan adler
...** i did a 3d printing test in the prusa software, you can find it among the attached images.<br>exchange:<br>.blend...
thingiverse
free

Prusa without Prusa (rc2) by madless
...prusa without prusa (rc2) by madless
thingiverse
just the main part of prusa rc2 faceshield, without writing.
enjoy :)
thingiverse
free

Prusa by acejbc
...prusa by acejbc
thingiverse
prusa knob info
m3 8mm screw
thingiverse
free

Prusa house
...prusa house
thingiverse
how prusa house could look like...
thingiverse
free

Prusa Mk2 "Fake Prusa" LCD cover by anraf1001
...r by anraf1001
thingiverse
version of prusa's lcd cover with "fake prusa" instead of "original prusa"
thingiverse
free

Prusa stabilizator by gutiueugen
...prusa stabilizator by gutiueugen
thingiverse
prusa stabilizator
thingiverse
free

Keychain Prusa by rbarbalho
...keychain prusa by rbarbalho
thingiverse
keychain with text prusa.
9
3ddd
$1
9
...9
3ddd
консоль
9
turbosquid
$12

Calligraphic Digit 9 Number 9
...hic digit 9 number 9 for download as max, obj, fbx, and blend on turbosquid: 3d models for games, architecture, videos. (1389349)
3ddd
$1

PLANTS 9
...plants 9
3ddd
папоротник , кашпо
plant 9.. hope u all like it
design_connected
$11
194 9
...194 9
designconnected
194 9 computer generated 3d model. designed by lissoni, piero.
design_connected
free

Tangram 9
...tangram 9
designconnected
free 3d model of tangram 9 by lago designed by lago, daniele.
design_connected
$11
Domino 9
...domino 9
designconnected
zanotta domino 9 computer generated 3d model. designed by progetti, emaf.
design_connected
$20
Docks 9
...docks 9
designconnected
gandia blasco docks 9 computer generated 3d model. designed by romero vallejo.
3d_export
$80

mq-9
...mq-9
3dexport
3d_export
$6
washbasin-9
...washbasin-9
3dexport
3d_export
$6
set-9
...set-9
3dexport
1
turbosquid
$15

ring 1+1
... available on turbo squid, the world's leading provider of digital 3d models for visualization, films, television, and games.
turbosquid
$10

chair(1)(1)
... available on turbo squid, the world's leading provider of digital 3d models for visualization, films, television, and games.
turbosquid
$8

Chair(1)(1)
... available on turbo squid, the world's leading provider of digital 3d models for visualization, films, television, and games.
turbosquid
$2

RING 1(1)
... available on turbo squid, the world's leading provider of digital 3d models for visualization, films, television, and games.
turbosquid
$1

Table 1(1)
... available on turbo squid, the world's leading provider of digital 3d models for visualization, films, television, and games.
turbosquid
$1

house 1(1)
... available on turbo squid, the world's leading provider of digital 3d models for visualization, films, television, and games.
design_connected
$11

No 1
...no 1
designconnected
sibast no 1 computer generated 3d model. designed by sibast, helge.
turbosquid
$2

desert house(1)(1)
...3d model desert house(1)(1) for download as 3ds, max, and obj on turbosquid: 3d models for games, architecture, videos. (1055095)
turbosquid
$50
door 1 darkwood 1
... available on turbo squid, the world's leading provider of digital 3d models for visualization, films, television, and games.
turbosquid
$15

Barrel Barricade 1-1
... available on turbo squid, the world's leading provider of digital 3d models for visualization, films, television, and games.