Thingiverse

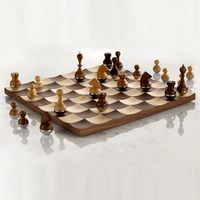
Magnetic Chess Set by juglaz
by Thingiverse
Last crawled date: 4 years ago
Materials
• Magnetshttps://www.digikey.com/products/en?keywords=469-1005-ND
• Plastic tweezershttps://www.amazon.com/gp/product/B00HGAKMMI/ref=oh_aui_detailpage_o00_s00?ie=UTF8&psc=1
• Super gluehttps://www.amazon.com/gp/product/B003Y49R7G/ref=oh_aui_detailpage_o01_s00?ie=UTF8&psc=1
• White paint marker (for touch-up)https://www.amazon.com/gp/product/B00KGCOZ9Y/ref=oh_aui_detailpage_o01_s01?ie=UTF8&psc=1
• Sharpie (for touch-up)
General Notes
Designed to be built on a 6x9” build volume.
The snap joints are designed to be a tight fit. Depending on how your machine is calibrated, you may need to do some work with a utility knife and/or Dremel to make them fit.
The Board
• Dual extrusion
• Ooze shield
• No raft
• No support
• 80-100% infill
• 0.3 mm layer height
Inserting Magnets
You need to do 64 of these, so cycle time is important. This was my process.
I started by gluing one magnet into a corner square and let it dry completely. This magnet, which I will refer to as the anchor, was very helpful in quickly orienting each magnet so they’re all facing the same way.
Put a drop of glue in several squares.
Drop a magnet onto the anchor (see above).
With one hand on the board and tweezers in the other, slide the magnet off the anchor with the tweezers.
Grab another pair of tweezers and press the magnet into a slot.
The Pieces
I scaled these pieces up to 123% to fill out the squares a bit better:https://www.thingiverse.com/thing:1288929
• 0.2 mm layer height
• 100% infill
• Support for knights and magnet slots
• No raft
I used a similar process for inserting these magnets but only used one pair of tweezers and held the piece in my other hand. I applied the felt circles as I glued in each magnet, allowing me to let them dry standing up.
The Box
• 0.3 mm layer height
• 70% infill
• Support for snap tabs
• No raft
Similar models
thingiverse
free

Sonoff Enclosure by JeffLZ
...title_o00_s00?ie=utf8&psc=1
https://www.amazon.com/gp/product/b00qvb6qpu/ref=ox_sc_saved_title_1?smid=atvpdkikx0der&psc=1
thingiverse
free
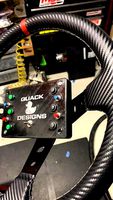
12 Function Deep Dish Button Box by coyoteyz13
..._title_o03_s00?ie=utf8&psc=1
https://www.amazon.com/gp/product/b07vhcb1q4/ref=ppx_yo_dt_b_search_asin_title?ie=utf8&psc=1
thingiverse
free

Desk Fan by NebNorse
...lpages04?ie=utf8&psc=1
motor control: https://www.amazon.com/gp/product/b01cnl6imc/ref=od_aui_detailpages04?ie=utf8&psc=1
thingiverse
free

Turntable
...amp;psc=1
m3 screws m3x6 or m3x8https://www.amazon.com/gp/product/b07twz7x38/ref=ppx_yo_dt_b_asin_title_o03_s00?ie=utf8&psc=1
thingiverse
free
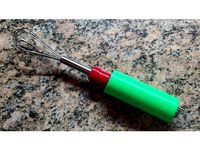
Hand Mixer by OM3
...e?ie=utf8&psc=1
power supplyhttps://www.amazon.com/gp/product/b01461mogq/ref=ppx_yo_dt_b_search_asin_title?ie=utf8&psc=1
thingiverse
free

Expo Dry Erase Marker set magnetic holder by Anonymous_Nobody
...=utf8&psc=1
e6000 craft adhesive:https://www.amazon.com/gp/product/b004bphqwu/ref=oh_aui_detailpage_o00_s01?ie=utf8&psc=1
thingiverse
free

Batarang Refrigerator Magnet by ntran37
...is 18 mm in diameter and 5 mm thick.
https://www.amazon.com/gp/product/b073xhk7zf/ref=oh_aui_detailpage_o00_s00?ie=utf8&psc=1
thingiverse
free
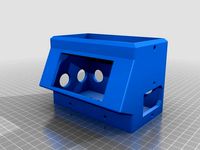
50A Power Supply Cover W/LCD Display by hkgary_g
...lpage_o06_s01?ie=utf8&psc=1
power socket
www.amazon.com/gp/product/b06xnmt3wl/ref=oh_aui_detailpage_o06_s00?ie=utf8&psc=1
thingiverse
free

Guitar Pickup Winder
...=utf8&psc=1
speed adjustmenthttps://www.amazon.com/gp/product/b07vpnhs5j/ref=ppx_yo_dt_b_asin_title_o02_s01?ie=utf8&psc=1
thingiverse
free
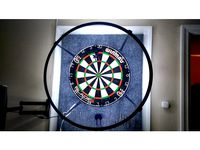
LED Dartboard Surround by nonothing
..._s00?ie=utf8&psc=1
magnets used: https://www.amazon.com/gp/product/b015rqveew/ref=oh_aui_detailpage_o05_s00?ie=utf8&psc=1
Juglaz
thingiverse
free
Djembe Tuning Grips by juglaz
...abs and tested it on a friend's drum. surprisingly the teeth held in just fine and was able to get his drum into tune. enjoy!
thingiverse
free
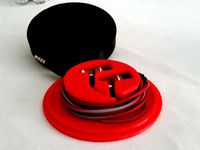
Fully Enclosed Earbud Case by juglaz
... tight fit. the fit between the case and cover will be very tight off the printer but will wear to a nice snug fit with some use.
thingiverse
free

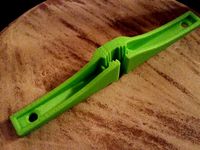
SNAP fit chess/game board by juglaz
...e to test the fit before printing the whole board.
credit to jun0 for the awesome pieces:http://www.thingiverse.com/thing:1763876
thingiverse
free
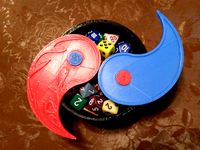
Red/Blue Yin-Yang MTG Dice Box by juglaz
...% fill on pins. if you don't use supports for the nubs you may need to clean them up with some pliers to make it fit the box.
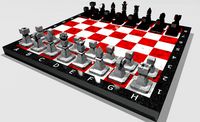
Chess
3ddd
free
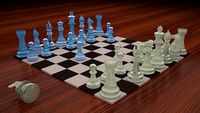
Chess
...chess
3ddd
chess , шахматы
chess
3d_ocean
$6

chess
...chess
3docean
chess game
chess,game
3d_ocean
$6

Chess
...chess
3docean
chess decor design elements game interior
just chess
3d_export
$5
chess
...chess
3dexport
chess modern
3d_export
$5

chess
...lo! this chess has made in blender. chess will done your interier model more life and interesting. each figure incrusted by gems.
3d_ocean
$7
chess board
...chess board
3docean
chess chess board with game glass
chess board with glass shade
3d_export
$5

chess
...chess
3dexport
complete set of chess pieces in just 2.5$ board game
3d_ocean
$6
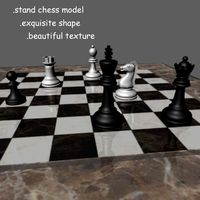
Chess Model
...chess model
3docean
chess model
stand chess model
3d_export
$12
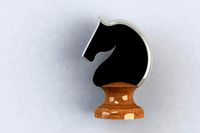
chess knight
...chess knight
3dexport
it is solidworks excellent product of chess horse or chess knight
3d_ocean
$15

Table Chess
...table chess
3docean
chess games table table chess
bureau of chess with all parts in 3d max file version 2009. enjoy it!
Magnetic
3d_ocean
$2

Magnet
...magnet 3docean 3d 3ds max electric magnet magnetic magnetism max model polygon realistic tesla magnet created in...
3d_export
$5

magnetic knife holder
...magnetic knife holder
3dexport
ordinary magnetic knife holder
archive3d
free

Fridge magnet 3D Model
...3d model archive3d refrigerator magnet fridge magnet magnet toy magnetic s n280712 - 3d model (*.3ds) for interior 3d...
3d_ocean
$25

Stationary Magnetic Bike
...nastic indoor magnetic orange sport stationary workout
3d model of black, grey and orange stationary magnetic bike with computer.
3d_export
$15

Magnetic card 3D Model
...magnetic card 3d model
3dexport
magneticcard card bank money visa mastercard magnetic
magnetic card 3d model bodya 11295 3dexport
3d_export
$15

Magnetic Pendulum 3D Model
...c pendulum 3d model
3dexport
3d_kot magnet pendulum chrome planet space ring sphere
magnetic pendulum 3d model drguz 205 3dexport
cg_studio
$50

Magnetic Globe3d model
...lobe3d model
cgstudio
.3ds .max .obj - magnetic globe 3d model, royalty free license available, instant download after purchase.
3d_export
$7
vibrating screening magnetic separation system
...vibrating screening magnetic separation system
3dexport
vibrating screening magnetic separation system
cg_studio
$36

Magnetic resonance scanner3d model
...
cgstudio
.3ds .dxf .obj - magnetic resonance scanner 3d model, royalty free license available, instant download after purchase.
3d_export
$36

Magnetic resonance scanner 3D Model
... scanner computed tomography brain mri medical diagnostic tac radiology
magnetic resonance scanner 3d model tartino 1946 3dexport
Set
archibase_planet
free

Setting
...setting
archibase planet
setting cover place setting
setting - 3d model (*.gsm+*.3ds) for interior 3d visualization.
archibase_planet
free
Setting
...setting
archibase planet
setting place setting cover
setting - 3d model (*.gsm+*.3ds) for interior 3d visualization.
archibase_planet
free

Setting
...setting
archibase planet
setting place setting cover
setting - 3d model (*.gsm+*.3ds) for interior 3d visualization.
3d_export
$8

decorative set mens set
...decorative set mens set
3dexport
decorative set men's set
archibase_planet
free
Set
...anet
set kitchen ware kitchen set kitchen tools
set kitchen tools n281114 - 3d model (*.gsm+*.3ds) for interior 3d visualization.
archibase_planet
free
Set
...set
archibase planet
beer set bar equipment
beer set - 3d model for interior 3d visualization.
archibase_planet
free
Set
...set
archibase planet
cover place setting
set - 3d model (*.gsm+*.3ds) for interior 3d visualization.
archibase_planet
free
Set
...set
archibase planet
kitchen set kitchen ware
set - 3d model (*.gsm+*.3ds) for interior 3d visualization.
archibase_planet
free
Set
...set
archibase planet
set cup glass kitchen ware
set - 3d model (*.gsm+*.3ds) for interior 3d visualization.
archibase_planet
free
Set
...set
archibase planet
flatware cover place setting
set n311210 - 3d model (*.gsm+*.3ds) for interior 3d visualization.