Thingiverse

LSD! Lead Screw Delta Printer by morganlowe
by Thingiverse
Last crawled date: 3 years, 1 month ago
So sitting at the table watching my little Rostock Nano go one of my friends says "Hey! Why not 3DLS that?" and I got mad, then I did.
Introduction Video!
This machine is a mini, it's 200x300 build volume or so. I'm sure it can be scaled up but I have no need for a large delta.
It's all printed and since I have a lathe I set it up to use the 8mm rods as structure. They are drilled and tapped M4 to bolt the machine together.
Parts are sized to fit snug and may require additional hand work to get a perfect fit. This is to maintain tight tolerances.
It's designed to use Haydn Huntley’s MagBall Arms at 215mm for the smoothest and tightest operation.
Electronics wise it's got a SKR 1.3 with TMC2209 drivers and a 24v supply. It uses large steppers to drive the leadscrews.
BOM:
Lots of filament.
This is setup to run a BLtouch but it's optional.
E3D V6 or equivalent.
Your favorite extruder and motor!
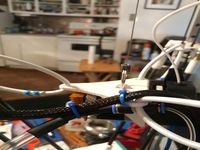
Lots of wires....
M4x12 screws to hold the uprights.
M4x25 screws to secure the upper and lower sections together.
Assortment of M3 screws to attach motors.
Some 608ZZ Bearings
3 Collar Locks
12864 LCD kit
Large 2.1a stepper motors
200mm Glass Bed
600mm 4 start lead screw
600mm x 8mm smooth rods
Igus Drylin LM8UU bearings
2x 50mm 24v Blowers
3 x Noctua 40x10mm 12v fans or some other brand but these ones are so nice.
Endstops
You'll need some M3 Self threading or Plastite screws about 4mm long for mounting endstops and circuit boards and 10mm long for mounting the bearing caps and other plastic parts to each other.
I used a 400watt 24v power supply.
There's space in the electronics tray for a Raspberry Pi, SKR, Quad MOSFET board and 2 voltage converters.
One for 12v from 24v and one for 5v from 24V to power lights, fans and the RPI from a single 24v power supply.
Optional Flying Extruder
You will need 12 tie rod ends like these and 12 M4x20 socket head bolts and nuts plus 12 M3x12 bolts and nuts to mount the tie rods in. Print the parts with "Flying Extruder" in the title and skip the regular carriages.
Optional Filament Switch
This uses the same switches as the endstop and mounts to the top with some of the extruder mounting holes. The inlet side is nicely curved and the output side is sized to take a M6 compression fitting for bowden tube to keep things neat. Definitely needed for the flying extruder.
Optional Heated Bed
You can get a heated bed made to about 180mm round 24v from China on Ebay pretty cheap. I used some thermal glue to put a thermistor same as the hotend in the middle of the heater on it's back side. This is fine and plenty close enough for a bed. You should insulate it though, I just used these cheap 220mm square ones cut to fit. Set the bed limit in Marlin to 60c if printed from PLA or PETG and 80c for ABS to not melt the printer.
Optional Strong Base
This is just a big fat reinforced base. It uses the same M5x30 screw in the top but also a M4x25 screw in the side. It just has a lot more beef to it.
Settings for Marlin are as follows:
Delta Height = 313mm
Delta radius = 220mm
Delta diagonal rod = 215mm
Delta Printable radius = 195mm
I added 2 x 10mm holes and a 13mmx40mm recessed area on the effector to pass wires through and install a small LED light strip under it.
I uploaded a screenshot of the electronics base in Priusaslicer for the 3DLS. It's a 235x235mm bed and fits with plenty of room.
I have not yet finished mine so consider this subject to change. I just changed everything in fact to give it more room to move within it's own self.
Thank you!
For more information join our Discord
Parts are ordered and printing has begun!
-Update 4/17/2021 Added a LED Light strip mount that slides over the smooth rod uprights to hold 55mm or so strips of LED light tape.Also added captive nuts for the upper and lower mounts. They use M5 hardware. Made an extruder mount that screws to the top parts with M3 plastite screws. Can be mounted inside or outside of the bar. There's a 0 degree and a 90 degree extruder mounts.
-Update 4/19/2021 Added a flying extruder option for those who might want it, Also added a filament sensor that uses the same switches as the end stops.
-Update 4/3/2021 Added 1 piece top and bottoms. Found a thin spot in the effector, re uploaded with improved design.
Update 4/10/2021 I'm putting it together and finding my errors. Many small changes and files uploaded. Soon it will be done and once it's no longer a work in progress everything is verified to fit.
Introduction Video!
This machine is a mini, it's 200x300 build volume or so. I'm sure it can be scaled up but I have no need for a large delta.
It's all printed and since I have a lathe I set it up to use the 8mm rods as structure. They are drilled and tapped M4 to bolt the machine together.
Parts are sized to fit snug and may require additional hand work to get a perfect fit. This is to maintain tight tolerances.
It's designed to use Haydn Huntley’s MagBall Arms at 215mm for the smoothest and tightest operation.
Electronics wise it's got a SKR 1.3 with TMC2209 drivers and a 24v supply. It uses large steppers to drive the leadscrews.
BOM:
Lots of filament.
This is setup to run a BLtouch but it's optional.
E3D V6 or equivalent.
Your favorite extruder and motor!
Lots of wires....
M4x12 screws to hold the uprights.
M4x25 screws to secure the upper and lower sections together.
Assortment of M3 screws to attach motors.
Some 608ZZ Bearings
3 Collar Locks
12864 LCD kit
Large 2.1a stepper motors
200mm Glass Bed
600mm 4 start lead screw
600mm x 8mm smooth rods
Igus Drylin LM8UU bearings
2x 50mm 24v Blowers
3 x Noctua 40x10mm 12v fans or some other brand but these ones are so nice.
Endstops
You'll need some M3 Self threading or Plastite screws about 4mm long for mounting endstops and circuit boards and 10mm long for mounting the bearing caps and other plastic parts to each other.
I used a 400watt 24v power supply.
There's space in the electronics tray for a Raspberry Pi, SKR, Quad MOSFET board and 2 voltage converters.
One for 12v from 24v and one for 5v from 24V to power lights, fans and the RPI from a single 24v power supply.
Optional Flying Extruder
You will need 12 tie rod ends like these and 12 M4x20 socket head bolts and nuts plus 12 M3x12 bolts and nuts to mount the tie rods in. Print the parts with "Flying Extruder" in the title and skip the regular carriages.
Optional Filament Switch
This uses the same switches as the endstop and mounts to the top with some of the extruder mounting holes. The inlet side is nicely curved and the output side is sized to take a M6 compression fitting for bowden tube to keep things neat. Definitely needed for the flying extruder.
Optional Heated Bed
You can get a heated bed made to about 180mm round 24v from China on Ebay pretty cheap. I used some thermal glue to put a thermistor same as the hotend in the middle of the heater on it's back side. This is fine and plenty close enough for a bed. You should insulate it though, I just used these cheap 220mm square ones cut to fit. Set the bed limit in Marlin to 60c if printed from PLA or PETG and 80c for ABS to not melt the printer.
Optional Strong Base
This is just a big fat reinforced base. It uses the same M5x30 screw in the top but also a M4x25 screw in the side. It just has a lot more beef to it.
Settings for Marlin are as follows:
Delta Height = 313mm
Delta radius = 220mm
Delta diagonal rod = 215mm
Delta Printable radius = 195mm
I added 2 x 10mm holes and a 13mmx40mm recessed area on the effector to pass wires through and install a small LED light strip under it.
I uploaded a screenshot of the electronics base in Priusaslicer for the 3DLS. It's a 235x235mm bed and fits with plenty of room.
I have not yet finished mine so consider this subject to change. I just changed everything in fact to give it more room to move within it's own self.
Thank you!
For more information join our Discord
Parts are ordered and printing has begun!
-Update 4/17/2021 Added a LED Light strip mount that slides over the smooth rod uprights to hold 55mm or so strips of LED light tape.Also added captive nuts for the upper and lower mounts. They use M5 hardware. Made an extruder mount that screws to the top parts with M3 plastite screws. Can be mounted inside or outside of the bar. There's a 0 degree and a 90 degree extruder mounts.
-Update 4/19/2021 Added a flying extruder option for those who might want it, Also added a filament sensor that uses the same switches as the end stops.
-Update 4/3/2021 Added 1 piece top and bottoms. Found a thin spot in the effector, re uploaded with improved design.
Update 4/10/2021 I'm putting it together and finding my errors. Many small changes and files uploaded. Soon it will be done and once it's no longer a work in progress everything is verified to fit.
Similar models
thingiverse
free

AM8 Y Carriage Kit For Ender3 Bed
...ttom side. there's just no room for it with this type of frame.
it includes a mount to fit my narrow y axis chain
thank you!
thingiverse
free

Prusa Z Rod Constraint (w/ Endstop Holder) by Pawl
...e: i printed it out and it didn't quite fit, so i extended the endstop holder. also, i added the sketchup files as requested.
thingiverse
free
Sylph Delta Flying Extruder Stepper Mount
...l.
printed in amazon basics white petg,
will need to be rotated before printing, this was from early when i was learning freecad
thingiverse
free

Printrbot Original Remix by orangefurball
...extruder mount will be updated to lock the gt2 belts better. the last thing i have to do is make a bolt-on y axis end stop mount.
thingiverse
free

Delta endstop mount by frankvdh
... 9 oct 17]: the hot-glued screws work surprisingly well :) but i have now designed and printed one carriage with the screw mount.
thingiverse
free

Adjustable Z endstop for Prusa i3 by dedalodaelus
...e screws of 20mm and 30mm fit perfect on this design (even has some mm to allow tight them hard)
comments and critics are welcome
thingiverse
free

Kossel - Delta flying extruder mount BMG by fcolls
...r mount for delta printers, i made this for my anycubic kossel linear plus. i used trianglelab pancake stepper and bmg extruder.
thingiverse
free

Anycubic Delta Heatbed Mount by cwalker74
...total stack height ~10mm. so the mounts are taller. the heated bed should fit flush to top of mount.
printed using pc filament.
thingiverse
free

SWX1 BIQU BL Mount by Kristad
...the bolts will sink into the mount.
i'm still waiting on my extruder to arrive, so i've not been able to test it out yet.
thingiverse
free

Wanhao D6 Glass Bed Clips by abner6161
...ts on the bottom. i use a 215mm x 215mm x 3mm plate and i haven't had any issues with my dual fan mount hitting these at all.
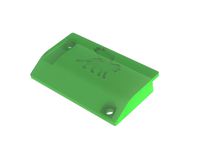
Morganlowe
thingiverse
free

AM8 - 3DLS Gantry Position Tool by morganlowe
...am8 - 3dls gantry position tool by morganlowe
thingiverse
just a simple thing to set where the gantry should go!
thingiverse
free
Edge Clamp Spool Holder by morganlowe
...ng. a spool holder to clamp on the edge of a desk or table. all 3d printed. fits all the spools i have ever encountered.
thanks!
thingiverse
free
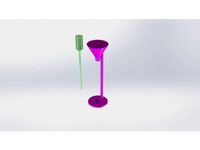
Filler Jig for KING Joints by morganlowe
... joints for the larger king pre-rolls.
print upright with support everywhere on the funnel side, no support needed on the poker.
thingiverse
free
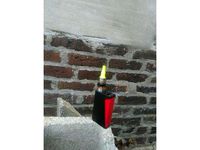
Bolt Shaped Drip Tip! by morganlowe
...eaded bolt with m12x1.25 threads for your e-cig!
see it printed here: https://youtu.be/poxalukhzve
enjoy, don't get screwed!
thingiverse
free

Drawing stand for Surface Pro by morganlowe
...ng. made it for my artist friend and he's loving it. uses 14 6mmx2mm round rubber feet. 10 on top 4 on the bottom.
thank you
thingiverse
free
Panasonic Toughbook CF-U1 HDD Cover by morganlowe
...s is a cover without a caddy for the cf-u1 ssd mod
just made and tested it with my mk2 cf-u1. fits and seals properly.
thank you!
thingiverse
free
Bowden Tube Bone by morganlowe
...ides snug over the tubes and just keeps them from going nuts. i might be the only person ever to need this but here it is!
enjoy!
thingiverse
free
Trowel for 50mm Concrete Curb by morganlowe
...ts in 2 parts with 3.8mm plastite screws. kinda niche but who knows, maybe you can use it! source files included, solidworks 2017
thingiverse
free

Spark Plug Inspired Drip Tip by morganlowe
...y universal. the outside hex is 19mm and it's 20mm tall without the tank nipple. it uses a 1x7mm o ring. print with support!
thingiverse
free
Spark Plug Inspired Drip Tip Tall Version by morganlowe
...:3013945
i found these print really well upside down with no support and a nice brim to stick it down. they are very thin walled.
Lsd
turbosquid
$27

Torsen LSD helica Differential
...e 3d model torsen lsd helica differential for download as iam on turbosquid: 3d models for games, architecture, videos. (1290429)
3ddd
$1

MADEL LSD
... решетка
http://www.madel.com/difusion_producto.php?lang=en&f;=2&p;=13
3d_export
$15
landing platform dock
...basis of their new lx(r) program to replace their lsd.[4] ...
cg_studio
$75
Entertainment Center VISMARA wall3d model
...wood carving art interior curbstone furniture shelf shelves plasma lsd living room house home movies television movie cabinets storage...
cg_studio
$67

Entertainment Center VISMARA small3d model
...wood carving art interior curbstone furniture shelf shelves plasma lsd living room house home movies television movie cabinets storage...
thingiverse
free
lsd pillar by Syzguru11
...lsd pillar by syzguru11
thingiverse
lsd pillar
sketchfab
$10

LSD vial
...48 tris: 7552
all my models are made with love for you to enjoy! - lsd vial - buy royalty free 3d model by dgns (@guillaumedgns)
thingiverse
free
LOGO LSD by Crogerio2500
...logo lsd by crogerio2500
thingiverse
logo lisbon school of design
thingiverse
free

Torsen LSD SCALED by pachek
...orsen lsd designed by "unotre". main change is that it is scaled by half to make it printable within my fabrikator mini
3d_sky
free

MADEL LSD
...madel lsd
3dsky
ventilation diffuser lattice
http://www.madel.com/difusion_producto.php?lang=en&f=2&p=13
Delta
design_connected
$16

Delta
...delta
designconnected
arflex international spa delta computer generated 3d model. designed by koivisto, eero.
design_connected
$16

Delta
...delta
designconnected
lj lamps delta computer generated 3d model. designed by janowski-lenhart, sasha.
design_connected
$13
Delta
...delta
designconnected
emu group delta armchairs computer generated 3d model. designed by marin chiaramonte .
3ddd
$1

Delta Light
...delta light
3ddd
delta light , you-turn reo 3033
точечний светильник delta light
3ddd
$1
Blanco / delta
...blanco / delta
3ddd
blanco , мойка
мойка blanco delta со смесителем
3ddd
$1
Delta Light Spot
...delta light spot
3ddd
delta light
светильник фирмы delta light
3ddd
free
Bianchi Delta LVMDLT200100
...i delta lvmdlt200100
3ddd
bianchi delta , смеситель
смеситель bianchi delta lvmdlt200100
design_connected
free
Delta 190
...delta 190
designconnected
free 3d model of delta 190 by zanotta designed by progetti, emaf.
design_connected
$27
Delta 211
...delta 211
designconnected
zanotta delta 211 computer generated 3d model. designed by progetti, emaf.
design_connected
$27

Delta 234
...delta 234
designconnected
zanotta delta 234 computer generated 3d model. designed by progetti, emaf.
Printer
archibase_planet
free

Printer
...inter
archibase planet
printer laser printer pc equipment
printer n120614 - 3d model (*.gsm+*.3ds) for interior 3d visualization.
archibase_planet
free

Printer
...rchibase planet
laser printer office equipment computer equipment
printer - 3d model (*.gsm+*.3ds) for interior 3d visualization.
turbosquid
$100

Printer
...er
turbosquid
royalty free 3d model printer for download as on turbosquid: 3d models for games, architecture, videos. (1487819)
turbosquid
$3

Printer
...turbosquid
royalty free 3d model printer for download as max on turbosquid: 3d models for games, architecture, videos. (1670230)
turbosquid
$1

printer
...turbosquid
royalty free 3d model printer for download as max on turbosquid: 3d models for games, architecture, videos. (1595546)
turbosquid
$1

printer
...turbosquid
royalty free 3d model printer for download as max on turbosquid: 3d models for games, architecture, videos. (1595105)
turbosquid
$10

Printer
...id
royalty free 3d model printer for download as max and 3dm on turbosquid: 3d models for games, architecture, videos. (1607146)
turbosquid
$7

Printer
...royalty free 3d model printer for download as ma, ma, and obj on turbosquid: 3d models for games, architecture, videos. (1644580)
turbosquid
$30

Printer
... available on turbo squid, the world's leading provider of digital 3d models for visualization, films, television, and games.
turbosquid
$20

Printer
... available on turbo squid, the world's leading provider of digital 3d models for visualization, films, television, and games.
Screw
3d_export
$5
screw
...screw
3dexport
screw
turbosquid
$29

Screw driver and screws
... available on turbo squid, the world's leading provider of digital 3d models for visualization, films, television, and games.
3d_ocean
$2
Screw
... steel twist wood screw
screw 3d model in 2 different materials real world scale rendered with mental ray file formats: .max .obj
3d_ocean
$4
Screw
...n
3d bolt male mechanic metal nut parts prop propeller schraube schraubenmutter screw steel twist
screw 3d model, clean modeling.
turbosquid
$2
screw
...crew
turbosquid
royalty free 3d model screw for download as on turbosquid: 3d models for games, architecture, videos. (1198271)
turbosquid
free
Screw
...screw
turbosquid
free 3d model screw for download as obj on turbosquid: 3d models for games, architecture, videos. (1240851)
3d_ocean
$2
Frame Screw
...frame screw
3docean
construction screw
a frame screw and plug.
turbosquid
$27
screw
...w
turbosquid
royalty free 3d model screw for download as max on turbosquid: 3d models for games, architecture, videos. (1334064)
turbosquid
$20

SCREW
...
turbosquid
royalty free 3d model screw for download as sldas on turbosquid: 3d models for games, architecture, videos. (729733)
turbosquid
$1
Screws
...
turbosquid
royalty free 3d model screws for download as max on turbosquid: 3d models for games, architecture, videos. (1640360)
Lead
turbosquid
$25

Lead Sled
... available on turbo squid, the world's leading provider of digital 3d models for visualization, films, television, and games.
turbosquid
$20

pencil leads
... available on turbo squid, the world's leading provider of digital 3d models for visualization, films, television, and games.
turbosquid
$10

Lead Pipe
... available on turbo squid, the world's leading provider of digital 3d models for visualization, films, television, and games.
turbosquid
$35

Leagoo Lead 7
... available on turbo squid, the world's leading provider of digital 3d models for visualization, films, television, and games.
3ddd
$1
leaded Glass
...glass
3ddd
стекло витраж
стаки не свернуты длч удобства подгонки под размеры.материалы легко меняються по вкусу.
текстуры+мах 10.
turbosquid
$15

LAS LEAD ARMCHAIRS
...del las lead armchairs for download as 3ds, max, obj, and fbx on turbosquid: 3d models for games, architecture, videos. (1443555)
turbosquid
$19

2 Black Lead Pencils
... available on turbo squid, the world's leading provider of digital 3d models for visualization, films, television, and games.
turbosquid
$9

Mechanical Pencil Lead Refill
... available on turbo squid, the world's leading provider of digital 3d models for visualization, films, television, and games.
turbosquid
$1

Antique lead crystal vase
...free 3d model antique lead crystal vase for download as blend on turbosquid: 3d models for games, architecture, videos. (1405722)
turbosquid
$60

Lead Bricks for Radiation Shielding
...icks for radiation shielding for download as ma, fbx, and obj on turbosquid: 3d models for games, architecture, videos. (1622529)