Thingiverse
Low Voltage Ceiling Light For Camper by tbillion
by Thingiverse
Last crawled date: 3 years ago
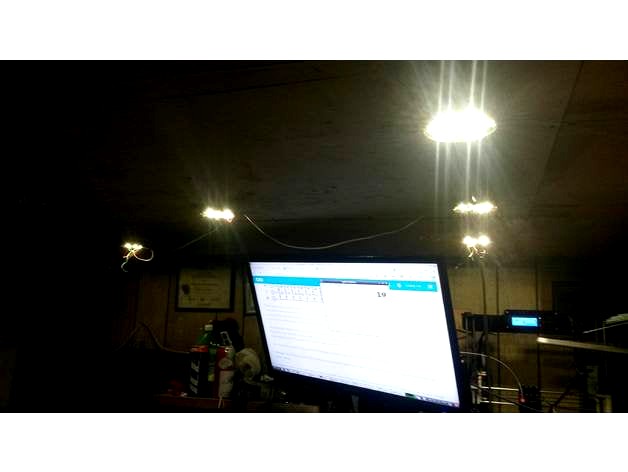
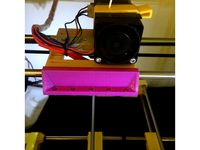
currently working on updating the lighting in my trailer, I live in it full time and am preparing to go ff grid, so these will be eventually powered off of a pretty large sized 3.4V battery. each one takes 6 COB mounted star leds. which puts them at around 13.86W per assembly. they are attached with 3mm screws, i just happened to have a bunch of old computer case screws around but lowes sells 3mm x 5 mm which is about what you would need. i picked up the leds for a song something like 5$usd with the heatsinks for 50 pcs.
Update: 8/11/17 6:03am
Ok, I added a bunc more pictures to hopefully help explain why this design has so many holes in it... lol.
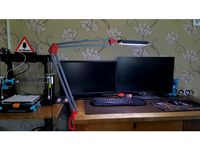
the holes in the side are to allow for routing of the wire, in my camper there is only so many places you would want a wire to go. I ended up printing 5 of these, one for the entry way one for over my printer, 2 for the middle of the room, and one for over the foot of the bed( as the head of the bed will have my later uploaded 4 way spot light like the one over my desk, or i may combine the two things into this thing as a sort of COB lighting suite.) the first middle of the room light works as a hub to send the wires out to the entryway light, the printer light, and the main lights. there are 4 holes in the dish on each side where the wire inlet/outlet holes are, this is so you can tack down the wire ends. I have used 4 conductor low voltage (telephone/alarm) wire, each conductor is rated at 7A, the red wire is used to power ALL the leds, the Black wire is used to Ground the entry way light, the green is used to ground the printer light, and the yellow grounds the rest of the main lights. 4 circuits in 1 cable. the picture of all of the lights is labeled to show the wire combination for each light (RY:Red/Yellow RB:Red/Black RG:Red/Green) the main hub light is the most crowded as far as wiring goes, it took a bit of effort to get all of the wires out of the way of the leds. I still need to design and print some sort of cable clam to secure the wire to the ceiling. i will probably do that next. The LEDs are connected in parallel using Bus wire, commonly bus wire is used for solar panels but i find that it is very handy for things like this as it is a flat wire that is pre tinned, which makes soldering a breeze, it took me an hour to solder all the leds together in their respective dishes, in contrast to the 2 hours it took to assemble them with the hold down screws, and orienting the leds so that they would not be shorted by the hold down screws, and further contrast to the 3.5 hours it took to mount them to the ceiling and wire them up. The center hole is a singular mounting hole so that you can attach them to the ceiling, because they are thin and my screws are long i had to use 6 4mm flat washers to move the housings off direct contact with the ceiling. the next thing on my to do list is to come up with a cover lens for them as even accidental eye contact leaves you with polka-dots in the eyes. All in all the light that comes off of them makes you feel like you are in a spiffy new model home. I am very happy with the results. i will update when the lenses are done. :)
-T
Update: 8/11/17 6:03am
Ok, I added a bunc more pictures to hopefully help explain why this design has so many holes in it... lol.
the holes in the side are to allow for routing of the wire, in my camper there is only so many places you would want a wire to go. I ended up printing 5 of these, one for the entry way one for over my printer, 2 for the middle of the room, and one for over the foot of the bed( as the head of the bed will have my later uploaded 4 way spot light like the one over my desk, or i may combine the two things into this thing as a sort of COB lighting suite.) the first middle of the room light works as a hub to send the wires out to the entryway light, the printer light, and the main lights. there are 4 holes in the dish on each side where the wire inlet/outlet holes are, this is so you can tack down the wire ends. I have used 4 conductor low voltage (telephone/alarm) wire, each conductor is rated at 7A, the red wire is used to power ALL the leds, the Black wire is used to Ground the entry way light, the green is used to ground the printer light, and the yellow grounds the rest of the main lights. 4 circuits in 1 cable. the picture of all of the lights is labeled to show the wire combination for each light (RY:Red/Yellow RB:Red/Black RG:Red/Green) the main hub light is the most crowded as far as wiring goes, it took a bit of effort to get all of the wires out of the way of the leds. I still need to design and print some sort of cable clam to secure the wire to the ceiling. i will probably do that next. The LEDs are connected in parallel using Bus wire, commonly bus wire is used for solar panels but i find that it is very handy for things like this as it is a flat wire that is pre tinned, which makes soldering a breeze, it took me an hour to solder all the leds together in their respective dishes, in contrast to the 2 hours it took to assemble them with the hold down screws, and orienting the leds so that they would not be shorted by the hold down screws, and further contrast to the 3.5 hours it took to mount them to the ceiling and wire them up. The center hole is a singular mounting hole so that you can attach them to the ceiling, because they are thin and my screws are long i had to use 6 4mm flat washers to move the housings off direct contact with the ceiling. the next thing on my to do list is to come up with a cover lens for them as even accidental eye contact leaves you with polka-dots in the eyes. All in all the light that comes off of them makes you feel like you are in a spiffy new model home. I am very happy with the results. i will update when the lenses are done. :)
-T
Similar models
thingiverse
free

MP mini LED Side bed Lights by coedshowers
...and space them accordingly.
the led track for the led light strip comes from jasonjoneshttps://www.thingiverse.com/thing:1698383
thingiverse
free

TV LED Light Clip With Screw Hole
...d the edge of my tv to hold the clips down. of course these clips with screw holes could be used for other applications as well.
thingiverse
free

Quill light for bridgeport clone mill by tbaggins
...; plexiglass. inner hole diameter is 2.2" outer diameter is 4.2" if you want to make a plexiglass cover for the lights.
thingiverse
free

FPV Indoor Gate Hanger
...t hot they will melt the print which could be a safety hazard. i left mine on for 8 hours and they were still cool to the touch.
thingiverse
free

LED Strip Wall or ceiling mount without glue by Alex_Tinkerman
...design is modular. so you can expand it as you like.
at the moment it works only with led strips whitout seal. update will come.
thingiverse
free

Ram 1500 Fog Light Bushings by north_of_55
... when they wear out.
i drilled the holes in the brackets out to 5/8" dia. as the od of the bushings is just under 5/8".
thingiverse
free

Halloween eyes by wizzle111
... glowing.
printed in 2 pieces so the sliding lid can be colored a different color than the box. yellow, white, red, etc.
enjoy!
thingiverse
free
work lamp by Matu1272
...te 12v
switch
at least one meter wire
3mm drill to drill the holes to hide wires.
10x m3x20mm screws and nuts
two part resin clue
thingiverse
free

COB LED Mount by SadSam
...s a small print area so i designed this in two halves. once cured i just used a small amount of resin to weld the parts together.
thingiverse
free
LED Lighting Mount by Aethelstan
...hope you enjoy this trivial thing that was more an exercise in modelling to specific dimensions rather than something i needed :)
Tbillion
thingiverse
free
Chevrolet Truck Door Emblem by tbillion
...chevrolet truck door emblem by tbillion
thingiverse
made for my brothers chevrolet truck.
thingiverse
free

AA Battery Holder by tbillion
... better connection surface and then jam nut a washer on the bare thread end to make a sort of adjustable thumb screw.
carpe diem
thingiverse
free

Movie Reel Recess light cover by tbillion
...d stage blender files are included. finally there is two versions of the gcode for an anet a8 printer, which i used to print it.
thingiverse
free

Anet A8 Y Belt Tensioner by tbillion
... i changed the parts over to directly accept 12mm long 3mm screws no nut needed. the part is stronger and works in pla.
enjoy -t
thingiverse
free

Real Drone landing gear! by tbillion
...or your pleasure. (maybe not hers xd) prototype worked but i needed bigger and better more customizable. stay tuned for version 2
thingiverse
free

NIMH Battery Tray V2 by tbillion
....com/itm/wholesale-silver-tone-metal-spring-battery-contact-plate-set-for-aaaaa-batteries/382246713722
scale is 10% of full size.
thingiverse
free
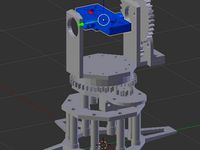
Auto Sentry Turret by tbillion
...g:5505
gear meshing may be crapy becasue i havent figured out the best way to determing this in blender. suggestions appreciated.
thingiverse
free

Remix - Parametric USB power hub by tbillion
...nk to some cheap bus wire http://www.ebay.com/itm/2ma-5mm-x-0-2mm-solar-pv-solder-ribbon-bus-bar-welding-wire-metal-/282599019726
thingiverse
free

DSO138 Rechargable Battery by tbillion
...and solder on your battery leads.
after it is finished printing and i am sure the design is good i will post the dso housing ...
thingiverse
free

Configure-able Battery Box by tbillion
... can get 25 aa garbage cells for free. or dollar tree sells 10 aa batteries for 1$ either way you go it is a pretty good option .
Camper
3d_ocean
$39
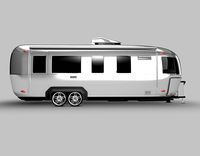
airstream camper
... trailer travel trip vehicle
high quality airstream dream camper. created in cinema4d but includes various other formats as well.
3d_ocean
$16

Camper Truck
... picnic polygonal road transportation travel traveling truck vehicle
stylized low poly version of camper truck! hope you like it!
turbosquid
$40
Romotow camper
...d model romotow camper for download as max, max, obj, and fbx on turbosquid: 3d models for games, architecture, videos. (1622502)
turbosquid
$31
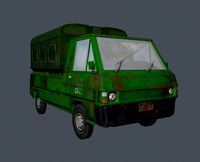
Abandoned camper truck1
...lty free 3d model abandoned camper truck1 for download as fbx on turbosquid: 3d models for games, architecture, videos. (1286122)
turbosquid
free
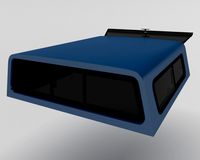
Camper Shell 2
...model camper shell 2 for download as blend, obj, fbx, and dae on turbosquid: 3d models for games, architecture, videos. (1710339)
turbosquid
free
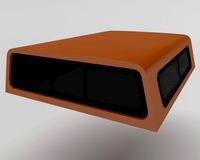
Camper Shell 1
...model camper shell 1 for download as blend, dae, fbx, and obj on turbosquid: 3d models for games, architecture, videos. (1708434)
turbosquid
$30

1960 Vintage Camper
... available on turbo squid, the world's leading provider of digital 3d models for visualization, films, television, and games.
turbosquid
$10

Tear Drop Camper
... available on turbo squid, the world's leading provider of digital 3d models for visualization, films, television, and games.
turbosquid
$28
Old Water Camper
... water camper for download as ma, max, 3ds, fbx, obj, and stl on turbosquid: 3d models for games, architecture, videos. (1598359)
turbosquid
$19

RV Motorhome Camper
... download as blend, unitypackage, c4d, dae, fbx, obj, and stl on turbosquid: 3d models for games, architecture, videos. (1652391)
Voltage
turbosquid
$30
Voltage Transformer
...el voltage transformer for download as 3ds, obj, fbx, and dae on turbosquid: 3d models for games, architecture, videos. (1208595)
turbosquid
$10

Voltage Regulator
... available on turbo squid, the world's leading provider of digital 3d models for visualization, films, television, and games.
turbosquid
$2

Voltage stabiliser
... available on turbo squid, the world's leading provider of digital 3d models for visualization, films, television, and games.
3d_export
$7
low voltage switch cabinet
...low voltage switch cabinet
3dexport
low voltage switch cabinet
turbosquid
$30

Automatic Voltage Regulator
...free 3d model automatic voltage regulator for download as obj on turbosquid: 3d models for games, architecture, videos. (1240422)
turbosquid
$30

High-voltage CT
... available on turbo squid, the world's leading provider of digital 3d models for visualization, films, television, and games.
3d_export
$65

high voltage tower
...high voltage tower
3dexport
simple rendering of the scene file
3d_export
$6
cantilever of low voltage switch cabinet
...cantilever of low voltage switch cabinet
3dexport
cantilever of low voltage switch cabinet
3d_export
$5

Autimatic Voltage Stablizer 3D Model
...autimatic voltage stablizer 3d model
3dexport
autimatic voltage stablizer 3d model uzair 62655 3dexport
turbosquid
$10

Windsor Line-Voltage Pendant
...ree 3d model windsor line-voltage pendant for download as max on turbosquid: 3d models for games, architecture, videos. (1508799)
Ceiling
3d_ocean
$5
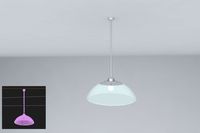
ceiling lamp
...ceiling lamp
3docean
ceiling decoration lamp light
ceiling lamp
3ddd
$1
Ceil - Lamp
...ceil - lamp
3ddd
mouhamad asswad , ceil
ceil - lamp from i max render
3d_export
$269
ceiling lamp
...ceiling lamp
3dexport
ceiling lamp
3ddd
free
ceiling light
...ceiling light
3ddd
ceiling light
3d_export
$10
ceiling light
...ceiling light
3dexport
ceiling light branches
3ddd
$1
Ceiling Lamp
...ceiling lamp
3ddd
подвес
ceiling lamp
3d_ocean
$6
Ceiling fan
...ce blades ceiling ceiling fan cool cooling fan fixture
ceiling fan created in cinema4d. comes with various other formats as well.
turbosquid
$20

Plaster ceiling ornament, ceiling medallion
...iling ornament, ceiling medallion for download as max and obj on turbosquid: 3d models for games, architecture, videos. (1376554)
turbosquid
$17

Ceiling
... free 3d model ceiling for download as max, obj, fbx, and stl on turbosquid: 3d models for games, architecture, videos. (1367286)
3d_export
$5

ceiling fan
...ceiling fan
3dexport
a simple ceiling fan model.
Light
archibase_planet
free

Light
...light
archibase planet
lamp lighting light
light - s2 - 3d model for interior 3d visualization.
archibase_planet
free

Light
...light
archibase planet
light luminaire lighting
light l0465 - 3d model (*.gsm+*.3ds) for interior 3d visualization.
3d_export
$5

lighting
...lighting
3dexport
lighting
3d_export
$5

lighting
...lighting
3dexport
lighting in livingroom
turbosquid
$3

Lighting Tree with Lights
...d model lighting tree with lights for download as max and 3ds on turbosquid: 3d models for games, architecture, videos. (1585507)
archibase_planet
free

Light
...light
archibase planet
luster lighting solution
light - s - 3d model for interior 3d visualization.
archibase_planet
free

Light
...light
archibase planet
luster lamp lighting
light 1 - 3d model for interior 3d visualization.
archibase_planet
free

Lights
...lights
archibase planet
surgical lights surgical lamp
surgical lights (floor) - 3d model for interior 3d visualization.
archibase_planet
free

Light
...light
archibase planet
lighting luminaire candlelight
light l0463 - 3d model (*.gsm+*.3ds) for interior 3d visualization.
3d_export
$18

street light-lighting-light-xia bing
...
3dexport
street light-lighting-light-xia bing<br>max 2015 v-ray 3 max 2015<br>textures<br>all files in zip...