Thingiverse
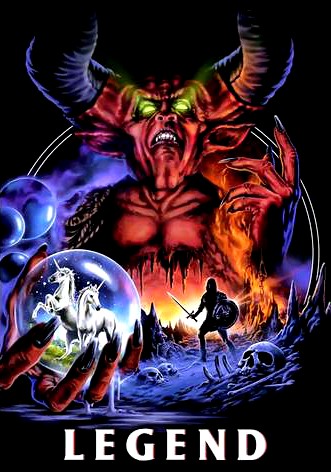
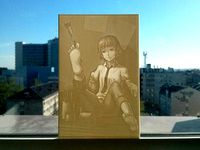
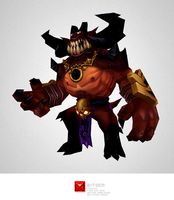
Lord Of Darkness Lithophane
by Thingiverse
Last crawled date: 4 years, 4 months ago
Film: Legend
Character: Darkness (Lord of Darkness)
Print Time: 19 Hours
Min/Max .6 - 2.8
Layers: 1.2
Speed: 45 mm/sec
Tools:
Printer: Ender 5
Filament: #Esun Cool White PLA+
Lithophane Profile courtesy of Mark Gonsowski: https://www.gameon3d.com/downloads-links
Lithophane Helper: https://www.thingiverse.com/thing:2718124
Slicer: Cura 4.4.1
Image Source: Bing Image Search
Photoshop for image sizing and color work
Lithophane Creator: https://tool.itslitho.com/#/CreateModel
Settings: In photos
I make all my Lithophanes to fit my custom frames.
Dimensions are 126.5mm x 177mm
DO NOT RESIZE LITHOPHANES IN YOUR SLICER!
If you want a different size, it is best to resize the B&W image, then create a new STL at lithophanemaker.com or https://tool.itslitho.com
You can use the same settings as I did, just tweaking for size.
Also, Different filaments have different transparency.
These settings worked well for Esun Cool White PLA+
Min .6 Max 2.8
This one was created with https://itslitho.com/
Settings in the pictures.
I used Mark Gonsowski's Lithophane Profile
It is included in this download package.
The only things you may need to change are Retraction settings and sprint speed.
I also change to 1.2mm layers vs 1.0
Cura 4.4.1
Printed on my Ender 5 with .4 nozzle, 1.2 layers
Filament is Esun Cool White PLA+
My Print time was 19 Hours @ 45mm sec
I mounted mine in a custom lithophane box and lit using a LED Flame Bulb
*Information from Mark about his lithophane profile
Taken from https://www.gameon3d.com/downloads-links
If you are using both my night light profile and Thomas Brooks Lithophanemaker to generate a night light STL you will need to add bottom layers only if you increase the "adapter thickness" to a value greater than the default value of 1.8 mm. If you increase the thickness from 1.8 to 2.0 for example you would need to add another 2 bottom layers if your using a layer height of .1
Some other Cura settings you may need to change depending on what filament you're using and printer setup/calibration would be your temps, retraction speed/distance and flow.
Similar models
thingiverse
free

Pirates of the Caribbean Lithophane
...e your temps, retraction speed/distance and flow.
music: the buccaneer's haul by shane ivers - https://www.silvermansound.com
thingiverse
free
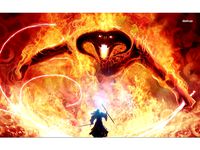
Lord of the Rings - Gandalf vs Balrog Lithophane 1
...epending on what filament you're using and printer setup/calibration would be your temps, retraction speed/distance and flow.
thingiverse
free
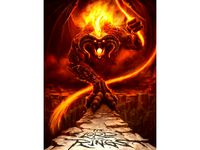
Lord of the Rings - Gandalf vs Balrog Lithophane 2
...epending on what filament you're using and printer setup/calibration would be your temps, retraction speed/distance and flow.
thingiverse
free
Sidewinder X1 Cura 4.4.1 Profile PLA and PETG
...ow is also adapted to my filament, this may vary for you.
i also included a text file with codes for start and finish that i use.
thingiverse
free
Rin Tezuka Lithophane by Harada
... print on a side to benefit from the layer resolution
i used these settings:
layer 0.15mm
nozzle 0.3mm
speed 45mm/sec
white pla
thingiverse
free

Jupiter lithophane
...e3 1.2) bowden, esun pla+ cool white, cura 4.4, 0,1layer, hotend/bed 205/0
128.67x125mm
print 16h timehttps://lithophanemaker.com
thingiverse
free
Lithophane Candle Stand by ITasteTerrible
...hiob lithophane candle stand make sure the settings a similar to the image. i remix this so that i...
thingiverse
free

Thanos lithophane.
...educe the speed to 30 if you have never printed lithophanes before use any resolution from 1-1.6 and lower your print speed to 30
thingiverse
free
Cantilever Test Print (customizable) by walter
...
150 micron layer height
solid shells, inside first
8mm/sec print speed
80% part cooling fan (using the cooling setup here)
thingiverse
free
PLA Cura 4.7 Profile - Artillery Sidewinder X1 V4 by Minkio95
...1 printer. printing speed is a bit low but you can speed it up if you want. let me know if you have any issues with this profile.
Lithophane
3d_export
free

lithophane of elfen lied
...lithophane of elfen lied
3dexport
elfen lied lithophane free
turbosquid
$25
Table Lamp (Bamboo Motif Lithophane Accent - Model 015)
... available on turbo squid, the world's leading provider of digital 3d models for visualization, films, television, and games.
thingiverse
free

Atlas lamp by nahojjjen
...atlas with a cutout for a lamp, holding a lithophane earth. assembly: glue the halves of the earth together....
thingiverse
free
Snowflake Lithophane by johnkh
...snowflake lithophane by johnkh
thingiverse
snowflake lithophane
thingiverse
free

Flower like Lithophane by johnkh
...flower like lithophane by johnkh
thingiverse
flower like lithophane
thingiverse
free

Flower like 2 Lithophane by johnkh
...flower like 2 lithophane by johnkh
thingiverse
flower like 2 lithophane
thingiverse
free

Flower like Lithophane by johnkh
...flower like lithophane by johnkh
thingiverse
flower like lithophane
thingiverse
free

Quest for Glory 1 (4-8) Litho by Sunnyside_down
...litho by sunnyside_down thingiverse quest for glory 1 (qfg1) lithophane collection 4 esrgan upscaled...
thingiverse
free

Quest for Glory 1 (5-8) Litho by Sunnyside_down
...litho by sunnyside_down thingiverse quest for glory 1 (qfg1) lithophane collection 5 esrgan upscaled...
thingiverse
free

Quest for Glory 1 (6-8) Litho by Sunnyside_down
...litho by sunnyside_down thingiverse quest for glory 1 (qfg1) lithophane collection 6 esrgan upscaled...
Lord
3d_export
$25
Lord Digsby ottoman 3D Model
...rior materials poly
lord digsby ottoman 3d model download .c4d .max .obj .fbx .ma .lwo .3ds .3dm .stl jockermax44 103909 3dexport
cg_studio
$50
God Vishnu3d model
...god vishnu3d model cgstudio lord vishnu indian god krishna vishnu god blue hindhu hindu...
cg_studio
$70
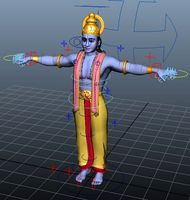
Lord Vishnu3d model
...an aryan india indian shiva siva
.mb .ma - lord vishnu 3d model, royalty free license available, instant download after purchase.
3ddd
$1
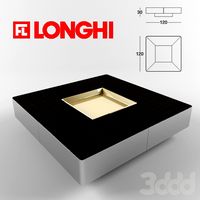
Longhi / Lord
...longhi / lord
3ddd
longhi , журнальный
стол журнальный lord. фабрика longhi
3ddd
$1

Lord Jim Chair
...lord jim chair
3ddd
montina
lord jim chair- montina
3ddd
$1

Il Loft / lord
...il loft / lord
3ddd
il loft , om
модель производителя, тех. характеристика в архиве
3ddd
$1
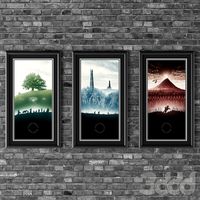
Posters - Lord of the Rings
...posters - lord of the rings
3ddd
постер
posters - lord of the rings
3d_ocean
$6
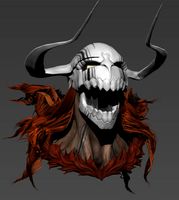
Vasto Lorde Bust
...e zbrush
did the bleach vasto lorde sculpt in zbrush 4r3. the download file contains zbrush 4r3 .zpr project and .ztl tool files.
3d_ocean
$19

High Poly Mafia Boss
...boss 3docean 1920s american boss costra nostra criminal drug lord gangster godfather italian mafia old man the model inspired...
3d_ocean
$39
Low Poly Demon Lord
...ted demon lord. he is bound to an hik skeleton and ready to be animated. to achieve the look as seen on the preview images the...
Darkness
3d_export
$20

Headphones 1 3D Model
...cinema c4d detailed music instrument sound studio headphone headphones ear black dark
headphones 1 3d model cgaxis 70077 3dexport
3ddd
$1

Hickory Chair Comode Artisan Curved Front Chest Ash
...korychair.com/furniture/living-room-den-and-foyer-furniture/1911-collection/i507619-artisan-curved-front-chest-ash.aspx
3ddd
$1

Bon Bentwood Chair
...come on trend.
size: h: 88cm w: 46cm d: 47cmhttp://www.bonbentwood.com.au/products/bon-calvi-bentwood-chair-dark-walnut
3d_ocean
$5
WOOD TEXTURES SET 002
... help to make your own project beautiful use it for texturize floor at the interiors, or make great design solution with it! c...
3d_ocean
$9
Table 5
...table 5
3docean
board cuisine dark desk diet large platen rich table wood
beautiful table for any interior and taste.
3d_ocean
$5
Table 14
...table 14
3docean
board cuisine dark desk diet large platen rich table wood
beautiful table for any interior and taste.
3d_ocean
$49

English Family House
...ave v-ray material. exterior only with low detailed interior walls. the objects are modeled using real world dimensions. the r...
3d_ocean
$4
Coffee Packaging
...for close-ups, and architectural visualization. units used: cm // model is scaled to real world. layer name: coffee packaging ...
3d_ocean
$5

Table 1
...table 1
3docean
board cuisine dark desk diet large platen rich table wood
beautiful table for any interior and taste.
3d_ocean
$9

Table 6
...table 6
3docean
board cuisine dark desk diet large platen rich table wood
beautiful table for any interior and taste.