Thingiverse

Lock-On Bot From the movie Runaway by rkxone
by Thingiverse
Last crawled date: 3 years, 5 months ago
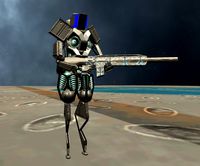
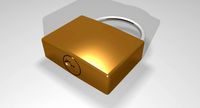
Lock-On Device from the movie Runaway (1984)
Another build from the Runaway movie, this time the little computer controlled Lock-On devices, this is a simple 7 hour build, A day of design work and test printing (Currently in paint) but some nice features, and some new test features.
November-16-2020
changed the wheel size so it should be a drop in fit now
changed the display size for a more drop in fit
electronics fit perfectly into the new v2 body (micro switches and dimensions I used are here: https://www.amazon.ca/gp/product/B00O9YOEDC/ref=ppx_yo_dt_b_asin_title_o05_s00?ie=UTF8&psc=1 )
What do I need for this kit?
2-3x Green 5mm LED
1x Red 5mm LED
1 Micro switch
Wiring for lights
Battery (Double A or cr2032)
4 6mm M3 cap hex screws
Design features
simple print
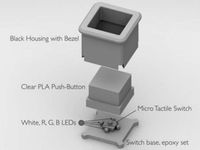
mounts for LED's and on off switch
bolts tie into the prop design and allow access to the electronics
variable front display, the grid can be printed alone from a background plate allowing multi material printing (black background and green grid) or printing in clear and paint blocking to allow back LED colour projecting.
A nice bright top light
Insets for all parts for simple assembly
Assembly:
Print and or paint the wheels black, glue into the insets
Print and or paint the body in white
Print the display using the type of print you want (multi material or clear) and glue to the inner frame
Optional: Mount the switch and glue in place, mount the red LED to the top and the green LEDs to the front posts), wire together to the battery
Glue the back hub into the inset provided
Screw the top down carefully to the body posts (DO NOT OVERTIGHTEN)
Enjoy!
Issues:
the line cuts may not be the best, this was my fist time trying to do this, and it's in tinkercad so it is not designed for it. I think it came out well. My first print had some minor issues with placement, LED's and switch all too close in the same area, and after test printing and testing the front display I found for my LED's I needed 2-3 so I added a holding post for a second and moved the switch back towards the center so it's not an issue
be careful removing the front support on the main body, the top crossover is thin!!!! I did not break mine and once you glue the front display in it fully strengthens it.
Post print:
files the holes for the fit you need to friction fit the LED's (posts were fine, top led needed light filing
remove any elephants foot, widened the insets for this
bolt the top down, fit's nice.
file/sand the edges of the display if it is still tight, my first test needed some sanding, not much but it did need it.
I have tested the blackout paint on the alternate combined display (leaving the grid clear) and it works out excellent.
I have fully tested this print. Photos coming shortly after the paint dries. Any questions please ask.
If you are interested in other models from this movie check out my Spider-bot thing here: https://www.thingiverse.com/thing:4652780
Enjoy! If you enjoy my prints please consider donating, even a dollar helps :) it's always appreciated :) https://www.paypal.me/RychardK
Another build from the Runaway movie, this time the little computer controlled Lock-On devices, this is a simple 7 hour build, A day of design work and test printing (Currently in paint) but some nice features, and some new test features.
November-16-2020
changed the wheel size so it should be a drop in fit now
changed the display size for a more drop in fit
electronics fit perfectly into the new v2 body (micro switches and dimensions I used are here: https://www.amazon.ca/gp/product/B00O9YOEDC/ref=ppx_yo_dt_b_asin_title_o05_s00?ie=UTF8&psc=1 )
What do I need for this kit?
2-3x Green 5mm LED
1x Red 5mm LED
1 Micro switch
Wiring for lights
Battery (Double A or cr2032)
4 6mm M3 cap hex screws
Design features
simple print
mounts for LED's and on off switch
bolts tie into the prop design and allow access to the electronics
variable front display, the grid can be printed alone from a background plate allowing multi material printing (black background and green grid) or printing in clear and paint blocking to allow back LED colour projecting.
A nice bright top light
Insets for all parts for simple assembly
Assembly:
Print and or paint the wheels black, glue into the insets
Print and or paint the body in white
Print the display using the type of print you want (multi material or clear) and glue to the inner frame
Optional: Mount the switch and glue in place, mount the red LED to the top and the green LEDs to the front posts), wire together to the battery
Glue the back hub into the inset provided
Screw the top down carefully to the body posts (DO NOT OVERTIGHTEN)
Enjoy!
Issues:
the line cuts may not be the best, this was my fist time trying to do this, and it's in tinkercad so it is not designed for it. I think it came out well. My first print had some minor issues with placement, LED's and switch all too close in the same area, and after test printing and testing the front display I found for my LED's I needed 2-3 so I added a holding post for a second and moved the switch back towards the center so it's not an issue
be careful removing the front support on the main body, the top crossover is thin!!!! I did not break mine and once you glue the front display in it fully strengthens it.
Post print:
files the holes for the fit you need to friction fit the LED's (posts were fine, top led needed light filing
remove any elephants foot, widened the insets for this
bolt the top down, fit's nice.
file/sand the edges of the display if it is still tight, my first test needed some sanding, not much but it did need it.
I have tested the blackout paint on the alternate combined display (leaving the grid clear) and it works out excellent.
I have fully tested this print. Photos coming shortly after the paint dries. Any questions please ask.
If you are interested in other models from this movie check out my Spider-bot thing here: https://www.thingiverse.com/thing:4652780
Enjoy! If you enjoy my prints please consider donating, even a dollar helps :) it's always appreciated :) https://www.paypal.me/RychardK
Similar models
thingiverse
free

LED Kataan Probe
...r pla and then painted the parts that i didn't want to glow.
this was made to be a nice addition to my christmas tree :) \//
thingiverse
free

FB Cmd Mic Test by fullcarbonbike
...y in a clear filament and i'm painting it silver. the end of the mic can be left clear and it looks like a lens in the movie.
thingiverse
free

WE Hi-Capa Front Sight by Creeping86
...ng super glue on the base and on the bottom of the sight. painted a white dot with some miniature paint and it's ready to go.
thingiverse
free

Recording Warning Light for Studio by sdj544
...ip light from my enclosure.
hooked up to a 9v battery and an extra spst switch i had.
used hot glue gun to secure wires and leds.
thingiverse
free

Destiny Ghost Body Round LED by cheesemcgee
...to the body front, just sand it down a bit, otherwise it's difficult to remove the led when you need to change the batteries.
thingiverse
free

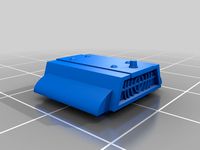
JR programmer v2 case by madmon
...hen slow insert your jr programmer and lightly move the printed switches to line up to the jrp switcher. the top is pressure fit.
thingiverse
free
Multi LED Switch by Deepsiks
... inner so the button will press down on it and leds are inserted from the bottom so they protrude into the switch body.
have fun.
thingiverse
free

Humpty Lock - Shugo Chara by Drelen
...th a top coat of glitter paint.
.
i still need to put on a glossy clear coat for protection but so far it is coming along nicely.
thingiverse
free

WLtoys K989 body
... this you will need to scale only the width to 76mm as i made a mistake in the design and this is easier than changing the design
thingiverse
free

Leviathan Axe Gods of War 4
...top and bottom are needed for this, otherwise it will not fit. use acrylic model paint afterwards to give it the color of choice.
Runaway
3d_export
$5

IAI Sparrow X lowpoly concept fighter
...also enables short take off and landing on smaller runaway to operate even from the streets. it is equipped...
thingiverse
free

mk3s fan shroud to prevent thermal runaway
...ting at higher temperatures. this modification has so far fixed the problem for me. i could only find the stl, not the step file.
thingiverse
free

Runaway heart by DuncanShadow
...ureshttps://www.instagram.com/duncanlouca
i also have a website where i have other sculpts for sale.https://www.duncanshadow.com/
thingiverse
free
GASLANDS RC BOMB- RUNAWAY STYLE (LOCK-ON)
... resin printer.
update: modded them to have the target part removed..since it may not even print with some printers at its size.
thingiverse
free

Runaway Replacement Headband by AdamoRobinson
...ou'll need:
2x 20mm m2 bolts
2x m2 nuts
the m2 nut traps along the band itself are for bolting a cushion to, once i model it.
thingiverse
free

Runaway Island Christmas Village House by JmsDwh
...translucent filament. if you mask the windows and paint the model, the light from an led tealight will shine through the windows.
thingiverse
free

Ender 3 Pro filament runaway sensor, z axis endstop salvage - remix by Tse_Tso
...eems that creality had changed the design slightly. anyway, original design is not working for ender 3 pro.
print and enjoy :)
thingiverse
free

Runaway Blimp aka Raytheon JLENS by mstyle183
...y-military-2015-10 http://foxtrotalpha.jalopnik.com/this-giant-sensor-packed-balloon-is-about-to-watch-over-1635655334/1739241144
thingiverse
free

staff of one by Silkburrito27
...the staff of one nico minoru wields in the runaway hulu series will upload more pictures when i'm able...
Rkxone
thingiverse
free

Militech by rkxone
...militech by rkxone
thingiverse
militech sign
for more of my wall art: https://www.thingiverse.com/rkxone/collections/wall-art
thingiverse
free
Avengers Bookmark by rkxone
...kxone
thingiverse
avengers bookmark
check out my other bookmarks here: https://www.thingiverse.com/rkxone/collections/bookmarks
thingiverse
free
Atari Bookmark by rkxone
...y rkxone
thingiverse
atari bookmark
check out my other bookmarks here: https://www.thingiverse.com/rkxone/collections/bookmarks
thingiverse
free
Viper Bookmark by rkxone
...y rkxone
thingiverse
viper bookmark
check out my other bookmarks here: https://www.thingiverse.com/rkxone/collections/bookmarks
thingiverse
free
Ghostbusters Bookmark by rkxone
...e
thingiverse
ghostbusters bookmark
check out my other bookmarks here: https://www.thingiverse.com/rkxone/collections/bookmarks
thingiverse
free

Punisher Bookmark by rkxone
...kxone
thingiverse
punisher bookmark
check out my other bookmarks here: https://www.thingiverse.com/rkxone/collections/bookmarks
thingiverse
free
Shadowrun Bookmark by rkxone
...kxone
thingiverse
shadowrun bookmark
check out my other bookmarks here: https://www.thingiverse.com/rkxone/collections/bookmarks
thingiverse
free

Shadowhunter Bookmark by rkxone
...e
thingiverse
shadowhunter bookmark
check out my other bookmarks here: https://www.thingiverse.com/rkxone/collections/bookmarks
thingiverse
free

Stormtrooper Bookmark by rkxone
...e
thingiverse
stormtrooper bookmark
check out my other bookmarks here: https://www.thingiverse.com/rkxone/collections/bookmarks
thingiverse
free

Biotechnica Sign by rkxone
...hingiverse
biotechnica sign from cyberpunk 2077
for more of my wall art: https://www.thingiverse.com/rkxone/collections/wall-art
Bot
turbosquid
$19

Bot
... available on turbo squid, the world's leading provider of digital 3d models for visualization, films, television, and games.
turbosquid
$1
bot
... available on turbo squid, the world's leading provider of digital 3d models for visualization, films, television, and games.
turbosquid
free

Bot
... available on turbo squid, the world's leading provider of digital 3d models for visualization, films, television, and games.
3d_export
$10
scanner bot
...scanner bot
3dexport
cool scanner bot who scans for fixing things...
3d_ocean
$9
Apc Bot
...n bot games toys
an all-purpose-constructo-bot. for cartoon purposes. the model is not rigged. please use vray adv for rendering.
3d_export
$75
Bot 3D Model
...bot 3d model
3dexport
robot bot man kiborg character
bot 3d model evgen 19504 3dexport
turbosquid
free

Eye Bot
...eye bot
turbosquid
free 3d model eye bot for download as fbx on turbosquid: 3d models for games, architecture, videos. (1514059)
turbosquid
$29
Gorill-bot
...bosquid
royalty free 3d model gorill-bot for download as fbx on turbosquid: 3d models for games, architecture, videos. (1239456)
turbosquid
$25

Lamp Bot
...bosquid
royalty free 3d model lamp bot for download as blend on turbosquid: 3d models for games, architecture, videos. (1230121)
turbosquid
$10
Spectre Bot
...osquid
royalty free 3d model spectre bot for download as fbx on turbosquid: 3d models for games, architecture, videos. (1616378)
Movie
3d_ocean
$9

Movie Theater
...movie theater
3docean
movie theater
movie theater building model
3ddd
$1
OFME / MOVIE
...ofme / movie
3ddd
ofme , movie
в архиве 8 моделей
3d_export
$5

movie clapboard
...xport
movie clapboard. lowpoly. here is video: >>>> https://rumble.com/vrjkbb-lowpoly-movie-clappboard-3d-model.html
3d_export
$5
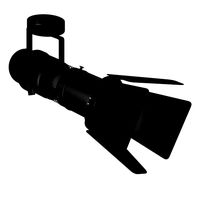
syprocom movie
...5 mm length 320 mm https://svetsupermarket.ru/spoty/potolochnie-i-nastennie-spoty/potolochnye-spoty/movie-mv-movie_mv_181_18.html
design_connected
$16
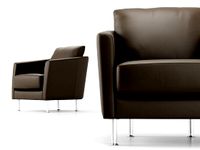
2045 Movie
...2045 movie
designconnected
intertime 2045 movie computer generated 3d model. designed by crea team intertime .
turbosquid
$29

Movie Popcorn
...quid
royalty free 3d model movie popcorn for download as fbx on turbosquid: 3d models for games, architecture, videos. (1238386)
turbosquid
$10

Movie Slate
...ty free 3d model movie slate for download as ma, obj, and fbx on turbosquid: 3d models for games, architecture, videos. (1265231)
turbosquid
free

movie Screen
... 3d model movie screen for download as 3ds, max, obj, and fbx on turbosquid: 3d models for games, architecture, videos. (1452759)
3ddd
free
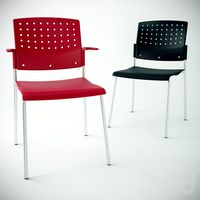
MOVIE 1 VISI
...movie 1 visi
3ddd
стул
стул офисный. movie 1 visi
turbosquid
$50

Movies Animation
... available on turbo squid, the world's leading provider of digital 3d models for visualization, films, television, and games.
Lock
turbosquid
$1

Lock
...ck
turbosquid
royalty free 3d model lock for download as fbx on turbosquid: 3d models for games, architecture, videos. (1286851)
3d_export
$5

lock handle
...lock handle
3dexport
lock handle
3d_export
$5
hinged lock
...hinged lock
3dexport
hinged lock
turbosquid
$1
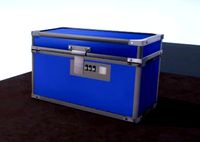
Lock Box with combination lock
...ee 3d model lock box for download as 3ds, obj, fbx, and blend on turbosquid: 3d models for games, architecture, videos. (1215494)
turbosquid
$2
Lock
...
royalty free 3d model lock for download as max, obj, and fbx on turbosquid: 3d models for games, architecture, videos. (1452660)
turbosquid
$35

Lock
... available on turbo squid, the world's leading provider of digital 3d models for visualization, films, television, and games.
turbosquid
$24

lock
... available on turbo squid, the world's leading provider of digital 3d models for visualization, films, television, and games.
turbosquid
$10

Lock
... available on turbo squid, the world's leading provider of digital 3d models for visualization, films, television, and games.
turbosquid
$6

Lock
... available on turbo squid, the world's leading provider of digital 3d models for visualization, films, television, and games.
turbosquid
$4
Lock
... available on turbo squid, the world's leading provider of digital 3d models for visualization, films, television, and games.