Thingiverse
Lithophane Bedside Light by NS_e
by Thingiverse
Last crawled date: 3 years, 1 month ago
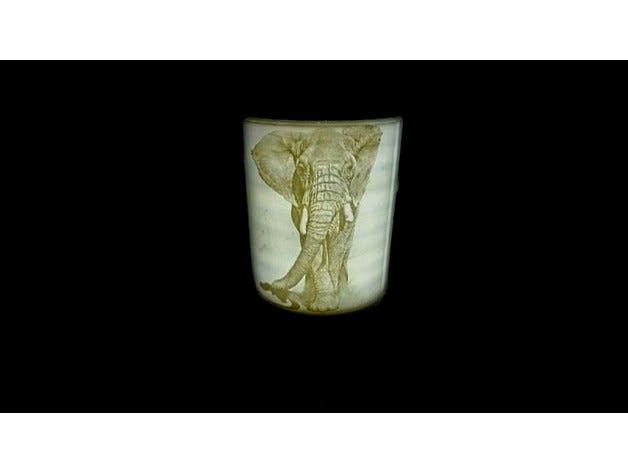
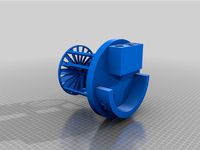
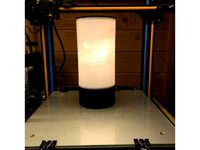
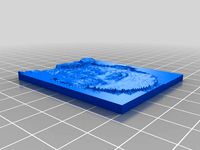
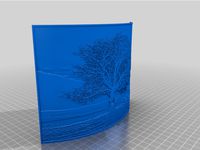
My first attempt of a lithophane project. My niece draws fantastic photo-realistic pictures in pencil, I thought a lithophane light would show off her work really well. But as I have just been experimenting with an Arduino starter kit it just had to be motorised.
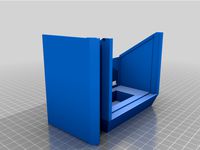
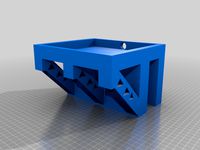
The parts were designed using FreeCad, which is a free 3d cad program. For an exploded view of the light or to edit parts, load the FCStd files into FreeCad.
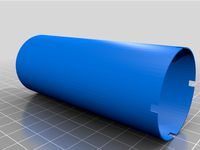
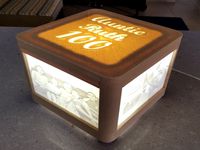
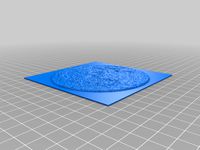
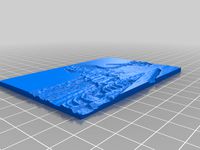
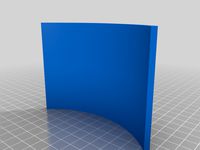
The shades were created on 3dp.rocks/lithophane. Positive image. Model, Maxsize 300mm, curve 360, vectors per pixel 5. Picture size needs to be 2.83 horizontal to each 1 vertical. i.e. 2150 x 760 pixels. This will then give the correct diameter to height when set at 300mm on Maxsize. Once the STL of the shade is obtained this is scaled up in the slicer by 140%, to give 150mm high & about 143mm diameter.
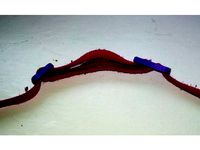
The stepper motor is a 28BY J48 as in many Arduino starter kits 5V driven through a ULN2003 Darlington driver. The LEDs are 12V white strips, I mounted 18 individual strips of 3, one strip of 3 in each segment of the light guides. Each one driven by through a ULN2003 channel as I was trying to make it so that the shade could be full height or 1/3 or 2/3 height. As 18 output channels were needed I had to use an Arduino mega.
The gear ring has 3 holes for magnets, these travel over a hall detector, this lines up the frames on the shade with the lights and tells the program what shade is fitted. The lens is printed in some pearl PLA which I had leftover it works very well as diffuser.
The Mk1 rotation didn’t work, so there are a few spacers included to move things up for the new gears, the back plate could be printed a little longer, instead of having the extension.https://youtu.be/A5WLvKnvdqg
The parts were designed using FreeCad, which is a free 3d cad program. For an exploded view of the light or to edit parts, load the FCStd files into FreeCad.
The shades were created on 3dp.rocks/lithophane. Positive image. Model, Maxsize 300mm, curve 360, vectors per pixel 5. Picture size needs to be 2.83 horizontal to each 1 vertical. i.e. 2150 x 760 pixels. This will then give the correct diameter to height when set at 300mm on Maxsize. Once the STL of the shade is obtained this is scaled up in the slicer by 140%, to give 150mm high & about 143mm diameter.
The stepper motor is a 28BY J48 as in many Arduino starter kits 5V driven through a ULN2003 Darlington driver. The LEDs are 12V white strips, I mounted 18 individual strips of 3, one strip of 3 in each segment of the light guides. Each one driven by through a ULN2003 channel as I was trying to make it so that the shade could be full height or 1/3 or 2/3 height. As 18 output channels were needed I had to use an Arduino mega.
The gear ring has 3 holes for magnets, these travel over a hall detector, this lines up the frames on the shade with the lights and tells the program what shade is fitted. The lens is printed in some pearl PLA which I had leftover it works very well as diffuser.
The Mk1 rotation didn’t work, so there are a few spacers included to move things up for the new gears, the back plate could be printed a little longer, instead of having the extension.https://youtu.be/A5WLvKnvdqg
Similar models
thingiverse
free
Simple lithophane box for 4in square 3mm wide lithophanes
...gs to fit the holes. i built this so that it did not need to be glued together and the lithophanes could be changed out. enjoy!
thingiverse
free

Super Bot Gears - a 3D-printed Arduino starter kit
...ybgqdcdxoum
arduino project hub:https://create.arduino.cc/projecthub/bzqp/super-bot-gears-a-3d-printed-arduino-starter-kit-91485e
thingiverse
free

Enclosure for Arduino Nano and ULN2003 by atlantisq
...o pieces.
designed to work with the astra tracker: https://www.thingiverse.com/thing:4761585 but should work with other projects.
thingiverse
free

Arduino starter kit electro motor frame by benitos77
...arduino starter kit electro motor frame by benitos77
thingiverse
case to hold electro motor of the arduino starter kit
thingiverse
free

Geared Clock Remix by 3DMB
... .2 each to fit the gears loosely.
put the minute and hour gears on with them set at 12 o'clock position. (facing each other)
thingiverse
free
Lithophane Housing by GingerTwin57
...er.com). the leds and lithophane are properly spaced for even lighting. i used 12v led light strip and got a nice warm backlight.
thingiverse
free

Lithophane Light Box Desktop Organizer Pencil
...ramed%20lithophane.html
width = 100
height = 133
depth = 7.5 (for the frame, used 3mm for lithophane thickness)
base height = 5mm
thingiverse
free
Strap shortener buckle/clip by tombrazier
...hese clips and they work a charm. the strap is 7mm wide. you could easily remix this for any strap. the freecad file is included.
thingiverse
free
Lithophane Carousel by Mrdjflores
...ed to using geared dc motor, with a variable dc converter so i could adjust speed.
excel file contains list of parts from amazon.
thingiverse
free
Lithophane Lamp
... the letters are cutout 0.6mm deep. i also created a blank lid - you can print in like that or add some cutouts in a cad program.
Ns
thingiverse
free

Four Ns by Nacho
...four ns by nacho
thingiverse
thingiverse
free
Hutprofil-Tragschiene NS 35 by crissicross
...hutprofil-tragschiene ns 35 by crissicross
thingiverse
hutprofil-tragschiene ns 35 80mm lang
thingiverse
free

key chain ns by nschweihs
...key chain ns by nschweihs
thingiverse
keychain
thingiverse
free
Nobsound Holder (ns-10G) by Gen4o
...nobsound holder (ns-10g) by gen4o
thingiverse
quick deatach
thingiverse
free
![NEO SYSTEM , Guardian [CONSULTAN] , NS-01-B by NeoWang](/t/8888886.jpg)
NEO SYSTEM , Guardian [CONSULTAN] , NS-01-B by NeoWang
...ystem , guardian [consultan] , ns-01-b by neowang
thingiverse
my first robot. ^_^ / neo system , guardian [consultan] , ns-01-b
thingiverse
free

Yamaha NS-F51 speaker leveling feet by ansisliepkalns
...nap-on feet for yamaha ns-f51 speakers that allow leveling on uneven floors and protecting the speaker corners from vacuum robot.
thingiverse
free

Joint clamp for NS 29/32 lab glassware Keck by danikw
... by danikw
thingiverse
a clamp for ns 29/32 glassware, it fits very thightly, so you might have to scale it up by a few percent.
thingiverse
free

Rice paddle holder for Zojirushi NS-ZCC-18 by chronarion
...rice paddle holder for a zojirushi rice cooker model ns-zcc-18. it may fit other models as well. i lost mine so i made a new one.
thingiverse
free

NS 1 Printbot - Spacers by jotauve
...es it able to navigate inside a corridor is also attached.
video of ns-1 working here: http://www.youtube.com/watch?v=xkkjglzjecm
thingiverse
free

NS Elo227 Dutch railways by Mikevd
...ould be added. the model prints to reasonable detail on an ultimaker. commercial 3d printing would result in an even finer model.
Bedside
thingiverse
free

Bedside Table by Jbech002
...bedside table by jbech002
thingiverse
it is a square bedside table.
thingiverse
free

bedside table by greg2e
...bedside table by greg2e
thingiverse
bedside table by gregory [created on 3dtin]
thingiverse
free

bedside lamp - Abarjur by IngoBoehm
...bedside lamp - abarjur by ingoboehm
thingiverse
bedside lamp
thingiverse
free
bedside phone holder
...bedside phone holder
thingiverse
simple bedside phone holder designed to fit over a 1 3/4 x 4 peice of lumber
thingiverse
free

acrylic bedside lamp by framlin
...acrylic bedside lamp by framlin
thingiverse
a bedside light that is illuminated through transperent acrylic planes
thingiverse
free

Bedside Lamp by Magier7
...bedside lamp by magier7
thingiverse
table lamp
thingiverse
free

Bedside lamp by Maker00
...uch bedside lamp
to make this lamp you need :
translucent paper
esp8266
jumper
mini breadboard
rgb led
usb câble
capacitif sensor
thingiverse
free

Bedside Gadgets Holder by cashlo
...cashlo
thingiverse
simple fully customizable bedside organizer for holding gadgets, from one phone to a whole family of gadgets.
thingiverse
free

Bed Bud - Modular BedSide Organizer by dave4506
...bed bud - modular bedside organizer by dave4506
thingiverse
a modular bedside organizer
thingiverse
free

Smartphone Bedside Table by jeje95
...eje95
thingiverse
little bedside table to use your smartphone as an alarm clock, very useful when you use your phone to wake up.
Lithophane
thingiverse
free

at at lithophane by philip3dprinter
...at at lithophane by philip3dprinter
thingiverse
at at lithophane
thingiverse
free
Lithophane universe
...lithophane universe
thingiverse
it is a lithophane if the universe
thingiverse
free
Lithophane Moon
...lithophane moon
thingiverse
lithophane moon
thingiverse
free
Lithophane Sphinx
...lithophane sphinx
thingiverse
lithophane sphinx
thingiverse
free

Lithophane NewYork
...lithophane newyork
thingiverse
lithophane newyork
thingiverse
free
Lithophane by sromanos
...lithophane by sromanos
thingiverse
experimenting with lithophanes
thingiverse
free
Tree Lithophane
...tree lithophane
thingiverse
a lithophane of a tree
thingiverse
free

Toyota Lithophane
...toyota lithophane
thingiverse
toyota lithophane logo print.
thingiverse
free
Santa Lithophane
...santa lithophane
thingiverse
a classic santa scene as a lithophane.
thingiverse
free

jse lithophane
...jse lithophane
thingiverse
lithophane of jacksepticeye's tank
E
thingiverse
free

Porta e- Juice e Atomizador by marciommr
...porta e- juice e atomizador by marciommr
thingiverse
porta e- juice e atomizador
thingiverse
free

E-Vic E-Cigarette Holder by silisand
...e-vic e-cigarette holder by silisand
thingiverse
e-cigarette holder for e-vic or other samsung 18650 battery sized e-cigarette
thingiverse
free

N I C E M E M E by MItchellBarofo
...n i c e m e m e by mitchellbarofo
thingiverse
a nice meme
thingiverse
free

Chip-E Robot Wall-E Edition- Wall-E the Movie by AnthonyBagliore1
...chip-e robot wall-e edition- wall-e the movie by anthonybagliore1
thingiverse
this a remix of the chip-e.
thingiverse
free

E-Pipe for E-Cigarettes by Easily3D
...garette or e-hookah by making it look like an "old-timey" smoking pipe. a perfect addition to any steampunk enthusiast.
thingiverse
free

The Zip-E Chip-E by JDP175
...down for an aerial adventure. at the end of his ride he will come to a stop releasing the line and landing on the lower platform.
thingiverse
free

Wall-E
...wall-e
thingiverse
realistic and scale version of wall-e. print with a low resolution to see every detain on him.
thingiverse
free

Burn E by TippyRocks
...burn e by tippyrocks
thingiverse
burn-e from the movie wall-e
made in 3ds max
thingiverse
free
E Keyring
...e keyring
thingiverse
this is a key
thingiverse
free

Letra E by Xbertus
...letra e by xbertus
thingiverse
letra e
Light
thingiverse
free

Light Bulb Light by rubyrox544
...light bulb light by rubyrox544
thingiverse
it is a light that uses a led light which can light up a room.
thingiverse
free

Night-light Tap-light by mrAkuaku
...p-light night-light/mood-light
here's a link to that project.http://www.instructables.com/id/beautiful-tap-light-night-light/
thingiverse
free

Bike Light
...bike light
thingiverse
bike light
thingiverse
free
Light Bulb
...light bulb
thingiverse
light bulb
thingiverse
free

Snowman light
...snowman light
thingiverse
snowman light
thingiverse
free

minecraft light
...minecraft light
thingiverse
minecraft light
thingiverse
free

USB Stick Light (night light) by northriver
...t light) by northriver
thingiverse
a 3d printed cover for a usb light stick.
it could be used as a night light or reading light?
thingiverse
free
Road Light, Street Light by silvanus321
...road light, street light by silvanus321
thingiverse
use the hair dryer to curve the pole.
print in 120% to fit the led light.
thingiverse
free
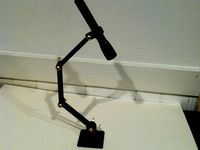
Mag Light Task light by khiebert
...mag light task light by khiebert
thingiverse
articulated arm for mini mag-light for those jobs that require three hands
thingiverse
free
Light shade for can lights by JustinSpanier
...he light from reflecting off of the tv. two of these per light seems to do the trick. i just used tape to attach them together.