Thingiverse
LCD 12864 case a.i.o. by fains684
by Thingiverse
Last crawled date: 4 years, 7 months ago
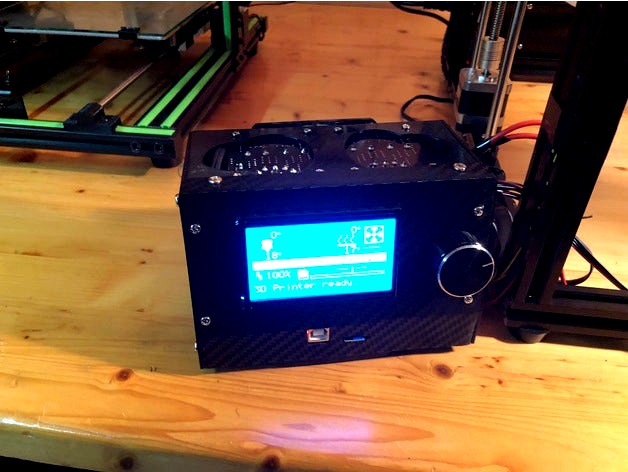
Case semplice e compatto per riunire tutta l'elettronica di una stampante, adatta per ospitare: schermo LCD 12862, scheda logica RepRap e 2mosfet per HotBed e HotEnd.
Materiale necessario all'assemblaggio:
8 viti M3 x 30 (Lcd e scheda logica)
8 viti M3 x 20 (2 mosfet)
10 viti M4 x15 (assemblare parti laterali
1 ventola 80mm x 80mm
Fascette da elettricista
L' assemblaggio è veloce ed intuitivo, tuttavia seguite le foto "guida" e non dovreste aver problemi.
NOTE:
Prima di serrare la parte superiore (Piastra Mosfet), cablate i Mosfet.
Usate le fascette da elettricista per bloccare la ventola
collegate la ventola direttamente all'alimentatore
Simple and compact case to bring all together the electronics of a printer, suitable to accommodate: 12862 LCD screen, logic board RepRap and 2mosfet for HotBed and HotEnd.
Material required for assembly:
8 M3 x 30 screws (LCD and logic board)
8 M3 x 20 screws (2 mosfets)
10 M4 x15 screws (assemble side parts
1 fan 80mm x 80mm
Electrician clamps
The Assembly is quick and intuitive, but follow the "photo guide" and you haven't any problems.
NOTE:
Before tightening the upper part (piastra Mosfet ), wire the Mosfet.
Use the electrician clamps to lock the fan
connect the fan directly to the power supply