Thingiverse
Kral PB sling adaptors by jonnyg30
by Thingiverse
Last crawled date: 4 years ago
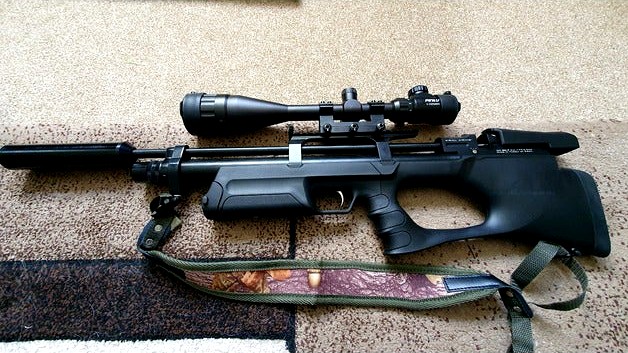
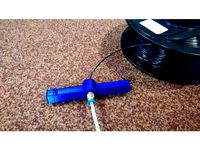
Adaptors to fit a sling to the Kral Puncher Breaker bullpup.
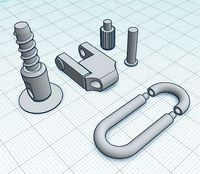
The fore grip is is too short allow effective mounting of a sling swivel without it getting in the way. The first adaptor allows the sling to be mounted further up keeping it out the way and ensuring the rifle sits better when slung over the shoulder. It does not impede access to the mag storage on the synthetic stock model.
The second part is a simple shaped "nut" to allow secure fixing to the rear of the stock on synthetic models. (I'd advise putting the stud a good few mm further forward than I have so it doesn't interfere with the butt pad, mine only just fit)
WARNING/DISCLAIMER:
1) Use this at your own risk. Choose your material and print settings wisely to gain the strongest print possible. I strongly advise inspecting the part for any defects and testing over something soft such as a sofa or a bed in case Newton decides to have his way with your rifle should the part fail! I've had no issues with mine since produced.
2) Do NOT attempt to simply screw the sling stud into the part, all you will do is cause it to split.
PARTS REQUIRED:
Standard front and rear sling stud set (self tapping thread)
PRINT SETTINGS:
All Parts printed in ABS @ 0.2mm layer height (best layer adhesion on my printer), no supports necessary and 100% infill. I added 1% increase all axis to account for shrinkage.
FINISHING:
This part needs to be a "snug" fit, so you will need to file/sand the the rings to final dimensions as necessary (shouldn't take much, mine only required a bit of smoothing). I decided to sand down and acetone smooth my part so it looked a bit nicer and sealed all the layers
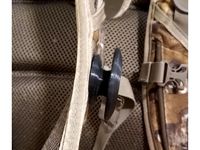
fitting the studs: ensure plastic washer is not fitted to stud. Grasp the stud in a pair of pliers or similar and gently heat with a jet lighter/small blowtorch or whatever you can find. Do not over heat! it needs to be just hot enough to soften the plastic (between 10-20 seconds of heating with a jet lighter worked for me). carefully screw in until resistance is felt, wait a few seconds for plastic to set then unscrew and repeat the process. Keep doing this until the stud is fully inserted but don't worry about it lining up at this point (this took several cycles for me). fit plastic spacer washer, screw stud in and line up as necessary.
For the rear stud on synthetic stocks, carry out the above off the rifle with the shaped nut. pilot drill the stock and then fit as normal.
The fore grip is is too short allow effective mounting of a sling swivel without it getting in the way. The first adaptor allows the sling to be mounted further up keeping it out the way and ensuring the rifle sits better when slung over the shoulder. It does not impede access to the mag storage on the synthetic stock model.
The second part is a simple shaped "nut" to allow secure fixing to the rear of the stock on synthetic models. (I'd advise putting the stud a good few mm further forward than I have so it doesn't interfere with the butt pad, mine only just fit)
WARNING/DISCLAIMER:
1) Use this at your own risk. Choose your material and print settings wisely to gain the strongest print possible. I strongly advise inspecting the part for any defects and testing over something soft such as a sofa or a bed in case Newton decides to have his way with your rifle should the part fail! I've had no issues with mine since produced.
2) Do NOT attempt to simply screw the sling stud into the part, all you will do is cause it to split.
PARTS REQUIRED:
Standard front and rear sling stud set (self tapping thread)
PRINT SETTINGS:
All Parts printed in ABS @ 0.2mm layer height (best layer adhesion on my printer), no supports necessary and 100% infill. I added 1% increase all axis to account for shrinkage.
FINISHING:
This part needs to be a "snug" fit, so you will need to file/sand the the rings to final dimensions as necessary (shouldn't take much, mine only required a bit of smoothing). I decided to sand down and acetone smooth my part so it looked a bit nicer and sealed all the layers
fitting the studs: ensure plastic washer is not fitted to stud. Grasp the stud in a pair of pliers or similar and gently heat with a jet lighter/small blowtorch or whatever you can find. Do not over heat! it needs to be just hot enough to soften the plastic (between 10-20 seconds of heating with a jet lighter worked for me). carefully screw in until resistance is felt, wait a few seconds for plastic to set then unscrew and repeat the process. Keep doing this until the stud is fully inserted but don't worry about it lining up at this point (this took several cycles for me). fit plastic spacer washer, screw stud in and line up as necessary.
For the rear stud on synthetic stocks, carry out the above off the rifle with the shaped nut. pilot drill the stock and then fit as normal.
Similar models
cg_trader
$3
1 inch Rifle Sling Swivel and Stud | 3D
...ble for other projects.
i have test printed at 0.1 layer height and 100% infill took just over a metre of filament for all parts.
thingiverse
free
Cyma CM028 AK47 tactical M4 stock adaptor by Camaleonte
...28c.
print with 100% infill on the bottom part. from tube upwards it never broke.
requires longer m5 screws (i guess 15mm or so).
thingiverse
free

Orion Blasters Lynx Ergo Stock Edition - QD and Sling Bar by ahalekelly
...ersions, sling bar fits a 1" sling and uses a 10-24 x 1-1/2" screw. qd geometry stolen from the endersavestheday remix.
thingiverse
free

Bastl Kastle 1.5 Knob Upgrade by 3DForce
... used white ink to fill mine and it looks really nice. heat hole with a lighter while holding upright if they are a little tight.
thingiverse
free

Canon SX60HS Telescope adaptors (1.25",2",1.25 Fit over lense by owenherlihy
...et screw.
i also included the solidworks files for anyone who wishes to edit them to fit their needs.
enjoy, and happy astronomy!
thingiverse
free

CoreA8 Slim Tronxy adaptor
...h the two screws. now adjust tronxy up/down to distance you want from bed (but above nozzle, of course) then tighten screws down.
thingiverse
free

Savage Rascal Stock Extension by depletedyourcranium
... small for the sling swivel stud in your application to avoid splitting the print during installing (drill out if its too small).
thingiverse
free

Tasco Rifle Scope Cap by 3DMaka
...oosely...measured 0.40mm difference between front and rear.
can be used for rear end.. just adjust "slicer" percentage
thingiverse
free
Sling Stop
...screw into the hole in the back of the sling stop, tighten but be careful not to strip the hole.
pack your stuff and go hunting.
thingiverse
free

Spiderweb leveling knob & springy thing by m4RT1n
...on a screwdriver to push it all the way in the mount
have fun...
if you like it please follow me or/and give it a like :) , thx
Jonnyg30
thingiverse
free

Remixed Meepo remote holder by jonnyg30
...break off's and improve longevity also cut back the base to give it a more interesting look and make some savings on filament
thingiverse
free

rotating mount chest rig remix by jonnyg30
...ner.
https://www.thingiverse.com/thing:1198982
printed in abs at 0.2mm layer height, 100% infill and acetone smoothed to finish.
thingiverse
free

Trampa charge port blank by jonnyg30
...0% infill. 20-25mins to print. the "t" was filled with paint afterwards and everything smoothed and polished to finish.
thingiverse
free

Remixed FTX vantage spoiler by jonnyg30
... how well it took the punishment. test printing a replacement spoiler mounting bracket i designed, will upload later if it works.
thingiverse
free

FrenzyIncarnate's Hydra 40mm fan cover -Remixed for better airflow by jonnyg30
...up the support settings so it looks a little rough in the photos but i'm sure it's nothing a second attempt won't fix
thingiverse
free

Remixed QX95s battery bay/skids by jonnyg30
...inking was if i get other batteries i can just switch the the battery bay to match the battery size i want to use nice an easily.
thingiverse
free

Trampa motor light mount by jonnyg30
...mm layer height, 100% infill, no supports needed. as usually with smaller parts, slower is better. print time is around 15-20mins
thingiverse
free

Lay-Z-spa garden hose adapter by jonnyg30
... of the hose adapter.
use with the shortest length of hose you can as a long hose could cause too much back pressure on the pump.
thingiverse
free
Combust's hex spool holder - front cross bar with filament feed by jonnyg30
...to and everything fits with those dimensions) let me know and i'll have another go. also please let me know if it works too!!
Kral
3ddd
$1

Tomas Kral настольная лампа
...tomas kral настольная лампа
3ddd
tomas kral
настольная лампа от современного дизайнера tomas kral, маты настроены
3ddd
$1

Terracotta от дизайнера Tomas Kral
... дизайнера tomas kral
3ddd
tomas kral
модель выполнена по фотографиям.http://curated.ru/design/terracotta-by-tomas-kral
3ddd
$1

настольная лампа
...настольная лампа 3ddd tomas kral настольная лампа из...
thingiverse
free

Kral Sakir keychain by cowmoulder
...kral sakir keychain by cowmoulder
thingiverse
kral sakir keychain
3d_sky
free
Tomas Kral table lamp
...dsky
minimalism modern trendy lamp table new plastic floor lamp hightech
table lamp from the modern designer tomas kral, mats set
3d_sky
free

Terracotta lamp from designer Tomas Kral
...signer tomas kral
3dsky
terracotta
the model is made from photographs.http://curated.ru/design/terracotta-by-tomas-kral
3dbaza
$3

Kral Ahsap Koltuk Takimi Sofa (338252)
...rt: obj<br>polys: 1715308<br>verts: 1743600<br>units: millimeters<br>dimension: 2117.45 x 840.78 x 805.35
thingiverse
free

remixed kral single shot mag
...s_kmn. top notch work mate, thank you very much.
printed in abs at both 0.2 & 0.1mm layer height, no support and 100% infill.
sketchfab
$100

PETA - İskender Lahdi / Alexander Sarcophagus
...4. yüzyıla ait, sidon kralı abdalonymos’a ait olduğu düşünülen kral lahiti. uzun cephesinde makedonya kralı büyük i̇skender’in perslerle yaptığı...
Sling
3d_ocean
$4

sling
...sling
3docean
child games sling slingshoot toys
sling model c4d r14 and 3dsmax 2010 file and obj texture materials
3ddd
$1
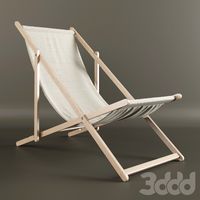
Sling Chair
...sling chair
3ddd
sling chair
design_connected
$16

Sling chair
...sling chair
designconnected
knoll sling chair computer generated 3d model. designed by pollock, charles.
design_connected
$13

Sling Ottoman
...sling ottoman
designconnected
thayer coggin sling ottoman computer generated 3d model. designed by baughman, milo.
turbosquid
$30

Sling Bag
...rbosquid
royalty free 3d model sling bag for download as max on turbosquid: 3d models for games, architecture, videos. (1364782)
turbosquid
$5

Sling chair
...osquid
royalty free 3d model sling chair for download as max on turbosquid: 3d models for games, architecture, videos. (1297890)
turbosquid
$34

Sling Chair
... available on turbo squid, the world's leading provider of digital 3d models for visualization, films, television, and games.
turbosquid
$4

Sling Glass
... available on turbo squid, the world's leading provider of digital 3d models for visualization, films, television, and games.
design_connected
$18

Sling Chair & Ottoman
...r & ottoman
designconnected
thayer coggin sling chair & ottoman computer generated 3d model. designed by baughman, milo.
turbosquid
$8

sling a plank knot
...g a plank knot for download as stl, x, 3ds, obj, fbx, and dae on turbosquid: 3d models for games, architecture, videos. (1667342)
Pb
turbosquid
$19

PB-WovenBasket
... available on turbo squid, the world's leading provider of digital 3d models for visualization, films, television, and games.
turbosquid
$7
Clutch PB
...model clutch pb for download as 3ds, dxf, obj, fbx, and blend on turbosquid: 3d models for games, architecture, videos. (1230418)
turbosquid
$9

PB-Sabrina Pendant
...id
royalty free 3d model pb-sabrina pendant for download as on turbosquid: 3d models for games, architecture, videos. (1306702)
turbosquid
$30
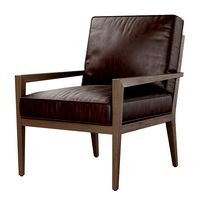
PB ANDREW LEATHER ARMCHAIR
... free 3d model pb andrew leather armchair for download as max on turbosquid: 3d models for games, architecture, videos. (1362330)
turbosquid
$10

PB VINTAGE TOWEL WARMER
...lty free 3d model pb vintage towel warmer for download as max on turbosquid: 3d models for games, architecture, videos. (1252521)
turbosquid
$5
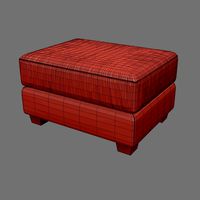
PB COMFORT LEATHER OTTOMAN
... free 3d model pb comfort leather ottoman for download as max on turbosquid: 3d models for games, architecture, videos. (1246284)
3ddd
$1

Potocco Lounge Chair Luna 758 PB
...potocco lounge chair luna 758 pb
3ddd
potocco
potocco lounge chair luna 758 pb
turbosquid
$49
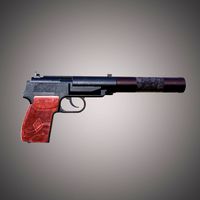
Makarov PB Silent Pistol
... available on turbo squid, the world's leading provider of digital 3d models for visualization, films, television, and games.
turbosquid
$9

PB Classic Milk Glass Pendant
... free 3d model pb classic milk glass pendant for download as on turbosquid: 3d models for games, architecture, videos. (1306714)
3ddd
$1

Pottery Barn PB Square Collection
...pottery barn pb square collection
3ddd
pottery barn
диван pottery barne коллекция pb square
размеры: ш 1900 мм г 870 мм в 870 мм
Adaptors
turbosquid
$15

Adaptor-2
...alty free 3d model adaptor-2model for download as dwg and ige on turbosquid: 3d models for games, architecture, videos. (1710809)
turbosquid
free

Adaptor plug
... available on turbo squid, the world's leading provider of digital 3d models for visualization, films, television, and games.
turbosquid
$20

Male DFP adaptor
... available on turbo squid, the world's leading provider of digital 3d models for visualization, films, television, and games.
turbosquid
$20

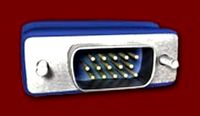
Female VGA Adaptor
... available on turbo squid, the world's leading provider of digital 3d models for visualization, films, television, and games.
turbosquid
$20
Male VGA Adaptor
... available on turbo squid, the world's leading provider of digital 3d models for visualization, films, television, and games.
turbosquid
$18

Memory stick adaptor
... available on turbo squid, the world's leading provider of digital 3d models for visualization, films, television, and games.
3d_export
$5

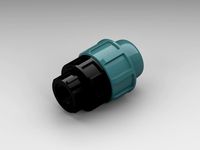
male union tee adaptor
...ame is male union tee adaptor , it is used in home and industrial area . if you want to get yhis parts blue print buy it from me
turbosquid
$20

Male M1 Digital Adaptor
... available on turbo squid, the world's leading provider of digital 3d models for visualization, films, television, and games.
turbosquid
$20

Male M1 Digital & Analog Adaptor
... available on turbo squid, the world's leading provider of digital 3d models for visualization, films, television, and games.
3d_export
$10
Samsung Travel Adapter 3D Model
...apter 3d model
3dexport
charger white travel adaptor battery charging device
samsung travel adapter 3d model g.lex 86392 3dexport