Thingiverse
KP3S LED Bar + Rocker Switch Mount by ericssonn
by Thingiverse
Last crawled date: 4 years, 11 months ago
Remix of J-Max's 10mm LED Rail.
print vertical with a brim, no supports needed.
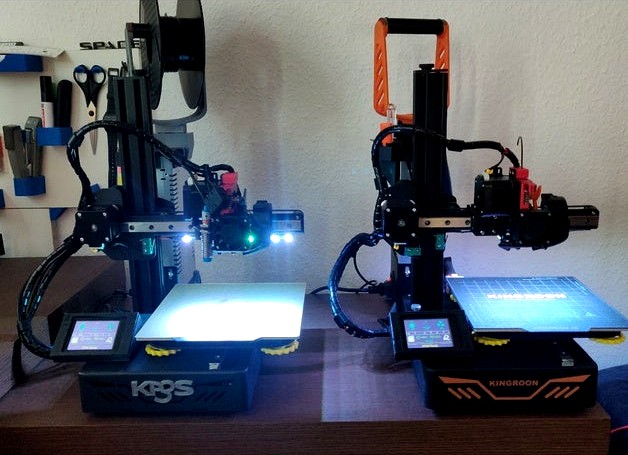
When looking at the left one, one can see that it has a slight angle to it, note that I will work on a v2 for the angled version because I find it irritating that the leds are seen when looking on it from the front. As of this moment I must say I prefer the straight one but I'm sure that'll change once I add the angled v2 version.
Edit: I added a rocker switch mount for this type of rocker switch: https://www.ebay.com/itm/5-Tlg-Kippschalter-12V-24V-220V-230V-10A-EIN-AUS-ON-OFF-2-Pin-Auto-KFZ-Boot/293689764552?hash=item4461462ac8:g:bXQAAOSwWGNfNgOo
The mounting mechanism works well, i assume you could remix something off the fly with the layout i made incase you wanna go with a different switch.
Even the switch case is printed without supports, print as given, just let it run and if neccessary remove any bad bridging. That worked great for me.
What I did to mount the switch case is take off the zip tie holding the cables (above X axis stepper motor), mount the switch and reattach the cables with another zip tie or some plastic/rubber coated tie wire.
print vertical with a brim, no supports needed.
When looking at the left one, one can see that it has a slight angle to it, note that I will work on a v2 for the angled version because I find it irritating that the leds are seen when looking on it from the front. As of this moment I must say I prefer the straight one but I'm sure that'll change once I add the angled v2 version.
Edit: I added a rocker switch mount for this type of rocker switch: https://www.ebay.com/itm/5-Tlg-Kippschalter-12V-24V-220V-230V-10A-EIN-AUS-ON-OFF-2-Pin-Auto-KFZ-Boot/293689764552?hash=item4461462ac8:g:bXQAAOSwWGNfNgOo
The mounting mechanism works well, i assume you could remix something off the fly with the layout i made incase you wanna go with a different switch.
Even the switch case is printed without supports, print as given, just let it run and if neccessary remove any bad bridging. That worked great for me.
What I did to mount the switch case is take off the zip tie holding the cables (above X axis stepper motor), mount the switch and reattach the cables with another zip tie or some plastic/rubber coated tie wire.