Thingiverse
key for crema valve Delonghi / AEG / Siemens in coffee machine by symbadisch
by Thingiverse
Last crawled date: 3 years, 3 months ago
EN
Hello everybody,
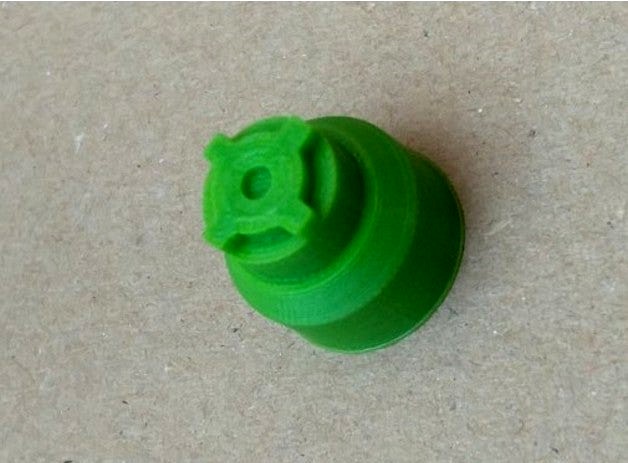
I made this great key for the Delonghi crema valve. My machine ECAM 23.420.SW.
It also fits at some AEG and Siemens models.
This key makes it possible to remove the crema valve and clean it regularly.
I would be very happy about a MAKE from you.
In order not to use up an unnecessary amount of filament for the key, I designed it as a plug-in attachment for a regular 1/4 "socket-wrench-handle with locking ball (handle with slide piece and 1/4" receptacle). This means that this plug-in attachment engages well and is secured against loss - see pictures.
Not all of you have such a socket wrench handle, I have provided the following additional drive types for you:
as hexagon: SW 5 + 6 (mm)
as Pozidriv cross recess profile: 2PZ
as a simple slot profile: 1 x 5.5 (mm)
but works good as a socket wrench: 1/4 " (quarter inch)
Application:
Please be careful when installing and removing so that none of the small parts get lost.
The crema valve consists of several parts (for me it consists of a plug, valve pin and spring).
Remove the strainer from the brewing unit, which is usually fastened with a central
Phillips screw.
Behind it is the piston of the brewing unit - the crema valve is installed here on the
front. Put your printed key on the plug of the built-in crema valve and put it in
snap into the 4 indentations.
Turn the key with very light pressure in both directions (clockwise / counter-clockwise)
turn back and forth. The spring inside pushes the valve
little by little (up towards your printed key).
My print settings:
Resolution 0.15 mm
Print speed 40 mm / s
Infill type: cube
Infill: 20%
Material: PLA or PETG
Printing time approx. 15 min.
All mentioned brands / brand names / institutions / organizations / product names / products and their pictures (for example photos) are used exclusively for the description of the depicted model and its construction / operation / handling and, where appropriate, also as installation instruction / information or source.
I have received no consideration for this from any of the trademark owners / institutions or organizations and this should also constitute "no advertising" for the brands / institutions or organizations listed here.
DE
Hallo zusammen,
ich habe diesen tollen Schlüssel für das Cremaventil von Delonghi erstellt.
Meine Maschine ECAM 23.420.SW.
Es passt auch bei einigen AEG und Siemens Modellen.
Damit ist es möglich das Cremaventil auszubauen und regelmäßig zu reinigen.
Über ein MAKE von Euch würde ich mich sehr freuen.
Um für den Schlüssel nicht unnötig viel Filament zu verbrauchen, habe ich diesen als Steckaufsatz für einen regulären 1/4" Steckschlüsselgriff mit Rastkugel konzipiert (Griff mit Gleitstück und 1/4" Aufnahme). Somit rastet dieser Steckaufsatz gut ein und ist verliergesichert - siehe Bilder.
Da nicht alle von Euch so einen Steckschlüsselgriff besitzen, habe ich die folgenden weiteren Antriebsformen bereitgestellt.
als Sechskant: SW 5 + 6
als Pozidriv Kreuzschlitzprofil: 2PZ
als einfaches Schlitzprofil: 1 x 5,5
funktioniert aber gut als Steckschlüssel: 1/4" (quarter inch)
Anwendung:
Bitte seit beim Ein- und Ausbau vorsichtig, damit keines der kleinen Teile Euch verlohren geht. Das Cremaventil besteht aus mehreren Teilen (bei mir aus Stöpsel, Ventilstift und Feder).
Sieb der Brüheinheit entfernen, meist ist dieses durch eine mittige
Kreuzschlitzschraube befestigt.
Dahinter liegt der Kolben der Brüheinheit - hier ist stirnseitig das Cremaventil
eingebaut. Euren gedruckten Schlüssel am Stöpsel des darin verbauten Cremaventils
aufsetzen und in den 4 Vertiefungen einrasten.
Mit ganz leichtem Anpressdruck in beide Richtungen
(Uhrzeigersin / gegen den Uhrzeigersinn) hin- und herdrehen.
Die darin befindliche Feder schiebt das Ventil nach und nach heraus
(nach oben in Richtung Eures gedruckten Schlüssels).
Meine Einstellungen:
Auflösung 0,15 mm
Druckgeschwindigkeit 40 mm/s
Infill Typ: Würfel
Infill: 20 %
Werkstoff: PLA oder PETG
Druckdauer ca. 15 min.
Alle im Text erwähnten Marken/ Markennamen / Institutionen / Organisationen/ Produktnamen / Produkte und deren Abbildungen (zum Beispiel Fotos) dienen ausschließlich zur Beschreibung des abgebildeten Models und dessen Bauweise / Funktionsweise / Handhabungsweise und gegebenenfalls auch als Montagehinweis / Informations- oder Quellenangabe.
Ich habe dafür von keinem der Markeninhaber / Institutionen oder Organisationen eine Gegenleistung erhalten und dies soll auch "keine Werbung" für die evtl. hier aufgeführten Marken / Institutionen oder Organisationen darstellen.
Hello everybody,
I made this great key for the Delonghi crema valve. My machine ECAM 23.420.SW.
It also fits at some AEG and Siemens models.
This key makes it possible to remove the crema valve and clean it regularly.
I would be very happy about a MAKE from you.
In order not to use up an unnecessary amount of filament for the key, I designed it as a plug-in attachment for a regular 1/4 "socket-wrench-handle with locking ball (handle with slide piece and 1/4" receptacle). This means that this plug-in attachment engages well and is secured against loss - see pictures.
Not all of you have such a socket wrench handle, I have provided the following additional drive types for you:
as hexagon: SW 5 + 6 (mm)
as Pozidriv cross recess profile: 2PZ
as a simple slot profile: 1 x 5.5 (mm)
but works good as a socket wrench: 1/4 " (quarter inch)
Application:
Please be careful when installing and removing so that none of the small parts get lost.
The crema valve consists of several parts (for me it consists of a plug, valve pin and spring).
Remove the strainer from the brewing unit, which is usually fastened with a central
Phillips screw.
Behind it is the piston of the brewing unit - the crema valve is installed here on the
front. Put your printed key on the plug of the built-in crema valve and put it in
snap into the 4 indentations.
Turn the key with very light pressure in both directions (clockwise / counter-clockwise)
turn back and forth. The spring inside pushes the valve
little by little (up towards your printed key).
My print settings:
Resolution 0.15 mm
Print speed 40 mm / s
Infill type: cube
Infill: 20%
Material: PLA or PETG
Printing time approx. 15 min.
All mentioned brands / brand names / institutions / organizations / product names / products and their pictures (for example photos) are used exclusively for the description of the depicted model and its construction / operation / handling and, where appropriate, also as installation instruction / information or source.
I have received no consideration for this from any of the trademark owners / institutions or organizations and this should also constitute "no advertising" for the brands / institutions or organizations listed here.
DE
Hallo zusammen,
ich habe diesen tollen Schlüssel für das Cremaventil von Delonghi erstellt.
Meine Maschine ECAM 23.420.SW.
Es passt auch bei einigen AEG und Siemens Modellen.
Damit ist es möglich das Cremaventil auszubauen und regelmäßig zu reinigen.
Über ein MAKE von Euch würde ich mich sehr freuen.
Um für den Schlüssel nicht unnötig viel Filament zu verbrauchen, habe ich diesen als Steckaufsatz für einen regulären 1/4" Steckschlüsselgriff mit Rastkugel konzipiert (Griff mit Gleitstück und 1/4" Aufnahme). Somit rastet dieser Steckaufsatz gut ein und ist verliergesichert - siehe Bilder.
Da nicht alle von Euch so einen Steckschlüsselgriff besitzen, habe ich die folgenden weiteren Antriebsformen bereitgestellt.
als Sechskant: SW 5 + 6
als Pozidriv Kreuzschlitzprofil: 2PZ
als einfaches Schlitzprofil: 1 x 5,5
funktioniert aber gut als Steckschlüssel: 1/4" (quarter inch)
Anwendung:
Bitte seit beim Ein- und Ausbau vorsichtig, damit keines der kleinen Teile Euch verlohren geht. Das Cremaventil besteht aus mehreren Teilen (bei mir aus Stöpsel, Ventilstift und Feder).
Sieb der Brüheinheit entfernen, meist ist dieses durch eine mittige
Kreuzschlitzschraube befestigt.
Dahinter liegt der Kolben der Brüheinheit - hier ist stirnseitig das Cremaventil
eingebaut. Euren gedruckten Schlüssel am Stöpsel des darin verbauten Cremaventils
aufsetzen und in den 4 Vertiefungen einrasten.
Mit ganz leichtem Anpressdruck in beide Richtungen
(Uhrzeigersin / gegen den Uhrzeigersinn) hin- und herdrehen.
Die darin befindliche Feder schiebt das Ventil nach und nach heraus
(nach oben in Richtung Eures gedruckten Schlüssels).
Meine Einstellungen:
Auflösung 0,15 mm
Druckgeschwindigkeit 40 mm/s
Infill Typ: Würfel
Infill: 20 %
Werkstoff: PLA oder PETG
Druckdauer ca. 15 min.
Alle im Text erwähnten Marken/ Markennamen / Institutionen / Organisationen/ Produktnamen / Produkte und deren Abbildungen (zum Beispiel Fotos) dienen ausschließlich zur Beschreibung des abgebildeten Models und dessen Bauweise / Funktionsweise / Handhabungsweise und gegebenenfalls auch als Montagehinweis / Informations- oder Quellenangabe.
Ich habe dafür von keinem der Markeninhaber / Institutionen oder Organisationen eine Gegenleistung erhalten und dies soll auch "keine Werbung" für die evtl. hier aufgeführten Marken / Institutionen oder Organisationen darstellen.
Similar models
3dwarehouse
free
Blaulichtbalken DBS 2000
...jetzt erstmal so gemacht . hoffe euch gefällt der balken . :) bitte komrntirt eure meinung und liket wenn euch der balken gefällt
thingiverse
free

Bremen - Wappen mit Schlüssel - Bremer Schlüssel by Amygdoloid
... schlüssels hinzugefügt.
update 23.11.20
ich habe das bremer wappen mit dem schlüssel in den klassischen speckfarben hinzugefügt.
thingiverse
free

Druckluft Motor by DDDUM
... und steueröffnung auf der kurbelwelle!
leider kann ich die teile nicht weiter bearbeiten, weil ich das programm nicht mehr habe.
thingiverse
free

Garden Sprinkler by konst57
...d besser.
der innendurchmesser der aufnahme ist 23 mm.
ich habe noch die klemme und 2 verbindungsstücke für 1/2 " beigefügt.
grabcad
free

Schwert, Sword Final Fantasy 7 Final Fantasy VII Remake
...hwert aus der spiel final fantasy 7, als material habe ich damaszener-stahl benutzt.
liken und kommentieren wie es euch gefällt.
thingiverse
free

Ablage für 858D Heißluftgebläse by herbert_b1
...da nicht reinhängen möchte. mit der extra halterung habe ich nun das gebläse im arbeitsbereich stehen und jederzeit im blickfeld.
thingiverse
free

Aldi Ampelschirm by Gilliearnie
...nicht mehr, falls jemand diese aufnimmt und mir zuschickt würde ich diese auch nochmal konstruieren und/oder den halter anpassen.
3dwarehouse
free

Apple IPhone X / IPhone 8
...er. im bild das in der datei zu finden ist habe ich das handy durch effekte von cinema 4d laufen lassen, daher die reinfektionen.
thingiverse
free

Firetruck by xLionMasterx
...sterx
thingiverse
this is a firetruck that i designed.
dies ist ein löschgruppenfahrzeug von der feuerwehr das ich designt habe.
thingiverse
free

Anycubic Mega X Netzteil Kühlung by agent4788
...entweder muss der passende stecker an den neuen lüfter gecrimpt, oder vom bestehenden lüfter abgeschnitten und angeläötet werden.

Delonghi
turbosquid
$6
DeLonghi
...d
royalty free 3d model delonghi for download as 3ds and obj on turbosquid: 3d models for games, architecture, videos. (1392550)
3ddd
$1

Кофемолка DeLonghi - KG79
...водителя:http://www.delonghi.com/ru-ru/products/coffee/coffee-makers/grinders/kg79---0177111025/
max2011, max2014, obj
3ddd
$1
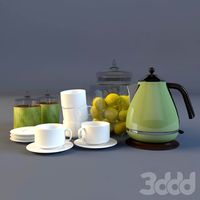
Набор и чайник Delonghi
... чашка , лимон
набор для чая, с лимонами, чашками, и чайником delonghi
3ddd
free

Тостер: DeLonghi 4003
...ель: delonghi
высота: 210мм
ширина: 330мм
глубина: 325мм
примечание: при использовании .fbx загружайте материалы с файла .max
turbosquid
$25

Delonghi Icona Toaster
... available on turbo squid, the world's leading provider of digital 3d models for visualization, films, television, and games.
turbosquid
$25
Teapot Delonghi KBZ2001
... available on turbo squid, the world's leading provider of digital 3d models for visualization, films, television, and games.
3ddd
free
Тостер Delonghi Icona Vintage
... delonghi
в архиве пять тостеров с настроенными материалами. текстуры не требуются - весь текст - геометрия
3ddd
$1

Чайник Delonghi Icona Vintage
... delonghi
в архиве все пять чайников с разными материалами. текстуры не требуются - весь текст - геометрия
3ddd
$1

Кофемашина DeLonghi Perfecta Cappuccino
...onghi
автоматическая кофемашина с 2-строчным дисплеем с возможностью индивидуальной настройки напитков, а также подогревом чашек.
turbosquid
$40

Delonghi Cappuccino Maker - ECAM45760S
...ppuccino maker - ecam45760s for download as max, fbx, and obj on turbosquid: 3d models for games, architecture, videos. (1641406)
Aeg
3ddd
$1
табло AEG
...
3ddd
табло , aeg , вокзал
табло aeg на 5 строк
3ddd
$1
AEG вытяжка
...aeg вытяжка
3ddd
aeg , вытяжка
вытяжка aeg, 3dmax 9, безтекстур, скриншот внутри архива.
3ddd
$1
Aeg ra 5522
..., обогреватель , радиатор
aeg ra 5522 радиатор.
3ddd
$1
Варочная поверхность AEG
... aeg
3ddd
aeg , варочная панель
варочная поверхность из существующего каталога фирмы aeg
3d_export
$7

aeg appliance collection
...orona, aeg appliance collection -aeg built-in coffee machine -aeg built-in oven -aeg built-in microwave polys: 82931 verts: 85617
3ddd
free
Стиральная машина AEG
...машина aeg
3ddd
aeg , стиральная машина
для удобства в сцене присутствует анимация люка.
3d_export
$7
aeg refrigerators set
...: 3dsmax 2015 + fbx, render: vray+corona, polys: 47847 verts: 48330 3 aeg fridge and freezer in 3 colors, black, silver and white
3ddd
$1
AEG Electrolux
...льшим разрешением. сглаживание ставьте по вкусу.
материалы само собой прилагаются.
*в архиве из моделей только варочная панель.
turbosquid
$13

Gas Cooktop no12 AEG
... model gas cooktop no12 aeg for download as max, fbx, and obj on turbosquid: 3d models for games, architecture, videos. (1652230)
3ddd
free
Модульные варочные поверхности, AEG ч.2
...спортировать материалы, приложил отдельно мультисубматериал. просто примените его на модель, материалы назначаться автоматически.
Crema
turbosquid
$3

Cappuccino cup crema
...oyalty free 3d model cappuccino cup crema for download as max on turbosquid: 3d models for games, architecture, videos. (1405455)
turbosquid
$20

Coffe package Tchibo Caffe Crema 500g
...del coffe package tchibo caffe crema 500g for download as max on turbosquid: 3d models for games, architecture, videos. (1155138)
3ddd
$1
Люстра Mantra (Испания) AKIRA CREMA 0930
... металл
люстра
бренд: mantra
цвет: хром
длина(см): 80
высота(см): 70-170
кол-во лампочек: 8
серия: akira crema
turbosquid
$24

Coffee Beans Bag Lavazza Crema E Gusto 1000g 2021
... lavazza crema e gusto 1000g 2021 for download as max and max on turbosquid: 3d models for games, architecture, videos. (1687395)
3ddd
$1
Mantra Akira Pendant Lamp Cromo/Crema 8L
...crema 8l
3ddd
mantra
подвесной светильник, высота регулируется от 700 до 1700 мм. диаметр 800мм. 8 рожков. замоделено с любовью=)
turbosquid
$14

Coffe Bag Lavazza Crema e Gusto 250g
...el coffe bag lavazza qualita oro 250g (2) for download as max on turbosquid: 3d models for games, architecture, videos. (1327634)
3ddd
$1
плитка керамическая Vallelunga Lirica
..., lirica плитка керамическая vallelunga lirica: -настенная плитка lirica crema глянцевая 30*10; -декоративный элемент lirica crema giglio 30*10; -декоративный...
3ddd
$1
Solaria от Tomassi
...tomassi 3ddd solaria , tomassi фирма: tomassi cucineмодель: solariaцвет: crema ...
archive3d
free

Chandelier 3D Model
...model archive3d luster chandelier lustre candlelight chandelier mantra akira crema n041011 - 3d model (*.3ds) for interior 3d...
3d_export
$10

Cream tube 3D Model
...cream tube 3d model 3dexport tube cream tubo crema firming aging skin makeup cosmetic cream tube 3d model...
Siemens
3ddd
$1

SIEMENS
...siemens
3ddd
siemens , варочная панель
варочная панель сименс
3ddd
$1

Siemens
... варочная панель
siemens варочная электро панель.
polys: 1278
в архиве две текстуры, вкл. и выкл. вариант)
3ddd
$1

Духовка Siemens
...духовка siemens
3ddd
siemens , духовка
духовка siemens
3ddd
$1
Siemens Oven
...siemens oven
3ddd
печь , siemens
siemens oven
3ddd
$1
Siemens ER626PB90E
...ая поверхность siemens er626pb90e (600x520x47h)
gas hob siemens siemens er626pb90e (600x520x47h)
file: max 2010, 2012; fbx; obj
3ddd
$1

Siemens HB76AA260
...iemens hb76aa260
3ddd
siemens , духовой шкаф
встраиваемый духовой шкаф siemens hb76aa260
3d_export
$6

siemens hb23gb540
...siemens hb23gb540
3dexport
oven siemens hb23gb540
3ddd
$1

Siemens ER926SB90E
...я варочная поверхность siemens er926sb90e (900x520x47h)
gas hob siemens er926sb90e (900x520x47h)
file: max 2010, 2012; fbx; obj
3ddd
$1

Siemens EH975SZ11E
...чная поверхность siemens eh975sz11e (912x520x51h)
induction hob siemens eh975sz11e (912x520x51h)
file: max 2010, 2012; fbx; obj
3ddd
$1
Siemens ER726RF90E
...я варочная поверхность siemens er726rf90e (710x520x47h)
gas hob siemens er726rf90e (710x520x47h)
file: max 2010, 2012; fbx; obj
Valve
3d_export
$5
Valve
...valve
3dexport
diverter valve
3d_export
$5
valve
...valve
3dexport
this is a 3d model of a valve available in all formats.
3d_export
free
valve
...valve
3dexport
simple valve 3d model, more free models here:
3d_export
$20

gate valve
...gate valve
3dexport
gate valve
3d_export
$10

stop valve
...stop valve
3dexport
stop valve
3d_export
$5
ball valve
...ball valve
3dexport
ball valve
turbosquid
$14

Valve
...e
turbosquid
royalty free 3d model valve for download as c4d on turbosquid: 3d models for games, architecture, videos. (1217741)
3ddd
$1
valve 02
...valve 02
3ddd
клапан
water valve
3ddd
$1

Valve 01
...valve 01
3ddd
клапан
water valve
turbosquid
$19

Valve
...royalty free 3d model valve for download as ige, obj, and stl on turbosquid: 3d models for games, architecture, videos. (1425806)
Key
archibase_planet
free
Key
...key
archibase planet
bunch of keys key
key n190510 - 3d model (*.gsm+*.3ds) for interior 3d visualization.
3d_export
$5
key
...key
3dexport
key
archibase_planet
free
Key
...key
archibase planet
key
key n080710 - 3d model (*.3ds) for interior 3d visualization.
3d_ocean
$2
Key
...key
3docean
door key lock open unlock
a key facecount: 617 (2x subsurfed: 9872)
archibase_planet
free

Key
...key
archibase planet
key
key n240713 - 3d model (*.gsm+*.3ds) for interior 3d visualization.
archibase_planet
free
Key
...key
archibase planet
key
key 2 n080710 - 3d model (*.gsm+*.3ds) for interior 3d visualization.
turbosquid
$3
Keys With Key Chain
... chain 3d model for download as blend, dae, stl, obj, and fbx on turbosquid: 3d models for games, architecture, videos. (1673644)
archibase_planet
free

Key
...key
archibase planet
key
key ancient strike plate n130912 - 3d model (*.3ds) for interior 3d visualization.
archibase_planet
free
Key
...key
archibase planet
key
key stephan mette n300412 - 3d model (*.gsm+*.3ds) for interior 3d visualization.
3d_export
free
key
...key
3dexport
a simple key obj, fbx, blend
Coffee
archibase_planet
free
Coffee
...e planet
coffee iced coffee coffee drink cold coffee
coffee drink n170614 - 3d model (*.gsm+*.3ds) for interior 3d visualization.
archibase_planet
free

Coffee
... planet
coffee packet of coffee pack of coffee
packet of coffee 1 n190614 - 3d model (*.gsm+*.3ds) for interior 3d visualization.
3d_export
$5

coffee
...coffee
3dexport
coffee
3d_export
$5

coffee
...coffee
3dexport
cartoon cup of coffee
3ddd
free

Coffee
...coffee
3ddd
кофе , книга
coffee, book
archibase_planet
free

Coffee
...coffee
archibase planet
coffee black coffee
nescafe n091007 - 3d model (*.gsm+*.3ds) for interior 3d visualization.
3ddd
$1
Coffee Table
...e table
3ddd
coffee , table , wood
coffee table
archibase_planet
free

Coffee mill
...base planet
coffee mill coffee-grinder coffee grinder
coffee mill n200515 - 3d model (*.gsm+*.3ds) for interior 3d visualization.
archibase_planet
free
Coffee mill
...base planet
coffee mill coffee-grinder coffee grinder
coffee mill n300111 - 3d model (*.gsm+*.3ds) for interior 3d visualization.
3d_ocean
$2

Starbucks coffee
...starbucks coffee
3docean
coffee starbucks
a high quality starbucks coffee.
Machine
archibase_planet
free

Machine
...machine
archibase planet
sewing-machine sewing machine equipment
singer machine- 3d model for interior 3d visualization.
archibase_planet
free
Machine
...hine
archibase planet
percolator equipment coffee-machine
machine n230708 - 3d model (*.gsm+*.3ds) for interior 3d visualization.
archibase_planet
free
Machine
...chibase planet
percolator coffee-machine kitchen equipment
coffee machine - 3d model (*.gsm+*.3ds) for interior 3d visualization.
archibase_planet
free
Slot machine
...ase planet
slot machine slot-machine playing machine
slot machine n260311 - 3d model (*.gsm+*.3ds) for interior 3d visualization.
turbosquid
$7

Machine
...ne
turbosquid
royalty free 3d model machine for download as on turbosquid: 3d models for games, architecture, videos. (1391792)
3d_ocean
$10
War machine
...war machine
3docean
camuflage machine robot war war machine
war machine created in 3dmax 2009 15.497-poly count
turbosquid
$7
machine
...turbosquid
royalty free 3d model machine for download as obj on turbosquid: 3d models for games, architecture, videos. (1452674)
3d_ocean
$12
Weighing-machine
...weighing-machine
3docean
market shop weighing-machine
3d model weighing-machine
archibase_planet
free
Sewing machine
...ine
archibase planet
sewing machine sewing-machine
sewing machine n080311 - 3d model (*.gsm+*.3ds) for interior 3d visualization.
archibase_planet
free
Coffee machine
...se planet
coffee machine percolator coffee-machine
coffee machine n010715 - 3d model (*.gsm+*.3ds) for interior 3d visualization.