Thingiverse
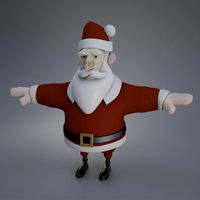
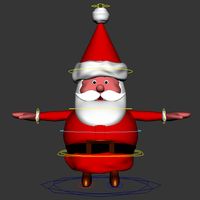
Jumbo Christmas - Santa Claus
by Thingiverse
Last crawled date: 4 years, 1 month ago
My original thing was deleted - here is an amended upload.
See Latest Updates Below
I've moved the pictures around so the latest version comes up first.
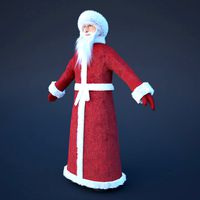
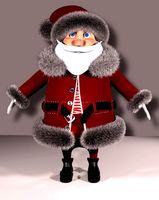
I wanted a "particular look" for my 4x Santa - if that's possible...
Took bits and pieces from various 4x figure-based sources and combined them (thanks everyone for your hard work). Skimbal's 4x figure was the main basis.
The beard from KySyth did not print too well and I had to use some filler and paint to complete it, but it'll do for now.
You can maybe try RetroRocketUK's 5x beard: https://www.thingiverse.com/thing:2675661 (scale to 80% for a 4x figure).
I may also try jolyrogr's beard version to see if that works better for me, found here: https://www.thingiverse.com/thing:2432524
All-in-all, turned out pretty much the way I wanted!
I will be re-printing the legs, to do black boots and red tops (filament swap halfway up the legs). I'll also try and re-print the body section, to include a black belt at the bottom of the body before the main body starts printing red (again, filament swap); will add a gold buckle if I can find something suitable on Thingiverse :)
Once my CR-10 S4 arrives, I'll be looking at doing an 8x version to match the size of the printed Nutcrackers I did...will also try and put together a Christmas Elf or two to match...
UPDATE: 18 March 2018
I re-printed the boots and hips, using black for the boots and doing a filament swap to red at about 42% (a couple of layers above the lower back leg hole) - turned out well.
Re-printed the hips as the original ones I printed were the older pin-fit-from-inside type from a different maker - Skimbal's legs/hips are fine and attach to the body without issues.
I'm rubbish with 3D design software - instead of re-printing the body with filament swops for the black belt, I've experimented with:
printing a black belt, based on incident's Action Calibration Bar (https://www.thingiverse.com/thing:74996), setting Simplify3D scaling to:
X = 185.00 mm
Y = 4.80 mm
Z = 0.60 mm
printing a gold buckle, based on Keyjay's Simple Buckles (https://www.thingiverse.com/thing:236297), using the "simple_big_buckle.stl" and setting Simplify3D scaling to:
X = 15.0 mm
Y = 10.0 mm
Z = 1.2 mm
I threaded the long black belt section under,through and over the center buckle bit until it was equal length on each side. Then used a few dabs of superglue to attach the belt to the body, a couple of mm from the white surround section on the lower body; trimmed the belt section to the right length once it was glued - turned out great!
Will upload some updated photos when I can.
I will be printing jolyrogr's beard version next, to replace the current beard section (https://www.thingiverse.com/thing:2432524) then will be adding RetroRocketUK's Santa Toy Sack (https://www.thingiverse.com/thing:2675661) in the next few weeks or so, but have to get the scale right to fit the hand grip, as Simplify3D either sees it's scale as enormous or extremely tiny...
UPDATE: 21 March 2018
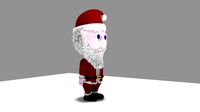
I printed jolyrogr's beard version today - as indicated in his thing, it's in progress and needs some work - however, it turned out quite well; I printed at 710% and duplicated the part, printing the top half and the bottom half together, then gluing - you could use supports, but the print time is vastly increased and filament wasted; if I had a dual extruder, it would make sense to use full supports. By printing the top/bottom half and gluing, no support is needed only light sanding required to hide the join.
At 710% the fit is too tight for the head to fit flush with the inner beard and the curvature where the head touches the inner beard base is not quite correct on the part, so I got out the Dremel and using a small ball sander, sanded down the inner piece so that the base of the head part would fit correctly. Looks a bit of a mess in the photo, but it does the job - the inside is not seen in any event.
Additionally, the beard ring piece that should fit on the head/neck part is way too small; at 710% print size, this allows you to whittle away the inner plastic of the ring to the diameter of the neck, leaving 2-3mm of the ring intact. This is just enough to allow fitting fit over the neck part and allow the beard to fit flush against the face (once you've done the above works on the curvature). So per jolyrogr, this part would need some work to avoid doing the above. I think if it was printed at 715% or 720%, it may fit better, but the curvature fit and ring size is still not quite correct.
To note that if you don't correct the neck-ring size, then the beard will go over the body post that the head sits on, but the beard is then too low on the face - if you have a blank head then it should be fine, but if like me you use the innie head with the mouth, then the mouth sits above the mustache section.
That aside, this beard and addition of the belt/buckle makes my Santa look so much more like Santa! Very happy with the result.
Just printing the Santa Toy Sack in green, and will add some final photos when it's all complete.
...I will try and create an Elf or two, or matching Mrs. Claus for my next project. Roll on Christmas!
UPDATE: 27 March 2018
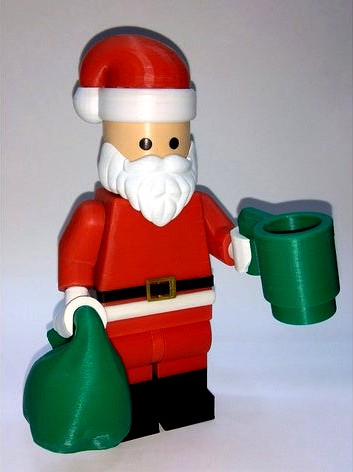
Printed the Toy Sack in green - turned out well, although the fit in the hand was not tight enough - I printed at 700%, so probably use 725%-750% for a good fit - I used 2 small strips of painter's tape on top of each other and over the handle; it now fits snug in the hand.
UPDATE: 07 April 2018
Added a mug in green - I used SE_2018's Bunch Of Cups thing: https://www.thingiverse.com/thing:2835593
My Santa Claus is now complete!
Mrs. Claus is also complete and I've included a picture of them together.
Mrs Claus can be found here: https://www.thingiverse.com/thing:2843428
The matching elves, Bernard and Twinkle, can be found here: https://www.thingiverse.com/thing:2880258
See Latest Updates Below
I've moved the pictures around so the latest version comes up first.
I wanted a "particular look" for my 4x Santa - if that's possible...
Took bits and pieces from various 4x figure-based sources and combined them (thanks everyone for your hard work). Skimbal's 4x figure was the main basis.
The beard from KySyth did not print too well and I had to use some filler and paint to complete it, but it'll do for now.
You can maybe try RetroRocketUK's 5x beard: https://www.thingiverse.com/thing:2675661 (scale to 80% for a 4x figure).
I may also try jolyrogr's beard version to see if that works better for me, found here: https://www.thingiverse.com/thing:2432524
All-in-all, turned out pretty much the way I wanted!
I will be re-printing the legs, to do black boots and red tops (filament swap halfway up the legs). I'll also try and re-print the body section, to include a black belt at the bottom of the body before the main body starts printing red (again, filament swap); will add a gold buckle if I can find something suitable on Thingiverse :)
Once my CR-10 S4 arrives, I'll be looking at doing an 8x version to match the size of the printed Nutcrackers I did...will also try and put together a Christmas Elf or two to match...
UPDATE: 18 March 2018
I re-printed the boots and hips, using black for the boots and doing a filament swap to red at about 42% (a couple of layers above the lower back leg hole) - turned out well.
Re-printed the hips as the original ones I printed were the older pin-fit-from-inside type from a different maker - Skimbal's legs/hips are fine and attach to the body without issues.
I'm rubbish with 3D design software - instead of re-printing the body with filament swops for the black belt, I've experimented with:
printing a black belt, based on incident's Action Calibration Bar (https://www.thingiverse.com/thing:74996), setting Simplify3D scaling to:
X = 185.00 mm
Y = 4.80 mm
Z = 0.60 mm
printing a gold buckle, based on Keyjay's Simple Buckles (https://www.thingiverse.com/thing:236297), using the "simple_big_buckle.stl" and setting Simplify3D scaling to:
X = 15.0 mm
Y = 10.0 mm
Z = 1.2 mm
I threaded the long black belt section under,through and over the center buckle bit until it was equal length on each side. Then used a few dabs of superglue to attach the belt to the body, a couple of mm from the white surround section on the lower body; trimmed the belt section to the right length once it was glued - turned out great!
Will upload some updated photos when I can.
I will be printing jolyrogr's beard version next, to replace the current beard section (https://www.thingiverse.com/thing:2432524) then will be adding RetroRocketUK's Santa Toy Sack (https://www.thingiverse.com/thing:2675661) in the next few weeks or so, but have to get the scale right to fit the hand grip, as Simplify3D either sees it's scale as enormous or extremely tiny...
UPDATE: 21 March 2018
I printed jolyrogr's beard version today - as indicated in his thing, it's in progress and needs some work - however, it turned out quite well; I printed at 710% and duplicated the part, printing the top half and the bottom half together, then gluing - you could use supports, but the print time is vastly increased and filament wasted; if I had a dual extruder, it would make sense to use full supports. By printing the top/bottom half and gluing, no support is needed only light sanding required to hide the join.
At 710% the fit is too tight for the head to fit flush with the inner beard and the curvature where the head touches the inner beard base is not quite correct on the part, so I got out the Dremel and using a small ball sander, sanded down the inner piece so that the base of the head part would fit correctly. Looks a bit of a mess in the photo, but it does the job - the inside is not seen in any event.
Additionally, the beard ring piece that should fit on the head/neck part is way too small; at 710% print size, this allows you to whittle away the inner plastic of the ring to the diameter of the neck, leaving 2-3mm of the ring intact. This is just enough to allow fitting fit over the neck part and allow the beard to fit flush against the face (once you've done the above works on the curvature). So per jolyrogr, this part would need some work to avoid doing the above. I think if it was printed at 715% or 720%, it may fit better, but the curvature fit and ring size is still not quite correct.
To note that if you don't correct the neck-ring size, then the beard will go over the body post that the head sits on, but the beard is then too low on the face - if you have a blank head then it should be fine, but if like me you use the innie head with the mouth, then the mouth sits above the mustache section.
That aside, this beard and addition of the belt/buckle makes my Santa look so much more like Santa! Very happy with the result.
Just printing the Santa Toy Sack in green, and will add some final photos when it's all complete.
...I will try and create an Elf or two, or matching Mrs. Claus for my next project. Roll on Christmas!
UPDATE: 27 March 2018
Printed the Toy Sack in green - turned out well, although the fit in the hand was not tight enough - I printed at 700%, so probably use 725%-750% for a good fit - I used 2 small strips of painter's tape on top of each other and over the handle; it now fits snug in the hand.
UPDATE: 07 April 2018
Added a mug in green - I used SE_2018's Bunch Of Cups thing: https://www.thingiverse.com/thing:2835593
My Santa Claus is now complete!
Mrs. Claus is also complete and I've included a picture of them together.
Mrs Claus can be found here: https://www.thingiverse.com/thing:2843428
The matching elves, Bernard and Twinkle, can be found here: https://www.thingiverse.com/thing:2880258
Similar models
thingiverse
free

Santa Rick - Ho Ho Ho . . . And A Bottle Of Rum! by Zuarrie
...ing:2134321) by chaoscoretech
note: updated version with belt buckle can be found here: https://www.thingiverse.com/thing:2693159
thingiverse
free

Stretch belt, wearable belt, waist belt
...ly as 20 mm, but scaling of the belt is easier than providing all the different stl files.
see also the notes in print settings.
thingiverse
free

Jumbo Christmas - Mrs Claus by HowardB
...use some red craft felt and cut it out similar to the gandalf figure (https://www.thingiverse.com/thing:2205297). the pdf cutout image...
thingiverse
free

Disturbed Belt Buckle by RangerOfTheOrder
...ud2se4
video of me printing it: https://youtu.be/2blyvkpo5ao
gianteye's bioshock buckle: http://www.thingiverse.com/thing:912
thingiverse
free
Santa Beard for Quirkbot by mini_fruit
...rint it whit the mustasch down and use suport.
i printed it in the wrong color. my tip is to print it in white or black filament.
thingiverse
free

Stormtrooper Lego Toilet Paper Holder - full and reworked by bratwurst1988
...rbody's happy with the result.
so in order for everybody to collect all the awesome models in just one place - here you go :)
thingiverse
free

Atelier Shallie Shallotte cosplay belt: buckle / end piece by fioraaeterna
...ng section for details on assembling/finishing it, the gem portion, and so on.
eyelets: https://www.thingiverse.com/thing:2468771
thingiverse
free
Fred The Frog but he's also got a beard by AdamTKWallace
...red the frog minus his santa hat because it's not christmas but kept the beard because beards are cool and fred loves beards.
3dwarehouse
free

Santa Claus Sitting
...s model directly into another model to maintain its interactiveness. #christmas #claus #dynamic #figure #holiday #poseable #santa
thingiverse
free

Santa Claus by darthspyder
...santa claus by darthspyder
thingiverse
santa claus
beard could be better but i wasn't able to make it how i wanted.
Claus
3d_ocean
$19
Santa Claus
...santa claus
3docean
christmas new year's santa claus
santa claus model - face topology - .obj - .ma
turbosquid
$2

Santa claus
...urbosquid
royalty free 3d model santa claus for download as on turbosquid: 3d models for games, architecture, videos. (1234444)
turbosquid
$229

Santa Claus
...bosquid
royalty free 3d model santa claus for download as ma on turbosquid: 3d models for games, architecture, videos. (1224524)
turbosquid
$49

Santa Claus
...osquid
royalty free 3d model santa claus for download as fbx on turbosquid: 3d models for games, architecture, videos. (1485444)
turbosquid
$38
Santa Claus
...osquid
royalty free 3d model santa claus for download as max on turbosquid: 3d models for games, architecture, videos. (1669783)
turbosquid
$19
Santa claus
...osquid
royalty free 3d model santa claus for download as stl on turbosquid: 3d models for games, architecture, videos. (1639060)
turbosquid
$10

Santa Claus
...osquid
royalty free 3d model santa claus for download as 3ds on turbosquid: 3d models for games, architecture, videos. (1394120)
3d_ocean
$12

Santa Claus
...at happy holiday justtomas man people santa snow snowfall snowman toon x-mas xmas
santa claus by justtomas .c4d r12 .3ds .obj +uv
turbosquid
$125
Santa Claus
...royalty free 3d model santa claus for download as obj and fbx on turbosquid: 3d models for games, architecture, videos. (1483725)
turbosquid
$100
santa claus
...
royalty free 3d model santa claus for download as jpg and ma on turbosquid: 3d models for games, architecture, videos. (1328975)
Jumbo
3ddd
$2
Jumbo
...jumbo
3ddd
jumbo collection
jumbo chair
3ddd
$1
JUMBO
...jumbo
3ddd
jumbo collection , журнальный
coffee table jumbo
3ddd
$1
Jumbo
...jumbo
3ddd
jumbo collection , комод
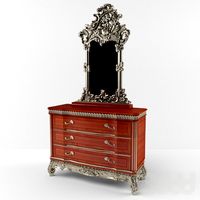
камод & зеркало jumbo
3ddd
free
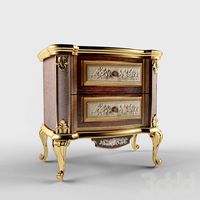
Jumbo
... прикроватная , тумба
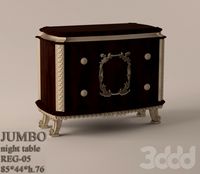
jumbo прикроватная тумбочка
3ddd
$1
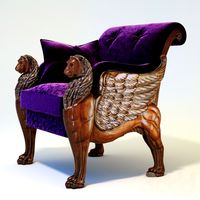
Jumbo
... грифон , капитоне
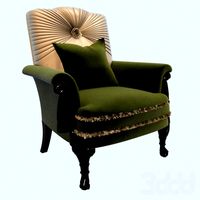
jumbo armchair and nothing more :)
3ddd
$1

JUMBO
...jumbo
3ddd
jumbo collection , журнальный
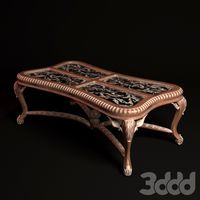
журнальный столик jumbo. габариты: 70*70*70 см.
3ddd
$1
jumbo
... прикроватная , jumbo collection
размер 70х40х72н
3ddd
$1
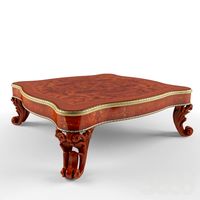
Jumbo
...bo collection , журнальный
стол jumbo man-46
размеры 135х135х53h
для fbx с ножек снят ts
3ddd
free
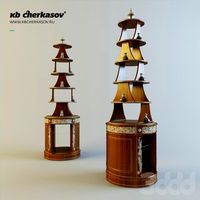
JUMBO
... этажерка
этажерка jumbo, моделилась под классический интерьер.
в архиве есть max2012, fbx + текстуры
3ddd
$1
Jumbo
...man-04b , муранское стекло
зеркало jumbo man-04b в раме из муранского стекла, l620xh1400
Santa
3d_ocean
$19
Santa
...an
3d cartoon santa christmas character santa 3d model santa claus
cartoon santa claus character. rigged with 3ds max cat system.
3d_ocean
$8
Santa
...santa
3docean
character man rig santa
create santa character with rig in maya 2013 and obj..
3ddd
$1
Santa rossa
...santa rossa
3ddd
santa rossa , капитоне
santa rossa
turbosquid
$79
santa
...anta
turbosquid
royalty free 3d model santa for download as on turbosquid: 3d models for games, architecture, videos. (1311838)
turbosquid
$5
santa
...turbosquid
royalty free 3d model santa for download as blend on turbosquid: 3d models for games, architecture, videos. (1212891)
turbosquid
$5

Santa
...turbosquid
royalty free 3d model santa for download as blend on turbosquid: 3d models for games, architecture, videos. (1357209)
3d_ocean
$5

Cartoon Santa
...nta santa claus season snow teddy winter
cartoon santa claus, very cute, lovely, works perfectly as a baby santa or even a teddy.
turbosquid
$200

Santa
... available on turbo squid, the world's leading provider of digital 3d models for visualization, films, television, and games.
turbosquid
$49
santa
... available on turbo squid, the world's leading provider of digital 3d models for visualization, films, television, and games.
turbosquid
$45

Santa
... available on turbo squid, the world's leading provider of digital 3d models for visualization, films, television, and games.
Christmas
3d_ocean
$3

Christmas bauble
...christmas bauble
3docean
christmas bauble christmas tree merry christmas
christmas bauble
turbosquid
$2

Christmas Ornament Christmas Ornament
... available on turbo squid, the world's leading provider of digital 3d models for visualization, films, television, and games.
3d_ocean
$5
Christmas
...de in 3ds max 2013 3dsmax with vray render included material and light obj file fbx file hope you like it please don’...
3d_export
free
christmas sphere
...christmas sphere
3dexport
christmas sphere to decorate your christmas pine in 3d
3d_export
free
christmas sphere
...christmas sphere
3dexport
christmas sphere to decorate your christmas pine in 3d
3d_export
$5
christmas balls
...christmas balls
3dexport
christmas balls, great decorations for your 3d christmas tree.
3d_ocean
$5
Christmas Ornaments
... ornaments in cinema 4d. it’s very basic, but extremely nice, especially for christmas. this is perfect for your holiday scene...
3d_ocean
$19

Christmas wreath
...christmas wreath
3docean
christmas decoration wreath
high quality christmas wreath with animated lights
turbosquid
$1

christmas
...rbosquid
royalty free 3d model christmas for download as max on turbosquid: 3d models for games, architecture, videos. (1357407)
3d_export
$5

christmas lollipop
...christmas lollipop
3dexport
christmas lollipop.