Thingiverse
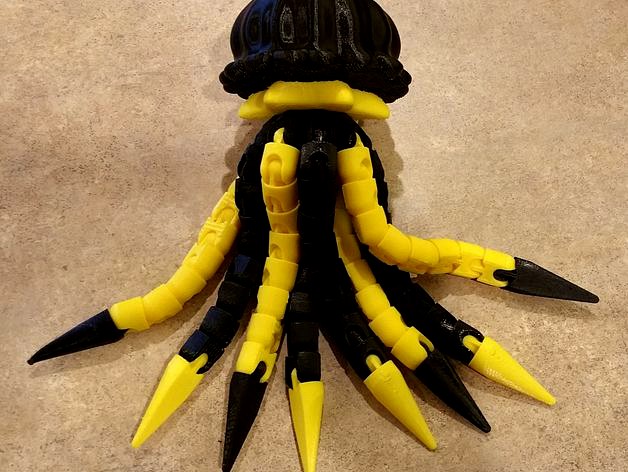
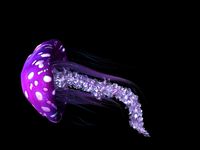
Jellyfish Mod Resized for ease of Assembly by Timetoprint00
by Thingiverse
Last crawled date: 2 years, 12 months ago
My first 3D printer arrived 2 weeks ago, the Flashforge New Creator Pro. After it arrived, we began looking through the files on Thingiverse and my oldest daughter couldn't wait to print out the Jellyfish. Our color selection was low, so that is why it is Black and Yellow.
The original model is very nice, and well put together. It was an excellent model to learn 3D printing with. The whole model was printed in Hatchbox PLA, on the FF New Creator Pro. The gcode was created using the ReplicatorG Sailfish software and PyPy. We really enjoyed making this model.
A BIG thanks to "CarryTheWhat" on the Top piece of the model, the art work for this piece alone is Awesome!
Also a BIG thanks to Ellindsey, for the original files uploaded for the Octopus, the ball-joint links are fun to play with!
If I knew more, perhaps I could have printed this out using the original scale of the files provided, but being a newbie, I had issues where the tentacles were frozen and would not rotate. To remedy I simply printed everything out 50% larger.
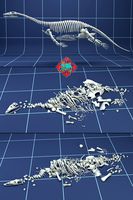
I also had issues with printing out the bottom base. For some reason the top and bottom surfaces of it would not print out... only a outer-ring of ball-sockets resulted... I'm betting this is due to the ReplicatorG Sailfish software, and not the model itself. Anyway to remedy I took the Skull-Head model uploaded by Ellindsey, and revised it in Google Sketchup; I cut the base free, selected one ball-socket and cleaned it up, and then copied it several time into a circle to make a new ball-socket ring. I then added new flat surfaces for the top and bottom. This model prints great.
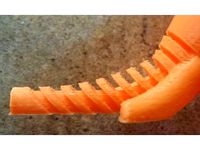
Also I learned that snapping the tentacles into the base was near impossilble. As a Dad, I could do it, but it took all my strength, and some sand paper. I could hear the PLA cracking as I did so. ABS would probably be better as it is more flexible.
To remedy, the final design has the bottom piece slightly larger, at 155% of the original size. The Tentacles snap much better (no sand paper needed); effort still required though. Also the Tentacle end piece is smaller at only 145% of the original; allowing them to snap-in more easily to the end of the tentacle links. The files uploaded depict the percentages that I trialed and found to work for me. You can print out these files as is or experiment further on your own on the sizing.
Just another quick-side note:
I had difficulty getting the PLA parts to stick to the bed when printing them out. The blue surface that Flashforge provided with the printer was worthless. What worked for me was a piece of Dollar Store glass (cut to size), covered in green "frog-tape" from Walmart, I then rubbed a white plastic eraser all over the frog-tape's surface. The parts stuck like a champ, and were easy to remove later, hot or cold.
Edit: 2018-01-21
I no longer use blue tape and glue stick. Instead I use a clear sheet of PEI cut to size and glued down to the original bed. It becomes tacky as the bed heats up, and PLA and PETG sticky very well to it.
The original model is very nice, and well put together. It was an excellent model to learn 3D printing with. The whole model was printed in Hatchbox PLA, on the FF New Creator Pro. The gcode was created using the ReplicatorG Sailfish software and PyPy. We really enjoyed making this model.
A BIG thanks to "CarryTheWhat" on the Top piece of the model, the art work for this piece alone is Awesome!
Also a BIG thanks to Ellindsey, for the original files uploaded for the Octopus, the ball-joint links are fun to play with!
If I knew more, perhaps I could have printed this out using the original scale of the files provided, but being a newbie, I had issues where the tentacles were frozen and would not rotate. To remedy I simply printed everything out 50% larger.
I also had issues with printing out the bottom base. For some reason the top and bottom surfaces of it would not print out... only a outer-ring of ball-sockets resulted... I'm betting this is due to the ReplicatorG Sailfish software, and not the model itself. Anyway to remedy I took the Skull-Head model uploaded by Ellindsey, and revised it in Google Sketchup; I cut the base free, selected one ball-socket and cleaned it up, and then copied it several time into a circle to make a new ball-socket ring. I then added new flat surfaces for the top and bottom. This model prints great.
Also I learned that snapping the tentacles into the base was near impossilble. As a Dad, I could do it, but it took all my strength, and some sand paper. I could hear the PLA cracking as I did so. ABS would probably be better as it is more flexible.
To remedy, the final design has the bottom piece slightly larger, at 155% of the original size. The Tentacles snap much better (no sand paper needed); effort still required though. Also the Tentacle end piece is smaller at only 145% of the original; allowing them to snap-in more easily to the end of the tentacle links. The files uploaded depict the percentages that I trialed and found to work for me. You can print out these files as is or experiment further on your own on the sizing.
Just another quick-side note:
I had difficulty getting the PLA parts to stick to the bed when printing them out. The blue surface that Flashforge provided with the printer was worthless. What worked for me was a piece of Dollar Store glass (cut to size), covered in green "frog-tape" from Walmart, I then rubbed a white plastic eraser all over the frog-tape's surface. The parts stuck like a champ, and were easy to remove later, hot or cold.
Edit: 2018-01-21
I no longer use blue tape and glue stick. Instead I use a clear sheet of PEI cut to size and glued down to the original bed. It becomes tacky as the bed heats up, and PLA and PETG sticky very well to it.
Similar models
thingiverse
free

Articulated Jellyfish! Ball-joint articulated octopus Remix! by 3DCentralVA
...e bottom of the body. that's it!
check out our etsy for all of our 3d printed awesomeness!https://www.etsy.com/shop/3dcentral
thingiverse
free

Tapered Print In Place Tentacles by Novel_Mutations
...se.com/thing:745413 but they will work with any of the original heads and any of the remix's that use the original tentacles.
grabcad
free

King- Jellyfish
...o move the piece. then i made the crown with the line tool and changed the color of the crown to gold, and the jellyfish to pink.
thingiverse
free

Tough PLA Ball and Socket by MakerBotPartnerLibrary
...city.
this design is a remix of "ball and socket (slotted) joint" posted by "funbiestudios" on april 6, 2013.
thingiverse
free

Wire Rack Holder Brace by Mochery
...rack clip.
print in a material with a little flex!!! petg ideally. i used raptor pla and i had a heck of a time snapping it on.
3dwarehouse
free

Octopus Bottom Modified - Original file from Ellindsey
...octopus bottom modified - original file from ellindsey
3dwarehouse
3d print - octopus bottom - modified with flat top surface
thingiverse
free

BBJJ (Blinky Ball-Jointed Jellyfish) by plasmaton
...ones first and test for fit before you print everything. i had to make some minor size tweaks to get them to work on my printer.
thingiverse
free

Stronger Ball and Socket Links by BManx2000
... though, so this still isn't perfect.
i used asa for my print, so i'm not sure if this will work with the more rigid pla.
thingiverse
free

Aluminum - 10039 by JakeV
...bottom of this plate. i plan to print on to kapton.
[edit]
uploaded a current photo with the kapton tape on the print surface.
thingiverse
free

Socket Organizers
...issing.
infill: 10% or more
support "top" - yes
support "bottom" - no
pla
layer res: 0.2 mm
nozzle: 0.4 mm
Timetoprint00
thingiverse
free

Elephant Magnet - w reinforced trunk by Timetoprint00
...ut in half and added a magnet. sized for a cheap 20mm magnet. same magnet style as sold at hobby lobby, comes in a 50 piece pack.
thingiverse
free
Elephant - Reinforced Trunk by Timetoprint00
...so i reinforce it by placing a half circle within it. i did so using tinkercad. it so sooooo much stronger and still looks good.
thingiverse
free

Bird Magnet Matthew 6:26 by Timetoprint00
... to children that god cares for the birds, and yet god values people more than them. i handed these out for jr. church on sunday.
thingiverse
free

Apple Android Refrigerator Magnet by Timetoprint00
... speed; hasn't been a problem yet).
altered design using tinkercad.
gorilla glue to attach magnet
this is a remix of 1290514
thingiverse
free
Oculus Quest Vive Adapter DAS by Timetoprint00
... thinner if petg were used for the material. however, petg clogs my nozzels after each print, so i don't use petg very often.
thingiverse
free

UDI Holystone U818A Cover with Camera Stand and storage for separate battery pack by Timetoprint00
...e lower section of a motor is simply an extended antenna. this did not seem to help the distance for control that much if at all.
thingiverse
free

WinBook TW700 Tablet Cooling Stand by Timetoprint00
...uld be diminished.
monoprice tablet 12 x 9: http://www.monoprice.com/product?p_id=6815 (an excellent tablet for just under $100).
thingiverse
free
UDI U818A - Stand Alone - Camera Mount & Battery Storage by Timetoprint00
... housing, then see my alternate design of a dome with camera mount .... thingi 2816084.
https://www.thingiverse.com/thing:2816084
thingiverse
free

FlashForge New Creator Pro - Bed Extender - Sized for 8 x 10 Plexiglass by Timetoprint00
...the plexi-glass, and then liberally apply glue stick to the top of the blue tape. parts, especially pla, adhere very well.
enjoy!
Jellyfish
3ddd
$1

Ваза Jellyfish
...ваза jellyfish
3ddd
jellyfish
дизайнерская ваза jellyfish.
turbosquid
$8

Jellyfish
...d model jellyfish for download as c4d, 3ds, fbx, obj, and stl on turbosquid: 3d models for games, architecture, videos. (1549297)
3ddd
free

Jellyfish by Abhika
...jellyfish by abhika
3ddd
abhika , jellyfish
люстра из полированных морских раковин
3d_export
$65

jellyfish
...jellyfish
3dexport
simple rendering of the scene file
3d_export
$65

jellyfish
...jellyfish
3dexport
simple rendering of the scene file
3d_export
$65

Jellyfish
...jellyfish
3dexport
simple rendering of the scene file
3d_export
$30

jellyfish
...jellyfish
3dexport
simple rendering of the scene file
3d_export
$25
jellyfish
...jellyfish
3dexport
simple rendering of the scene file
3d_export
$25

Jellyfish
...jellyfish
3dexport
simple rendering of the scene file
3d_export
$8

Jellyfish
...p animation length is 100 frames.<br>feel free to contact me if you have any questions or need this model in other formats.
Resized
3d_ocean
$5

Shelf Resizer
...s to increase or decrease rows of shelf on the fly. once you setup the row, it saves this setting and size will stay at next s...
3d_export
$39
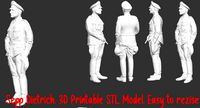
Sepp Dietrich 3d Printable STL Easy to resize
...at suggests the licensor endorses you or your use.<br>noncommercial — you may not use the material for commercial purposes.
3d_export
free

christmas decoration
...christmas decoration
3dexport
stl file for 3dprint is ready just resize it fbx 3ds and max2017 is ready vray material
3d_export
$8

minimal rings
...
this file contains 3 rings<br>the stl format is ready to print the 3dm one is poly surface and easy to edit and resize.
3d_ocean
$30
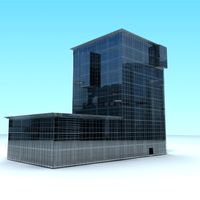
Building
...otel skyscraper
this building new and modern model you can resize it to any size you need and to use this to any external project
3d_ocean
$2
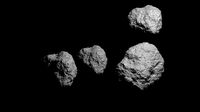
Asteroids
...om bump mapping on surface of asteriods for the organic look. you can add textures and also resize this is ready to render. (r2r)
3d_ocean
$12

Shopping Tools
...file design for shopping tools on any were in this world file include max.3ds.obj.zip very handy use this file and easy to resize
3d_ocean
$8

Ton 002 Hi-Poly
...reall piece. and it use arroway textures, which are resized and part of the...
3d_ocean
$12

HQ Pack of Painted Grass Textures
...hey are in big resolution, so you can resize them to any size you need. all textures comes in four different color variations....
3d_export
$25

beam
...odel for cnc router.1395*250*20. you can resize that model.if you want to receve a layers of this model, you can ask us about it.
Ease
3ddd
$1

Sofa EASE
...ofa ease.paola lenti | aqua collection. upholstered round sofa with removable cover , design by francesco rota. size ∅180х55h см.
3d_export
$5

painter ease
...aterials are logically named<br>the main format is in 3ds max 2009.<br>satisfcation garranteed..<br>thank you !
3d_export
$12
VECNA mask stranger things
...stranger things 3dexport it is cut for your greater ease of...
3d_export
$20

Luzik
...will be more so far my dear full of ease ...
3d_export
$5
office cubicle empty
...and a filing cabinet fully textured and unwrapped for ease of use if you want to change the...
3d_export
free
robot for animation
...type. parent objects have also been added here, for ease of...
3d_ocean
$4

Animated Robot for games
...for games 3d model robot for you games. exporte easey to unity realised with...
3d_export
$39
Classic Motorbike oH 3D Model
...motorbike the individual parts have been linked together for ease use and materials applied nice 3ds max realistic sexy...
3d_export
$39

Classic Motorbike oH2 3D Model
...motorbike the individual parts have been linked together for ease use and materials applied nice 3ds max realistic sexy...
3d_ocean
$25
Dinosaur Skeleton
...skeleton. this model is a low-poly models, and for ease of use i made two additional stacking effect, you...
Mod
design_connected
$13

MOD. 4233 - MOD. 4234 Table Lamp
...mod. 4233 - mod. 4234 table lamp
designconnected
arcahorn mod. 4233 - mod. 4234 table lamp computer generated 3d model.
design_connected
$11

MOD.1095
...mod.1095
designconnected
mod.1095 computer generated 3d model. designed by sarfatti, gino.
3ddd
$1

fireplaces mod Spec
...fireplaces mod spec
3ddd
камин
fireplaces mod spec 180x90x125h
3ddd
free

Flos Mod. 2129
... mod
фабрика: flos
модель: mod. 2129
описание: подвесной светильник, металл, белый, черный.
сайт: www.flos.com
turbosquid
$32

MOD A 001
... available on turbo squid, the world's leading provider of digital 3d models for visualization, films, television, and games.
turbosquid
$29

Maars Mod
... available on turbo squid, the world's leading provider of digital 3d models for visualization, films, television, and games.
turbosquid
$15

Mod 70..
... available on turbo squid, the world's leading provider of digital 3d models for visualization, films, television, and games.
turbosquid
$10

MOD Sofa
... available on turbo squid, the world's leading provider of digital 3d models for visualization, films, television, and games.
turbosquid
$1

Mod-Lite
... available on turbo squid, the world's leading provider of digital 3d models for visualization, films, television, and games.
turbosquid
$1
pc mod
... available on turbo squid, the world's leading provider of digital 3d models for visualization, films, television, and games.
Assembly
3d_export
$7
Electronic product assembly machine assembly machine
...electronic product assembly machine assembly machine
3dexport
electronic product assembly machine assembly machine
3d_export
$15
generator assembly line
...ced and assembled in the form of module block. it is a demonstration project of generator assembly. welcome to download and learn
3d_export
$10
elevator traction machine assembly line motor assembly process
... traction machine assembly line motor assembly process
3dexport
elevator traction machine assembly line (motor assembly process)
3d_export
$16
pin assembly machine
...pin assembly machine
3dexport
pin assembly machine
3d_export
$7
tower-crane-assembly
...tower-crane-assembly
3dexport
tower-crane-assembly
turbosquid
$100

Engine Assembly
...id
royalty free 3d model engine assembly for download as stl on turbosquid: 3d models for games, architecture, videos. (1658296)
turbosquid
$100

Engine Assembly
...id
royalty free 3d model engine assembly for download as stl on turbosquid: 3d models for games, architecture, videos. (1658293)
turbosquid
$100
Engine Assembly
...id
royalty free 3d model engine assembly for download as stl on turbosquid: 3d models for games, architecture, videos. (1658291)
turbosquid
$75
Platform Assembly
...royalty free 3d model platform assembly for download as blend on turbosquid: 3d models for games, architecture, videos. (1472939)
turbosquid
$15
generator assembly
...y free 3d model generator assembly for download as and sldas on turbosquid: 3d models for games, architecture, videos. (1469469)