Thingiverse
ISDT H605 Chargingbox by Marcel50
by Thingiverse
Last crawled date: 4 years, 2 months ago
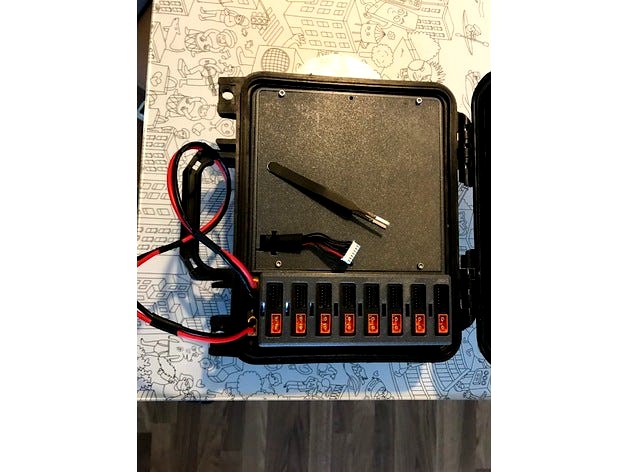
This is my second charging Case I designed and build it uses 8x ISDT H605Air Charger.
I wanted it to be small easy to use and able to charge all day long :D
Charging is as easy as plugging in the Battery and sliding a tool down the hole to press the button (in my case tweezers the hole is also an Air vent for cooling and a gap to look at the charge indicator).
I pre-configured my Charge setting to 6s 2,4A (setup is done via Phone App).
It weights 7kg and has a build in 18650 Pack 6s15p over 1kWh and charges up to 35x 6s 1300mah packs.
The print files are designed to fit perfectly into the hard case and Assembly is very easy, all you need to have is a spot welder and soldering iron besides a 3d printer.
I would recommend fit testing the cells first on the top plate before printing the rest because I noticed that there a small differences from manufactures in cell insulation thickness, as long as the cell isn't thicker than 18,6 mm you should be good.
Parts used:https://www.amazon.de/gp/product/B07NDG7C1W/ref=ppx_yo_dt_b_asin_image_o04_s00?ie=UTF8&psc=1
https://www.amazon.de/3D-Drucker-Richer-R-Gebl%C3%A4se-Radialer-Turbofan-K%C3%BChler-Kit-24V/dp/B07SNH8CQB/ref=sr_1_11?dchild=1&keywords=24v+fan&qid=1621970992&sr=8-11
https://www.banggood.com/ISDT-H605-Air-50W-5A-DC-2S-6S-Lipo-Battery-Smart-bluetooth-Charger-With-APP-Operation-p-1386099.html?rmmds=myorder&cur_warehouse=CN&ID=224