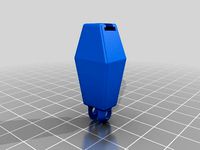
Thingiverse
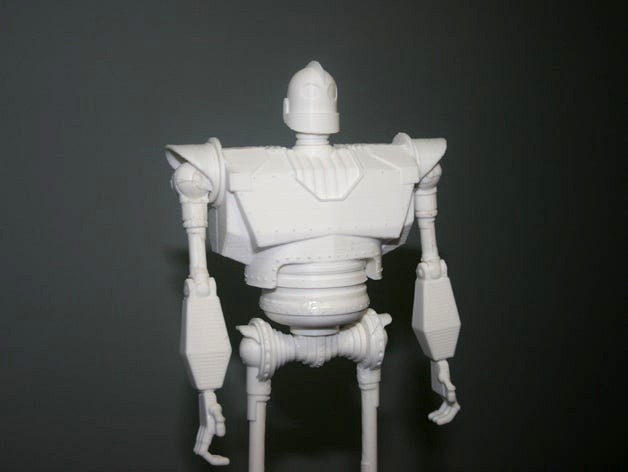
Iron Giant by mckinneyj
by Thingiverse
Last crawled date: 4 years ago
My friend's son loves Iron Giant. They asked me to make him one. I found this model on GrabCad (https://grabcad.com/library/iron-giant-1) and modified to it be printable. with articulating arms and head and waist.
NOTE: I FORGOT THE SHOULDERS. They have been added now. I also uplaoded models that are oriented properly to print as I feel is best.
EDIT: Due to popular request, I added parts without the supports.
Parts:
Head
Upper torso front
upper torso back
lower torso
hip (x2)
left leg
right leg
fore arms
upper arm (x2)
shoulder pin (x4)
Printing:
Orientation of the prints is important. The upper arm and legs in particular should to be printed laying down to get the greatest strength. Then legs have supports in the model that work pretty well but do leave some scarring (sorry).
Assembly:
You will need some glue (super glue works great). Clean the parts well before assembly. I included supports in many of the models. where holes are printed vertically I added supports that will need to be punched out with a screw driver or pried out with pliers. Many of the supports will pull right off, but you may want to clean up the edges with a razor.
arm assembly:
to assemble an arm you need a shoulder, shoulder pins (x2), upper arm, and lower arm. after cleaning up the prints pin the shoulder to the fat end of the upper arm. You may need to sand the pin down. DO NOT FORCE THE PIN! It will break the should (i speak from experience)
after pushing in the pin I put a few drops of super glue on the outside ends of the pin to glue the pin to the shoulder piece. If you use too much glue you could immobilize the joint.
Then pin the lower arm to the upper arm. the pins are long for the elbow joint. I carefully used a razor to cut off the extra material. Then glued the outside ends of the pin to the lower arm piece. Again not too much.
waist assembly:
You need the 'lower torso' and two 'hips'. Before you glue these together do a test fit. You may need to shave of the tip of the hip so they can both fit flush against the...crotch...of the lower torso. Once you are sure they fit flush glue them well. Especially the the interface between the hip and the crotch. The one you made flush. This is a weak point.
Torso assembly:
The Head arms and waist will all fit into the Upper torso pieces. DO A DRY FIT FIRST! make sure the joints all rotate well. Clean off the joints where necessary. I also had to clean up the interface between the two upper torso parts to get a good clean seam between them.
Once you are comfortable with the fit, glue it up. Be sure to keep glue away from joints.
Leg assembly:
Do a dry fit. Alignment is crucial if you want it to stand on it's own two feet. Then glue them up.
You are Done! Enjoy
Similar models
thingiverse
free
Xavibot by SickRanchez
...sickranchez thingiverse i wanted to make a smaller robot similar to jimbo the robot with fewer pieces and a...
cults
free

Supergirl articulated doll
...glued in place.
i added a pair of fists in case any one prefers them. (they will probably print easier than the open palmed ones)
thingiverse
free

Supergirl articulated doll by ATARKA
...glued in place.
i added a pair of fists in case any one prefers them. (they will probably print easier than the open palmed ones)
thingiverse
free

OUTER SHOULDER for use with upper arm lower arm ect. by NordwickDesign
...y nordwickdesign
thingiverse
outer shoulder for use with upper arm lower arm ect.
print 2x scale for pictured size. no supports.
thingiverse
free

Brody the Bro-bot by Freezdried
...- the waist and upper arms in particular. otherwise, print each part separately and put it all together to make your own bro-bot!
thingiverse
free
Titanfall 2 Northstar custom by aghosh212
...
(av) b5 (hip) <- l01(hip) <- l02 (upper leg) <- l03 (lower leg) <- l04(ankle joint) <- lp7 (ankle) <-lp6(foot)
thingiverse
free

Shoulder for use with upper and lower arm by NordwickDesign
...h upper and lower arm by nordwickdesign
thingiverse
shoulder for use with upper and lower arm.
print 2x scale for pictured size.
thingiverse
free
Shoulder/Upper Arm Armor by chiefrentageek
...hat's what's pictured.
printed in "watermelon" pla filament (as i had extra).
just fuse and/or glue together.
thingiverse
free

CW Defensor 3D Printable upgrades by SummersideGuy
...he feet. they are printed this way to ensure structural strength only the peg length. will require supports touching build plate.
thingiverse
free

CW and KO CW Defensor Upgrade Set by SummersideGuy
...he feet. they are printed this way to ensure structural strength only the peg length. will require supports touching build plate.
Giant
3ddd
$1

Anglepoise Giant
...anglepoise giant
3ddd
anglepoise giant
anglepoise giant lamp, fully shaded and rigged so you can add it to you scene easily
design_connected
$18

Giant 1227
...giant 1227
designconnected
anglepoise giant 1227 computer generated 3d model. designed by carwardine, george.
3ddd
free
Cosmo Giant
...ax , cosmo , giant
высота (см)92
диаметр (см)45
3d_export
$65

giant panda
...giant panda
3dexport
simple rendering of the scene file
3d_export
$20

Iron Giant 3D Model
...iron giant 3d model
3dexport
iron giant cartoon robot characters
iron giant 3d model robertpurmalis 82264 3dexport
3d_export
$50
Giant Grandpa 3D Model
...giant grandpa 3d model
3dexport
giant ghost fantasy horror monster creature
giant grandpa 3d model truemen.studio 6740 3dexport
3d_export
$50

Giant Boy 3D Model
...giant boy 3d model
3dexport
giant ghost fantasy horror monster creature
giant boy 3d model truemen.studio 6738 3dexport
3d_export
$50

Giant Lady 3D Model
...giant lady 3d model
3dexport
giant ghost fantasy horror monster creature
giant lady 3d model truemen.studio 6741 3dexport
3d_export
$50
Giant Man 3D Model
...giant man 3d model
3dexport
giant ghost fantasy horror monster creature
giant man 3d model truemen.studio 6742 3dexport
3d_export
$27

Giant Tortoise 3D Model
... model
3dexport
turtle tortoise animal shell carapace vegetarian giant reptile wild
giant tortoise 3d model matvic 83351 3dexport
Iron
archibase_planet
free

Iron
...ase planet
iron flatiron flat iron smoothing-iron
iron scarlett sc1133s n260112 - 3d model (*.3ds) for interior 3d visualization.
archibase_planet
free

Iron
...et
iron flatiron flat iron smoothing-iron
iron black & decker n131213 - 3d model (*.gsm+*.3ds) for interior 3d visualization.
3ddd
free

Iron
...mbo-unlimitedideas.com/produtos_post/iron-console/
в архиве сцена 2011 и 2014, fbx и obj, текстуры
рендер: vray 2.4
3d_ocean
$15

Steam iron
...ign made by me. you can use it for your projects and games as you want. iron, steam iron, philips,siemens, clothes,ironing, tefal
3ddd
$1
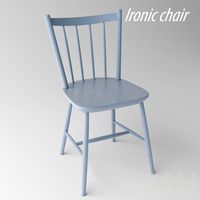
Ironic chair
...ironic chair
3ddd
ironic
ironic chair
classic chair design by ton
materials: blue polished wood
3d_export
$5
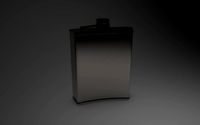
iron flask
...iron flask
3dexport
3d model of an iron flask
3d_export
$5
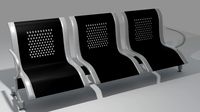
iron chair
...iron chair
3dexport
iron chair that usually seen in a train station.
3d_export
$10
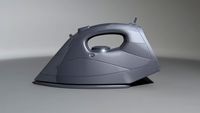
Iron 3D Model
...iron 3d model
3dexport
iron smoothing-iron flatiron
iron 3d model poctob 77216 3dexport
archive3d
free

Iron 3D Model
...smoothing-iron
iron scarlett sc1133s n260112 - 3d model (*.3ds) for interior 3d visualization.
3d_ocean
$18
Iron Man
...applied to model model can be used in games etc. file formats 1 maya 2012 2 .obj 3 .fbx 4 .3ds 5 max 2012 high resolution turn...