Thingiverse

Installing Klipper on TronXY X5SA by cab404
by Thingiverse
Last crawled date: 3 years, 3 months ago
** obligatory "your warranty in now void" disclaimer **THIS GUIDE IS FOR CHITU V6 BOARDS ONLY
So, you've decided to upgrade you printer software-wise. You are in for a ride!
Here's a gist on Github, cause tv can't format it's markdown properly
What can you expect
You'll get Klipper experience.
That includes speeds up to 300 mm/s (I've tested infill at 180, and it was pretty much flawless), proper linear advance, low vibration on high accelerations without relying on approximations like S-Curve, no lags on dense GCode files — it's nothing like Marlin or the stock firmware.
Also, you won't be able to control your printer from it's screen anymore.
IDK, maybe that's a deal breaker for you, but controlling printer from WiFi is much more comfortable IMO.
Getting a Klippy machine (Klipper host)
First of all, you need a Raspberry Pi 2 or later you want to use as a Klipper/Octoprint machine. Other ARM-based computers are good as well — e.g NanoPi, BananaPi, etc.
Follow this guide to get and install OctoPi, and follow this one up to "Building and Flashing" section to get Klipper on your OctoPi.
Use this printer.cfg as your printer config.
Getting Klipper onto the printer
Copy update.cbd onto SD card, insert it into your printer, reboot. If you heard some beeps, and then your screen does not light up anymore — it's been installed!
You can build your own update.cbd, instructions are on top of the config file, follow with regard to "Building and Flashing" section we skipped earlier.If you ever reconsider your life's choices, you can always reflash stock firmware the same way.
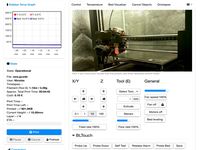
Now connect your printer to Pi via USB, and reload host in the Klipper tab in the Octoprint.
Enabling Linear Advance
If you would also want to enable Linear Advance, you'll need
Some skill with soldering iron
1k resistor.
Serial adapter
You can kind of live without that, especially if you aren't handy with a soldering iron.
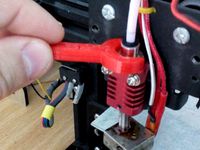
Connect to your E-stepper as per this guide. Use ground from PSU, and connect uart pin to one marked with red arrow.
Open OTP tab and write 2.7 and 1.1. This will disable StealthChop, thus allowing you to use Linear Advance feature.
Graz, you successfully reprogrammed your stepper to be usable with Linear Advance! Your corners will look better than ever.
I use linear advance at 1.5, your's probably will be around that value.
So, you've decided to upgrade you printer software-wise. You are in for a ride!
Here's a gist on Github, cause tv can't format it's markdown properly
What can you expect
You'll get Klipper experience.
That includes speeds up to 300 mm/s (I've tested infill at 180, and it was pretty much flawless), proper linear advance, low vibration on high accelerations without relying on approximations like S-Curve, no lags on dense GCode files — it's nothing like Marlin or the stock firmware.
Also, you won't be able to control your printer from it's screen anymore.
IDK, maybe that's a deal breaker for you, but controlling printer from WiFi is much more comfortable IMO.
Getting a Klippy machine (Klipper host)
First of all, you need a Raspberry Pi 2 or later you want to use as a Klipper/Octoprint machine. Other ARM-based computers are good as well — e.g NanoPi, BananaPi, etc.
Follow this guide to get and install OctoPi, and follow this one up to "Building and Flashing" section to get Klipper on your OctoPi.
Use this printer.cfg as your printer config.
Getting Klipper onto the printer
Copy update.cbd onto SD card, insert it into your printer, reboot. If you heard some beeps, and then your screen does not light up anymore — it's been installed!
You can build your own update.cbd, instructions are on top of the config file, follow with regard to "Building and Flashing" section we skipped earlier.If you ever reconsider your life's choices, you can always reflash stock firmware the same way.
Now connect your printer to Pi via USB, and reload host in the Klipper tab in the Octoprint.
Enabling Linear Advance
If you would also want to enable Linear Advance, you'll need
Some skill with soldering iron
1k resistor.
Serial adapter
You can kind of live without that, especially if you aren't handy with a soldering iron.
Connect to your E-stepper as per this guide. Use ground from PSU, and connect uart pin to one marked with red arrow.
Open OTP tab and write 2.7 and 1.1. This will disable StealthChop, thus allowing you to use Linear Advance feature.
Graz, you successfully reprogrammed your stepper to be usable with Linear Advance! Your corners will look better than ever.
I use linear advance at 1.5, your's probably will be around that value.
Similar models
thingiverse
free

CR10 V2 Klipper config with 3D Touch and AC Bed by XT350TTX
...hat linear / pressure advance is not possible for stock cr10v2 creality mainboard with klipper. (tmc2208 in stealthchop)
have fun
thingiverse
free

Klipper Config for Anycubic Predator
...tft 2.4 touch screen display reprap smart controller panel similar 12864 lcd" not working. but octoklipper is so great...
thingiverse
free
Calibration Sheet For Stepper Motors by Davidlewtas
...rrent steps per millimetre ÷ measure size =
for example 20 mm x 384spm ÷ 19.12mm = 401.6spm
i hope this helps you and good luck!!
thingiverse
free

Artillery Genius Klipper config by Mudz
...btt skr 1.4 with tmc2209
tft screen don't work with klipper
**the led is not enabled but you can add the code to the firmware
thingiverse
free

BlueMaker BM-3S-350 Klipper Config by jasonshrout
..._z1 endstop pin isn't what you will have (was having an issue with mine and moved it to x+. the actual pin for that is p1.24
thingiverse
free

Klipper Configuration for Geeetech Mecreator 2 by Fred-D
...is checked, your printer is ready to print. it's now up to you to fine tune it.
i hope this experience will help you.
enjoy!
thingiverse
free

Klipper Firmware for Anycubic Mega Zero 1 and 2 by TheNoob0
...and end macros, bed leveling menu and support for mainsail os
update 2021-03-28:
added seprate config files for mainsail os users
thingiverse
free

Kingroon KP3S Klipper 0.96 oled screen by nehiLo
...//
printer.cfg
[mcu host]
serial: /tmp/klipper_host_mcu
[display]
lcd_type: ssd1306
menu_timeout: 30
i2c_mcu: host
i2c_bus: i2c.1
thingiverse
free
Klipper Configs for Creality Printers by artheoday
...klipper configs for creality printers by artheoday
thingiverse
klipper config... i will upload more in the future
thingiverse
free
What is Octoprint and all usefull plugins backup
...in
and default password : chiron
then set you new password and enjoy !
for more info :https://www.youtube.com/watch?v=svzjnslxajc
Cab404
thingiverse
free

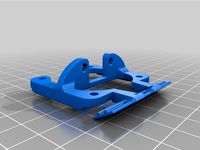
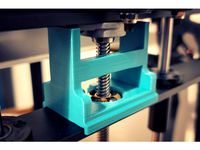
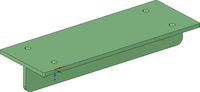
Lazy BMG Adapter for TronXY X5SA by cab404
...lazy bmg adapter for tronxy x5sa by cab404
thingiverse
it's a basic bmg adapter, mounted in place of a drag chain.
thingiverse
free

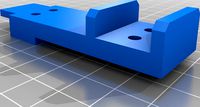
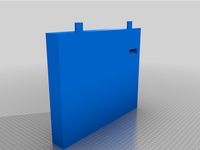
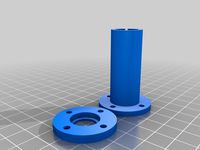
RPi Camera mount for TronXY X5SA (or any other printer really) by cab404
...er really) by cab404
thingiverse
remixed it for tronxy x5sa, to be mounted instead of one of the extrusion caps.
uses m4 screws.
Klipper
thingiverse
free

Artillery Genius Klipper by DavidMega
...artillery genius klipper by davidmega
thingiverse
simple klipper config for the artillery genius.
works well for me.
thingiverse
free
Klipper Configs for Creality Printers by artheoday
...klipper configs for creality printers by artheoday
thingiverse
klipper config... i will upload more in the future
thingiverse
free

RotoRev Klipper LED Board Mount by 3dcrash
...rotorev klipper led board mount by 3dcrash
thingiverse
read led board mount for the rotorev klipper 220mm.
thingiverse
free

Klipper Calibrate Ring
...fically to be a klipper printer.
this uses less filament and takes less time when you do a large 150% ring for doing fine tuning.
thingiverse
free
Artillery Genius Klipper config by Mudz
...btt skr 1.4 with tmc2209
tft screen don't work with klipper
**the led is not enabled but you can add the code to the firmware
thingiverse
free

Klipper M600 code by woodwaker
...st any raspberry pi will run it.
this is customized for a btt skr mini e3 v2, but there are presets for almost any printer board.
thingiverse
free
Kingroon KP3S Klipper 0.96 oled screen by nehiLo
...//
printer.cfg
[mcu host]
serial: /tmp/klipper_host_mcu
[display]
lcd_type: ssd1306
menu_timeout: 30
i2c_mcu: host
i2c_bus: i2c.1
thingiverse
free

Klipper Cult Faceplate for Artillery Printers by pseudo6626
...ns of the faceplate, so that it should now match the stock tft on the sidewinder x1. disclaimer, i have not printed to check yet.
thingiverse
free

Klipper Firmware Calibration Model by ChickinTenders
...per max acceleration value.
your values may differ, hope this helps!
rotate the the stl so the shelled out portion is facing up.
thingiverse
free
CR10 V2 Klipper config with 3D Touch and AC Bed by XT350TTX
...hat linear / pressure advance is not possible for stock cr10v2 creality mainboard with klipper. (tmc2208 in stealthchop)
have fun
X5Sa
thingiverse
free
Chain riser X5SA by xanatorium
...chain riser x5sa by xanatorium
thingiverse
chain risers for x5sa
thingiverse
free
Tronxy X5S X5SA Organizer
...tronxy x5s x5sa organizer
thingiverse
organizer for tronxy x5s; x5sa
thingiverse
free
Tronxy X5SA Z-Blocker by n02m4n
...tronxy x5sa z-blocker by n02m4n
thingiverse
a z-blocker for my x5sa.
thingiverse
free

Tronxy X5SA Fan Duct by Noobik4ever
...tronxy x5sa fan duct by noobik4ever
thingiverse
fun duct for tronxy x5sa
thingiverse
free

Tronxy X5S, X5SA linear rail
...tronxy x5s, x5sa linear rail
thingiverse
linear rail tronxy x5sa
thingiverse
free

Tronxy X5SA Filament holder Screw
...tronxy x5sa filament holder screw
thingiverse
better holder for tronxy x5sa filament as screw
thingiverse
free
TronXY X5SA PRO BLTouch Mount
...tronxy x5sa pro bltouch mount
thingiverse
a simple bltouch mount for the tronxy x5sa pro.
thingiverse
free
Tronxy X5SA Extruder TPU Upgrade
...tronxy x5sa extruder tpu upgrade
thingiverse
redesigned anycubic kossel extruder tpu upgrade for tronxy x5sa
thingiverse
free

X5SA Tronxy Towline by Daelin89
... towline by daelin89
thingiverse
broke the towline on my tronxy x5sa-400. so i remade it in fusion 360. have yet to test print
thingiverse
free
Tronxy X5SA Display Offset by Darkwulf3D
...tronxy x5sa display offset by darkwulf3d
thingiverse
tronxy x5sa pro display offset for the large table adjustment wheels
Tronxy
thingiverse
free
LMF8LUU for tronxy x5s
...lmf8luu for tronxy x5s
thingiverse
lmf8luu for tronxy x5s
thingiverse
free
TRONXY XY2PRO by MaiMaiFACTORY
...tronxy xy2pro by maimaifactory
thingiverse
tronxy xy2-pro
sadebox
thingiverse
free

Power_supply_cover for TRONXY by Karollo
...power_supply_cover for tronxy by karollo
thingiverse
power supply cover for tronxy.
thingiverse
free
Tronxy support by d3m1sf
...tronxy support by d3m1sf
thingiverse
soporte para impresora tronxy x3.
thingiverse
free
Tronxy 13mm wrench
...tronxy 13mm wrench
thingiverse
13mm wrench for hotend fitting on tronxy x1...
thingiverse
free

Tronxy x5s by alex190074
...tronxy x5s by alex190074
thingiverse
tronxy x5s cart x fully adjustable only !!
thingiverse
free
Tronxy Logo
...tronxy logo
thingiverse
made this logo
thingiverse
free

Patas TronXY X3 - Vitofeli - TronXY Legs by Todopic
...todopic
thingiverse
patas separadoras para la tronxy x3, permite colocar la caja de control debajo y aprovechas mejor el espacio
thingiverse
free
TRONXY X5S EXTRUDER by ADAM98
...tronxy x5s extruder by adam98
thingiverse
tronxy x5s extruder
thingiverse
free

Belt tensioner Tronxy by jpalianak
...belt tensioner tronxy by jpalianak
thingiverse
belt tensioner tronxy
Installing
3ddd
$1

electrical installation
...electrical installation
3ddd
electrical installation , розетка
electrical installation
turbosquid
$2

electrical installation
...lectrical installation for download as 3ds, obj, fbx, and dae on turbosquid: 3d models for games, architecture, videos. (1196387)
turbosquid
free

Heating installation
... available on turbo squid, the world's leading provider of digital 3d models for visualization, films, television, and games.
3d_export
$5

Flange fixer for installation
...lange fixer for installation
3dexport
flange fixer for installation with diameter 3000. for chimney for wind generator tubes etc
turbosquid
$20

Hand Art Installation
...yalty free 3d model hand art installation for download as obj on turbosquid: 3d models for games, architecture, videos. (1671299)
turbosquid
$40

Hand butterfly Art installation
... 3d model hand butterfly art installation for download as obj on turbosquid: 3d models for games, architecture, videos. (1671304)
turbosquid
$10

Chinese atmosphere installations umbrella
...mosphere installations umbrella for download as fbx and blend on turbosquid: 3d models for games, architecture, videos. (1481622)
turbosquid
free

Sci Fi external installation
...el sci fi external installation for download as obj and blend on turbosquid: 3d models for games, architecture, videos. (1438747)
3ddd
$1

полотенцесушитель Omega R ("Instal Project")
... польша
полотенцесушитель omega r (600x1173mm), польской фирмы "instal project"
turbosquid
$40

Cristmass installation. Pine, campfire, night
... available on turbo squid, the world's leading provider of digital 3d models for visualization, films, television, and games.