Thingiverse
InMoov - Advanced Eye Mechanism by Dakota76
by Thingiverse
Last crawled date: 3 years, 1 month ago
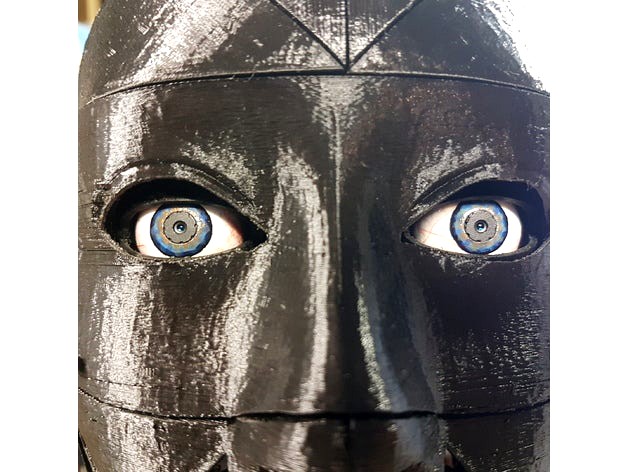
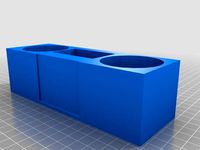
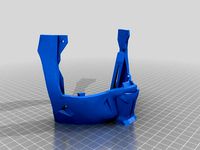
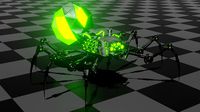
This is an advanced eye upgrade for the InMoov robot. It features eye lids and independent movement of each eye. The design files include a drill mount for sanding and painting eye balls.
Demonstration videos @: https://www.youtube.com/channel/UC-TVs2NgcdnF-nCaefCc6zghttps://www.youtube.com/watch?v=2tN2dbpm3rchttps://www.youtube.com/watch?v=9xMmtNk8nvE
Note: this is a difficult build as clearances are small and some specialized tools may be required for assembly.
You Will Need:
6x SG90 servos with related hardware and hornshttps://www.amazon.com/J-Deal%C2%AE-Micro-Helicopter-Airplane-Controls/dp/B00X7CJZWM/ref=sr_1_3?ie=UTF8&qid=1506426852&sr=8-3&keywords=sg90
2x 2-56 threaded ball jointshttps://www.amazon.com/Great-Planes-Threaded-2-56-Ball/dp/B001BHEFUM/ref=sr_1_sc_3?s=toys-and-games&ie=UTF8&qid=1506223441&sr=1-3-spell&keywords=2-56+thraded+ball+links
2x 2-56 threaded 12" long pushrodshttps://www.amazon.com/Du-Bro-801-2-56-Threaded-6-Pack/dp/B0006O4HQS/ref=sr_1_1?s=toys-and-games&ie=UTF8&qid=1506224591&sr=1-1&keywords=du-bro+rod
4 pushrod to servo horn couplershttps://www.amazon.com/Du-Bro-Connectors-Re-Usable-Nylon-12-Pack/dp/B0006O8U0M/ref=pd_bxgy_21_img_3?_encoding=UTF8&psc=1&refRID=T6TWGRKJFR511VMMFAY5
2x camerashttps://www.amazon.com/Small-Camera-micro-security-Surveillance/dp/B00WSJIMJC/ref=sr_1_12?ie=UTF8&qid=1506426350&sr=8-12&keywords=600+tvl+camera
monofilament or braided fishing line in 6 to 8lb test
Forceps - The non toothed type used for stitches (used to aid installation of fishing line and hinge rods)
small phillips head screw driver (mounting servos and servo horns)
riffler files
I will be adding a assembly manual with instructions as soon as time allows. Extra points for building before instructions are released. lol
Preliminary instructions: (You may want to print these for easy reference!)
These instructions are preliminary and by no means complete!! * Parts require filing for proper fit as they were designed tight to adjust fit by hand. hook servos to control board and center them before assembly
1.) Print all .stl files with a maximum layer height of .1mm for best results. (recommend printing eyeballs first so you can sand and paint them while everything else prints) File rough edges with riffler files and chase all .072" holes with a .07" drill bit except for servo screw holes on servo frame.
2.) Sand and paint eyeballs to your taste using the eyeball cordless drill finishing mounts with a metric screw in the mounts for drill chick. I painted my irises at a .5" diameter as this is the diameter of average human irises (some like the large iris of the original InMoov eyes)
3.) Optional Mount cameras (camera specs will be in official instructions when released) into back of eyeballs. Fix in place with a tiny bit of CA glue. Also fix wires off to side as pictured in eye photo being careful not to add height as the cameras barely fit without hitting gimbal.
4.) Using a hacksaw or jewelers saw, cut and chamfer ends of two 8mm, four 6mm and four 5mm pieces from the non threaded end of one of your pushrods. The 8mm are used for eyeball gimbal to servo frame attachment, the 5mm are used to mount the eyeballs to the eyeball gimbal, the 6mm are used to attach the eyelids to servo frame.
5.) Using small bit of pushrod from last step, attach the gimbals to servo frame with 8mm length rods. You will need the forceps to hold rots for insertion into holes without damaging them. Next mount eyeballs to gimbal using 5mm rods taking note of camera orientation for correct image. Next install ball part of linkage on the beam between eyelids on both pairs. then install eyelids to servo frame using the 6mm rods.
6.) install servos, horns, printed servo horns and, linkages as pictured. bending of connecting rods is necessary to make connections.
7.) Use 6-8LB test monofilament fishing line or similar diameter braided line in four 12" sections. this will leave alot of excess but will be easier to work with in this length. Using forceps to help, use Rapala knots (google it) to tie the four sections of string to each of the side holes in eyeballs. Fish the 4 lines up through the holes in the servo frame. Wrap the lines around printed servo horns of upper servos a couple times and affix them using servo horn holes.
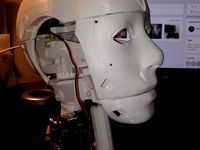
8.) Position completed mechanism behind mask and glue in place. (I recommend hot glue so it can be removed later if needed for maintenance or upgrades as I refine the mechanism)
Demonstration videos @: https://www.youtube.com/channel/UC-TVs2NgcdnF-nCaefCc6zghttps://www.youtube.com/watch?v=2tN2dbpm3rchttps://www.youtube.com/watch?v=9xMmtNk8nvE
Note: this is a difficult build as clearances are small and some specialized tools may be required for assembly.
You Will Need:
6x SG90 servos with related hardware and hornshttps://www.amazon.com/J-Deal%C2%AE-Micro-Helicopter-Airplane-Controls/dp/B00X7CJZWM/ref=sr_1_3?ie=UTF8&qid=1506426852&sr=8-3&keywords=sg90
2x 2-56 threaded ball jointshttps://www.amazon.com/Great-Planes-Threaded-2-56-Ball/dp/B001BHEFUM/ref=sr_1_sc_3?s=toys-and-games&ie=UTF8&qid=1506223441&sr=1-3-spell&keywords=2-56+thraded+ball+links
2x 2-56 threaded 12" long pushrodshttps://www.amazon.com/Du-Bro-801-2-56-Threaded-6-Pack/dp/B0006O4HQS/ref=sr_1_1?s=toys-and-games&ie=UTF8&qid=1506224591&sr=1-1&keywords=du-bro+rod
4 pushrod to servo horn couplershttps://www.amazon.com/Du-Bro-Connectors-Re-Usable-Nylon-12-Pack/dp/B0006O8U0M/ref=pd_bxgy_21_img_3?_encoding=UTF8&psc=1&refRID=T6TWGRKJFR511VMMFAY5
2x camerashttps://www.amazon.com/Small-Camera-micro-security-Surveillance/dp/B00WSJIMJC/ref=sr_1_12?ie=UTF8&qid=1506426350&sr=8-12&keywords=600+tvl+camera
monofilament or braided fishing line in 6 to 8lb test
Forceps - The non toothed type used for stitches (used to aid installation of fishing line and hinge rods)
small phillips head screw driver (mounting servos and servo horns)
riffler files
I will be adding a assembly manual with instructions as soon as time allows. Extra points for building before instructions are released. lol
Preliminary instructions: (You may want to print these for easy reference!)
These instructions are preliminary and by no means complete!! * Parts require filing for proper fit as they were designed tight to adjust fit by hand. hook servos to control board and center them before assembly
1.) Print all .stl files with a maximum layer height of .1mm for best results. (recommend printing eyeballs first so you can sand and paint them while everything else prints) File rough edges with riffler files and chase all .072" holes with a .07" drill bit except for servo screw holes on servo frame.
2.) Sand and paint eyeballs to your taste using the eyeball cordless drill finishing mounts with a metric screw in the mounts for drill chick. I painted my irises at a .5" diameter as this is the diameter of average human irises (some like the large iris of the original InMoov eyes)
3.) Optional Mount cameras (camera specs will be in official instructions when released) into back of eyeballs. Fix in place with a tiny bit of CA glue. Also fix wires off to side as pictured in eye photo being careful not to add height as the cameras barely fit without hitting gimbal.
4.) Using a hacksaw or jewelers saw, cut and chamfer ends of two 8mm, four 6mm and four 5mm pieces from the non threaded end of one of your pushrods. The 8mm are used for eyeball gimbal to servo frame attachment, the 5mm are used to mount the eyeballs to the eyeball gimbal, the 6mm are used to attach the eyelids to servo frame.
5.) Using small bit of pushrod from last step, attach the gimbals to servo frame with 8mm length rods. You will need the forceps to hold rots for insertion into holes without damaging them. Next mount eyeballs to gimbal using 5mm rods taking note of camera orientation for correct image. Next install ball part of linkage on the beam between eyelids on both pairs. then install eyelids to servo frame using the 6mm rods.
6.) install servos, horns, printed servo horns and, linkages as pictured. bending of connecting rods is necessary to make connections.
7.) Use 6-8LB test monofilament fishing line or similar diameter braided line in four 12" sections. this will leave alot of excess but will be easier to work with in this length. Using forceps to help, use Rapala knots (google it) to tie the four sections of string to each of the side holes in eyeballs. Fish the 4 lines up through the holes in the servo frame. Wrap the lines around printed servo horns of upper servos a couple times and affix them using servo horn holes.
8.) Position completed mechanism behind mask and glue in place. (I recommend hot glue so it can be removed later if needed for maintenance or upgrades as I refine the mechanism)
Similar models
thingiverse
free

gMax, 80/20 frame parts for mods, hacks, and addons by Spudwheelie
...pport-terminal-rocker-toggle-switch/dp/b00zwwyucu/ref=sr_1_15?ie=utf8&qid=1464391427&sr=8-15&keywords=switch+spst#ask
thingiverse
free

3D Printable 3D Printer by TheJadeRabbit
...r_1_4?ie=utf8&qid=1530916900&sr=8-4&keywords=3d+printer+hotend
code(marlin): https://github.com/marlinfirmware/marlin
thingiverse
free

TRAXXTRUDER Compact geared extruder by liu_d
...1&keywords=48p+13t
more details are coming! the prototype is waiting on some hardware and photos/video will be uploaded asap.
3ddd
$1

Tea set from the Big Bang Theory / Набор для чаепития
...qid;=1449144667&sr;=1-66&keywords;=creamer+and+sugar+service
файл мах 2016!!!
+файл мах 2013 vray
+файл мах 2013 corona
thingiverse
free

UVC Receiver Holder, FPV by Ericm1030
...ay-universal-smartphone-attachment/dp/b06y3w6z2t/ref=sr_1_8?ie=utf8&qid=1524408594&sr=8-8&keywords=phone+tripod+mount
thingiverse
free

Google Cardboard Strap Holder by combovercool
...230r-chemical-indirect-ventilation-adjustable/dp/b000ro6166/ref=sr_1_5?ie=utf8&qid=1419013816&sr=8-5&keywords=goggles
thingiverse
free

The Cube Mini Fridge by thewatchmakerfl
...ref=sr_1_2?ie=utf8&qid=1436833279&sr=8-2&keywords=potentiometer&pebp=1436833322445&perid=0pmtmyyyy6vn4mzst3fx
thingiverse
free

Mini desk fan by Creborg319
....com/6300rpm-shaft-magnetic-motor-hobby/dp/b00bg61s44/ref=sr_1_5?ie=utf8&qid=1533705112&sr=8-5&keywords=mini+dc+motor
thingiverse
free
Speaker box by Ratakis
...-4ft/dp/b01kstsv76/ref=sr_1_1_sspa?s=electronics&ie=utf8&qid=1521518432&sr=1-1-spons&keywords=aux+cable&psc=1
thingiverse
free

MacBook Pro with Retina Display Vertical Dock by TomExplorador
...er/dp/b008ala6dw/ref=sr_1_3?s=electronics&ie=utf8&qid=1517752168&sr=1-3&keywords=macbook+ethernet+adapter+thunder

Inmoov
turbosquid
$29

inMOOV by Nina Lieven
...model inmoov by nina lieven for download as max, obj, and fbx on turbosquid: 3d models for games, architecture, videos. (1230519)
thingiverse
free

InMoov KeyChain !!! by Alessandruino
...inmoov keychain !!! by alessandruino
thingiverse
this is an inmoov keychain for you or a fantastic jewel for your inmoov :)
thingiverse
free

Inmoov by joseph02
...inmoov by joseph02
thingiverse
porte clé inmoov, 2 couleurs. imprimé sans raft ni support.
thingiverse
free

inmoov full by ambroise
...inmoov full by ambroise
thingiverse
inmoov full
thingiverse
free

INMOOV EYELID ( PAUPIERES POUR INMOOV ) by heisenberg333
...ov parts .it's made very good .
you can see full tutorial on attached excel file
https://www.youtube.com/watch?v=h_jdau9v5zq
thingiverse
free
Inmoov Legs by kike1978
...inmoov legs by kike1978
thingiverse
inmoov custom legs, not articulated.
thingiverse
free
InMoov Head by Mindylee
...inmoov head by mindylee
thingiverse
inmoov open source hardware
thingiverse
free
inmoov top mouth by mix3rn
...inmoov top mouth by mix3rn
thingiverse
inmoov
thingiverse
free
Stand Inmoov
...the servo drive head.
with this body, you can move your head upright. for movement, you can use the standard inmoov vertical stem
thingiverse
free
back battery inmoov by ambroise
...back battery inmoov by ambroise
thingiverse
back battery inmoov
Advanced
turbosquid
$139

Carol (Advanced)
... available on turbo squid, the world's leading provider of digital 3d models for visualization, films, television, and games.
turbosquid
$15

Explay Advance
... available on turbo squid, the world's leading provider of digital 3d models for visualization, films, television, and games.
turbosquid
$15

ADVANCED ROOM.max
... available on turbo squid, the world's leading provider of digital 3d models for visualization, films, television, and games.
turbosquid
$2

Advanced Crate
... available on turbo squid, the world's leading provider of digital 3d models for visualization, films, television, and games.
turbosquid
$1
Advanced Canister
... available on turbo squid, the world's leading provider of digital 3d models for visualization, films, television, and games.
turbosquid
$20

automatic Advance Gun
...
royalty free 3d model automatic advance gun for download as on turbosquid: 3d models for games, architecture, videos. (1609069)
turbosquid
$4

Advanced Shower Equipment
...free 3d model advanced shower equipment for download as blend on turbosquid: 3d models for games, architecture, videos. (1282411)
turbosquid
$1

Advanced Sniper Rifle
...oyalty free 3d model advanced sniper rifle for download as obj on turbosquid: 3d models for games, architecture, videos. (720205)
3d_ocean
$32

Advanced Hospital Bed
...ds max 2010 or higher and many others. formats *.max scanline *.max vray *.max mentalray *.c4d advanced render *.c4d cinema 4d...
turbosquid
$17

Advance Rifle Patrol
...free 3d model advance rifle patrol for download as ma and obj on turbosquid: 3d models for games, architecture, videos. (1409260)
Eye
3ddd
$1

Best / Eye Eye
...пристенная best eye eye.
1660 полигонов.
wall mounted range hood best eye eye.
1660 polygons.
file: max 2010, 2012; fbx; obj.
3d_export
$5

eyes
...eyes
3dexport
eyes
3d_ocean
$5

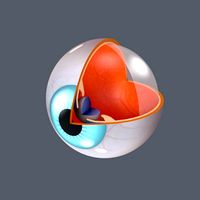
3D EYE
...ocean
body cornia dynamic eye eye eyes human human eye iris nurbs eye organ
detailed eye . purchase and use it for any purpose ..
3d_ocean
$5
3d Eye
...3d eye
3docean
3d eye eyes
this is 3d eye model
3d_export
$5

Human eye
...human eye
3dexport
human eye, iris, eyeball, eye anatomy
turbosquid
free

Eye
...eye
turbosquid
free 3d model eye for download as c4d on turbosquid: 3d models for games, architecture, videos. (1429061)
turbosquid
free

Eyes
...eyes
turbosquid
free 3d model eyes for download as blend on turbosquid: 3d models for games, architecture, videos. (1153269)
turbosquid
$25

eye
...e
turbosquid
royalty free 3d model eye for download as blend on turbosquid: 3d models for games, architecture, videos. (1371896)
turbosquid
$10

Eye
...eye
turbosquid
royalty free 3d model eye for download as c4d on turbosquid: 3d models for games, architecture, videos. (1303492)
turbosquid
$5

Eye
...e
turbosquid
royalty free 3d model eye for download as blend on turbosquid: 3d models for games, architecture, videos. (1343488)
Mechanism
3d_export
$50

Mechanism
...mechanism
3dexport
mechanism -------- animation is present only in the blender file.
3d_export
$5

mechanics
...mechanics
3dexport
turbosquid
$50

mechanic
... available on turbo squid, the world's leading provider of digital 3d models for visualization, films, television, and games.
3ddd
$1
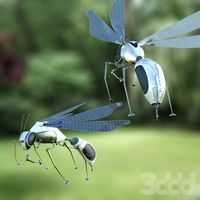
Mechanical Wasp
...mechanical wasp
3ddd
робот
mechanical wasp
3d_export
$20
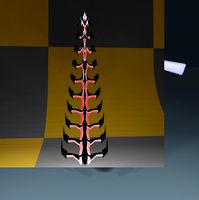
Mechanical tail
...mechanical tail
3dexport
mechanical tail<br>four-part movement
3d_export
$5
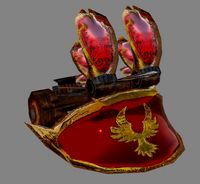
mechanical ballista
...mechanical ballista
3dexport
a mechanical ballista useful for medieval or fantasy games does not contain animations
turbosquid
$59

Mechanical Part
...id
royalty free 3d model mechanical part for download as c4d on turbosquid: 3d models for games, architecture, videos. (1410833)
turbosquid
$50
Mechanical Spider
...royalty free 3d model mechanical spider for download as blend on turbosquid: 3d models for games, architecture, videos. (1599864)
turbosquid
$45

Mechanical Pencil
...royalty free 3d model mechanical pencil for download as blend on turbosquid: 3d models for games, architecture, videos. (1503379)
turbosquid
$35

Mechanical fish
...id
royalty free 3d model mechanical fish for download as max on turbosquid: 3d models for games, architecture, videos. (1152530)