Thingiverse
Indirect Light Fixture Kit by candicemakes
by Thingiverse
Last crawled date: 3 years ago
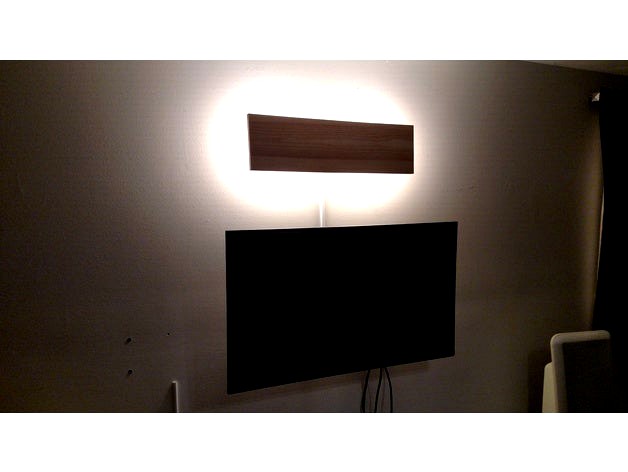
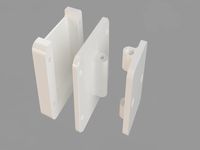
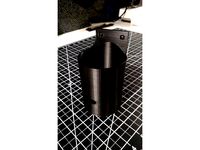
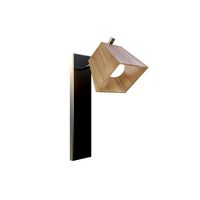
This is an indirect lighting fixture that I designed to fit over a single gang wall box for permanent installation, or to be used with a lamp cord for less permanent installs. The kit consists of a wall bracket/electrical box that holds two standard Leviton 9874 porcelain lamp bases, a fascia bracket to mount to the back of the lighting baffle, and a 80mm x 80mm template to make mounting it level easy and quick.
The lighting baffle can be a material of your choice; in this case I used a piece of pine with a nice grain, but the bracket is strong enough to support most any wood you would chose to use.
Materials List:
Printed Parts:
1x - Bracket Box
1x - Fascia Bracket
1x - Wall Mount Template (Optional)
Non Printed Parts:
1x - User selected baffle/shade material (In the above shown installation I used a 26" x 6" piece of pine. Any wood, metal, or plastic can be used.)
2x - Leviton 9874 porcelain lamp bases (https://www.amazon.com/gp/product/B00134U13I/ref=oh_aui_search_detailpage?ie=UTF8&psc=1 )
2x - M3x16 Screw
2x - Lightbulbs
1x - 8ft Lamp Cord (Optional, not required if hard wiring)
4x - M4x16 Screws
4x - M4 Nuts
4x - Screws (will vary depending on baffle/shade material)
1x - Nail (Optional, only used if using wall mount template)
4x - Wall anchors and screws (As appropriate to your wall material application.)
Instructions: Use wall mount template to determine desired location of light fixture. Use a nail to hang template by central hole. Allow to hang freely as to allow for leveling. Once leveled mark the four hole locations. Remove and discard template. Install wall bracket box into location marked with wall anchors. Install porcelain lamp bases and wire to power or lamp cord. (Please note that I am not a professional electrician and have intentionally omitted specific wiring instructions. Please consult your local regulations on electrical power and installation before installing this fixture.) After the wall bracket is installed center and mount the fascia bracket to the back of the piece of baffle/shade material that you have selected with 4 screws. Install light bulbs into the sockets then slide the fascia bracket into the face of the bracket box. Use an M3 screw at the top and bottom of the bracket box to secure the fascia to the bracket box.
That's it! I intended this to be used with a pair of Phillips Hue bulbs for maximum flexibility but any bulb will do. This fixture can be made to look as rustic or modern as the room decor warrants since the baffle/shade material is completely independent of the printed pieces. Additionally, I've included mounting holes on the bottom of the bracket if you prefer a more traditional light box style front, bottom, and sides baffle. This fixture provides indirect lighting ideal for use in areas with reflective surfaces otherwise prone to glare such as home theaters and galleries.
Similar models
thingiverse
free
Logitech C920 wall mount
...rdware needed:
4x m3x16mm screws.
4x m3 nuts
1x m4x50mm screw
1x m4 nut
2x wall screws (i used some extras from the ikea cabinet)
cg_trader
$3

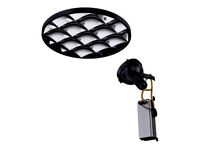
Bulb and Mounting Socket
...cket. this item can be installed into a lamp and has realistic incandescentlight bulb features and materials for when off and on.
thingiverse
free

Cord Wrap with Wall Outlet and Surface Mount Box by sennah91
...8mm (to mount the strain relief)
nuts:
4x m4 (to mount the surface mount cover to the corpus)
4x m4 (to mount the strain relief)
thingiverse
free

Hanging Wall Lamp
...ommended, incandescent lights generate to much heat. be smart!
if you like this, check my tripod floor lamp.
please, post a make.
thingiverse
free

Arduino Relay Box by klein0r
...o relay box by klein0r
thingiverse
16x m4 screws (to mount plugs)
2x m3 screws (to mount power supply)
1x arduino relay (4x 10a)
cg_trader
$2

Shade Lamp
... ceiling fixture illuminated lamb bulb ceilinglamp furniture ceiling lighting ceiling lamp ceiling light light bulb light fixture
thingiverse
free

LUMITREE - Branch Adaptable Lamp by rapzz
...0mm screw
2x m5 30mm screw
2x m5 lock nut
this project is totally adaptable, so you can make your lamp in the way you want it to.
cg_trader
free

THORN Gino Indirect Wall Mounted
... lamp light light fittings lighting design luminaire nelca f roco thorn lighting wall lamp wall light aircraft part aircraft part
cg_trader
$7

Wall lamp with bulb cord and outlet
...review images rendered by arnold render lamp walllamp interior design light wall lighting modern bulb cord cable outlet furniture
3dwarehouse
free

Millennium Lighting RWHWB8-SR Wall Bracket Fixture
...8-sr wall bracket fixture
3dwarehouse
wall mount industrial sconce, bracket mount #bracket #cage #industrial #lamp #sconce #wall
Candicemakes
thingiverse
free
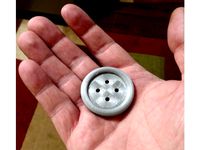
40mm Oversized Button by candicemakes
...ngiverse
this is an over-sized 40mm button that i designed for costuming use. it can easily be scaled up or down for other uses.
thingiverse
free

MTG Exerted Cartouche Marker by candicemakes
...andicemakes
thingiverse
this is an "exerted" marker cartooche that i made for a friend that plays magic the gathering.
thingiverse
free
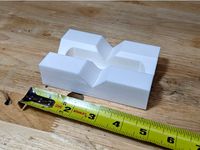
45 Degree Setup Block by candicemakes
...block compatible with 1/4-20 bolts for workshop use such as drilling round stock, chamfering edges, and clamping at weird angles.
thingiverse
free

Universal Construction Brackets by candicemakes
...ight 3 point corner brackets.
this is currently a work in progress; i will add additional construction brackets as i design them.
thingiverse
free

Pocket NC Tool Holder by candicemakes
...pace for all of the included tools needed for doing setup. two m4x12 screws and 2 m4 nuts are needed to attach it to the machine.
thingiverse
free

Steelcase Compatible Hutch Hooks by candicemakes
...sizes to accommodate headphones with both a small and lagre headband, and a reversed hook designed to snap into the rear channel.
thingiverse
free

High Strength Hanging Loop by candicemakes
...countersunk head screws. in the application pictured i've added some to my basement laundry room for hanging garments to dry.
thingiverse
free
Wall Mount Tool Holder with Drainage by candicemakes
...oint at the bottom to prevent liquid from collecting in the bottom when used in a wet environment or with tools prone to residue.
thingiverse
free

Hair Dryer Bracket by candicemakes
...o get the hair dryer up and out of the way. the bracket is made as two pieces as to allow for a wide variety of hair dryer sizes.
thingiverse
free

Anova Precision Cooker Hanging Bracket by candicemakes
...i designed this bracket to allow it to occupy a minimum of space in a corner, on the back of a cabinet door, or just on the wall.
Indirect
3d_export
$7

Indirect Reflector v 1
...r subdivision<br>please don't forget to rate the model, for us it is very important<br>© leonid naku [zurel] 2022
3d_export
$23
Floodlight and Indirect Reflector v 1
...r subdivision<br>please don't forget to rate the model, for us it is very important<br>© leonid naku [zurel] 2022
3ddd
$1
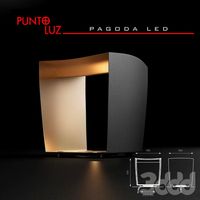
Pagoda LED
...punto , luz , floor , lamp lamp providing indirect light. the design of the fixture makes it a...
3d_export
$30

gas equipment
...in the hydraulic drill, make-up of the heating system, indirect heating boiler, etc. high...
3d_export
$8

endo studio - deco sconce in 6 shades
...sconce washes the wall with a gentle glow of indirect light. its striking form was inspired by the bold,...
3d_export
$80

pll-o9
...system is also used by china's marines.<br>the pll-09 provides indirect fire support for rapid deployment brigades. these chinese brigades...
3d_export
$14

hall
...1.5 rc3.<br>vertices: 948630<br>faces: 803558<br>fbx: yes<br>v-ray material: yes<br>texture: no<br>camera: no<br>light: no<br>indirect illumination (gi): no<br>render settings: no<br>units: meters<br>dimensions:<br>x: 17.8 m<br>y: 51.9...
3d_export
$5

hall
...compressed=3.54 mb)<br>vertices: 349607<br>faces: 300304<br>fbx: yes<br>v-ray material: yes<br>texture: no<br>cameras: 8<br>light: no<br>indirect illumination (gi): no<br>render settings: no<br>units:...
3d_export
$7
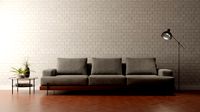
modern style sofa interior - interior 3d scene
...the file contains 6 camera settings, all direct and indirect lighting already setup for use. including obj, stl, collada...
3d_export
$10

modern sofa set - interior 3d scene
...camera settings, 1 exterior hdri sky, all direct and indirect lighting already setup for use. including obj, stl, mtl...
Fixture
turbosquid
$5
Fixture
...turbosquid
royalty free 3d model fixture for download as max on turbosquid: 3d models for games, architecture, videos. (1160462)
turbosquid
$39

FIXTURE
...id
royalty free 3d model fixture for download as ige and obj on turbosquid: 3d models for games, architecture, videos. (1332983)
turbosquid
$2

Fixture
... available on turbo squid, the world's leading provider of digital 3d models for visualization, films, television, and games.
turbosquid
$1
fixture
... available on turbo squid, the world's leading provider of digital 3d models for visualization, films, television, and games.
turbosquid
$1

fixture
... available on turbo squid, the world's leading provider of digital 3d models for visualization, films, television, and games.
3d_export
$10
ROBOT FIXTURE
...fixture
3dexport
it is a robot fixture. it is used to pick the insert from the table and place that insert into the mold cavity.
turbosquid
free
lighting fixtures
...odel lighting fixtures for download as 3ds, max, obj, and fbx on turbosquid: 3d models for games, architecture, videos. (1428616)
3d_ocean
$2
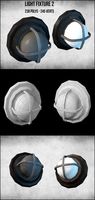
Light Fixture 02
...reat for any game enviroment. the light fixture has texture with both lid bulb, and unlid bulb. low poly (238 polygons – 245 v...
turbosquid
$29

bathroom fixtures
...odel bathroom fixtures for download as 3ds, max, obj, and c4d on turbosquid: 3d models for games, architecture, videos. (1180328)
turbosquid
$20
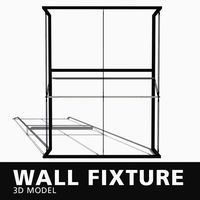
Wall Fixture
... 3d model wall fixture for download as 3ds, obj, c4d, and fbx on turbosquid: 3d models for games, architecture, videos. (1270353)
Kit
turbosquid
$3

Bathroom Kit Baño kit
... available on turbo squid, the world's leading provider of digital 3d models for visualization, films, television, and games.
turbosquid
$19

Kit
... available on turbo squid, the world's leading provider of digital 3d models for visualization, films, television, and games.
3d_export
$20

Drift Kit
...drift kit
3dexport
turbosquid
$40

BitCoin Kit
...urbosquid
royalty free 3d model bitcoin kit for download as on turbosquid: 3d models for games, architecture, videos. (1519068)
turbosquid
$9

Industrial kit
...osquid
royalty free 3d model industrial kit for download as on turbosquid: 3d models for games, architecture, videos. (1144117)
turbosquid
$6

Kit Vases
...
turbosquid
royalty free 3d model kit vases for download as on turbosquid: 3d models for games, architecture, videos. (1285114)
turbosquid
free

Survival Kit
...rbosquid
royalty free 3d model survival kit for download as on turbosquid: 3d models for games, architecture, videos. (1637721)
turbosquid
$50

Ninja Kit
...rbosquid
royalty free 3d model ninja kit for download as fbx on turbosquid: 3d models for games, architecture, videos. (1672364)
turbosquid
$35

Brushes Kit
...osquid
royalty free 3d model brushes kit for download as max on turbosquid: 3d models for games, architecture, videos. (1216721)
turbosquid
$19
Medical kit
...osquid
royalty free 3d model medical kit for download as fbx on turbosquid: 3d models for games, architecture, videos. (1486089)
Light
archibase_planet
free

Light
...light
archibase planet
lamp lighting light
light - s2 - 3d model for interior 3d visualization.
archibase_planet
free

Light
...light
archibase planet
light luminaire lighting
light l0465 - 3d model (*.gsm+*.3ds) for interior 3d visualization.
3d_export
$5

lighting
...lighting
3dexport
lighting
3d_export
$5

lighting
...lighting
3dexport
lighting in livingroom
turbosquid
$3

Lighting Tree with Lights
...d model lighting tree with lights for download as max and 3ds on turbosquid: 3d models for games, architecture, videos. (1585507)
archibase_planet
free

Light
...light
archibase planet
luster lighting solution
light - s - 3d model for interior 3d visualization.
archibase_planet
free

Light
...light
archibase planet
luster lamp lighting
light 1 - 3d model for interior 3d visualization.
archibase_planet
free

Lights
...lights
archibase planet
surgical lights surgical lamp
surgical lights (floor) - 3d model for interior 3d visualization.
archibase_planet
free

Light
...light
archibase planet
lighting luminaire candlelight
light l0463 - 3d model (*.gsm+*.3ds) for interior 3d visualization.
3d_export
$18

street light-lighting-light-xia bing
...
3dexport
street light-lighting-light-xia bing<br>max 2015 v-ray 3 max 2015<br>textures<br>all files in zip...