Thingiverse

Inclinometer by ramblejeff
by Thingiverse
Last crawled date: 3 years, 1 month ago
Print these parts:
Scale_Holder
Clamp_Jaw
There are two clamp bars one has a hole at the end the other has a hole in the middle. Use the one you prefer.
Clamp_Bar // Hole at the end
Clamp_Bar_P // Hole in the middle
These parts are small and will require rafts:
Pointer
Clamp_Wedges
Print Angle-Throw-Gauge.pdf.
Assembly
From Angle-Throw-Gauge.pdf cut out a scale.
Use 3M 77 Spray Adhesive or similair, to fasten the printed scale to the scale holder.
Assemble the clamp:
Put a wedge through the hole in the Clamp Jaw
Push the clamp bar through the hole in the Clamp Jaw
Slide the wedge and check that the clamp jaw is locked
Four wedges are printed. Use the one that works best
Pendulum and Axle
Bend a paper clip to make the pendulm and axle.
Push the Clamp Bar into the square hole on the Scale Holder.
Align the hole in the Clamp Bar with the hole in the Scale Holder. A paper clip through the hole will help alignment.
Glue the clamp bar in place.
Push the pendulm axle through the hole in the Scale Holder and Clamp Bar.
Push a small peice of tubing over the axle. It will stop the pointer from rubbing on the scale.
Push the pointer on to the axle. A drop of glue will hold it in place.
The pendulm should move freely without sticking. Use solder to increase the pendulm weight.
Sources
The clamp is a remix of “Hobby Clamps” by ModelStation, Hobby Clamps
And uses The Angle-Throw-Gauge.pdf, by Dennis Summer, Dennis Sumner's blog
Edit
2017/11/5 add new photograph and construction sequence
Similar models
thingiverse
free

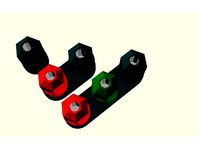
Hobby Clamps by ModelStation
...t; file has one of each size of wedge so that you can test the different fits.
added the spreader clamp
added 140mm blank bar
thingiverse
free

Small Clamp by ep1cman
...is you will need to glue the fixed jaw to the end of the clamp. be careful to not get any glue onto the sliding part of the camp.
thingiverse
free

A Windmill by Winslow
...n windmill” by edmund v. gillon published by perigee books.
see more of my designs at https://www.thingiverse.com/winslow/designs
cg_trader
$10

Paper clips - Push pins - Clamps Colletion
...shpin tachuela chinche tachon sujetador office oficina 3d paper papel office supply metal plastic household tools household tools
thingiverse
free

Spine Candle Holder with Alignment by Modlet
...possible to minimize gaps. i printed the spine pieces with supports. i printed the aligner buttons at a higher resolution (.1mm).
thingiverse
free

zipper pull tab (over paper clip) by digitalmy
...lip) by digitalmy
thingiverse
print 2pcs
use paper clip with t-shape end
print with maximum quality
use super-glue to join parts
thingiverse
free

Clip clamp for 10x10mm square tube/rod - end holder by BMGD
...erse.com/thing:1158824.
print upright with sharp end up. the 10x10mm rod/tube end goes into this and is clamped by the clip clamp
thingiverse
free

Clothespin Mini Clamps/ Modular Clamping System by Erich_with_an_H
...ar store may not available in your corner of the universe. check the image with the included dimensions before making this thing.
grabcad
free

Paper Clip
...
grabcad
designed this paper clip as a hobby and learnt new things about sheetmetal and assembly.
3d files are attached for use.
thingiverse
free

jaw 90° by lukin
...is is jaw made for clamping things.
it is made from petg.
you can use it for clamping objects which you glue under the angle 90°.
Ramblejeff
thingiverse
free
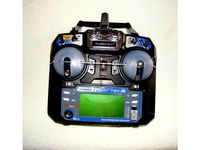
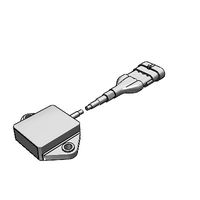
Transmitter Stick protector by ramblejeff
...transmitter stick protector by ramblejeff
thingiverse
designed for turnigy tgy-i6, may fit other transmitters.
thingiverse
free

Hatch Bolts by ramblejeff
...designed for this. the bolt is made from a short length of piano wire.
as the parts are small they are best printed on a raft.
thingiverse
free
4mm Terminals by ramblejeff
...terminal_demo();
shows all three terminals
hint
"darkslategrey" gives better impression of shape on the black terminals
thingiverse
free

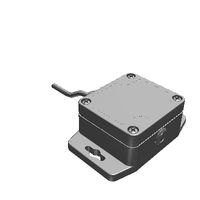
Volt Meter Case by ramblejeff
...vements
the case would look better with rounded corners, maybe the next version?
edits
2017/11/07 added pictures of printed case.
thingiverse
free

Two Servo Fixing Plate by ramblejeff
...nt them breaking out i recommend printing with 3 or 4 shells. the plate is glued to the model.
edits
2017/11/05 added photographs
thingiverse
free

Alligator Clip to 4mm Banana Terminals by ramblejeff
...terminals to the top and then glue the base to the top.
edit
added photographs and stl's
2017/11/10 added car socket picture.
thingiverse
free

RC Equipment by ramblejeff
... print the servo and arm separately.
sources
ruler.scad by jbrown123, thingverse (https://www.thingiverse.com/thing:30769/#files
thingiverse
free

RC Model Control Horns by ramblejeff
...n
draw the control horn
hint
these parts need to be strong. print with 3 or 4 shells and 50% or greater fill.
sources
flite test
Inclinometer
3dfindit
free
MEMS Inclinometer
...mems inclinometer
3dfind.it
catalog: 2gig
thingiverse
free
#MakerBotAcademyMath Inclinometer by Trigger998
...he inclinometer fits on the makerbot x2 replicator build plate and can be printed at 0.3mm low quality with no support or rafts.
thingiverse
free

Inclinometer Case by az3dr
...nggood.com/4-x-90-degree-electronic-protractor-digital-inclinometer-waterproof-magnetic-level-angle-measuring-tool-p-1665210.html
thingiverse
free
Cover Digital Inclinometer by otto9due
...r by otto9due
thingiverse
it's a small cover for digital inclinometers with the possibility of inserting two spare batteries
3dfindit
free
Tilt Sensors and Inclinometers
...tilt sensors and inclinometers
3dfind.it
catalog: te connectivity
thingiverse
free

Simple Inclinometer by Infinty_Matter
... straws and popsicles before but i don't think they are any more accurate as an iron sight, also added a handle for loners );
thingiverse
free

Arduino based inclinometer by Game_tester
...t it in tinkercad https://www.tinkercad.com/things/gzpzfg6wibe
< /iframe>
if you printed it, please post photo to makes
thingiverse
free

Digital inclinometer / protractor wall hanger by eddyheide
...nometer / protractor wall hanger by eddyheide
thingiverse
just a simple wall hanger for your (chinese) mini digital protractor.
thingiverse
free

Inclinometer for airplanes by Raddy
...luminum strip 15x2mm and some screws.
you can buy the protractor at aliexpress for 12$, your phone and a good app works the same.
thingiverse
free

Arduino Inclinometer, customizable by jonsag
...also kicad schematics and pcb layout.
you can find more info on the mpu6050 gimbal at https://www.thingiverse.com/thing:4702784 .