Thingiverse
Impossible Duct & Mechanism V2 by 1Smug_Bastard
by Thingiverse
Last crawled date: 3 years ago
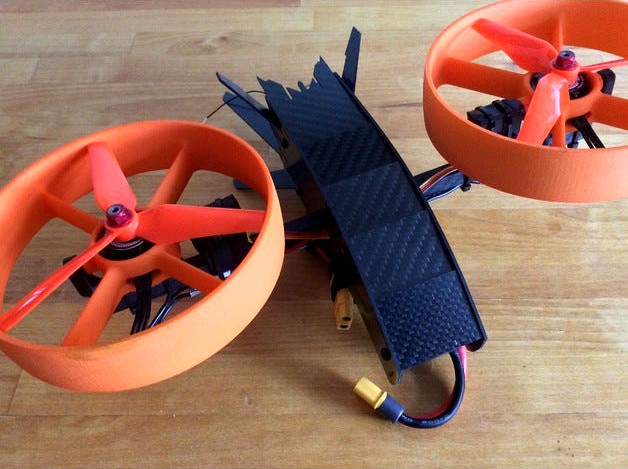
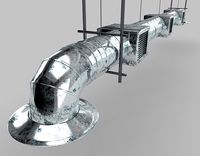
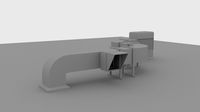
5" Duct / Mechanism for use with Tricopter-Mini or Bicopter tail assembly. Mechanism can tilt upwards of 40 degrees without touching the Servo. 5" Ducts require 6" arms to maintain the proper clearance. Servo users require the Imposible Tail Mechanism Servo Holder "Tall" and Back Support. by Motorpixiegimbals https://www.thingiverse.com/thing:1035497)
Note: Can also be used on a Quadcopter making it a Mega-Whoop.
Original Project (Old Files)https://www.thingiverse.com/thing:3028330
See the following website for more detailshttps://rcexplorer.se/forums/topic/impossible-tail-duct-wip/
V2 Major Changes
Updated the Propellers area of rotation giving it a better "sweet spot".
Added a version with a secondary Aero Lip to utilize the thrust from the Propeller to draw in more air mass. (Experimental & untested)
Fixed several join errors.
Added the identical file above without the secondary Aero Lip.
8-5-2018 Update
Updated screw hole placement.
Created a "simpler" duct without Primary or Secondary Aero Lip.
8-8-2018 Update
Added hex tool access hole to Simple Duct.
9-14-2018 Update
Added Beefier Version of Simple Duct.
Step by Step tips for safety, ease of use and greater efficiency
Note This assumes your print quality is good and you haven't altered the design in some unknowable way. Furthermore 5" Bullnose Tri-blade Propellers should be used as they have the largest surface area to come into contact with the Duct wall.
1) When mounting the Duct, first install the Propeller onto the Motor. (DAL T5044 Props are ideal)
2) Install the Motor wires through the Duct side hole (left or right) before soldering them to an ESC.
3) Mount the Motor on the Duct but leave the screws finger tight. (Don't use lock tight)
4) Shim the props, using pieces of cardboard or thick paper that are exactly 0.5 mm thick (verify with micrometer). Be aware that cardboard does give a little so odds are the Propellers ends up closer to 0.3 or 0.4 mm. If done correctly, the shims shouldn't fall out while the Motor mount is torqued down.
5) Tighten down the Motor screws in a cross pattern to ensure that the Propeller spacing is even.
6) Remove the shims.
7) Spin the Propeller by hand to ensure your clearance is <1 mm from the Duct wall at all points of the Propellers rotation.
8) Power up the Motor and slowly increase it's speed while checking to see if the Propellers are making contact. (Be careful) If they do contact the wall, STOP immediately! Afterwards sand down the portion of the Duct wall or re-shim the Propellers to adjust their position and repeat the test.
9) Verify Propeller spacing before flight by spinning them by hand. It's possible (but rare) for the mounts to shift during transport or a hard landing. Trust me, you don't want the Propellers contacting the Ducts mid flight.
Here's a perfect video on how NOT to setup a duct
www.youtube.com/watch?v=mY8ZPB0Gs2I
Bench Test of "Simple Duct" https://www.youtube.com/watch?v=KYfMw9gPbCE
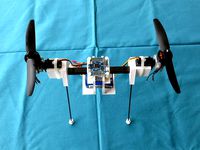
Test flight
Disclaimer this copter is largely untuned so the wind is making it hard to keep the copter in front of the Camera.https://www.youtube.com/watch?v=rvPskyMfO-w
Note: Can also be used on a Quadcopter making it a Mega-Whoop.
Original Project (Old Files)https://www.thingiverse.com/thing:3028330
See the following website for more detailshttps://rcexplorer.se/forums/topic/impossible-tail-duct-wip/
V2 Major Changes
Updated the Propellers area of rotation giving it a better "sweet spot".
Added a version with a secondary Aero Lip to utilize the thrust from the Propeller to draw in more air mass. (Experimental & untested)
Fixed several join errors.
Added the identical file above without the secondary Aero Lip.
8-5-2018 Update
Updated screw hole placement.
Created a "simpler" duct without Primary or Secondary Aero Lip.
8-8-2018 Update
Added hex tool access hole to Simple Duct.
9-14-2018 Update
Added Beefier Version of Simple Duct.
Step by Step tips for safety, ease of use and greater efficiency
Note This assumes your print quality is good and you haven't altered the design in some unknowable way. Furthermore 5" Bullnose Tri-blade Propellers should be used as they have the largest surface area to come into contact with the Duct wall.
1) When mounting the Duct, first install the Propeller onto the Motor. (DAL T5044 Props are ideal)
2) Install the Motor wires through the Duct side hole (left or right) before soldering them to an ESC.
3) Mount the Motor on the Duct but leave the screws finger tight. (Don't use lock tight)
4) Shim the props, using pieces of cardboard or thick paper that are exactly 0.5 mm thick (verify with micrometer). Be aware that cardboard does give a little so odds are the Propellers ends up closer to 0.3 or 0.4 mm. If done correctly, the shims shouldn't fall out while the Motor mount is torqued down.
5) Tighten down the Motor screws in a cross pattern to ensure that the Propeller spacing is even.
6) Remove the shims.
7) Spin the Propeller by hand to ensure your clearance is <1 mm from the Duct wall at all points of the Propellers rotation.
8) Power up the Motor and slowly increase it's speed while checking to see if the Propellers are making contact. (Be careful) If they do contact the wall, STOP immediately! Afterwards sand down the portion of the Duct wall or re-shim the Propellers to adjust their position and repeat the test.
9) Verify Propeller spacing before flight by spinning them by hand. It's possible (but rare) for the mounts to shift during transport or a hard landing. Trust me, you don't want the Propellers contacting the Ducts mid flight.
Here's a perfect video on how NOT to setup a duct
www.youtube.com/watch?v=mY8ZPB0Gs2I
Bench Test of "Simple Duct" https://www.youtube.com/watch?v=KYfMw9gPbCE
Test flight
Disclaimer this copter is largely untuned so the wind is making it hard to keep the copter in front of the Camera.https://www.youtube.com/watch?v=rvPskyMfO-w
Similar models
grabcad
free

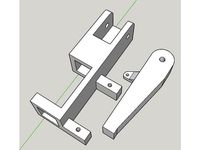
Double Axis Tilt mechanism
...n directly be in use with a vtol or a copter. the design consists of a platform for mounting the motor and holder for each servo.
thingiverse
free

16mm Tri-Copter Boom Servo Mount and Motor Plate by mattshane
...otor mount as well. changed the servo arm mount hole to under the boom mount hole to allow a screw all the way through the mount.
thingiverse
free

Impossible Tail Duct & Mechanism by 1Smug_Bastard
... material: nylon @ 100um
see the following website for more details: https://rcexplorer.se/forums/topic/impossible-tail-duct-wip/
thingiverse
free
TBS Source One v0.11 Motor & Frame Protector by Haitchpeasauce
...**update 23-aug-2018: added a middle hole to allow for use as a soft mount
**update 07-oct-2018: added back versions with no hole
thingiverse
free

Tri - V tail multi rotor XBS by Phil_Maddox
...tch system
update > added some 40deg motor mounts for the v tail
if you like this hit the button
comments always welcome
enjoy
thingiverse
free
BiCopter by algerbens
...t, later a camera and 5.8ghz transmitter were added and the bicopter was flown fpv.
https://www.youtube.com/watch?v=a6w27psw3t0
thingiverse
free

Trident/Switchblade 250 Updated Tail Mech by mpbiv
...larger servo, and should accomodate a hitec hs-65mg or similar size servo. the new tilt mechanism is also designed...
thingiverse
free

5" Raspberry pi LCD Wall-mount by Indigo4
... wall-mount by indigo4
thingiverse
simple wall-mount for the 5" raspberry pi lcdhttps://www.youtube.com/watch?v=yrewbiu0v7g
thingiverse
free
VTOL tilt motor mount mechanism by BMGD
...g. for larger props you have to adapt the mount. arm moment is about 28mm and this servo can do 30mm so enough for ample tilting.
thingiverse
free

FPV Race Copter 210 by Bitfrost
...6
added improved bottom
added 30° cam mount
video:https://www.youtube.com/watch?v=_j_uxy7bhbqhttps://youtu.be/86c178tadpo?t=1m49s
Bastard
turbosquid
$4

bastard
...ree 3d model bastard for download as 3ds, obj, fbx, and blend on turbosquid: 3d models for games, architecture, videos. (1210525)
design_connected
$18

Lazy Bastard
...lazy bastard
designconnected
montis lazy bastard computer generated 3d model. designed by pot, bertjan.
turbosquid
$5

Bastard Sword
...bosquid
royalty free 3d model bastard sword for download as on turbosquid: 3d models for games, architecture, videos. (1340112)
turbosquid
$3

Bastard Sword
...yalty free 3d model bastard sword for download as obj and fbx on turbosquid: 3d models for games, architecture, videos. (1405959)
turbosquid
$5

Bastard Sword
...ee 3d model bastard sword for download as blend, fbx, and obj on turbosquid: 3d models for games, architecture, videos. (1669423)
turbosquid
$2

Bastards Sword
...e 3d model bastards sword for download as 3ds, fbx, and blend on turbosquid: 3d models for games, architecture, videos. (1430861)
turbosquid
$8

Bastard sword
... model bastard sword for download as 3ds, obj, fbx, and blend on turbosquid: 3d models for games, architecture, videos. (1398466)
turbosquid
$3

Bastard sword
...3d model bastard sword for download as 3ds, max, obj, and fbx on turbosquid: 3d models for games, architecture, videos. (1346491)
turbosquid
$12

Bastard Sword
...del bastard sword for download as blend, fbx, x, obj, and dae on turbosquid: 3d models for games, architecture, videos. (1611332)
turbosquid
$10
Bastard Sword
... available on turbo squid, the world's leading provider of digital 3d models for visualization, films, television, and games.
Impossible
3ddd
free

super impossible
...super impossible
3ddd
kartell , super impossible
cтул super impossible фирмы kartell
design_connected
$16

Mr. Impossible
...mr. impossible
designconnected
kartell mr. impossible computer generated 3d model. designed by starck, philippe.
turbosquid
$25

Impossible mug
...uid
royalty free 3d model impossible mug for download as max on turbosquid: 3d models for games, architecture, videos. (1357393)
3d_export
$5

impossible triangle
... and materials.<br>https://www.shutterstock.com/video/clip-1057067141-3d-animation-impossible-triangle-that-assembled-cubes
3ddd
$1

Kartell Mr. Impossible
...kartell mr. impossible
3ddd
kartell
фабрика: kartell
производство: италия
mr. impossible
turbosquid
$1

Impossible Cube
... available on turbo squid, the world's leading provider of digital 3d models for visualization, films, television, and games.
turbosquid
free

Impossible triangle
... available on turbo squid, the world's leading provider of digital 3d models for visualization, films, television, and games.
turbosquid
$3

Kartell Mr. Impossible
...odel kartell mr. impossible for download as max, obj, and fbx on turbosquid: 3d models for games, architecture, videos. (1218079)
3d_export
$8

Impossible figure the BOX 3D Model
...impossible figure the box 3d model
3dexport
impossible figure esher box
impossible figure the box 3d model tasal 24342 3dexport
3d_export
$8

Impossible figure the TRIANGLE 3D Model
...gure the triangle 3d model
3dexport
impossible figure esher triangle
impossible figure the triangle 3d model tasal 24343 3dexport
Duct
turbosquid
$19
Duct Set
...d
royalty free 3d model duct set for download as max and fbx on turbosquid: 3d models for games, architecture, videos. (1145038)
turbosquid
$10
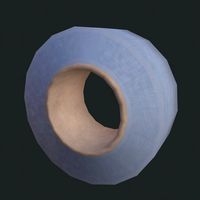
Duct Tape
...id
royalty free 3d model duct tape for download as ma and ma on turbosquid: 3d models for games, architecture, videos. (1580351)
turbosquid
free
Duct Tape
...
free 3d model duct tape for download as obj, fbx, and blend on turbosquid: 3d models for games, architecture, videos. (1486518)
3d_ocean
$7
Air-duct
... ventilation
high quality industrial air duct ventilation model. created in cinema 4d but comes in various other formats as well.
turbosquid
$20
Air ducts
...lty free 3d model air ducts for download as max, obj, and fbx on turbosquid: 3d models for games, architecture, videos. (1262476)
3d_export
$10
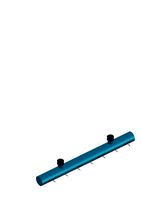
Supply air duct
...supply air duct
3dexport
supply air duct with two axial fans and hangers
turbosquid
$2
Duct Tape
...e 3d model duct tape for download as obj, fbx, blend, and dae on turbosquid: 3d models for games, architecture, videos. (1473972)
turbosquid
free

Duct Tape
... available on turbo squid, the world's leading provider of digital 3d models for visualization, films, television, and games.
3d_ocean
$3
Duct tape
...polys. includes: cinema 4d project. model in 3 formats (obj, fbx, 3ds). 6 .tga texture maps (albedo, ambient occlusion, diffus...
turbosquid
$29

Turbo Duct 2
... available on turbo squid, the world's leading provider of digital 3d models for visualization, films, television, and games.
V2
3d_export
free

Lamp v2
...lamp v2
3dexport
lamp v2 with solar panel
3d_export
$5

hammerhead v2
...hammerhead v2
3dexport
razer hammerhead v2 headphones, modeled in cinema 4d, render in corona
3d_export
$5

manometer v2
...manometer v2
3dexport
3d_export
$5

potato v2
...potato v2
3dexport
turbosquid
$52

Lifebuoys v2
...squid
royalty free 3d model lifebuoys v2 for download as fbx on turbosquid: 3d models for games, architecture, videos. (1560870)
turbosquid
$2

Mask v2
...turbosquid
royalty free 3d model mask v2 for download as stl on turbosquid: 3d models for games, architecture, videos. (1527741)
turbosquid
free

Flashlight V2
...d
free 3d model flashlight v2 for download as , obj, and fbx on turbosquid: 3d models for games, architecture, videos. (1663559)
turbosquid
$20

Kitchen V2
...ty free 3d model kitchen v2 for download as max, obj, and fbx on turbosquid: 3d models for games, architecture, videos. (1155111)
turbosquid
$20

kengkod64-v2
... free 3d model kengkod64-v2 for download as 3dm, ztl, and stl on turbosquid: 3d models for games, architecture, videos. (1701415)
turbosquid
$19

Chair v2
...yalty free 3d model chair v2 for download as ma, obj, and fbx on turbosquid: 3d models for games, architecture, videos. (1693360)
Mechanism
3d_export
$50

Mechanism
...mechanism
3dexport
mechanism -------- animation is present only in the blender file.
3d_export
$5

mechanics
...mechanics
3dexport
turbosquid
$50

mechanic
... available on turbo squid, the world's leading provider of digital 3d models for visualization, films, television, and games.
3ddd
$1
Mechanical Wasp
...mechanical wasp
3ddd
робот
mechanical wasp
3d_export
$20
Mechanical tail
...mechanical tail
3dexport
mechanical tail<br>four-part movement
3d_export
$5
mechanical ballista
...mechanical ballista
3dexport
a mechanical ballista useful for medieval or fantasy games does not contain animations
turbosquid
$50
Mechanical Spider
...royalty free 3d model mechanical spider for download as blend on turbosquid: 3d models for games, architecture, videos. (1599864)
turbosquid
$35

Mechanical fish
...id
royalty free 3d model mechanical fish for download as max on turbosquid: 3d models for games, architecture, videos. (1152530)
turbosquid
$27
Step Mechanism
...uid
royalty free 3d model step mechanism for download as obj on turbosquid: 3d models for games, architecture, videos. (1436024)
turbosquid
$15

Mechanical head
...id
royalty free 3d model mechanical head for download as max on turbosquid: 3d models for games, architecture, videos. (1164676)