Thingiverse
IKEA LACK enclosure / table printer tower by Lilik7
by Thingiverse
Last crawled date: 3 years ago
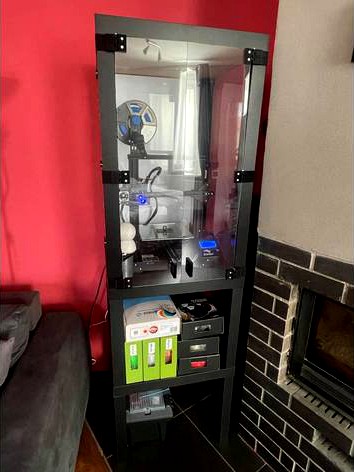
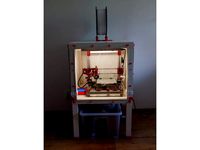
PRINT TOWER by Lilik7
created from 4 Ikea Lack tabels (3 boards and 16 legs)
You need:
4 x 1000x500x2 (or 4) plexiglass
32x 4x40 screw
8x 3x15 screw
22x 4x25 bolt
6x 4x40 bolt
12x 4x25 bolt (countersunk head)
34x M4 nut
74x M4 pad
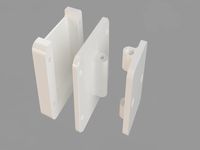
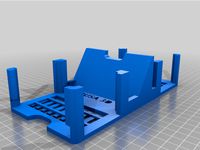
You print:
2x A-LACK
2x B-LACK
2x C-LACK
6x D-LACK
2x E-LACK
4x F-LACK
4x G-LACK
1x handle 3
1x handle D
(1x CAM holder)
(1x screen cover)
Instruction:
1/ Assemble T1 and T2 (use Ikea instructions)
2/ Connect T1 and T2 with G - LACK
3/ Assemble T4 - between legs and board use A - LACK, B - LACK and 2x F - LACK
4/ Screw on A - LACK, B - LACK and 2x F - LACK on board of T2 and screw on T3 on T2
5/ Screw on 2x C - LACK and 2x E - LACK on T3
6/ Put on it T4 and screw it
7/ Measure and cut the plexiglass
8/ Catch on side and back plexiglass
9/ Connect D - LACK
10/ Measure position of front plexiglass (doors) and screw it
11/ Put HANDLE on doors (50 mm between screws)
12/ If possible, cut a hole for the cables
13/ Place the 3D printer
14/ Send photos of your print tower!
created from 4 Ikea Lack tabels (3 boards and 16 legs)
You need:
4 x 1000x500x2 (or 4) plexiglass
32x 4x40 screw
8x 3x15 screw
22x 4x25 bolt
6x 4x40 bolt
12x 4x25 bolt (countersunk head)
34x M4 nut
74x M4 pad
You print:
2x A-LACK
2x B-LACK
2x C-LACK
6x D-LACK
2x E-LACK
4x F-LACK
4x G-LACK
1x handle 3
1x handle D
(1x CAM holder)
(1x screen cover)
Instruction:
1/ Assemble T1 and T2 (use Ikea instructions)
2/ Connect T1 and T2 with G - LACK
3/ Assemble T4 - between legs and board use A - LACK, B - LACK and 2x F - LACK
4/ Screw on A - LACK, B - LACK and 2x F - LACK on board of T2 and screw on T3 on T2
5/ Screw on 2x C - LACK and 2x E - LACK on T3
6/ Put on it T4 and screw it
7/ Measure and cut the plexiglass
8/ Catch on side and back plexiglass
9/ Connect D - LACK
10/ Measure position of front plexiglass (doors) and screw it
11/ Put HANDLE on doors (50 mm between screws)
12/ If possible, cut a hole for the cables
13/ Place the 3D printer
14/ Send photos of your print tower!
Similar models
thingiverse
free
OMG oh no yet another lack enclosure by kumekay
...al
1x spool rail extender (for large 2kg+ spools)
6x m3x20 bolts with nuts
nb: you should cut 50mm parts from bottom of legs (4x)
thingiverse
free

Dipole Balun by phcsys
...m4 35mm threaded rod (i use brass)
6x m4 hex nut
2x m4 wing nut
some lock washers
4x m3x8 screws (may differ)
1x n-type connector
3dwarehouse
free

Blocurile T1, T2, T3, T4, T5, Cartier Gavana 3, Pitesti, Romania
...ier gavana 3, pitesti, romania
3dwarehouse
blocurile turn t1, t2, t3, t4, t5 din cartierul gavana 3 #blocuri_turn_t1_t2_t3_t4_t5
thingiverse
free

GT2 Tensioner and GT2 Holder M4 screw by marcelanalyzer
...t2 6mm to be installed externally
for a tensioner and holder kit you will need:
4x - m4x19mm bolts
2x - m4x29mm bolts
6x - m4 nut
thingiverse
free
Dual Extruder by Psycho1981
...ng:
4x allen screw m5
4x square nut m5
4x washer m5
electronic:
-ramps 1.4 board
-atx power supply
-firmware "marlin"
thingiverse
free

MPCNC electronic box for MKS GEN v1.4 by parek
...24v and ground)
1x full graphic display
6x jts connector 4pin
2x jts connector 2pin
4x feet, its rubber end from old nerf ammo :)
3dwarehouse
free

Walter Knoll - OKI tables
...walter knoll - oki tables
3dwarehouse
t1 t2 t3 t4
thingiverse
free
Logitech C920 wall mount
...rdware needed:
4x m3x16mm screws.
4x m3 nuts
1x m4x50mm screw
1x m4 nut
2x wall screws (i used some extras from the ikea cabinet)
thingiverse
free

Hinge by Modellaner
...screw m5 x 55 mm
1x safetynut m5
6x countersunk screw m4
6x safetynut m4
hope you like it, i appreciate any feedback on my posts!
thingiverse
free

Monka 6x4 robot chassis by Jirkasirka
... you will need:
4x tt motor
6x wheel
servo s3003
2x 625bearing
m3, m4, m5 bolts ans nuts and other custom electronic(arduino ...)
Lilik7
thingiverse
free

Ender 3 screen cover by Lilik7
...ender 3 screen cover by lilik7
thingiverse
make from dark filament!
thingiverse
free
Xiaomi cam 360 holder by Lilik7
...xiaomi cam 360 holder by lilik7
thingiverse
cam holder for xiaomi 360 cam.
thingiverse
free
Ticket to ride card holder by Lilik7
...or destination routes
4 - for unselected destination routes
with hole for returning the card, when returning cards at the bottom.
Lack
3d_export
$5

LACK LACK Coffee table white 90x55 cm IKEA
..., white, 90x55 cm ikea<br>https://www.ikea.com/ru/ru/p/lack-lakk-zhurnalnyy-stol-belyy-50449907/?ysclid=l8zshj49w6656165430
turbosquid
$4

Ikea Lack
... available on turbo squid, the world's leading provider of digital 3d models for visualization, films, television, and games.
3ddd
$1

IKEA Lack Coffee Table
... кофейный
ikea lack coffee tablehttp://www.ikea.com/gb/en/catalog/products/00104291
turbosquid
$5

IKEA Lack Table
...ack table for download as blend, blend, unitypackage, and fbx on turbosquid: 3d models for games, architecture, videos. (1623135)
turbosquid
$10

Ikea Lack Set
... available on turbo squid, the world's leading provider of digital 3d models for visualization, films, television, and games.
turbosquid
$3

IKEA Lack Library
... available on turbo squid, the world's leading provider of digital 3d models for visualization, films, television, and games.
turbosquid
$1

IKEA LACK TABLE
... available on turbo squid, the world's leading provider of digital 3d models for visualization, films, television, and games.
turbosquid
free

IKEA Lack Shelf
... available on turbo squid, the world's leading provider of digital 3d models for visualization, films, television, and games.
turbosquid
$9

Ikea Table 5 Lack
... available on turbo squid, the world's leading provider of digital 3d models for visualization, films, television, and games.
turbosquid
$5

IKEA Lack Side Table
... available on turbo squid, the world's leading provider of digital 3d models for visualization, films, television, and games.
Enclosure
3d_export
free

electrical enclosure
...l enclosure where electrical devices like (relays, contactors, busbars ) are kept in order to protect from hazardous environment.
turbosquid
$100

GPU Enclosure
...yalty free 3d model gpu enclosure for download as obj and stl on turbosquid: 3d models for games, architecture, videos. (1381061)
3d_export
$5

Electrical Enclosure
...ed. also has tower lights attaced on the top.<br>file format that are available:<br>.step<br>.obj<br>.stl
archive3d
free

Enclosure 3D Model
...closure 3d model
archive3d
shower enclosure-acquarius- 3d model for interior 3d visualization.
archive3d
free

Enclosure 3D Model
...enclosure 3d model
archive3d
shower enclosure-omega- 3d model for interior 3d visualization.
archive3d
free

Enclosure 3D Model
...enclosure 3d model
archive3d
shower enclosure-vega - 3d model for interior 3d visualization.
archive3d
free

Enclosure 3D Model
...enclosure 3d model
archive3d
shower enclosure-zenith - 3d model for interior 3d visualization.
turbosquid
$20

shower enclosure
... available on turbo squid, the world's leading provider of digital 3d models for visualization, films, television, and games.
turbosquid
$14

Dumpster Enclosure
... available on turbo squid, the world's leading provider of digital 3d models for visualization, films, television, and games.
turbosquid
$25

3d printer enclosure
... model 3d printer enclosure for download as ipt, skp, and fbx on turbosquid: 3d models for games, architecture, videos. (1634310)
Ikea
3ddd
$1
IKEA
...ikea
3ddd
ikea , стеллаж
ikea
3ddd
$1
IKEA
...ikea
3ddd
ikea
кухня ikea
3ddd
$1
IKEA
...ikea
3ddd
ikea
осторожно, тяжелая модель
ikea
3ddd
$1
IKEA
...ikea
3ddd
ikea
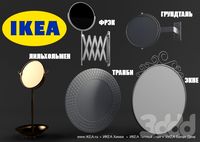
5 зеркал от ikea
3ddd
$1
IKEA
...ikea
3ddd
ikea , бойа
ikea светильник потолочный
3ddd
$1
IKEA
...ikea
3ddd
ikea , барный
bar stool ikea
3ddd
$1

IKEA
...ikea
3ddd
ikea , зубная щетка , косметика
ikea
3ddd
free
IKEA
...ikea
3ddd
ikea , трюмо
дамский столик ikea.
3ddd
$1
IKEA
...3ddd
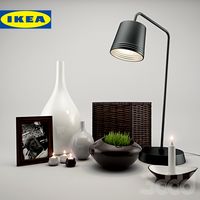
ps , декоративный набор , ikea
ikea decor
3ddd
$1

Ikea
...ikea
3ddd
ikea , lagra
модель лампы от ikea
Tower
archibase_planet
free
Tower
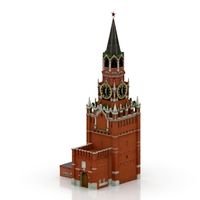
...kremlin tower spasskaya tower
tower kremlin spasskaya tower n120615 - 3d model (*.gsm+*.3ds+*.max) for exterior 3d visualization.
archibase_planet
free
Tower
...r kremlin tower petrovskaya tower
tower petrovskaya kremlin n120615 - 3d model (*.gsm+*.3ds+*.max) for exterior 3d visualization.
archibase_planet
free
Tower
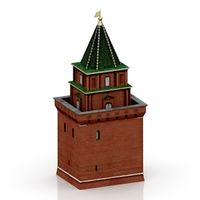
...ino-eleninskaya tower
tower constantino eleninskaya kremlin n120615 - 3d model (*.gsm+*.3ds+*.max) for exterior 3d visualization.
archibase_planet
free
Tower
...tower
archibase planet
tower statuette eiffel tower
tower decor n180914 - 3d model (*.gsm+*.3ds) for interior 3d visualization.
archibase_planet
free
Tower
...lanet
tower construction building
tower polices post street tower n110913 - 3d model (*.gsm+*.3ds) for exterior 3d visualization.
3d_export
$5
tower
...tower
3dexport
a fortified tower with a moat.
archibase_planet
free
Tower
...tower
archibase planet
building tower construction
tower n300712 - 3d model (*.gsm+*.3ds) for exterior 3d visualization.
archibase_planet
free
Tower
...uilding kremlin construction
tower 2 vtoraya bezymyannaya kremlin n100914 - 3d model (*.gsm+*.3ds) for exterior 3d visualization.
archibase_planet
free
Tower
...tower
archibase planet
forcetower tower
forcetower - 3d model for interior 3d visualization.
archibase_planet
free
Transmission tower
...lectricity pylon lattice tower framework tower
transmission tower n121015 - 3d model (*.gsm+*.3ds) for exterior 3d visualization.
Printer
archibase_planet
free

Printer
...inter
archibase planet
printer laser printer pc equipment
printer n120614 - 3d model (*.gsm+*.3ds) for interior 3d visualization.
archibase_planet
free

Printer
...rchibase planet
laser printer office equipment computer equipment
printer - 3d model (*.gsm+*.3ds) for interior 3d visualization.
turbosquid
$100

Printer
...er
turbosquid
royalty free 3d model printer for download as on turbosquid: 3d models for games, architecture, videos. (1487819)
turbosquid
$3

Printer
...turbosquid
royalty free 3d model printer for download as max on turbosquid: 3d models for games, architecture, videos. (1670230)
turbosquid
$1

printer
...turbosquid
royalty free 3d model printer for download as max on turbosquid: 3d models for games, architecture, videos. (1595546)
turbosquid
$1

printer
...turbosquid
royalty free 3d model printer for download as max on turbosquid: 3d models for games, architecture, videos. (1595105)
turbosquid
$10

Printer
...id
royalty free 3d model printer for download as max and 3dm on turbosquid: 3d models for games, architecture, videos. (1607146)
turbosquid
$7

Printer
...royalty free 3d model printer for download as ma, ma, and obj on turbosquid: 3d models for games, architecture, videos. (1644580)
turbosquid
$30

Printer
... available on turbo squid, the world's leading provider of digital 3d models for visualization, films, television, and games.
turbosquid
$20

Printer
... available on turbo squid, the world's leading provider of digital 3d models for visualization, films, television, and games.
Table
3ddd
free
Table
...table
3ddd
table
table
archibase_planet
free
Table
...table
archibase planet
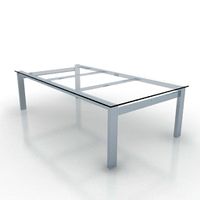
table glass-table round table glass table
table n240311 - 3d model (*.3ds) for interior 3d visualization.
archibase_planet
free
Table
...e
archibase planet
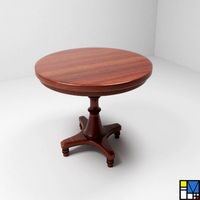
table dining-room table dinner table round table
table - 3d model (*.gsm+*.3ds) for interior 3d visualization.
3d_export
$5

table
...table
3dexport
table classic-table
archibase_planet
free
Table
...se planet
table glass table round table glass-table
table tonin habitat n280111 - 3d model (*.3ds) for interior 3d visualization.
archibase_planet
free

Table
...table
archibase planet
table dining-room table dinner table
table - 3d model (*.3ds) for interior 3d visualization.
archibase_planet
free
Table
...table
archibase planet
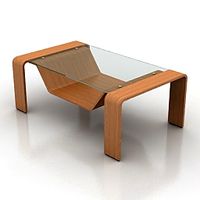
table coffee table glass table
table - 3d model (*.gsm+*.3ds) for interior 3d visualization.
archibase_planet
free
Table
...table
archibase planet
table glass-table coffee table
table - 3d model (*.gsm+*.3ds) for interior 3d visualization.
archibase_planet
free
Table
...table
archibase planet
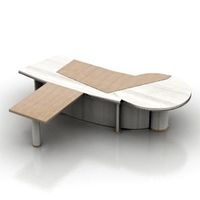
table writing table office table
table - 3d model (*.gsm+*.3ds) for interior 3d visualization.
3d_ocean
$5
Table
...table
3docean
dining table furniture home kitchen table
simple wooden table.