Thingiverse

IKEA LACK Enclosure Fan
by Thingiverse
Last crawled date: 4 years, 3 months ago
Enclosure Fan
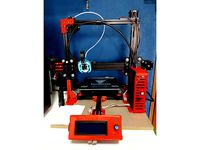
I build a new IKEA LACK Housing for my Ender 3 Printer. I reviewed the existing enclosure fan designs and they didn't fit for me.
So I decided to design one from scratch. My goal was to keep it as simple as possible.
You would need a high pressure fan with dimmensions 120x120x20-30mm to get the air out of the enclosure.
Installation:
Recommendations
Carbon Filter 2-4mm (Cut it by yourself)
Scythe DFS123812H-3000 Ultra Kaze 120mm 3000RPM Case Fan - Black
Dim: 120x120x30mm
Screws
You need the following screws and nuts:
For 30mm Fan:
4x M4x60mm
For 20mm FAN:
4x M4x50mm
Use M4 Nylon nuts to screw everything together and nothing gets loose.
M4 Washers , for a little bit distance between filter plate and fan
Instructions
Print everything
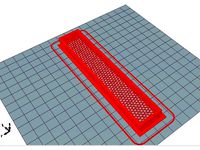
Cut a square with the dim. 125x125mm into your IKEA Lack Table.
Cut the carbon filter to 120x120mm and cut off the corners to have space for the mount holes. Use filterplate as template.
Put the carbon filter in the fan housing.
(Optional) Put fan cover on the top of the fan.
Use the long screw to align everything.
Put the filterholder plate underneath.
Add 1 Nut and 2 Washers at each screw to on the bottom of the fan.
Put the fan in the fan housing with all plates.
After that pull in the Fanhousing into lack table.
Use counter plate and m4 nuts on the bottom of the lacktable to secure everything.
Updates
02/15/2020 Updated filterplate to provide more clearance to fan.
I build a new IKEA LACK Housing for my Ender 3 Printer. I reviewed the existing enclosure fan designs and they didn't fit for me.
So I decided to design one from scratch. My goal was to keep it as simple as possible.
You would need a high pressure fan with dimmensions 120x120x20-30mm to get the air out of the enclosure.
Installation:
Recommendations
Carbon Filter 2-4mm (Cut it by yourself)
Scythe DFS123812H-3000 Ultra Kaze 120mm 3000RPM Case Fan - Black
Dim: 120x120x30mm
Screws
You need the following screws and nuts:
For 30mm Fan:
4x M4x60mm
For 20mm FAN:
4x M4x50mm
Use M4 Nylon nuts to screw everything together and nothing gets loose.
M4 Washers , for a little bit distance between filter plate and fan
Instructions
Print everything
Cut a square with the dim. 125x125mm into your IKEA Lack Table.
Cut the carbon filter to 120x120mm and cut off the corners to have space for the mount holes. Use filterplate as template.
Put the carbon filter in the fan housing.
(Optional) Put fan cover on the top of the fan.
Use the long screw to align everything.
Put the filterholder plate underneath.
Add 1 Nut and 2 Washers at each screw to on the bottom of the fan.
Put the fan in the fan housing with all plates.
After that pull in the Fanhousing into lack table.
Use counter plate and m4 nuts on the bottom of the lacktable to secure everything.
Updates
02/15/2020 Updated filterplate to provide more clearance to fan.
Similar models
thingiverse
free

Air Filter for LACK Enclosure by danailch
...)
8x - wood screws
to be added next:
a housing for the carbon filter (the filter can be used without it).
the size of the screws.
thingiverse
free

IKEA LACK active carbon fan feed-through by petolone
...surfaces of the lack table by using a dremel with a cutting disc. the inner card board honey-comb i removed with a medical knife.
thingiverse
free

IKEA Lack Enclosure Raspberry Pi cam holder 45°
... using it on my ender 3. after printing you will need:
1x m4 bolt and a nut (i used m4 x 12)
4x m2.5 with nuts (i used m2,5 x 10)
thingiverse
free

Simple Fume Extractor by shred
...bon sheet for kitchen hoods
4x screws m4x50
4x washers m4
4x nuts m4
print both parts with the grill side rotated to the heatbed.
thingiverse
free

HEPA Filter Enclosure by jmccluskey
...replacement filter, part # lv-h132-rf (on amazon)
fan: ac infinity axial 1238 w/ ac infinity, fan speed controller. (on amazon)
thingiverse
free

Fan Filtering Unit
...e desired location.
after marking your filter cut out and drill holes remove the 4 corners from the model using a snap-off knife.
thingiverse
free
Lazy IKEA Lack Fan Duct by Psych0_d0g
...emi permanently in place and i would add a small layer of silicone around the edge and let it harden before fixing it to the lack
thingiverse
free

Lack Handle by tejawood
...wesome handle for the lack table enclosure here; https://www.thingiverse.com/thing:1814763
used m2 screws, washers & and nuts
thingiverse
free

Solder fume extractor
...3-delig-588546
you might also want to mount a fan guard (https://www.thingiverse.com/thing:1581974) to the other side of the fan.
thingiverse
free
Tevo Tarantula Display Mount by TheDino
...
push the enclosure through the screw using the bottom holes
add washer
add another nut. tighten the two nuts against each other.
Lack
3d_export
$5

LACK LACK Coffee table white 90x55 cm IKEA
..., white, 90x55 cm ikea<br>https://www.ikea.com/ru/ru/p/lack-lakk-zhurnalnyy-stol-belyy-50449907/?ysclid=l8zshj49w6656165430
turbosquid
$4

Ikea Lack
... available on turbo squid, the world's leading provider of digital 3d models for visualization, films, television, and games.
3ddd
$1

IKEA Lack Coffee Table
... кофейный
ikea lack coffee tablehttp://www.ikea.com/gb/en/catalog/products/00104291
turbosquid
$5

IKEA Lack Table
...ack table for download as blend, blend, unitypackage, and fbx on turbosquid: 3d models for games, architecture, videos. (1623135)
turbosquid
$10

Ikea Lack Set
... available on turbo squid, the world's leading provider of digital 3d models for visualization, films, television, and games.
turbosquid
$3

IKEA Lack Library
... available on turbo squid, the world's leading provider of digital 3d models for visualization, films, television, and games.
turbosquid
$1

IKEA LACK TABLE
... available on turbo squid, the world's leading provider of digital 3d models for visualization, films, television, and games.
turbosquid
free

IKEA Lack Shelf
... available on turbo squid, the world's leading provider of digital 3d models for visualization, films, television, and games.
turbosquid
$9

Ikea Table 5 Lack
... available on turbo squid, the world's leading provider of digital 3d models for visualization, films, television, and games.
turbosquid
$5

IKEA Lack Side Table
... available on turbo squid, the world's leading provider of digital 3d models for visualization, films, television, and games.
Enclosure
3d_export
free

electrical enclosure
...l enclosure where electrical devices like (relays, contactors, busbars ) are kept in order to protect from hazardous environment.
turbosquid
$100

GPU Enclosure
...yalty free 3d model gpu enclosure for download as obj and stl on turbosquid: 3d models for games, architecture, videos. (1381061)
3d_export
$5

Electrical Enclosure
...ed. also has tower lights attaced on the top.<br>file format that are available:<br>.step<br>.obj<br>.stl
archive3d
free

Enclosure 3D Model
...closure 3d model
archive3d
shower enclosure-acquarius- 3d model for interior 3d visualization.
archive3d
free

Enclosure 3D Model
...enclosure 3d model
archive3d
shower enclosure-omega- 3d model for interior 3d visualization.
archive3d
free

Enclosure 3D Model
...enclosure 3d model
archive3d
shower enclosure-vega - 3d model for interior 3d visualization.
archive3d
free

Enclosure 3D Model
...enclosure 3d model
archive3d
shower enclosure-zenith - 3d model for interior 3d visualization.
turbosquid
$20

shower enclosure
... available on turbo squid, the world's leading provider of digital 3d models for visualization, films, television, and games.
turbosquid
$14

Dumpster Enclosure
... available on turbo squid, the world's leading provider of digital 3d models for visualization, films, television, and games.
turbosquid
$25

3d printer enclosure
... model 3d printer enclosure for download as ipt, skp, and fbx on turbosquid: 3d models for games, architecture, videos. (1634310)
Ikea
3ddd
$1
IKEA
...ikea
3ddd
ikea , стеллаж
ikea
3ddd
$1
IKEA
...ikea
3ddd
ikea
кухня ikea
3ddd
$1

IKEA
...ikea
3ddd
ikea
осторожно, тяжелая модель
ikea
3ddd
$1
IKEA
...ikea
3ddd
ikea
5 зеркал от ikea
3ddd
$1
IKEA
...ikea
3ddd
ikea , бойа
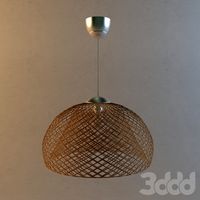
ikea светильник потолочный
3ddd
$1
IKEA
...ikea
3ddd
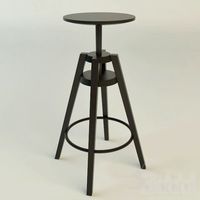
ikea , барный
bar stool ikea
3ddd
$1

IKEA
...ikea
3ddd
ikea , зубная щетка , косметика
ikea
3ddd
free

IKEA
...ikea
3ddd
ikea , трюмо
дамский столик ikea.
3ddd
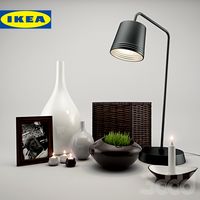
$1
IKEA
...3ddd
ps , декоративный набор , ikea
ikea decor
3ddd
$1

Ikea
...ikea
3ddd
ikea , lagra
модель лампы от ikea
Fan
3d_export
$5

fan
...fan
3dexport
fan 3d model, table fan, fan, electric fan, ventilator
archibase_planet
free

Fan
...fan
archibase planet
fan large fan
fan out n260707 - 3d model for interior 3d visualization.
archibase_planet
free

Fan
...fan
archibase planet
fan ceiling fan ventilator
fan stealth n300615 - 3d model (*.gsm+*.3ds) for interior 3d visualization.
3d_export
$15

fan
...fan
3dexport
is an ancient fan
3ddd
$1

Fan-C-Fan by marco gallegos
...n-c-fan by marco gallegos
3ddd
вентилятор , marco gallegos
fan-c-fan by marco gallegos
3d_export
$10

fan
...fan
3dexport
a detailed fan designed for home or space blowing is now available for only 19.99!
turbosquid
$1

Fan
...fan
turbosquid
free 3d model fan for download as on turbosquid: 3d models for games, architecture, videos. (1427865)
turbosquid
$14

Fan
...fan
turbosquid
royalty free 3d model fan for download as on turbosquid: 3d models for games, architecture, videos. (1415642)
3ddd
$1

Светильник Fan
...светильник fan
3ddd
fan , italamp
светильник fan, производитель italamp
turbosquid
$25

Fan
...fan
turbosquid
royalty free 3d model fan for download as c4d on turbosquid: 3d models for games, architecture, videos. (1483246)