Thingiverse
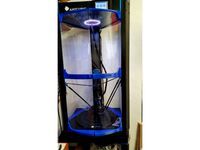
IKEA Lack Enclosure Anet A6 cooling duct assembly by Gnattycole
by Thingiverse
Last crawled date: 3 years, 1 month ago
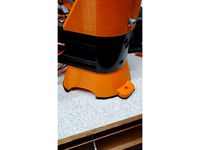
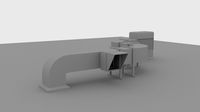
Following on from my control board cooling fan cover ( https://www.thingiverse.com/thing:3032480 ), I needed a method of ensuring cool air from outside the enclosure could be drawn in as I figured there could be a high likelihood of the enclosure temperature rising considerably when printing with ABS. I also wanted a method of allowing a slight positive pressure to be created inside the enclosure to prevent the ingress of dust.
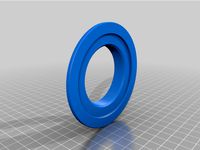
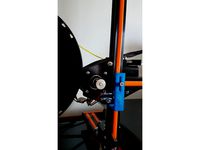
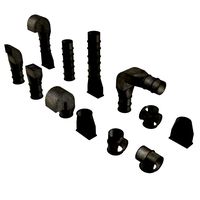
The intake cover is designed to use the fan screws to attach it to the existing cooling fan which in turn is attached to the control board cover. This is mounted via the standard mortice and tenon joint from the original Anet control board cover. The cover has two threaded holes in the base which is designed to accept the intake transit pieces. There is a drilling jig provided to ensure accurate drilling of the Lack table top, the holes should be opened up to 42 -44mm using a proprietary hole-saw or Forstner bit.
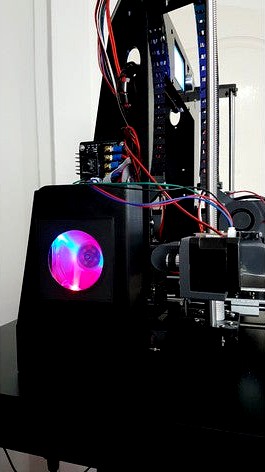
The fan inspection cover has been designed to accept a 60mm perspex disc to enable the fan rotation to be viewed.(https://www.amazon.co.uk/Plastic-Circles-Acrylic-Transparent-Supplied/dp/B077H62GJK/ref=sr_1_2?ie=UTF8&qid=1537200948&sr=8-2&keywords=perspex+60mm+disc for example although E-bay is sometimes cheaper) I've uploaded a solid one for those that do not wish to glue the window into the cover and is also streamlined to aid airflow to fan. Either cover is a friction fit using stubs which locate in the fan mounting turret screw holes. The window cover can be removed using one of those suction cups used to change halogen GU10 bulbs. The plain cover has been designed to have a knob mounted with an M3 x 14mm screw and nut, the latter held captive in the knob.
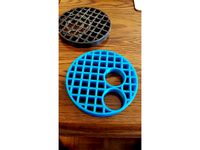
The next stage is to design a filter box to be mounted on the underside of the printer deck (AKA Ikea cardboard furniture) and probably incorporate an additional booster fan if necessary.
Update. 08.09.18. Filter housing now built and tested. see https://www.thingiverse.com/thing:3090158
I've added the STL's on here but the details are on the link.
The intake cover is designed to use the fan screws to attach it to the existing cooling fan which in turn is attached to the control board cover. This is mounted via the standard mortice and tenon joint from the original Anet control board cover. The cover has two threaded holes in the base which is designed to accept the intake transit pieces. There is a drilling jig provided to ensure accurate drilling of the Lack table top, the holes should be opened up to 42 -44mm using a proprietary hole-saw or Forstner bit.
The fan inspection cover has been designed to accept a 60mm perspex disc to enable the fan rotation to be viewed.(https://www.amazon.co.uk/Plastic-Circles-Acrylic-Transparent-Supplied/dp/B077H62GJK/ref=sr_1_2?ie=UTF8&qid=1537200948&sr=8-2&keywords=perspex+60mm+disc for example although E-bay is sometimes cheaper) I've uploaded a solid one for those that do not wish to glue the window into the cover and is also streamlined to aid airflow to fan. Either cover is a friction fit using stubs which locate in the fan mounting turret screw holes. The window cover can be removed using one of those suction cups used to change halogen GU10 bulbs. The plain cover has been designed to have a knob mounted with an M3 x 14mm screw and nut, the latter held captive in the knob.
The next stage is to design a filter box to be mounted on the underside of the printer deck (AKA Ikea cardboard furniture) and probably incorporate an additional booster fan if necessary.
Update. 08.09.18. Filter housing now built and tested. see https://www.thingiverse.com/thing:3090158
I've added the STL's on here but the details are on the link.
Similar models
thingiverse
free

Tevo Tarantula Controller Cover fan mount by twb010
...les for mounting the cover have integrated stand-offs to allow for plenty of room for components and connectors on the mks board.
thingiverse
free

Anet A6 Control board cover with 8cm fan by Gnattycole
...lack table, directly inside the cover and connect to the board supply terminals. the fan can be connected here at the same time..
thingiverse
free

Anet A8 Electronics Enclosure by awtilso
...board used. the face uses a 70mm fan. i used #4 x 1/2" screws to mount the boards in the case along with holding the lid on.
thingiverse
free

AM8 Electronics Case - with fan on enclosure lid by bipsen
...an lid (mounted on the outside).
note: i have not printed the dual-fan lid, but it should be possible to mount 2 80mm fans on it.
thingiverse
free

Controlbox lid for 60mm fan for Ender by Creappie
...e fan already printed.
be aware that the 60mm fan should be no more than 15 mm high to ensure enough distance from control board.
thingiverse
free

AM8 Anet A8 Main Board 80mm Fan Cover by Lotis
...ix of zadthebad's main board fan cover. i simply made the opening smaller and moved the mounting holes to accept an 80mm fan.
cg_trader
$3

ANET COOLING FAN COVER | 3D
...equired, stylish design, the mounting holes fits the regular screws that came with the cooling fan, 0.1mm layer hight recommended
thingiverse
free

Tevo Tarantula mount for MKS Gen L v1.0 control board by fmlive
...new fan cover. the stepper drivers i was using are subject to run hotter so i included a cover with two 40 mm fans on the cover.
thingiverse
free

40mm Fan Dust Filter by Ikagara
...iminate the need for you to clean your fans, heat sinks or electronics from dust, hair, and fur.
dimentions: 40mm x 40mm x 11.5mm
cults
$1

RAMPS 1.x Arduino mounting plate with 60mm integrated fan mount
...ate. it also has an integrated 60mm fan mount for easy application of a cooling spring breeze to your hot drivers and mosfets.
Gnattycole
thingiverse
free
Yard Gully Drain cover with two Waste pipe entries by Gnattycole
...fset because that was dictated by my particular situation but it might be useful for someone else out there with a similar issue.
thingiverse
free
YASAR (Yet Another Spool Adaptor Ring) For Emmetts Bearing by Gnattycole
... i made this adaptor ring which some folk might find useful, although there seem to be loads on thingiverse now i've made it.
thingiverse
free
Kossel Linear Plus Feet with screwdown lugs by Gnattycole
...a pair of m4 x 8mm cap head screws and tee nuts per foot.
thanks to airwaves ted for the original design which works really well.
thingiverse
free

Ottoman Bed foot risers (Extensions for Roomba) by Gnattycole
...sn't required. it picks up the entire bed by an additional 80mm which to be honest, i think is a more sensible height anyway.
thingiverse
free

Cole & Mason Salt and Pepper mills button by Gnattycole
...per mill top case and secure it in place. the m4 screw also acts as the plunger to operate the switch on the mill motor assembly.
thingiverse
free
Predator Enclosure Door centre frame for single piece doors by Gnattycole
... screw
4 x neodymium magnets, diameter 8mm x 3mm thick.
2 x clear extruded acrylic sheet, thickness: 2mm, length: 875, width: 225
thingiverse
free

Wansview 1080P USB cam mount for 20mm Ball joint by Gnattycole
...uot;ball and socket" mount.
now i know it all works, i must get round to printing the whole thing in black for the predator.
thingiverse
free

Single sided spool holder Heavy Duty by Gnattycole
...a few cheapo bucket examples which i probably wouldn't buy again. spool widths of 55mm - 75mm and boss diameters of 52- 75mm.
thingiverse
free
Anet E12 Z stop simple adjuster by Gnattycole
...re you have sufficient clearance for it to make the limit switch.
my first upload to thingiverse so hope it is of use to someone.
thingiverse
free

Vice Clams (Soft Jaws) for 3" vice magnetic by Gnattycole
...t printing with supports, raft or brim as this fills the v grooves with filament and you'll spend ages trying to bust it out.
A6
3ddd
free

audi a6
...audi a6
3ddd
audi a6
audi a6
3ddd
$1

AUDI A6
...audi a6
3ddd
audi
audi a6, — семейство легковых автомобилей бизнес-класса, выпускающихся под маркой audi
3ddd
$1
Slipper Bath A6
...slipper bath a6
3ddd
toto
slipper bath a6
3ddd
$1

Slipper Bath A6
...slipper bath a6
3ddd
toto , ванна
slipper bath a6
3d_export
$40

Audi A6 3D Model
...audi a6 3d model
3dexport
audi a6
audi a6 3d model kaxa3d 8037 3dexport
3d_export
$79

Audi A6 3D Model
...audi a6 3d model
3dexport
audi auto a6
audi a6 3d model growl 3313 3dexport
3d_export
$40

Audi a6 3D Model
...audi a6 3d model
3dexport
car audi a6
audi a6 3d model bararhakopre20 91055 3dexport
turbosquid
$99
Audi A6
... available on turbo squid, the world's leading provider of digital 3d models for visualization, films, television, and games.
turbosquid
$99

Audi A6
... available on turbo squid, the world's leading provider of digital 3d models for visualization, films, television, and games.
turbosquid
$90

Audi A6
... available on turbo squid, the world's leading provider of digital 3d models for visualization, films, television, and games.
Lack
3d_export
$5

LACK LACK Coffee table white 90x55 cm IKEA
..., white, 90x55 cm ikea<br>https://www.ikea.com/ru/ru/p/lack-lakk-zhurnalnyy-stol-belyy-50449907/?ysclid=l8zshj49w6656165430
turbosquid
$4

Ikea Lack
... available on turbo squid, the world's leading provider of digital 3d models for visualization, films, television, and games.
3ddd
$1

IKEA Lack Coffee Table
... кофейный
ikea lack coffee tablehttp://www.ikea.com/gb/en/catalog/products/00104291
turbosquid
$5

IKEA Lack Table
...ack table for download as blend, blend, unitypackage, and fbx on turbosquid: 3d models for games, architecture, videos. (1623135)
turbosquid
$10

Ikea Lack Set
... available on turbo squid, the world's leading provider of digital 3d models for visualization, films, television, and games.
turbosquid
$3

IKEA Lack Library
... available on turbo squid, the world's leading provider of digital 3d models for visualization, films, television, and games.
turbosquid
$1

IKEA LACK TABLE
... available on turbo squid, the world's leading provider of digital 3d models for visualization, films, television, and games.
turbosquid
free

IKEA Lack Shelf
... available on turbo squid, the world's leading provider of digital 3d models for visualization, films, television, and games.
turbosquid
$9

Ikea Table 5 Lack
... available on turbo squid, the world's leading provider of digital 3d models for visualization, films, television, and games.
turbosquid
$5

IKEA Lack Side Table
... available on turbo squid, the world's leading provider of digital 3d models for visualization, films, television, and games.
Anet
thingiverse
free

Anet by derbodesign
...anet by derbodesign
thingiverse
logo anet
thingiverse
free

Anet e10 , Anet v1.0 by jonathan_943D
...anet e10 , anet v1.0 by jonathan_943d
thingiverse
soporte de ventilador de 80mm, para controladora anet v1.0
thingiverse
free

Anet A8 Anet AM8 Y belt holder
...anet a8 anet am8 y belt holder
thingiverse
anet a8 anet am8 y belt holder
thingiverse
free

Anet A8 Probe Bracket for anet sensor by chelrix
...anet a8 probe bracket for anet sensor by chelrix
thingiverse
anet a8 probe bracket for anet official sensor and marlin firmware
thingiverse
free

Anet logo by JUST3D_PRNTNG
...anet logo by just3d_prntng
thingiverse
anet logo
thingiverse
free

Fan nozzle for Anet A8 with original Anet levelsensor by peteruhlmann
...et levelsensor by peteruhlmann
thingiverse
here is an improved fan nozzle for the anet a8 with original level sensor from anet.
thingiverse
free

Anet Et4 Box
...anet et4 box
thingiverse
tool box for anet et4
thingiverse
free

Anet Logo by Superflex_Plastic_Fantastic
...anet logo by superflex_plastic_fantastic
thingiverse
anet logo to incorporate into designs.
thingiverse
free

Box for Anet ET4
...box for anet et4
thingiverse
this is a simple box for tool of anet et4
thingiverse
free

Anet V1.0 Board Kühlung (80mm Lüfter) / Anet A8 by MadCre8
...anet v1.0 board kühlung (80mm lüfter) / anet a8 by madcre8
thingiverse
anet v1.0 board kühlung (80mm lüfter) / anet a8
Duct
turbosquid
$19
Duct Set
...d
royalty free 3d model duct set for download as max and fbx on turbosquid: 3d models for games, architecture, videos. (1145038)
turbosquid
$10
Duct Tape
...id
royalty free 3d model duct tape for download as ma and ma on turbosquid: 3d models for games, architecture, videos. (1580351)
turbosquid
free
Duct Tape
...
free 3d model duct tape for download as obj, fbx, and blend on turbosquid: 3d models for games, architecture, videos. (1486518)
3d_ocean
$7
Air-duct
... ventilation
high quality industrial air duct ventilation model. created in cinema 4d but comes in various other formats as well.
turbosquid
$20
Air ducts
...lty free 3d model air ducts for download as max, obj, and fbx on turbosquid: 3d models for games, architecture, videos. (1262476)
3d_export
$10

Supply air duct
...supply air duct
3dexport
supply air duct with two axial fans and hangers
turbosquid
$2
Duct Tape
...e 3d model duct tape for download as obj, fbx, blend, and dae on turbosquid: 3d models for games, architecture, videos. (1473972)
turbosquid
free

Duct Tape
... available on turbo squid, the world's leading provider of digital 3d models for visualization, films, television, and games.
3d_ocean
$3
Duct tape
...polys. includes: cinema 4d project. model in 3 formats (obj, fbx, 3ds). 6 .tga texture maps (albedo, ambient occlusion, diffus...
turbosquid
$40
Ventilation Duct PACK
...tion duct pack for download as ma, obj, fbx, and unitypackage on turbosquid: 3d models for games, architecture, videos. (1287068)
Enclosure
3d_export
free

electrical enclosure
...l enclosure where electrical devices like (relays, contactors, busbars ) are kept in order to protect from hazardous environment.
turbosquid
$100

GPU Enclosure
...yalty free 3d model gpu enclosure for download as obj and stl on turbosquid: 3d models for games, architecture, videos. (1381061)
3d_export
$5

Electrical Enclosure
...ed. also has tower lights attaced on the top.<br>file format that are available:<br>.step<br>.obj<br>.stl
archive3d
free

Enclosure 3D Model
...closure 3d model
archive3d
shower enclosure-acquarius- 3d model for interior 3d visualization.
archive3d
free

Enclosure 3D Model
...enclosure 3d model
archive3d
shower enclosure-omega- 3d model for interior 3d visualization.
archive3d
free

Enclosure 3D Model
...enclosure 3d model
archive3d
shower enclosure-vega - 3d model for interior 3d visualization.
archive3d
free

Enclosure 3D Model
...enclosure 3d model
archive3d
shower enclosure-zenith - 3d model for interior 3d visualization.
turbosquid
$20

shower enclosure
... available on turbo squid, the world's leading provider of digital 3d models for visualization, films, television, and games.
turbosquid
$14

Dumpster Enclosure
... available on turbo squid, the world's leading provider of digital 3d models for visualization, films, television, and games.
turbosquid
$25

3d printer enclosure
... model 3d printer enclosure for download as ipt, skp, and fbx on turbosquid: 3d models for games, architecture, videos. (1634310)
Ikea
3ddd
$1
IKEA
...ikea
3ddd
ikea , стеллаж
ikea
3ddd
$1
IKEA
...ikea
3ddd
ikea
кухня ikea
3ddd
$1

IKEA
...ikea
3ddd
ikea
осторожно, тяжелая модель
ikea
3ddd
$1
IKEA
...ikea
3ddd
ikea
5 зеркал от ikea
3ddd
$1
IKEA
...ikea
3ddd
ikea , бойа
ikea светильник потолочный
3ddd
$1
IKEA
...ikea
3ddd
ikea , барный
bar stool ikea
3ddd
$1

IKEA
...ikea
3ddd
ikea , зубная щетка , косметика
ikea
3ddd
free

IKEA
...ikea
3ddd
ikea , трюмо
дамский столик ikea.
3ddd
$1

IKEA
...3ddd
ps , декоративный набор , ikea
ikea decor
3ddd
$1

Ikea
...ikea
3ddd
ikea , lagra
модель лампы от ikea
Cooling
turbosquid
free
Cool Inc. Cool Box
... available on turbo squid, the world's leading provider of digital 3d models for visualization, films, television, and games.
3d_export
$5

cool penguin
...cool penguin
3dexport
cool penguin
turbosquid
$1
cooling
... available on turbo squid, the world's leading provider of digital 3d models for visualization, films, television, and games.
3d_export
$26
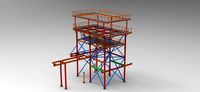
cooling tower
...ers.<br>model with full detail in real size. all nodes and bolted connections are built. it was designed for nuclear power.
3ddd
$1
Mantra Cool
...14 версиях и obj-файл, а также материал для включенного и для выключенного светильника. turbosmooth/meshsmooth при необходимости.
3d_export
$5
cool electric guitar
...cool electric guitar
3dexport
cool electric guitar
turbosquid
$5

Cooling glass
...quid
royalty free 3d model cooling glass for download as obj on turbosquid: 3d models for games, architecture, videos. (1193829)
turbosquid
$30

CPU Cooling
...royalty free 3d model cpu cooling for download as max and fbx on turbosquid: 3d models for games, architecture, videos. (1386263)
turbosquid
$5

Cool CLoud
...
royalty free 3d model cool cloud for download as ma and obj on turbosquid: 3d models for games, architecture, videos. (1572300)
3d_export
$5
table cooling fan
...table cooling fan
3dexport
table cooling fan made of black plastic. individual small size cooling fan for office desk.
Assembly
3d_export
$7
Electronic product assembly machine assembly machine
...electronic product assembly machine assembly machine
3dexport
electronic product assembly machine assembly machine
3d_export
$15
generator assembly line
...ced and assembled in the form of module block. it is a demonstration project of generator assembly. welcome to download and learn
3d_export
$10
elevator traction machine assembly line motor assembly process
... traction machine assembly line motor assembly process
3dexport
elevator traction machine assembly line (motor assembly process)
3d_export
$16
pin assembly machine
...pin assembly machine
3dexport
pin assembly machine
3d_export
$7
tower-crane-assembly
...tower-crane-assembly
3dexport
tower-crane-assembly
turbosquid
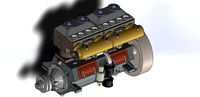
$100

Engine Assembly
...id
royalty free 3d model engine assembly for download as stl on turbosquid: 3d models for games, architecture, videos. (1658296)
turbosquid
$100

Engine Assembly
...id
royalty free 3d model engine assembly for download as stl on turbosquid: 3d models for games, architecture, videos. (1658291)
turbosquid
$100

Engine Assembly
...id
royalty free 3d model engine assembly for download as stl on turbosquid: 3d models for games, architecture, videos. (1658293)
turbosquid
$75
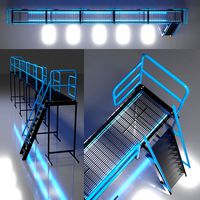
Platform Assembly
...royalty free 3d model platform assembly for download as blend on turbosquid: 3d models for games, architecture, videos. (1472939)
turbosquid
$15
generator assembly
...y free 3d model generator assembly for download as and sldas on turbosquid: 3d models for games, architecture, videos. (1469469)