Thingiverse

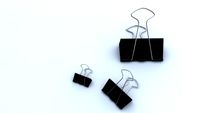
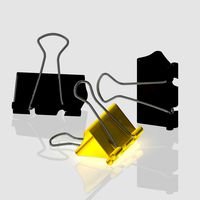
IKEA Lack clips V2.2.3 by splifnat
by Thingiverse
Last crawled date: 3 years, 1 month ago
Assemblage invisible pour meuble IKEA Lack
Le kit est fait pour utiliser du verre ou du plexiglas de 2,5mm ou 6mm
Visserie a bois 3x20mm environ
L'assemblage ce fait par des clips, 100% invisible.
Attention, une fois mis en place, le démontage peut détruire les pièces !!!
Liste des piéces à imprimer :
Si vous n'avez pas à surélever avec un autre morceaux de pied,il vous faut :
1- Gabarit_percage_V2.2.1_embase_table
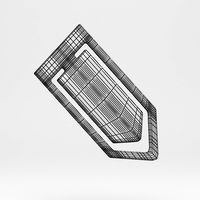
4 - V2.2_clips_invisible_5mm
1 - V2.2_Support_clips5mm+plexi_avec_biseau_avant_droit
1 - V2.2_Support_clips5mm+plexi_avec_biseau_avant_gauche
2 - V2.2_Support_clips5mm+plexi_avec_biseau (pour l'arriére)
1 - V2.2.1_Fixation_plexi_haut_avant_droit
1 - V2.2.1_Fixation_plexi_haut_avant_gauche
2 - V2.2.1_Fixation_plexi_haut (pour l'arriére)
Si vous avez besoin de surélevé avec un morceau de pied :
1 - Gabarit_percage_V2.2.1_embase_pied.stl
4 - V2.2.2_insert_pied
4 - V2.2.2_Réhausse_support_clips_seul_5mm_insert_pied
4 - V2.2_Support_clips_seul_5mm (il vient se visser sur la rehausse)
V1:
-Ajout des support plexiglas
V2:
-Assemblage par clips
V2.1:
-Ajout de biseau pour les pied de table
V2.2:
-Assemblage sans avoir à creuser le pied (épaisseur 5mm sans biseau)
V2.2.1:
-Modification des trous pour les support haut
-Modification gabarit de perçage pour la table
-Ajout d'un gabarit de perçage pour les pieds
-Ajout d'un clips invisible avec UN seul trou de fixation diam 4mm
V2.2.2:
-Ajout d'un insert dans le pied pour rallonger le clips
-Ajout d'une rehausse pour adapter la hauteur
V2.2.3:
-Modification de certaines pièces avec un écartement de 6mm pour le plexi
IKEA Lack furniture invisible assembly
The kit is made to use 2,5mm or 6mm glass or plexiglass
Screws with wood 3x20mm approximately
The assembly is done now by clips, 100% invisible.
Caution, once installed, dismantling can destroy the parts !!!
List of parts to print:
If you do not have to raise with another piece of foot, you need :
1- Gabarit_percage_V2.2.1_embase_table
4 - V2.2_clips_invisible_5mm
1 - V2.2_Support_clips5mm+plexi_avec_biseau_avant_droit
1 - V2.2_Support_clips5mm+plexi_avec_biseau_avant_gauche
2 - V2.2_Support_clips5mm+plexi_avec_biseau (pour l'arriére)
1 - V2.2.1_Fixation_plexi_haut_avant_droit
1 - V2.2.1_Fixation_plexi_haut_avant_gauche
2 - V2.2.1_Fixation_plexi_haut (pour l'arriére)
If you need to elevate with a piece of foot:
1 - Gabarit_percage_V2.2.1_embase_pied.stl
4 - V2.2.2_insert_pied
4 - V2.2.2_Réhausse_support_clips_seul_5mm_insert_pied
4 - V2.2_Support_clips_seul_5mm (he comes to screw on the raiser)
V1:
- Added plexiglass supports
V2:
- Assembly by clips
V2.1:
- Addition of bevel for table legs
V2.2:
- Assembly without having to dig the foot (thickness 5mm without bevel)
V2.2.1:
- Changing the holes for the top brackets
- Modification of drilling template for the table
- Adding a drilling template for the feet
- Addition of an invisible clips with ONE only fixing hole diam 4mm
V2.2.2:
Add an insert in the foot to lengthen the clips
Add a riser to adjust the height
V2.2.3:
Modification of some parts with a spacing of 6mm for plexi
Le kit est fait pour utiliser du verre ou du plexiglas de 2,5mm ou 6mm
Visserie a bois 3x20mm environ
L'assemblage ce fait par des clips, 100% invisible.
Attention, une fois mis en place, le démontage peut détruire les pièces !!!
Liste des piéces à imprimer :
Si vous n'avez pas à surélever avec un autre morceaux de pied,il vous faut :
1- Gabarit_percage_V2.2.1_embase_table
4 - V2.2_clips_invisible_5mm
1 - V2.2_Support_clips5mm+plexi_avec_biseau_avant_droit
1 - V2.2_Support_clips5mm+plexi_avec_biseau_avant_gauche
2 - V2.2_Support_clips5mm+plexi_avec_biseau (pour l'arriére)
1 - V2.2.1_Fixation_plexi_haut_avant_droit
1 - V2.2.1_Fixation_plexi_haut_avant_gauche
2 - V2.2.1_Fixation_plexi_haut (pour l'arriére)
Si vous avez besoin de surélevé avec un morceau de pied :
1 - Gabarit_percage_V2.2.1_embase_pied.stl
4 - V2.2.2_insert_pied
4 - V2.2.2_Réhausse_support_clips_seul_5mm_insert_pied
4 - V2.2_Support_clips_seul_5mm (il vient se visser sur la rehausse)
V1:
-Ajout des support plexiglas
V2:
-Assemblage par clips
V2.1:
-Ajout de biseau pour les pied de table
V2.2:
-Assemblage sans avoir à creuser le pied (épaisseur 5mm sans biseau)
V2.2.1:
-Modification des trous pour les support haut
-Modification gabarit de perçage pour la table
-Ajout d'un gabarit de perçage pour les pieds
-Ajout d'un clips invisible avec UN seul trou de fixation diam 4mm
V2.2.2:
-Ajout d'un insert dans le pied pour rallonger le clips
-Ajout d'une rehausse pour adapter la hauteur
V2.2.3:
-Modification de certaines pièces avec un écartement de 6mm pour le plexi
IKEA Lack furniture invisible assembly
The kit is made to use 2,5mm or 6mm glass or plexiglass
Screws with wood 3x20mm approximately
The assembly is done now by clips, 100% invisible.
Caution, once installed, dismantling can destroy the parts !!!
List of parts to print:
If you do not have to raise with another piece of foot, you need :
1- Gabarit_percage_V2.2.1_embase_table
4 - V2.2_clips_invisible_5mm
1 - V2.2_Support_clips5mm+plexi_avec_biseau_avant_droit
1 - V2.2_Support_clips5mm+plexi_avec_biseau_avant_gauche
2 - V2.2_Support_clips5mm+plexi_avec_biseau (pour l'arriére)
1 - V2.2.1_Fixation_plexi_haut_avant_droit
1 - V2.2.1_Fixation_plexi_haut_avant_gauche
2 - V2.2.1_Fixation_plexi_haut (pour l'arriére)
If you need to elevate with a piece of foot:
1 - Gabarit_percage_V2.2.1_embase_pied.stl
4 - V2.2.2_insert_pied
4 - V2.2.2_Réhausse_support_clips_seul_5mm_insert_pied
4 - V2.2_Support_clips_seul_5mm (he comes to screw on the raiser)
V1:
- Added plexiglass supports
V2:
- Assembly by clips
V2.1:
- Addition of bevel for table legs
V2.2:
- Assembly without having to dig the foot (thickness 5mm without bevel)
V2.2.1:
- Changing the holes for the top brackets
- Modification of drilling template for the table
- Adding a drilling template for the feet
- Addition of an invisible clips with ONE only fixing hole diam 4mm
V2.2.2:
Add an insert in the foot to lengthen the clips
Add a riser to adjust the height
V2.2.3:
Modification of some parts with a spacing of 6mm for plexi
Similar models
thingiverse
free

Vertex K8400 Extension feet / Vertex K8400 rehausse de pied by Sthev
...d to the original feet (two m3 nuts and two m3x16 screws per foot). allow you to change the power supply for adding a heating bed
thingiverse
free

Gab_3D Touch by Arno191
...se
reproduction à l’échelle 1 avec un pied à coulisse, d'un 3d touche pour être utilisé comme gabarit l'or des montages.
thingiverse
free

Ikea Lack pied 15cm by G-My67
... table ikea lack, utilisé ici comme meuble pour imprimante 3d avec intégration de bande led.
il en faut 2 par pied donc 8 en tout
thingiverse
free

DJI Mavic Air 2 Train d'atterrissage - Landing Gear extension by SL3D-Workshop
... faciliter l'assemblage.
j'espère que vous trouverez les modifications apportées utiles et qu'elles vous plaisent ;).
thingiverse
free
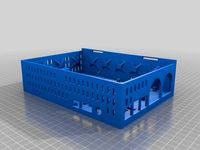
Boitier Raspberry PI 3 Bat Man by PrincesseLulu
...hiers pour l’impression 3d, un pour la partie haute, un pour la partie basse.
un fichier 3d de l'assemblage pour un rendu 3d.
thingiverse
free
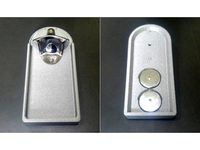
décapsuleur mural aimanté by JeromePayet
...avec deux aimant à l'arrière pour retenir les capsules, un tuto en pdf est disponible pour mieux comprendre l'assemblage.
thingiverse
free
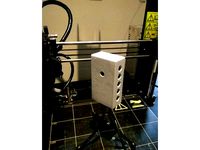
Boitier Raspberry Pi Zero W avec Pi Camera V2 by NCNETFR
...y a suffisament de place pour des broches sur le gpio.
quatre vis m3x10 tête cylindrique seront nécessaire pour l'assemblage.
grabcad
free

Méthodologie de conception 3D (Gain de temps).
... une boitier électrique avec changement des dimensions.
exemple 2 = deux chassis machine avec modification de l'encombrement.
grabcad
free

Assembly Design for beginners
...;atelier assemblage pour les débutants afin de se familiariser avec les contraintes d'assemblage et l'atelier en général.
thingiverse
free

DAGOMA DiscoUltimate Extrudeur V2.7 Modif. by Juliencasimir83
... a hole under the filament sensor for ease of disassembly.
réalisé avec thinkercad : https://www.tinkercad.com/things/3asrbsh8riv
Splifnat
thingiverse
free

AM8 screen support on top by splifnat
...am8 screen support on top by splifnat
thingiverse
screen support to am8
thingiverse
free

Chaine support E3DV6 by splifnat
... e3dv6 by splifnat
thingiverse
here is a support for chain compatible with
bowden x-carriage mount for e3d v6 from jackwaterfall
thingiverse
free

Y tensioner for AM8 GT2 8.5mm by splifnat
...to be able to insert an gt2 8.5mm toothed pulley.
the rest is identical to that of avz: https://www.thingiverse.com/thing:2459058
thingiverse
free

XXL Geometric Deer Wall Sculture by splifnat
...gn perfectly. this way it can be printed on 22x22 beds without problem.
the deer once assembled is almost 60cm wide and 65cm high
thingiverse
free

Clips LED IKEA LEDBERG V-slot or T-slot by splifnat
... v-slot or t-slot by splifnat
thingiverse
clips pour bandeau led ikea ledberg et fixation sur profilé aluminium v-slot ou t-slot
thingiverse
free
Clone E3D V6 40 mm Fan Duct with extra tight fit by splifnat
...ness of the walls to be as small as possible
radiator diameter = 22 mm
it's ok with https://www.thingiverse.com/thing:2117245
thingiverse
free

Pi camera Bed AM8/ Anet A8 by splifnat
...rroie y
support camera 2.1 for anet a8 with fixation on the heating plate and holds springs, it passes over the belt tensioner y
thingiverse
free
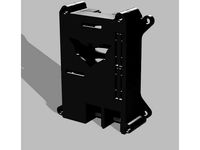
AM8 Electronics case + raspberry (octoprint) + ramps + dual mosfets + zip tie + 120mm Fan by splifnat
...120mm fan by splifnat
thingiverse
it's a remix of the am8 electronic box with:
ramps 1.4
two mosfets
raspberry pi
120mm fan
thingiverse
free

Chaine Anet A8 axe X et Z by splifnat
...z
button for the z switch
switch knob z switch
if you have any problems, do not hesitate to contact me so that i modify the file.
Lack
3d_export
$5

LACK LACK Coffee table white 90x55 cm IKEA
..., white, 90x55 cm ikea<br>https://www.ikea.com/ru/ru/p/lack-lakk-zhurnalnyy-stol-belyy-50449907/?ysclid=l8zshj49w6656165430
turbosquid
$4

Ikea Lack
... available on turbo squid, the world's leading provider of digital 3d models for visualization, films, television, and games.
3ddd
$1

IKEA Lack Coffee Table
... кофейный
ikea lack coffee tablehttp://www.ikea.com/gb/en/catalog/products/00104291
turbosquid
$5

IKEA Lack Table
...ack table for download as blend, blend, unitypackage, and fbx on turbosquid: 3d models for games, architecture, videos. (1623135)
turbosquid
$10

Ikea Lack Set
... available on turbo squid, the world's leading provider of digital 3d models for visualization, films, television, and games.
turbosquid
$3

IKEA Lack Library
... available on turbo squid, the world's leading provider of digital 3d models for visualization, films, television, and games.
turbosquid
$1

IKEA LACK TABLE
... available on turbo squid, the world's leading provider of digital 3d models for visualization, films, television, and games.
turbosquid
free

IKEA Lack Shelf
... available on turbo squid, the world's leading provider of digital 3d models for visualization, films, television, and games.
turbosquid
$9

Ikea Table 5 Lack
... available on turbo squid, the world's leading provider of digital 3d models for visualization, films, television, and games.
turbosquid
$5

IKEA Lack Side Table
... available on turbo squid, the world's leading provider of digital 3d models for visualization, films, television, and games.
V2
3d_export
free

Lamp v2
...lamp v2
3dexport
lamp v2 with solar panel
3d_export
$5

hammerhead v2
...hammerhead v2
3dexport
razer hammerhead v2 headphones, modeled in cinema 4d, render in corona
3d_export
$5

manometer v2
...manometer v2
3dexport
3d_export
$5

potato v2
...potato v2
3dexport
turbosquid
$52

Lifebuoys v2
...squid
royalty free 3d model lifebuoys v2 for download as fbx on turbosquid: 3d models for games, architecture, videos. (1560870)
turbosquid
$2

Mask v2
...turbosquid
royalty free 3d model mask v2 for download as stl on turbosquid: 3d models for games, architecture, videos. (1527741)
turbosquid
free

Flashlight V2
...d
free 3d model flashlight v2 for download as , obj, and fbx on turbosquid: 3d models for games, architecture, videos. (1663559)
turbosquid
$29

Thanos v2
...
royalty free 3d model thanos v2 for download as ztl and obj on turbosquid: 3d models for games, architecture, videos. (1651077)
turbosquid
$29

Titan v2
...d
royalty free 3d model titan v2 for download as ztl and obj on turbosquid: 3d models for games, architecture, videos. (1540228)
turbosquid
$29

Frieza v2
...
royalty free 3d model frieza v2 for download as ztl and obj on turbosquid: 3d models for games, architecture, videos. (1701238)
Ikea
3ddd
$1
IKEA
...ikea
3ddd
ikea , стеллаж
ikea
3ddd
$1
IKEA
...ikea
3ddd
ikea
кухня ikea
3ddd
$1

IKEA
...ikea
3ddd
ikea
осторожно, тяжелая модель
ikea
3ddd
$1
IKEA
...ikea
3ddd
ikea
5 зеркал от ikea
3ddd
$1
IKEA
...ikea
3ddd
ikea , бойа
ikea светильник потолочный
3ddd
$1
IKEA
...ikea
3ddd
ikea , барный
bar stool ikea
3ddd
$1

IKEA
...ikea
3ddd
ikea , зубная щетка , косметика
ikea
3ddd
free

IKEA
...ikea
3ddd
ikea , трюмо
дамский столик ikea.
3ddd
$1

IKEA
...3ddd
ps , декоративный набор , ikea
ikea decor
3ddd
$1

Ikea
...ikea
3ddd
ikea , lagra
модель лампы от ikea
Clips
archibase_planet
free
Clip
...clip
archibase planet
paper-clip clip office equipment
clip band - 3d model for interior 3d visualization.
3d_export
$5
screw clip
...screw clip
3dexport
screw clip
3d_ocean
$4
Butterfly clip
... a butterfly clip, it comes with a ready to render set for out of the box rendering. obj version and max alones version included.
turbosquid
$2

clip
...
royalty free 3d model clip for download as ma, obj, and fbx on turbosquid: 3d models for games, architecture, videos. (1358622)
turbosquid
$5

Clip
...lty free 3d model clip for download as c4d, 3ds, fbx, and obj on turbosquid: 3d models for games, architecture, videos. (1521355)
turbosquid
$19
Clip
... available on turbo squid, the world's leading provider of digital 3d models for visualization, films, television, and games.
turbosquid
$4
Clips
... available on turbo squid, the world's leading provider of digital 3d models for visualization, films, television, and games.
turbosquid
$3
clip
... available on turbo squid, the world's leading provider of digital 3d models for visualization, films, television, and games.
turbosquid
$2

clips
... available on turbo squid, the world's leading provider of digital 3d models for visualization, films, television, and games.
turbosquid
free

clip
... available on turbo squid, the world's leading provider of digital 3d models for visualization, films, television, and games.
3
turbosquid
$10

Mountain Bike 3 -3 of 3
...model mountain bike 3 (#3 of 3) for download as fbx and blend on turbosquid: 3d models for games, architecture, videos. (1438752)
turbosquid
$6

Rock 3-3
...urbosquid
royalty free 3d model rock 3-3 for download as obj on turbosquid: 3d models for games, architecture, videos. (1628065)
turbosquid
$29

Books 150 pieces 3-3-3
...books 150 pieces 3-3-3 for download as max, obj, fbx, and stl on turbosquid: 3d models for games, architecture, videos. (1384033)
turbosquid
$3

Genesis 3 Clothing 3
... available on turbo squid, the world's leading provider of digital 3d models for visualization, films, television, and games.
3d_export
$5

hinge 3
...hinge 3
3dexport
hinge 3
3ddd
$1

Розетка 3
...розетка 3
3ddd
розетка
розетка 3
turbosquid
$50

is-3
... available on turbo squid, the world's leading provider of digital 3d models for visualization, films, television, and games.
turbosquid
$10

Mountain Bike 3 -2 of 3
...model mountain bike 3 (#2 of 3) for download as fbx and blend on turbosquid: 3d models for games, architecture, videos. (1438750)
turbosquid
$10

Mountain Bike 1 -3 of 3
...model mountain bike 1 (#3 of 3) for download as fbx and blend on turbosquid: 3d models for games, architecture, videos. (1438743)
3d_export
$5

3 CATS
...3 cats
3dexport
3 cats pen holder
2
design_connected
$11

No 2
...no 2
designconnected
sibast no 2 computer generated 3d model. designed by sibast, helge.
turbosquid
$6

Cliff Rock 2-2
...uid
royalty free 3d model cliff rock 2-2 for download as obj on turbosquid: 3d models for games, architecture, videos. (1619161)
turbosquid
$29

Book variation 2 2
...3d model book variation 2 2 for download as max, obj, and fbx on turbosquid: 3d models for games, architecture, videos. (1366868)
turbosquid
$22

Classic baluster (2) (2)
...assic baluster (2) (2) for download as max, obj, fbx, and stl on turbosquid: 3d models for games, architecture, videos. (1483789)
turbosquid
$99

Smilodon 2 Pose 2
... available on turbo squid, the world's leading provider of digital 3d models for visualization, films, television, and games.
turbosquid
$20

Barrel Barricade 2-2
... available on turbo squid, the world's leading provider of digital 3d models for visualization, films, television, and games.
turbosquid
$6

Wall Trophy (2) (2)
... available on turbo squid, the world's leading provider of digital 3d models for visualization, films, television, and games.
turbosquid
free

Tire label 2 of 2
... available on turbo squid, the world's leading provider of digital 3d models for visualization, films, television, and games.
3ddd
$1

Кровать, 2 тумбочки, 2 светильника
...кровать, 2 тумбочки, 2 светильника
3ddd
кровать, 2 тумбочки, 2 светильника
нормальное качество
формат 3ds max
без текстур
3ddd
free

Кровать, 2 тумбочки, 2 светильника
...кровать, 2 тумбочки, 2 светильника
3ddd
кровать, 2 тумбочки, 2 светильника
нормальное качество
формат 3ds max
без текстур