Thingiverse
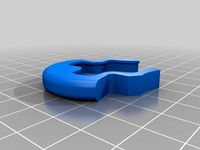
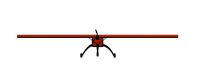
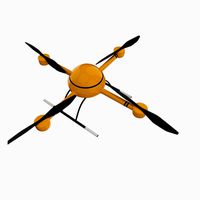
Icarus - A Brushless Micro Offset Quadcopter Frame by Haitchpeasauce
by Thingiverse
Last crawled date: 3 years, 1 month ago
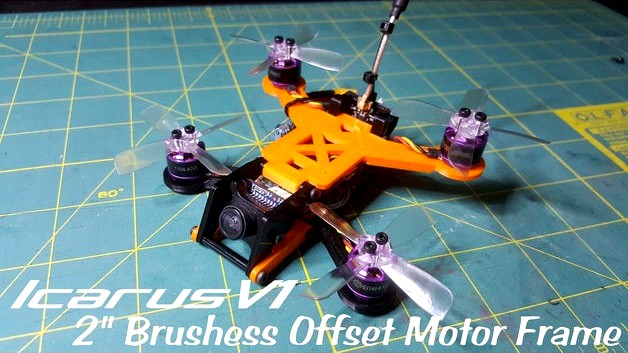
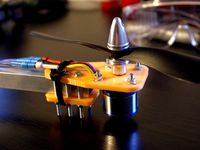
A 3D printed brushless micro FPV quadcopter frame featuring offset motors for smooth flights!
Just wanted to share my first 2-inch frame design. I thought it would be fun to have a crack at designing a 3D printed quadcopter frame.
Here are some cool features of the design:
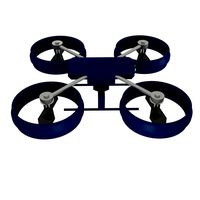
Flipped top-bottom plates that allow motors to be mounted offset or inverted from each other so that the props ride in clean air.
Flexible build options, allowing 2, 3, perhaps 4 layer stack heights.
Backpack system allows mounting of a 20x20 VTx or perhaps even a Runcam Split Mini.
Props not in view of the camera.
Can be set up to mount battery top or bottom.
Lightweight yet solid structure.
Easy to print. All parts print quickly and do not require supports.
Plastic frame means screws bite straight into the plastic, no need for nuts when fastening.
Plans to create an HD camera mount, as well as 2.5" and 3" versions.
Total build around 77g dry. This frame performed surprisingly well on its maiden flight, very fast and smooth and easy to handle. There were some minor wobbles when applying high throttle, but with some tuning I think this will become a great little craft. I am very happy with these initial results!
This frame was inspired by the Airblade Dark Knight and the RotorX Switchback. I just love their smooth handling because of the offset motors, and wanted a 3D printable 2" version.
More parts and accessories on the way, as well as an instruction video.
Please post feedback, I'm excited to hear your thoughts!
Hardware required:
4x 18-25mm M2 screws for the stack
10x 6-8mm M2 screws for the camera pod and backpack mount
2x 3mm M2 screws for the camera
20mm M2 standoff, preferably metal
Build Notes:
Select the base plate where the stack screws will go in (top or bottom), and use a 2mm or 2.5mm drill bit to widen the holes so that the stack screws can pass through easily.
The base plate holes are intentionally 2mm diameter so that the stack screws bite into them and hold the completed model together.
Just wanted to share my first 2-inch frame design. I thought it would be fun to have a crack at designing a 3D printed quadcopter frame.
Here are some cool features of the design:
Flipped top-bottom plates that allow motors to be mounted offset or inverted from each other so that the props ride in clean air.
Flexible build options, allowing 2, 3, perhaps 4 layer stack heights.
Backpack system allows mounting of a 20x20 VTx or perhaps even a Runcam Split Mini.
Props not in view of the camera.
Can be set up to mount battery top or bottom.
Lightweight yet solid structure.
Easy to print. All parts print quickly and do not require supports.
Plastic frame means screws bite straight into the plastic, no need for nuts when fastening.
Plans to create an HD camera mount, as well as 2.5" and 3" versions.
Total build around 77g dry. This frame performed surprisingly well on its maiden flight, very fast and smooth and easy to handle. There were some minor wobbles when applying high throttle, but with some tuning I think this will become a great little craft. I am very happy with these initial results!
This frame was inspired by the Airblade Dark Knight and the RotorX Switchback. I just love their smooth handling because of the offset motors, and wanted a 3D printable 2" version.
More parts and accessories on the way, as well as an instruction video.
Please post feedback, I'm excited to hear your thoughts!
Hardware required:
4x 18-25mm M2 screws for the stack
10x 6-8mm M2 screws for the camera pod and backpack mount
2x 3mm M2 screws for the camera
20mm M2 standoff, preferably metal
Build Notes:
Select the base plate where the stack screws will go in (top or bottom), and use a 2mm or 2.5mm drill bit to widen the holes so that the stack screws can pass through easily.
The base plate holes are intentionally 2mm diameter so that the stack screws bite into them and hold the completed model together.
Similar models
thingiverse
free

Joza TX130 quadcopter frame
...are to be threaded m2.
i have had the plates cut out of 3mm carbon fiber plates. 1,5mm for the top plate. stand offs are printed.
thingiverse
free

E-Flight Mini Motor Mount by Shovelhead84
... plate should be large enough to accommodate most 12-20amp escs.
firewall, 3mm
mounting plate, 2mm
sidewalls taper from 2mm - 1mm
thingiverse
free

Brushless Whoop Quadcopter by RalphHilton
...fc and 4 in 1 esc.
i used 4 8mm nylon spacers between the top and bottom sections.
tx01 camera mount. battery housing.
5cm props.
thingiverse
free

EZ-85 85MM brushless frame by Kentuliz
...again in a middle 2mm of flexi, and put flexi again on 90% of progress.
if you printing in abs or other than pla it will be fine.
thingiverse
free

QAV-R 120H - 2.5" Frame by Flowr
...2 and 1304s
designed for 2 - 2.5" props (max 65mm - gemfan flash)
20x20mm fc and escs mount
motor to motor it's +- 120mm
thingiverse
free
Evolution Tube Frame Quad
...pter using 14mm tube arms. print 2 plates and 8 motor mount plates, 4 for top and 4 for bottom. i will upload the arm mount soon.
thingiverse
free

Micro H-Quadcopter FPV Top Plate by FunFlyFPV
...lates are for the spektrum va1100 and the walkera tx5805 micro fpv cameras and attaches to the bottom plate with m2 nylon screws.
thingiverse
free
M2 & M2.5 to M3 Adapters & Soft Mounts (20 x 20 mm Flight Controllers) by Karamvir_Bhagat
... rotate and mount the stack like a tiny whoop with a corner facing forward to in the regular manner by mounting through the arms.
thingiverse
free

TTGT 120mm BETA V4 - 2.5" Freestyle Frame by Flowr
... motors (and some 130x - 1304) and 20x20mm stack, if you want to use 16x16mm stack, please print 16x16mm to 20x20mm fc adapter :)
thingiverse
free

2.5 inch quad H-frame by deaderbug
...0x20 stacks in the middle for the esc and fc and a 20x20 stack in the back for the rx and vtx.
added backpack for miniion antenna
Haitchpeasauce
thingiverse
free
AcroBrat Soft Mount Landing Feet & Arm Protectors by Haitchpeasauce
...uot; version for extra protection
a "light" version for less weight at the extremities
try both and see which you like!
thingiverse
free
TBS Source One v0.11 Motor & Frame Protector by Haitchpeasauce
...**update 23-aug-2018: added a middle hole to allow for use as a soft mount
**update 07-oct-2018: added back versions with no hole
thingiverse
free

AcroBrat Tail Mount Axii, Antenna, Buzzer+LED by Haitchpeasauce
...sion with rx antennas angled in an l shape at 90 degrees for crossfire dipole.
24 apr 2019: added version to fit foxeer lollipop.
thingiverse
free

AcroBrat Bumper Bar Pack by Haitchpeasauce
...sions, making a snug fit. it takes a little more effort to mount the bumper, but the result is better protection and more secure.
Icarus
design_connected
$11
Icarus
...icarus
designconnected
artecnica icarus pendant lights computer generated 3d model. designed by tord boontje.
turbosquid
free

Icarus Lamp
... available on turbo squid, the world's leading provider of digital 3d models for visualization, films, television, and games.
turbosquid
free
SpaceShip Icarus
... available on turbo squid, the world's leading provider of digital 3d models for visualization, films, television, and games.
3d_export
$10

kid icarus
...kid icarus
3dexport
3d printer model kid_icarus
3d_export
$20

Orbital Rocket Icarus 3D Model
...cket icarus 3d model
3dexport
space craft orbital rocket icarus itharus
orbital rocket icarus 3d model janiashvili 30470 3dexport
turbosquid
$3

Wolf Claws (Kid Icarus: Uprising)
...model wolf claws (kid icarus: uprising) for download as blend on turbosquid: 3d models for games, architecture, videos. (1280325)
thingiverse
free

Icarus by GenericStudentJC1
...icarus by genericstudentjc1
thingiverse
icarus from the greek myth icarus and daedalus.
thingiverse
free

icarus by sikander
...icarus by sikander
thingiverse
parts for icarus
thingiverse
free
ANSA Icarus by KineticGothicTank
...odynamic, the lack of landing gear, however means that the icarus command modules have crashed every time they attempted to land.
sketchfab
$20

Icarus - Planet of the Apes
... on the aforementionned planet. - icarus - planet of the apes - buy royalty free 3d model by ralph's workshop (@ralphedenbag)
Brushless
turbosquid
$4
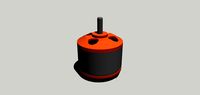
Brushless motor
...r download as 3ds, dxf, obj, xsi, wrl, fbx, dwg, dae, and skp on turbosquid: 3d models for games, architecture, videos. (1366202)
3d_export
$10
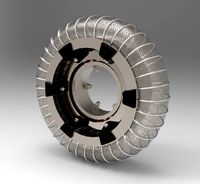
wheel and motor for mars rover
...last project: a mars rover concept. complete wheel and brushless electrical motor designed to attach to an atv or...
3d_export
$100
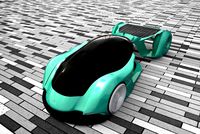
the volt futuristic ev hypercar
...future ! some design aspects : this is in-wheel (brushless hub) motors vehicle, for each motor the core part...
3d_export
$20
si cantik cargo plane for humanity medicine kit
...used for the tailboom. the electronic components used are brushless motor os 1000kv which can produce thrust 3kgas a...
free3d
free
N6375 Brushless Motor
...n6375 brushless motor
free3d
n6375 brushless motor
thingiverse
free

Tyro 79 brushless key
...tyro 79 brushless key
thingiverse
tyro 79 brushless key
thingiverse
free
Propeller antirotation brushless lock
...propeller antirotation brushless lock
thingiverse
propeller antirotation brushless lock
thingiverse
free
Brushless motor holder by NukeCraft
...brushless motor holder by nukecraft
thingiverse
brushless motor holder for bl3650
thingiverse
free
Brushless motor mount by robotbuilders
...brushless motor mount by robotbuilders
thingiverse
replacement mount for brushless motor.
thingiverse
free
Brushless motor mount by TarsVH
...brushless motor mount by tarsvh
thingiverse
a mount for a 2830 size brushless motor
Quadcopter
3d_export
$5
quadcopter
...quadcopter
3dexport
futuristic quadcopter design.<br>original design davidflo 77
turbosquid
$19
quadcopter
...lty free 3d model quadcopter for download as max, ma, and obj on turbosquid: 3d models for games, architecture, videos. (1591426)
turbosquid
$25
QuadCopter
... available on turbo squid, the world's leading provider of digital 3d models for visualization, films, television, and games.
3d_export
$5
Quadcopter 3D Model
...quadcopter 3d model
3dexport
quadcopter studio shaders
quadcopter 3d model vortex333 93968 3dexport
3d_export
$5
Quadcopter 3D Model
...quadcopter 3d model
3dexport
quadcopter aircraft helicopter
quadcopter 3d model greatghost 94019 3dexport
3d_export
$18
passenger quadcopter
... a multicopter is an aircraft built according to a helicopter scheme, with three or more rotors. previews rendered with redshift.
turbosquid
$159
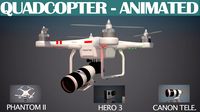
Quadcopter Animated.
... available on turbo squid, the world's leading provider of digital 3d models for visualization, films, television, and games.
turbosquid
$19
Drone Quadcopter
... available on turbo squid, the world's leading provider of digital 3d models for visualization, films, television, and games.
turbosquid
$12
Drone Quadcopter
... available on turbo squid, the world's leading provider of digital 3d models for visualization, films, television, and games.
3d_export
$29

Quadcopter
...
questions about the continuation of the collection or the model can be asked here:<br>https://www.artstation.com/evgen_beg
Offset
turbosquid
$20

Armchair Offset
...ee 3d model armchair offset for download as max, fbx, and obj on turbosquid: 3d models for games, architecture, videos. (1593561)
3ddd
$1
Комод Madia Offset
...комод madia offset
3ddd
oro-milano
комод madia offset. бренд oro-milano
3ddd
$1
Столик Offset (Bonaldo)
...aldo (италия)
артикул: c3596
модель предоставляется в форматах: max(2010), fbx, obj, 3ds, с материалами, текстурами и размерами.
turbosquid
free

Wooden Barrel - Offset
...alty free 3d model wooden barrel - offset for download as fbx on turbosquid: 3d models for games, architecture, videos. (1184305)
turbosquid
$14

Offset Armchair by Menu
...ffset armchair by menu for download as max, 3ds, obj, and fbx on turbosquid: 3d models for games, architecture, videos. (1681480)
turbosquid
$65

Small Offset Printer
... available on turbo squid, the world's leading provider of digital 3d models for visualization, films, television, and games.
turbosquid
$8
Offset floor lamp
... available on turbo squid, the world's leading provider of digital 3d models for visualization, films, television, and games.
3ddd
free
Roche Bobois / Offset
...roche bobois / offset
3ddd
стеллаж
линейка мебели offset.roche-bobois.desing sacha lakic.
3d_export
$65
Small Offset Printer 3D Model
...dustrial production equipment tool small offset machine machinery plotter
small offset printer 3d model dropassets 54178 3dexport
turbosquid
$5

MIRROR---Half moon offset
...ror---half moon offset for download as max, 3ds, fbx, and obj on turbosquid: 3d models for games, architecture, videos. (1525571)
Micro
3ddd
$1
Micro
...micro
3ddd
автобус
turbosquid
$80

MICRO
...ty free 3d model micro for download as max, c4d, obj, and fbx on turbosquid: 3d models for games, architecture, videos. (1700743)
3ddd
$1

JBL Micro Wireless
... micro , колонка , плеер
jbl micro wireless
turbosquid
$10
Suppressor Micro
...quid
royalty free 3d model suppressor micro for download as on turbosquid: 3d models for games, architecture, videos. (1380433)
turbosquid
$20
Micro Meter
...osquid
royalty free 3d model micro meter for download as fbx on turbosquid: 3d models for games, architecture, videos. (1350448)
turbosquid
$7
NIghtstand Micro
...d
royalty free 3d model nightstand micro for download as max on turbosquid: 3d models for games, architecture, videos. (1248117)
3ddd
$1
Micro wind turbine
...micro wind turbine
3ddd
турбина
micro wind turbine for your green building projects
turbosquid
$29
Micro Speakers
... available on turbo squid, the world's leading provider of digital 3d models for visualization, films, television, and games.
turbosquid
$29

Micro Servo.max
... available on turbo squid, the world's leading provider of digital 3d models for visualization, films, television, and games.
turbosquid
$20

Micro cells
... available on turbo squid, the world's leading provider of digital 3d models for visualization, films, television, and games.
Frame
archibase_planet
free

Frame
...frame
archibase planet
frame photo frame
frame n190813 - 3d model (*.gsm+*.3ds) for interior 3d visualization.
archibase_planet
free

Frame
...frame
archibase planet
frame photo frame
frame n071113 - 3d model (*.gsm+*.3ds) for interior 3d visualization.
3ddd
$1

Frame
...frame
3ddd
frame
3ddd
free

Frame
...frame
3ddd
frame
archibase_planet
free

Frame
...frame
archibase planet
frame mirror frame ornament
frame n260113 - 3d model (*.gsm+*.3ds) for interior 3d visualization.
archibase_planet
free

Frame
...frame
archibase planet
frame photo frame
frame photo n190813 - 3d model (*.gsm+*.3ds) for interior 3d visualization.
archibase_planet
free

Frame
...frame
archibase planet
frame window window frame
frame 1 - 3d model (*.gsm+*.3ds) for interior 3d visualization.
archibase_planet
free

Frame
...frame
archibase planet
frame window frame window
frame 3 - 3d model (*.gsm+*.3ds) for interior 3d visualization.
archibase_planet
free

Frame
...frame
archibase planet
frame wall frame decoration
frame 1 - 3d model (*.gsm+*.3ds) for interior 3d visualization.
archibase_planet
free

Frame
...frame
archibase planet
frame window window frame
frame 2 - 3d model (*.gsm+*.3ds) for interior 3d visualization.