Thingiverse
How to fix a chair in 20 min using a Makerbot by themitch22
by Thingiverse
Last crawled date: 3 years ago
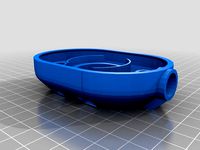
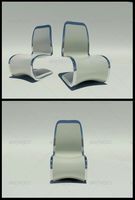
I have this office chair that lost one of the bolts that holds the backing on the back support so that it keeps falling down. It's annoying so I can't lean back in my chair.
So I was thinking, "Hey (myself), I have a makerbot! I'll just design and print a new bolt to hold my chair backing together". I don't usually have conversations with myself but it was a lightbulb moment.
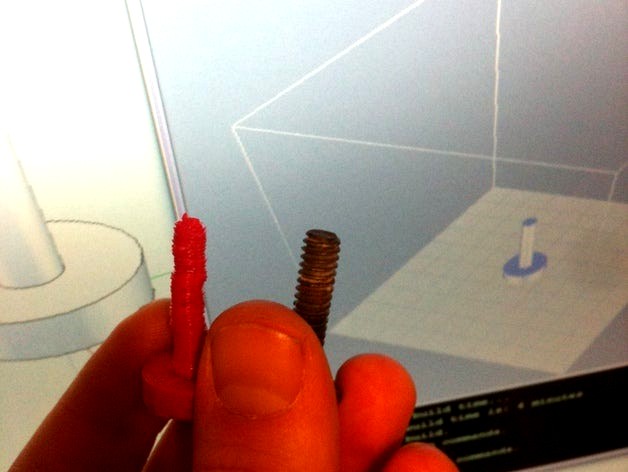
First, I took my calipers and started measuring the hole dimensions. Total bolt length would be 30mm (1.2"), about 5mm diameter (M5), and about a 15mm (.6") bolt head diameter. I simply drew circles in sketchup, extruded them to the right height and made my first part. Exported as STL (with plugin), skeinforged it in RepG, fired up the Makerbot and printed it.
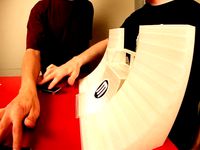
First print worked well but I realized I entered in the dimensions as radius not diameter so it was twice as big as I needed. So design, forge, repeat and I had a correctly sized stud. As you probably know towering small diameter pieces doesn't work too good since the plastic is still molten and the extruder head is pulling the stacked plastic. It basically corrects the overall shape and is still within the right dimensions but it's very wobbly. It fit! Unfortunately, it would pop out of the chair because it wasn't secured well.
Third revision I designed a slot in the head to make it more like the other bolt, I increases the diameter .2mm and printed again. This time the bolt actually turned out pretty well, although still wobbly, but hard enough to considered a part. This time I used the newly designed bolt and it screwed right in, probably by gumming up the threads in the chair with ABS.
So there you have it. Designed, printed, revised, and fixed a chair without even leaving my desk!
So I was thinking, "Hey (myself), I have a makerbot! I'll just design and print a new bolt to hold my chair backing together". I don't usually have conversations with myself but it was a lightbulb moment.
First, I took my calipers and started measuring the hole dimensions. Total bolt length would be 30mm (1.2"), about 5mm diameter (M5), and about a 15mm (.6") bolt head diameter. I simply drew circles in sketchup, extruded them to the right height and made my first part. Exported as STL (with plugin), skeinforged it in RepG, fired up the Makerbot and printed it.
First print worked well but I realized I entered in the dimensions as radius not diameter so it was twice as big as I needed. So design, forge, repeat and I had a correctly sized stud. As you probably know towering small diameter pieces doesn't work too good since the plastic is still molten and the extruder head is pulling the stacked plastic. It basically corrects the overall shape and is still within the right dimensions but it's very wobbly. It fit! Unfortunately, it would pop out of the chair because it wasn't secured well.
Third revision I designed a slot in the head to make it more like the other bolt, I increases the diameter .2mm and printed again. This time the bolt actually turned out pretty well, although still wobbly, but hard enough to considered a part. This time I used the newly designed bolt and it screwed right in, probably by gumming up the threads in the chair with ABS.
So there you have it. Designed, printed, revised, and fixed a chair without even leaving my desk!
Similar models
thingiverse
free

simplistic mod for qu-bd extruder by cwalker1960
...ver position as my printer is my own design and the other mods were inaccesable on my setup without changing the extruder mount..
thingiverse
free

Dual hobbed bolt extruder V2 by odino
...
it should work fine even at high speed.
still wip. i haven't print it yet.
as soon as i can i'll upload the single stl
thingiverse
free

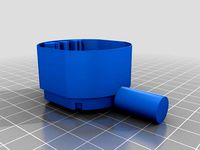
Large Spool Adapter for Makerbot Replicator Mini by AJDeels007
...l spools. it clips right to the back of the printer and works like a charm. the design can be tweaked for thicker spools as well.
thingiverse
free

Braille! by langfordw
... fiddling with this).
i think this might have a lot of potential. a braille bracelet will be next in my printing/designing queue.
thingiverse
free

Flashforge ELP camera holder (V2) by Jaydawgx7
...#39;d use my other design and combine it with this so its one piece and does't need to be glued and the camera also snaps in.
thingiverse
free
Printed Extruder (Printruder) by Zaggo
...photos i saw of nophead\'s \"fast extruder\" .
(update: there's now a 4th part to print: insulatorretainer.stl)
thingiverse
free

Compact Camera Tripod - foldable, M3 edition
...r my printer this works well, but you might have to adjust the diameters.
fusion 360 files are attached for easier customization.
thingiverse
free

Proximity Sensor Mount by JBFUK
... find one to fit so designed this myself.
one of my first 3d designs so go easy on me - it's not perfect but it does the job.
thingiverse
free

Pellet Shute & Clamp by FroggyExact
...next to the heater. great!
i designed it with countersunk nut holders (m5), and the bolt heads are partially countersunk as well.
thingiverse
free

X-axis extruder cable chain mount Remix (remix of a remix) by KTwillkai
....thingiverse.com/wolly71
thought since i was designing it i might as well share it!
my first design on here, don't judge lol.
Themitch22
thingiverse
free

Test by themitch22
...test by themitch22
thingiverse
this is a test
thingiverse
free

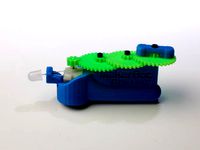
Dimetrodon by themitch22
...dimetrodon by themitch22
thingiverse
dimetrodon toy scanned with 123d catch and cleaned up with meshmixer.
thingiverse
free
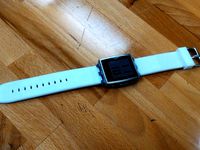
Flexible Pebble Steel Watch Band by themitch22
...ble pebble steel watch band by themitch22
thingiverse
printed with ninjaflex 1.75mm on a polyprinter 229 designed in solidworks.
thingiverse
free
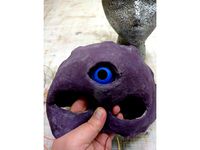
Animatronic Third Eye by themitch22
...d doing a custom latex mask for cosplay. it uses standard 9g servo (tower pro, etc) to create a realistic moving eye ball effect.
thingiverse
free

Miniature Grandfather Clock by themitch22
... a manifold problem that doesn't render the base properly. if anyone with sketchup knowledge can help, i'd appreciate it.
thingiverse
free

VW Rabbit Badge by themitch22
...printed after fixing (i hope) an extruder problem, and used the last of the blue abs bre pettis gave me at makerfaire (thanks!!).
thingiverse
free

Quakecon 2014 keychain tag by themitch22
...g:281876/
also a remix of thing-a-day #4: simplified bottle openerhttp://www.thingiverse.com/thing:17031/
designed with tinkercad
thingiverse
free
Duli 2.0 Headphone Cup Modified by themitch22
... be hard to clean off. so i took the stl in tinkercad and subtracted the surface to be flat so i could print it without supports.
thingiverse
free

Zen Garden by themitch22
...100mmx100mm limitations and i don't think the overhangs are severe. feel free to give me suggestions of changes for printing.
thingiverse
free

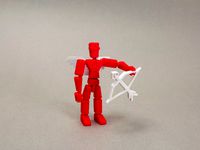
Life Sized JoelBot by themitch22
...if you would like to contribute filament or printer time to this cause (it will be shipped to mrrf 2018) please pm me or comment.
Min
turbosquid
$30

min
... available on turbo squid, the world's leading provider of digital 3d models for visualization, films, television, and games.
3ddd
$1
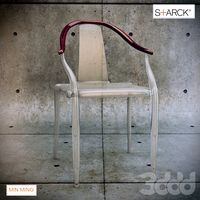
Min Ming Stark
...min ming stark
3ddd
min ming , stark
chair by stark min ming.
turbosquid
$10

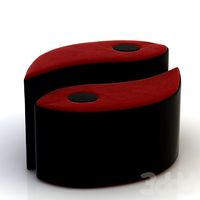
3 Min Egg
... available on turbo squid, the world's leading provider of digital 3d models for visualization, films, television, and games.
archive3d
free

Table min. 3D Model
...table min. 3d model
archive3d
table tables
3d_export
$7
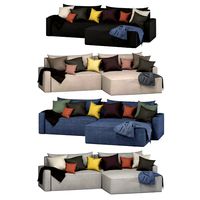
min otti sofa
...ry: polygonal materials: yes textures: yes animated: no uv mapped: yes rigged: no<br>units: cm polys:981.653 vertex:927.801
3d_export
$5

minor collection
...ø 50 x h min 10 5 lamp ø 76,5 x h min 10 polys: 36 896 verts: 38 354 https://www.ideal-lux.com/en/products/minor/minor-linear-sp4
3ddd
$1

Cremasco 4027/6S-BRSF-BI
...cremasco 4027/6s-brsf-bi 3ddd cremasco люстра d 84 x h min ...
3ddd
$1
velvet pouf
...пуф velvet pouf height max : 35 cm height min : 25...
3ddd
$1
SOSPIRO SP6
...3ddd ideal lux , sospiro ø 690 x h min 800 / max 1350...
3ddd
$1

Fabbian Medusa
...medusa 3ddd fabbian , medusa диаметр: 60 см, высота: min 51 см - max 89...
Makerbot
thingiverse
free

MakerBot Mixtape by MakerBot
...t.com/makerbot-mixtape.html
designed by john b., matt k. and john d.
a collaborative project with playbutton
www.playbutton.com
thingiverse
free

MakerBot Nameplate by MakerBot
...plicator. this was seen in episode 5 of season 2 of makerbot tv http://www.youtube.com/watch?v=k815gaeelw8
created by todd blatt
thingiverse
free

Makerbot Mixtape Heart by MakerBot
... about a makerbot mixtape in a heart!
made by using the makerbot mixtape negative file
designed by john briscella and matt kroner
thingiverse
free
MakerBot Gnome by MakerBot
...at details that were not lost.
for more information on the makerbot digitizer desktop 3d scanner, visit makerbot.com/digitizer.
thingiverse
free
Makerbot Skate Park by MakerBot
...makerbot skate park by makerbot
thingiverse
a complete fingerboarding skate park.
thingiverse
free
MakerBot BotStep17 REVE by MakerBot
...esigned by harry mulliken.
this is part of the makerbot replicator, which you can find at http://www.thingiverse.com/thing:18813
thingiverse
free
Makerbot Mixtape Negative by MakerBot
...ngiverse
now your can make a makerbot mixtape out of almost any thing on thingiverse.
designed by john briscella and matt kroner
thingiverse
free
MakerBot Man Cupid by MakerBot
...piece at once and get moving parts right off the build plate.
available in the makerbot store gumball machine for a limited time!
thingiverse
free
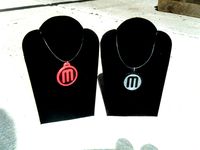
MakerBot Pendant by MakerBot
...39;t go wrong sporting this necklace! wear it with pride. both dualstrusion and one color models are available.
created by todd
thingiverse
free
MakerBot Dynamo by MakerBot
...
and if a led not exciting enough for you, just think of all the other wonderful things you can power, one hand crank at a time.
Fix
3ddd
$1
Fixed Gear Велосипед
... fixed , bicycle
классический шоссейный велосипед, переделанный под fixed gear.
design_connected
$16
Idée fixe
...idée fixe
designconnected
jacco maris idée fixe computer generated 3d model. designed by maris , jacco.
3d_export
$5
fixing scale knob
...fixing scale knob
3dexport
fixing scale knob
turbosquid
$10

Mini Fix
...bosquid
royalty free 3d model mini fix for download as sldas on turbosquid: 3d models for games, architecture, videos. (1581558)
turbosquid
$49
fixed bike
... available on turbo squid, the world's leading provider of digital 3d models for visualization, films, television, and games.
turbosquid
$39

Fixed Bicycle
... available on turbo squid, the world's leading provider of digital 3d models for visualization, films, television, and games.
3ddd
$1
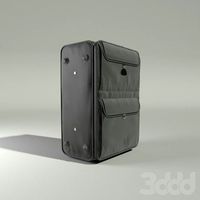
Bag Fixed
...bag fixed
3ddd
чемодан
a bag model by me
3ddd
$1
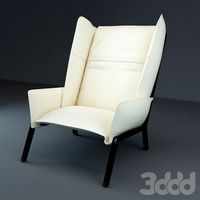
Кресло BEAU FIXE
...fixe
3ddd
beau fixe , ligne roset
кресло beau fixe:
w 80 cm d 106 cm h 97 cm sh 43,5 cm
turbosquid
free

Crowbar "Fixed"
... available on turbo squid, the world's leading provider of digital 3d models for visualization, films, television, and games.
3ddd
$1
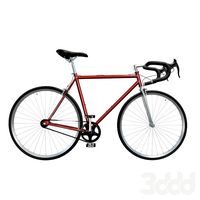
Fixed gear
...fixed gear
3ddd
велосипед
шоссейный велосипед с фиксированной передачей
How
3ddd
$1

Vitra / How High the Moon
...ow high the moon" японского дизайнера shiro kuramata для vitra, 1986 год.
материал - вытяжная сетка из никелированной стали.
3ddd
$1

Howe London Captain's Bar Stool
... барный
howe london captain's bar stool
dimension : w49.5 x d54.5 cm
seat height : 85 cm
base diameter : 45.8 cm
3d_export
$5
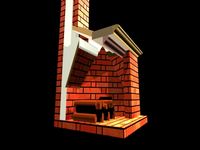
How a fireplace works in transformation animation 3D Model
...on animation 3d model
3dexport
fireplace
how a fireplace works in transformation animation 3d model first3dstudio 100328 3dexport
3d_export
$5

Toy How to Train Your Dragon 3D Model
...how to train your dragon 3d model
3dexport
toy howtotrainyourdragon
toy how to train your dragon 3d model sprut007 96434 3dexport
3d_export
free

How to Get a defind jawline
... other muscle in our body,the jaw muscles grow when stimulated by targeted training.jawline impacts facial beauty and attraction.
3d_export
free

table
...table 3dexport how poly...
3d_export
$10

broken eggs
...broken eggs 3dexport to see for yourself how refraction works, just rotate the model, paying attention to...
3d_export
$10
donut
...donut 3dexport a nice donut for u pls tell how is...
3d_export
$6

heart in cage
...heart in cage 3dexport a 3d representation of how a emotional barriers look...
3d_export
free

chair loft
...chair loft 3dexport chair loft. how poly and low poly...
20
3d_export
$15
rocks 20
...rocks 20
3dexport
rocks 3d model 20
3ddd
$1
DECOR MEDIEVO 20*20 MIX
...ллекция: bolonia
фабрика: mainzu
страна: испания
размер: 20x20 см
ссылка:http://www.mainzu.com/bolonia.php#prettyphoto
3d_export
$6
tap-20
...tap-20
3dexport
3ddd
$1

Bed 20
...bed 20
3ddd
постельное белье
bed 20. i hope you like it
software : 3dsmax + md + vray 2.4
turbosquid
$40

20 Shields
...turbosquid
royalty free 3d model 20 shields for download as on turbosquid: 3d models for games, architecture, videos. (1305068)
3d_export
$5

houseberg home 20
...houseberg home 20
3dexport
houseberg home 20
turbosquid
$96

J-20
...20
turbosquid
royalty free 3d model j-20 for download as max on turbosquid: 3d models for games, architecture, videos. (1658873)
turbosquid
$10

Decor 20
...urbosquid
royalty free 3d model decor 20 for download as stl on turbosquid: 3d models for games, architecture, videos. (1677149)
turbosquid
$10

building 20
...osquid
royalty free 3d model building 20 for download as max on turbosquid: 3d models for games, architecture, videos. (1362227)
turbosquid
$6
Bedcloth 20
...osquid
royalty free 3d model bedcloth 20 for download as max on turbosquid: 3d models for games, architecture, videos. (1522681)
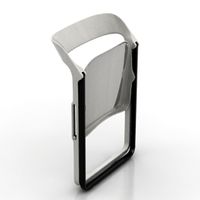
Chair
3d_ocean
$12
Chair
...chair
3docean
bauhouse chair bauhouse chair chair chair
bauhouse chair
3ddd
$1

chair
...chair
3ddd
chair
chair
3ddd
$1
chair
...chair
3ddd
chair
chair
3ddd
$1

chair
...chair
3ddd
chair
chair
3ddd
$1
Chair
...chair
3ddd
chair
chair
3d_ocean
$8
Chair
...chair
3docean
chair
chair model
archibase_planet
free
Chair
...chair
archibase planet
chair easy chair easy-chair
chair s3d-1120 - 3d model for interior 3d visualization.
archibase_planet
free
Chair
...chair
archibase planet
chair folding-chair camp-chair
chair - 3d model (*.gsm+*.3ds) for interior 3d visualization.
archibase_planet
free
Chair
...chair
archibase planet
chair bar chair easy chair seat
chair - 3d model (*.gsm+*.3ds) for interior 3d visualization.
archibase_planet
free
Chair
...chair
archibase planet
chair camp-chair folding-chair
chair close - 3d model (*.gsm+*.3ds) for interior 3d visualization.
Using
3ddd
$1
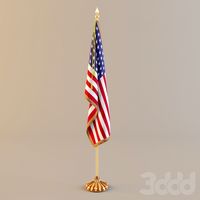
US flag
...us flag
3ddd
флаг
us flag
3d_export
free
Among us
...among us
3dexport
among us red
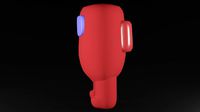
3d_export
free

Among Us
...among us
3dexport
this 3d-model of a character from the game "among us". it can be used as a toy or decoration.
3d_export
$6
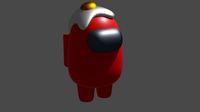
among us
...among us
3dexport
doll from among us in red
3d_export
$5
amoung us
...amoung us
3dexport
amoung us character. was created by cinema 4d 19
3d_export
$5
Humvee us
...humvee us
3dexport
humvee us 3d model good quality for animation
3d_export
$15

among us
...among us
3dexport
turbosmooth modifier can be used to increase mesh resolution if necessary
3d_export
$25
mailbox us
...mailbox us
3dexport
low poly model mailbox us. modeling in the blender, texturing in substance painter
design_connected
$13
Use Me
...use me
designconnected
sitland use me computer generated 3d model. designed by paolo scagnellato.
3d_export
$5

Among Us
...rt
the among us model comes in a variety of colors that can be customized by anyone, and even works with little in the animation