Thingiverse
How to 3d Scan for free by Mkvgz
by Thingiverse
Last crawled date: 3 years, 1 month ago
First, let me say im not english native speaker so my english knowledge is not optimal, but that being said bare with me as i try to explain this very easy but rewarding process of scanning your own objects or anything you can imagine, like your own self!
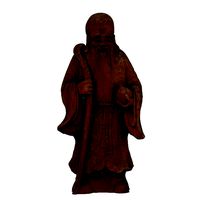
If you are interesed on the bust itself, you can find it here
If you are interesed on supporting me, you can do so via cgtraderl
Tools Needed
Phone with a camera. The better the camera the easier it'll be to get a good 3d scan. In my case a Huawei P10. Also, a good lighting and a background without much movement on it are quite crucial for the best results.
The thing you want to scan. I mean.. kinda crucial, right?
Zephyr. A program to put your photos together and create the model itself on a 3d enviroment. In my case i use the free version of it since cant afford the 149 € they charge on steam. Works well but it's limited to 50 pictures per model (more than enough for a middle/not-huge & small size objects).
Tools NOT Needed but Highly Recommended
Octopus tripod. I have the cheapest out of here. But you can also print your own from Thingiverse. Having your phone on a steady position while shooting its key. You can circle around the object as you take pictures but for me it works way better when have a stationary camera using the Tripod + turntable.
Turntable. The one im using is this. It helps with moving the object tiny degrees at the time while spins on itself so makes the scan more accurate and easier.
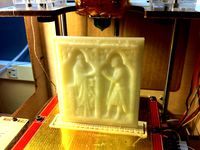
Talcum powder. Sometimes scanning shiny and reflective objects can be quite tricky due to the reflections of the light surrounding the model. That's when the powder come in. Applying along the surface it will give it more of a mate finish to the piece improving the chances of getting a great result. I used it to scan the bust you see in the images attached.
Meshmixer & Meshlab. they are both useful resources to make sure the 3d model is printable and decent quality.
1st Phase: Preparation
Set up the object on your turntable. To make sure it won't slip once the process is going on, i put a small piece of double-sided tape at the bottom of the piece where it connects against the turntable.Remember, if the object is shiny or reflective might be harder to get good results. If so and dont mind getting the object dusty, try the talcum powder. Helps, a lot.
Put the phone on your tripod aiming down at a 30-ish angle. Make sure your setup is sturdy and won't move while taking pictures.
2nd Phase: Capturing
Take the first picture. Always have the full object inside the frame and try to have it occupying as much as the frame as possible. Like this
Turn the object a small amount, i'd say 30 degress max. For a small object you should be able to round it with less than 15 pictures. Remember, we are limited on the amount of pictures able to process in the next phase. 50 to be exact. So try to stay around the 15ish mark at this point. Don't take many more and definitely NOT LESS or the mesh will have holes in it.
Once we have completed a full view around the model we are gonna lower the tripod and get it at 0 degress. Repeat the 15ish picture process we did in the step 2.
Time to repeat the process but this time we gonna lower the tripod below the object and take pictures from down-up at an angle of 30 degress max.
This will ensure we have most of the angles, every nook and crannie, of the object. You should have 50 photos at this stage. If not, repeat or remove innecesary ones.
3rd Phase: Photogrammetry
This fancy word is just the science of making measurements from photographs. This is what we are about to do with the software Zephyr i mentioned on the required tools. So if you don't have it yet, download it now to continue!
Since im trying to make this guide as basic and accesible for everyone as possible. We are not gonna tweak much in the options. But i'll provide some links with more info about different options and suggestions. My personal one, experiment. Try, discard and repeat.
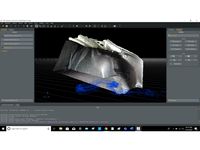
Open the program and you will recieve a screen like this one. If not, go to the navigation bar of the program, Workflow>New project. Make sure the options are checked as the image from the link above. Then, hit next.
Time to import our pictures. Then hit next twice.
You will see a window with 2 drop down menus and a tooltip of what does each preset. For the bust, i used close and Deep.The time it'll take to finish all the steps required will be significantly greater if you choose exhaustive over deep. I personally did not see an improved final model worth the time per quality. Bit feel free to experiment, i definitely would love for you guys to do that and report back if find a sweet spot!
Dense point cloud. Same as before, you get a tooltip of each setting, give it a look and choose what suits you best. Every model and photoshoot is a different world! For the example bust i used Close Range and High details - Raw output since i took mine on Raw format.
Surface reconstruction. Same, self explanatory. If your model has quite some details always want to go with sharp features. I used Close range, High details - Sharp.
Textured Mesh wizard. I suggest to don't touch much around here. What i tend to do is going with default settings and move the image resolution slider around 70% we can tweak the topology of the mesh further on the process so there is no need to touch much around here.
Run it! This is an intensive process so don't expect to have much resources avaliable to do stuff while this is on going.
4th Phase: Cleaning and repairing the model.
If you feel like the model topology is not good enough, you can go to tools>Mesh Filters>Photoconsistency and tweak it. Here are a nice reading about the different options and what they do by the folks from zephyr. Highly recommended.Once the last process is completed you should be able to see your model and more often that not, some cluster of not desired stuff around it.
You can use the selection tool to draw polygons around the cluster and press del to erase them.
Holes in the mesh are a thing. A usual and nerve wracking thing. You have various ways to fix and close them. I often use Meshmixer and solidify option. But in zephyr you have this two options.
Once the holes are repaired i tend to export the mesh (export>export textured mesh) and then use Meshlab and check for manifold edges and smooth any bumpy surface using the Deep Smooth option.
We have come a long way but not done yet. Depending on the model it might be quite too thin to print. This is an easy thing to check since usually slicer programms in layer view show empty sections where it should be a extrusion. Like this. That's when we need to add thickness the model. We can do that by open the model in Meshmixer an use the option Make Solid once there we are presented with some options, we need to use accurate under type of solid, this will grant us access to the Min Thickness slider, slide it to a printable value. Feel free to play with different settings then export it
That's it! Time for printing!
With that concludes my guide for how to 3d scan with a cheap setup from start to finish. By any stretch of the imagination im not an expert. That being said i hope you find this guide helpful since i know it can feel like a daunting task.
If you find it helpful i would love to heard from you in the comments or even get to see your 3d scans! Took me a while to make the guide and i think nothing would be more gratifying than that.
Feel free to support me on cgtrader or at the Tip Designer button if you like this or any of my designs and feel like doing so. Won't complain, i promise.
If you have any issue post below and hopefully me or the community will be able to find a solution to the issue. And all the things i have shown today can be done in a wide variation of ways, this is just how i do it.
Random Notes and Tips
There is so many things about this subject to convey in a simple text guide that some of them might be not included either because they are not crucial and long to explain or i simply forgot about them. That's why im gonna use this section for things like that.
Masking Images with Masquerade. Sometimes if the background is too busy the software starts to freak out and pick random reference points in the background and the end result can be something like this. In order to avoid that there is a tool called 3DF Masquerade that allows you to mask every image roughly before starting all the software process. The end result with the same pics is this. There is quite some difference right? I don't need to use it very often to be honest but it's still a recommended step since all the processing and time it takes to the software is significantly decreased by doing this. It took me around 15-20 minutes to mask all the 50 images. A useful link on how to use the tool can be found here
Newspaper. If you don't feel like masking the images you can also place your object over a piece of newspaper/calendar and it will act as reference points during the image stiching process. I've use this method in the past and works really well too. Still i rather mask the images because in the long run saves me quite a bit of time since has way less information to process. Up to you.
If you are interesed on the bust itself, you can find it here
If you are interesed on supporting me, you can do so via cgtraderl
Tools Needed
Phone with a camera. The better the camera the easier it'll be to get a good 3d scan. In my case a Huawei P10. Also, a good lighting and a background without much movement on it are quite crucial for the best results.
The thing you want to scan. I mean.. kinda crucial, right?
Zephyr. A program to put your photos together and create the model itself on a 3d enviroment. In my case i use the free version of it since cant afford the 149 € they charge on steam. Works well but it's limited to 50 pictures per model (more than enough for a middle/not-huge & small size objects).
Tools NOT Needed but Highly Recommended
Octopus tripod. I have the cheapest out of here. But you can also print your own from Thingiverse. Having your phone on a steady position while shooting its key. You can circle around the object as you take pictures but for me it works way better when have a stationary camera using the Tripod + turntable.
Turntable. The one im using is this. It helps with moving the object tiny degrees at the time while spins on itself so makes the scan more accurate and easier.
Talcum powder. Sometimes scanning shiny and reflective objects can be quite tricky due to the reflections of the light surrounding the model. That's when the powder come in. Applying along the surface it will give it more of a mate finish to the piece improving the chances of getting a great result. I used it to scan the bust you see in the images attached.
Meshmixer & Meshlab. they are both useful resources to make sure the 3d model is printable and decent quality.
1st Phase: Preparation
Set up the object on your turntable. To make sure it won't slip once the process is going on, i put a small piece of double-sided tape at the bottom of the piece where it connects against the turntable.Remember, if the object is shiny or reflective might be harder to get good results. If so and dont mind getting the object dusty, try the talcum powder. Helps, a lot.
Put the phone on your tripod aiming down at a 30-ish angle. Make sure your setup is sturdy and won't move while taking pictures.
2nd Phase: Capturing
Take the first picture. Always have the full object inside the frame and try to have it occupying as much as the frame as possible. Like this
Turn the object a small amount, i'd say 30 degress max. For a small object you should be able to round it with less than 15 pictures. Remember, we are limited on the amount of pictures able to process in the next phase. 50 to be exact. So try to stay around the 15ish mark at this point. Don't take many more and definitely NOT LESS or the mesh will have holes in it.
Once we have completed a full view around the model we are gonna lower the tripod and get it at 0 degress. Repeat the 15ish picture process we did in the step 2.
Time to repeat the process but this time we gonna lower the tripod below the object and take pictures from down-up at an angle of 30 degress max.
This will ensure we have most of the angles, every nook and crannie, of the object. You should have 50 photos at this stage. If not, repeat or remove innecesary ones.
3rd Phase: Photogrammetry
This fancy word is just the science of making measurements from photographs. This is what we are about to do with the software Zephyr i mentioned on the required tools. So if you don't have it yet, download it now to continue!
Since im trying to make this guide as basic and accesible for everyone as possible. We are not gonna tweak much in the options. But i'll provide some links with more info about different options and suggestions. My personal one, experiment. Try, discard and repeat.
Open the program and you will recieve a screen like this one. If not, go to the navigation bar of the program, Workflow>New project. Make sure the options are checked as the image from the link above. Then, hit next.
Time to import our pictures. Then hit next twice.
You will see a window with 2 drop down menus and a tooltip of what does each preset. For the bust, i used close and Deep.The time it'll take to finish all the steps required will be significantly greater if you choose exhaustive over deep. I personally did not see an improved final model worth the time per quality. Bit feel free to experiment, i definitely would love for you guys to do that and report back if find a sweet spot!
Dense point cloud. Same as before, you get a tooltip of each setting, give it a look and choose what suits you best. Every model and photoshoot is a different world! For the example bust i used Close Range and High details - Raw output since i took mine on Raw format.
Surface reconstruction. Same, self explanatory. If your model has quite some details always want to go with sharp features. I used Close range, High details - Sharp.
Textured Mesh wizard. I suggest to don't touch much around here. What i tend to do is going with default settings and move the image resolution slider around 70% we can tweak the topology of the mesh further on the process so there is no need to touch much around here.
Run it! This is an intensive process so don't expect to have much resources avaliable to do stuff while this is on going.
4th Phase: Cleaning and repairing the model.
If you feel like the model topology is not good enough, you can go to tools>Mesh Filters>Photoconsistency and tweak it. Here are a nice reading about the different options and what they do by the folks from zephyr. Highly recommended.Once the last process is completed you should be able to see your model and more often that not, some cluster of not desired stuff around it.
You can use the selection tool to draw polygons around the cluster and press del to erase them.
Holes in the mesh are a thing. A usual and nerve wracking thing. You have various ways to fix and close them. I often use Meshmixer and solidify option. But in zephyr you have this two options.
Once the holes are repaired i tend to export the mesh (export>export textured mesh) and then use Meshlab and check for manifold edges and smooth any bumpy surface using the Deep Smooth option.
We have come a long way but not done yet. Depending on the model it might be quite too thin to print. This is an easy thing to check since usually slicer programms in layer view show empty sections where it should be a extrusion. Like this. That's when we need to add thickness the model. We can do that by open the model in Meshmixer an use the option Make Solid once there we are presented with some options, we need to use accurate under type of solid, this will grant us access to the Min Thickness slider, slide it to a printable value. Feel free to play with different settings then export it
That's it! Time for printing!
With that concludes my guide for how to 3d scan with a cheap setup from start to finish. By any stretch of the imagination im not an expert. That being said i hope you find this guide helpful since i know it can feel like a daunting task.
If you find it helpful i would love to heard from you in the comments or even get to see your 3d scans! Took me a while to make the guide and i think nothing would be more gratifying than that.
Feel free to support me on cgtrader or at the Tip Designer button if you like this or any of my designs and feel like doing so. Won't complain, i promise.
If you have any issue post below and hopefully me or the community will be able to find a solution to the issue. And all the things i have shown today can be done in a wide variation of ways, this is just how i do it.
Random Notes and Tips
There is so many things about this subject to convey in a simple text guide that some of them might be not included either because they are not crucial and long to explain or i simply forgot about them. That's why im gonna use this section for things like that.
Masking Images with Masquerade. Sometimes if the background is too busy the software starts to freak out and pick random reference points in the background and the end result can be something like this. In order to avoid that there is a tool called 3DF Masquerade that allows you to mask every image roughly before starting all the software process. The end result with the same pics is this. There is quite some difference right? I don't need to use it very often to be honest but it's still a recommended step since all the processing and time it takes to the software is significantly decreased by doing this. It took me around 15-20 minutes to mask all the 50 images. A useful link on how to use the tool can be found here
Newspaper. If you don't feel like masking the images you can also place your object over a piece of newspaper/calendar and it will act as reference points during the image stiching process. I've use this method in the past and works really well too. Still i rather mask the images because in the long run saves me quite a bit of time since has way less information to process. Up to you.
Similar models
thingiverse
free
Relief Scan #1 by tbuser
...pping paper at the same time.
i'm really surprised how much detail it picked up since the relief is pretty small and shallow.
cg_trader
$45

Initial ring example | 3D
...ase feel free to buy this one. this is a size 7 so if you need resizing do let me know. i will be adding a video at a later time.
thingiverse
free
Pill Keyfob by nigelayres
...n ones, i imagine.
i've used quite a fine thread to prevent dust ingress and to reduce the likelihood of it vibrating loose.
cg_trader
free
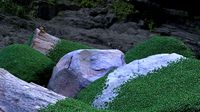
3D Scanned Rocks With Moss
...or you want to hire me to do something similar to this then please don't hesitate to ask me...
thingiverse
free
The Interchangeable Scraper by 3D-Print_Tech-Design
...ething you would like me to do!
if you do a remix or a new version, just make sure to tip me and attribute me as well, thank you!
thingiverse
free

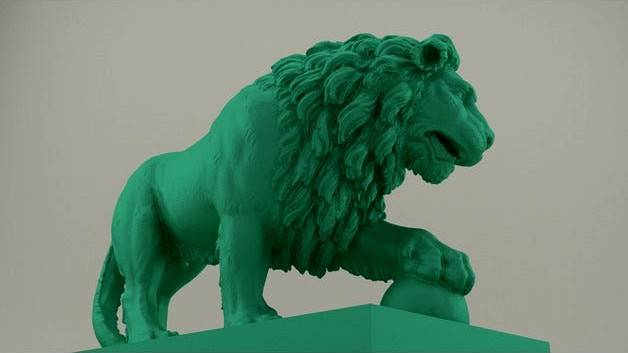
MANN by Mkvgz
...el like it, check my guide 'how to 3d scan for free' here
if you are interesed on supporting me, you can do so via paypal
thingiverse
free
Bird Feeder Bottle Cap
...bottle cap thingiverse i saw a picture of a similar design somewhere here a few days ago (https://www.thingiverse.com/thing:2883603). i...
cg_trader
$21
Simple Berserk helmets collection
...a quick product it does not look bad , now let us return to talk about how the people sarround you they makes your time shorter .
thingiverse
free
2013-2019 GT86/FRS/BRZ Trunk Scan
...trimmed version of only the interior / right side of the trunk
enjoy, and if you use it to create a model i would love to see it.
thingiverse
free

Dodge Viper Keyless Entry Remote by SekiWofl
... feel free to comment, anything can be helpful to me :)
i can offer to adapt it and/or print it. please contact me if interested.
Mkvgz
thingiverse
free
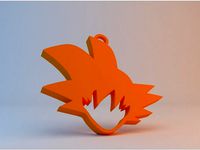
Goku DBZ Keychain by Mkvgz
...goku dbz keychain by mkvgz
thingiverse
continuing the dbz series.
thingiverse
free
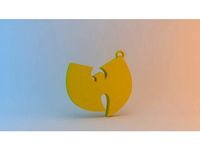
Wu-Tang keychain by Mkvgz
...wu-tang keychain by mkvgz
thingiverse
wu -tang !
hope you like :)
thingiverse
free
Quake 'Excellent' keychain by Mkvgz
...quake 'excellent' keychain by mkvgz
thingiverse
a keychain from my favorite childhood game.
thingiverse
free

Fortnite Keychain "Take the L" by Mkvgz
...fortnite keychain "take the l" by mkvgz
thingiverse
take the l
thingiverse
free
MANN by Mkvgz
...el like it, check my guide 'how to 3d scan for free' here
if you are interesed on supporting me, you can do so via paypal
thingiverse
free

Vegeta DBZ Keychain by Mkvgz
... by mkvgz
thingiverse
vegeta keychain 30mm x 40mm x 4mm
edit 1: added alternative with a hole to add a metal keychain link on it
thingiverse
free
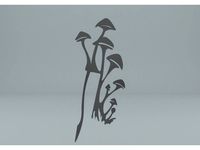
Mushroom Bookmark by Mkvgz
...ou want?
hope you all like it and feel free to upload a make of it or leave a tip. hugely appreciated.
have a good one everyone.
thingiverse
free
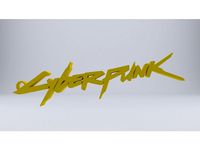
Cyberpunk 2077 - Keychain by Mkvgz
...se a 0.2 mm nozzle and use 0.08/0.10 (depending on your stepper) for better results, detail its very tiny.
cyberpunk 2077 trailer
thingiverse
free

Majin logo DBZ by Mkvgz
...m and the base split it in case you want to print in dual tone just like in the render picture.
6mm high x 28mm width x 35mm long
thingiverse
free

Dark Souls III Keychain by Mkvgz
...t keychain from this masterpiece of a game.
hope you all like.
edit: removed until i fix it, was too small to print, some parts.
Scan
turbosquid
$39
Figurine Scanned 3d Scan
... available on turbo squid, the world's leading provider of digital 3d models for visualization, films, television, and games.
turbosquid
$1

scan
... available on turbo squid, the world's leading provider of digital 3d models for visualization, films, television, and games.
3ddd
$1
Vibia / Scan
...vibia / scan
3ddd
vibia
vibia модель scan
turbosquid
$39

Japanese Figurine Scanned 3d Scan
... available on turbo squid, the world's leading provider of digital 3d models for visualization, films, television, and games.
turbosquid
$39
Japanese Figurine Scanned 3d Scan B
... available on turbo squid, the world's leading provider of digital 3d models for visualization, films, television, and games.
turbosquid
$6
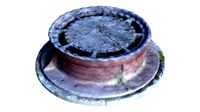
Manhole scan
...uid
royalty free 3d model manhole scan for download as blend on turbosquid: 3d models for games, architecture, videos. (1698089)
turbosquid
$1

Scanned Figurine
...d
royalty free 3d model scanned figurine for download as obj on turbosquid: 3d models for games, architecture, videos. (1556538)
turbosquid
$1

Scanned Vase
...squid
royalty free 3d model scanned vase for download as obj on turbosquid: 3d models for games, architecture, videos. (1372016)
turbosquid
$1
Scanned Rock
...squid
royalty free 3d model scanned rock for download as obj on turbosquid: 3d models for games, architecture, videos. (1372647)
turbosquid
free
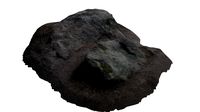
Rock scan
...osquid
free 3d model rock scan for download as obj and blend on turbosquid: 3d models for games, architecture, videos. (1291924)
How
3ddd
$1

Vitra / How High the Moon
...ow high the moon" японского дизайнера shiro kuramata для vitra, 1986 год.
материал - вытяжная сетка из никелированной стали.
3ddd
$1

Howe London Captain's Bar Stool
... барный
howe london captain's bar stool
dimension : w49.5 x d54.5 cm
seat height : 85 cm
base diameter : 45.8 cm
3d_export
$5
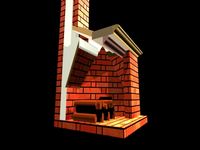
How a fireplace works in transformation animation 3D Model
...on animation 3d model
3dexport
fireplace
how a fireplace works in transformation animation 3d model first3dstudio 100328 3dexport
3d_export
$5

Toy How to Train Your Dragon 3D Model
...how to train your dragon 3d model
3dexport
toy howtotrainyourdragon
toy how to train your dragon 3d model sprut007 96434 3dexport
3d_export
free

How to Get a defind jawline
... other muscle in our body,the jaw muscles grow when stimulated by targeted training.jawline impacts facial beauty and attraction.
3d_export
free

table
...table 3dexport how poly...
3d_export
$10

broken eggs
...broken eggs 3dexport to see for yourself how refraction works, just rotate the model, paying attention to...
3d_export
$10
donut
...donut 3dexport a nice donut for u pls tell how is...
3d_export
$6

heart in cage
...heart in cage 3dexport a 3d representation of how a emotional barriers look...
3d_export
free

chair loft
...chair loft 3dexport chair loft. how poly and low poly...
Free
design_connected
$13

Free
...free
designconnected
parri design free armchairs computer generated 3d model. designed by marco maran.
turbosquid
$5

free
... available on turbo squid, the world's leading provider of digital 3d models for visualization, films, television, and games.
turbosquid
$5

Free
... available on turbo squid, the world's leading provider of digital 3d models for visualization, films, television, and games.
turbosquid
free
Free
... available on turbo squid, the world's leading provider of digital 3d models for visualization, films, television, and games.
design_connected
free
Free barstool
...free barstool
designconnected
free 3d model of free barstool by kristalia designed by graffeo, monica.
3d_export
$5
free mixamo
...free mixamo
3dexport
free mixamo
3d_export
free

free rocks
...free rocks
3dexport
free price rock
turbosquid
free

Free Free Standing Punching Bag
... available on turbo squid, the world's leading provider of digital 3d models for visualization, films, television, and games.
turbosquid
free
Hamburger Free
...urbosquid
free 3d model hamburger free for download as blend on turbosquid: 3d models for games, architecture, videos. (1592262)
turbosquid
free
Pallet Free
...ree
turbosquid
free 3d model pallet free for download as fbx on turbosquid: 3d models for games, architecture, videos. (1156509)