Thingiverse
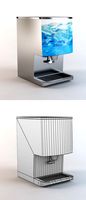
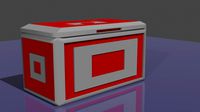
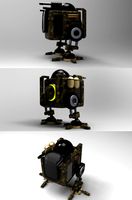
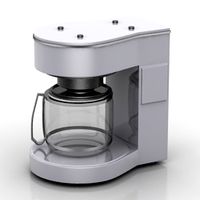
Hoshizaki Ice Machine Evaporator Cleaning Block by RJ_Make
by Thingiverse
Last crawled date: 3 years ago
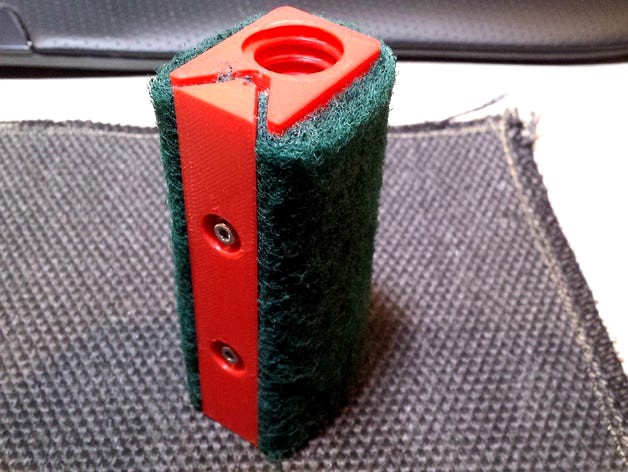
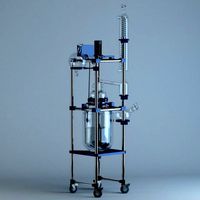
This is a great tool for those working on hoshizaki Ice Machines, it works very well.
Things you will need.
2) 3M x 23 SS Hex Cap Screw
2) M4 SS Flat Washer
2) M3x8-5 Brass Knurl Inserts
1) Wooden Paint Stick (preferably a fully wooded stick to as to help prevent damage to the evaporator surface)
1) a supply of 4x6 (you will need to cut about 1/4 off) scotch bright pads
Printing: (ABS)
1) Print the IM Cleaner Body V2 standing and either 100% infill and 200 microns OR, using a dual process', print the bottom half (just under the threaded section for the pole) at 30% and the rest (the threads) at 100% at 200 microns
2) Print the IM Cleaner Clamp V2 laying on it's small side (Recessed Holes Up) at 100% infill with no supports.
Assembly:
Using a soldering Iron, melt the Brass Knurl Inserts into the IM Cleaner Body V2. Making sure you have a small lip of plastic over the top of the Inserts (helps keep them from pulling out)
Install the SS Flat Washer onto the SS Hex Cap Screw, run them through the IM Cleaner Clamp V2 and into the cooled Brass Knurl Inserts.
Loading a Scotch Bright Pad:
Most likely you will need to cut about 1/4 off the end of the pad, but you should do a dry run just to make sure.
The easiest way to load a scotch bright pad is to make sure the screws are fully extended and just holding on by a few threads (gives you plenty of room to insert the pad).
Then insert the scotch bright pad all the way into one side of the clamp. Using the clamp press down hard (with your fingers), trapping the one side of the pad while tightly wrapping it around the body. Rub each corner to help the body crease into the pad.
Then release the clamp a little bit and then push the other side in between the clamp and body. Once the pad is fully inserted and tight, screw down the clamp screws to secure everything.
I will try and upload a video of the process in the future.
Similar models
thingiverse
free

Cart / stroller spoke clip
...t to screw something to this.
inserts used: brass knurled threaded insert nuts assortment kit: m3x3mmx5mm using a soldering iron.
thingiverse
free

M6 Knurled Nut (Rändelmutter) by crazydino
...
printing:
for max stability, print with 100% infill.
note:
you should put glue into the hole before inserting your threaded rod.
grabcad
free

Knurled knob with 1/4-20 threaded insert
...knurled knob with 1/4-20 threaded insert
grabcad
knurled knob with 1/4-20 threaded insert
thingiverse
free

ANYCUBIC 3D MKS MOSFET Mount
...ixed it to my wanhao duplicator i3 with epoxy.
parts list:
4x - m3 x 4mm x 5mm knurled brass threaded insert
4x - m3 x 10mm screw
thingiverse
free

1/100 APC V2 by njd13
...26mm length of 1mm brass rod for the axles, and 9.5mm length for the turrent. printed on zortrax m200 at 140 micron successfully.
thingiverse
free

insert test by LPHconus
...ade for
m2 brass-knurl
m2.5 brass-knurl
m3 brass-knurl
m4 brass-knurl
you are able to pay those form ebay: http://ebay.to/2g2m498
thingiverse
free

XT60 holder mount with threaded inserts
...ith m3 screw to secure both the xt60 using the lid, and the assembly as a whole. the forward facing brass inserts can be skipped.
grabcad
free

M1.6 Knurl Insert Nut 2mm and 3mm length
...ss knurled nut
m1.6
2.9mm outside diameter
2mm length and file v2 3mm length
p.s. best chose for easy printing or cnc is file v2
grabcad
free

M1.4 Knurl Insert Nut 3mm length
...3mm length
grabcad
brass knurled nut
m1.4
2.9mm outside diameter
3mm length
p.s. best chose for easy printing or cnc is file v2
grabcad
free

M1.4 Knurl Insert Nut 2mm length
...2mm length
grabcad
brass knurled nut
m1.4
2.9mm outside diameter
2mm length
p.s. best chose for easy printing or cnc is file v2
Hoshizaki
3dwarehouse
free

Hoshizaki
...hoshizaki
3dwarehouse
sushi cooler
3dwarehouse
free

Hoshizaki Ice machine
...hoshizaki ice machine
3dwarehouse
#ice_dispenser #ice_machine
3dwarehouse
free

Ice Machine Hoshizaki
...ice machine hoshizaki
3dwarehouse
ice machine / machine
3dwarehouse
free

Hoshizaki Freezer Dummy Model
...hoshizaki freezer dummy model
3dwarehouse
3dwarehouse
free

refrigerator 冷蔵庫_ホシザキ HOSHIZAKI
...refrigerator 冷蔵庫_ホシザキ hoshizaki
3dwarehouse
refrigerator 冷蔵庫_ホシザキ hoshizaki
3dwarehouse
free
Ice Machine Hoshizaki FM-80 (640x600x800)
...aglaçon #machine #hoshizaki #fm80 #pro #proffesional #professionnel #commercial #glace #ice #icecube #glacon #glaçon #640x600x800
3dwarehouse
free
Ice Machine Hoshizaki FM-120 (940x600x800)
...glaçon #machine #hoshizaki #fm120 #pro #proffesional #professionnel #commercial #glace #ice #icecube #glacon #glaçon #940x600x800
3dwarehouse
free

HOSHIZAKI Cold water dispenser DIW-30A-P
...hoshizaki cold water dispenser diw-30a-p
3dwarehouse
3dwarehouse
free

HOSHIZAKI Hot water dispenser DHM-15A-HW
...hoshizaki hot water dispenser dhm-15a-hw
3dwarehouse
Evaporator
turbosquid
$3

SYRUP EVAPORATOR
...
royalty free 3d model syrup evaporator for download as sldas on turbosquid: 3d models for games, architecture, videos. (1264221)
3d_export
$10

Balmuda Natural Evaporative Humidifier
...~ 100,000 model parts: 1 texture format: .png .jpg resolution: 1024*1024 pbr in substance painter formats: .obj .gltf .fbx .blend
3d_export
$15

Humidifier 3D Model
...porative wick vaporizer steam ultrasonic fog spray health breathing breath ionizer air
humidifier 3d model firdz3d 96889 3dexport
3d_export
$6
crystallizerdn1400-3000
...rculating crystallizer according to flow mode; continuous crystallizer and intermittent crystallizer according to operation mode.
3d_export
$5

incense burner
... perfume in some solid form. this can be used as pomanders, where the perfume diffuses slowly by evaporation rather than burning.
3d_export
$29
Chemical Glass Reactor
...chemical, pharmacy and the advanced synthetic. -scene for 3ds max 2012 and v-ray 2.0 !!!in file only 3d model without interior!!!
3d_export
$26
cooling tower
...ers.<br>model with full detail in real size. all nodes and bolted connections are built. it was designed for nuclear power.
3d_export
$10

air cooler
...edium, low and sleep dust filter : carbon dust filter cleanses the air the folder include of blender, obj, mtl, stl, fbx formats.
3d_export
$150

large laser cutting machine
...any questions also you can email to me. designed with solidworks 2017, render with keyshot **************************************
3d_export
$5

sample model of split air conditioner outdoor box low poly
...our creativity.<br>p.s. this model was created in software 'blender 3d' with gnu general public license (gpl, or fr
Rj
3d_export
$5

BBS RJ RG R16
...bbs rj rg r16
3dexport
двухсоставные колпачки для bbs rj rg r16
3ddd
$1
Irobot RJ
... пылесос
это что то вроде умного пылесоса :)модель придумана.можно использовать в robotic studio так как полигонов немного.
cg_studio
$49

Canadair RJ-700 Delta Connection3d model
...odel
cgstudio
.max - canadair rj-700 delta connection 3d model, royalty free license available, instant download after purchase.
3d_export
$35
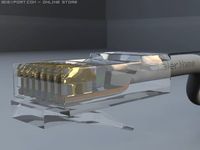
RJ45 3D Model
...rj45 3d model
3dexport
rj45 net nets rj-45 connection jack ethernet
rj45 3d model deviacium 5819 3dexport
cg_studio
$129
BAe 146 a3d model
...bae 146 a3d model cgstudio aircraft avro rj rj bae 146 british bae146 uk aerospace euro eurowing germany...
3d_export
$20

bts bt21 hanbok seria set cookie forms
...or 7 centimeters in height<br>7 characters without van<br>koya, tata, rj shooky, chimmy, mang,...
3d_export
$10
patch panel
...it projects.<br>originally modelled in solidworks 2015.<br>-19 ", 1u, 24 rj45 ports.<br>-all colors can be easily modified.<br>-all materials are included.<br>-solidworks...
3d_export
$8

Acustic guitar low-poly PBR game ready
...pbr game ready 3dexport acustic guitar modeled after renome's rj series guitar. the model has <br> and <br>.<br>the texture...
thingiverse
free

RJ Cross by Jbech002
...rj cross by jbech002
thingiverse
it is a cross with an rj logo on it.
3dfindit
free
RJS & RJC
...rjs & rjc
3dfind.it
catalog: wmberg
Ice
3d_export
$19

Cartoon Iceberg Ice Cave sea surface Snow Mountain ice ice surface sea ice cone Ice Cave gla
...on iceberg, ice cave, sea surface, snow mountain, ice, ice surface, sea ice cone, ice cave, glacier 2.files include 3dmax fbx obj
3d_export
$19

Cartoon Iceberg Ice Cave sea surface Snow Mountain ice ice surface sea ice cone Ice Cave gla
...on iceberg, ice cave, sea surface, snow mountain, ice, ice surface, sea ice cone, ice cave, glacier 2.files include 3dmax fbx obj
3d_ocean
$2
Ice
...snow texture tile
this is a tile able, hand painted ice texture tile. included is one versions at 512×512 pixels in .tga format.
3d_ocean
$2
Ice Dispenser
...cooler
ice dispenser model in 3ds max. you can see this machine in soft drink shop, super market, hypermarket and some fast food.
3d_export
$5

Ice cream
...ice cream
3dexport
ice crice
3d_export
free
Donut with icing
...donut with icing
3dexport
donut with icing
3d_ocean
$3
ice cubes
...ice cubes
3docean
coke cube ice soda beverage
3d model and shader of ice cubes
3d_export
$12
ice cream
...ice cream
3dexport
ice cream, made in blender
3d_export
free
Ice box
...ice box
3dexport
it is a ice box as shown in the pictures.
3d_ocean
$2
Ice Texture
...al freeze frost frozen frozen water ice icey snow winter
the texture of the ice / ice surface. files included: tga and jpg files.
Block
archibase_planet
free

Blocks
...blocks
archibase planet
blocks bricks toy
toy blocks - 3d model (*.gsm+*.3ds) for interior 3d visualization.
3d_export
$5

Block
...block
3dexport
3d_export
$10
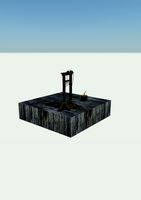
The guillotine and the block
...the guillotine and the block
3dexport
the guillotine and the block autocad 2013
3d_ocean
$8
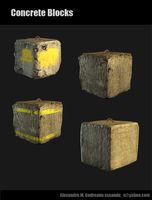
Concrete Blocks
... blocks, barriers or cover for characters during a fire fight. each one has its own diffuse map, specular and normal map in tg...
archibase_planet
free
Glass block
...glass block
archibase planet
glass block brick
glass block n211009 - 3d model (*.gsm+*.3ds) for interior 3d visualization.
3d_export
$99
city block
...city block
3dexport
city block 3d model. include max, obj and fbx files.
3d_ocean
$3
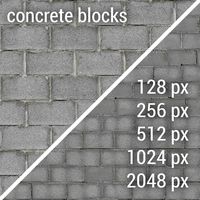
Concrete Blocks Textures
...res
3docean
block blocks concrete seamless wall walls
a couple of seamless textures with two differents sizes of concrete blocks.
3d_export
$5

plummer block
...plummer block
3dexport
this is an 3d model of plummer block assembly where seven parts are required to assemble this.
design_connected
$16

Block 2
...block 2
designconnected
henry pilcher block 2 computer generated 3d model. designed by pilcher, henry.
3d_export
$7

concrete blocks on pallets
...concrete blocks on pallets
3dexport
concrete blocks on pallets, 3 types of blocks. there are all the necessary textures.
Cleaning
turbosquid
$29

Clean Bow
...osquid
royalty free 3d model clean bow for download as blend on turbosquid: 3d models for games, architecture, videos. (1257234)
turbosquid
$25
Jacuzzi Clean
...quid
royalty free 3d model jacuzzi clean for download as max on turbosquid: 3d models for games, architecture, videos. (1461249)
turbosquid
$32
Bobcat Clean
... free 3d model bobcat clean for download as max, obj, and fbx on turbosquid: 3d models for games, architecture, videos. (1393706)
turbosquid
$1
Zanbato - Clean
...ree 3d model zanbato - clean for download as ma, obj, and fbx on turbosquid: 3d models for games, architecture, videos. (1328531)
turbosquid
$10

Cleaning Products
...model cleaning products for download as ma, max, fbx, and obj on turbosquid: 3d models for games, architecture, videos. (1559247)
turbosquid
$25
cleaning kit
... available on turbo squid, the world's leading provider of digital 3d models for visualization, films, television, and games.
turbosquid
$20

Cleaning pads
... available on turbo squid, the world's leading provider of digital 3d models for visualization, films, television, and games.
turbosquid
$16
Cleaning Bucket
... available on turbo squid, the world's leading provider of digital 3d models for visualization, films, television, and games.
turbosquid
$10
cleaning bucket
... available on turbo squid, the world's leading provider of digital 3d models for visualization, films, television, and games.
turbosquid
free

Cleaning Equipment
...ng equipment for download as max, 3ds, dae, dxf, fbx, and obj on turbosquid: 3d models for games, architecture, videos. (1693554)
Machine
archibase_planet
free

Machine
...machine
archibase planet
sewing-machine sewing machine equipment
singer machine- 3d model for interior 3d visualization.
archibase_planet
free
Machine
...hine
archibase planet
percolator equipment coffee-machine
machine n230708 - 3d model (*.gsm+*.3ds) for interior 3d visualization.
archibase_planet
free
Machine
...chibase planet
percolator coffee-machine kitchen equipment
coffee machine - 3d model (*.gsm+*.3ds) for interior 3d visualization.
archibase_planet
free
Slot machine
...ase planet
slot machine slot-machine playing machine
slot machine n260311 - 3d model (*.gsm+*.3ds) for interior 3d visualization.
turbosquid
$7

Machine
...ne
turbosquid
royalty free 3d model machine for download as on turbosquid: 3d models for games, architecture, videos. (1391792)
3d_ocean
$10
War machine
...war machine
3docean
camuflage machine robot war war machine
war machine created in 3dmax 2009 15.497-poly count
turbosquid
$7
machine
...turbosquid
royalty free 3d model machine for download as obj on turbosquid: 3d models for games, architecture, videos. (1452674)
3d_ocean
$12
Weighing-machine
...weighing-machine
3docean
market shop weighing-machine
3d model weighing-machine
archibase_planet
free
Sewing machine
...ine
archibase planet
sewing machine sewing-machine
sewing machine n080311 - 3d model (*.gsm+*.3ds) for interior 3d visualization.
archibase_planet
free
Coffee machine
...se planet
coffee machine percolator coffee-machine
coffee machine n010715 - 3d model (*.gsm+*.3ds) for interior 3d visualization.
Make
3d_export
$5

make make planet
...make make planet
3dexport
turbosquid
$1

Make
...ke
turbosquid
royalty free 3d model make for download as obj on turbosquid: 3d models for games, architecture, videos. (1403181)
3ddd
free

make up
...make up
3ddd
косметика
makeup
turbosquid
$65
Make an interior
... available on turbo squid, the world's leading provider of digital 3d models for visualization, films, television, and games.
turbosquid
$5

Make Up Stand
...bosquid
royalty free 3d model make up stand for download as on turbosquid: 3d models for games, architecture, videos. (1542368)
turbosquid
$12

make up table
...quid
royalty free 3d model make up table for download as max on turbosquid: 3d models for games, architecture, videos. (1280789)
turbosquid
$1

Make up desk
...oyalty free 3d model make up desk for download as max and obj on turbosquid: 3d models for games, architecture, videos. (1222023)
turbosquid
$1
Make up desk
...oyalty free 3d model make up desk for download as max and obj on turbosquid: 3d models for games, architecture, videos. (1222007)
turbosquid
$29
Ammo making machine
...aking machine for download as max, unitypackage, fbx, and obj on turbosquid: 3d models for games, architecture, videos. (1572915)
turbosquid
$29
Making light Collection
... available on turbo squid, the world's leading provider of digital 3d models for visualization, films, television, and games.