Thingiverse
Hope foreskin restoration device molds.
by Thingiverse
Last crawled date: 4 years, 1 month ago
I, the designer of the "Hope" foreskin restoration device have decided to release the molds in the best interest of hundreds of thousands
of men restoring their bodies to the natural state and function.
I cannot meet the growing demand for these devices, and since $$ profit was never the objective of designing these anyway; I am releasing
them knowing that the ever growing community of Intactivist and Foreskin Restoration people will cause the supply to grow at an ever
increasing rate.
This increase in supply will lower the selling price, encouraging more men to try restoration and ultimately result in a much faster end
to the INFANT GENITAL MUTILATION culture of the USA and eventually the world.
IF you are an individual that desires to print these molds and produce devices to sell or give away please consider the following.
Foreskin restoration is not difficult provided that the devices used are well designed and high quality.
Making devices from poor quality molds will result in frustration and ultimately hinder bringing about the end of Infant Genital Mutilation.
As such, Use only the highest quality prints and molds as this will impact the quality of every device you cast into them.
Go for perfection on the molds and you will have nothing to regret in the final product and impact on society.
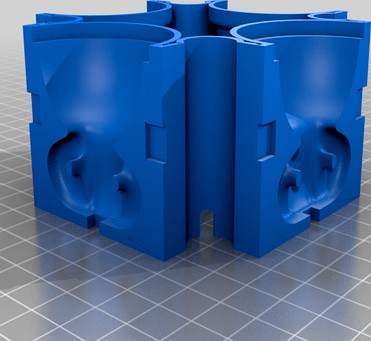
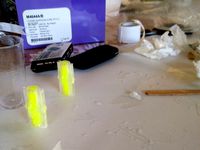
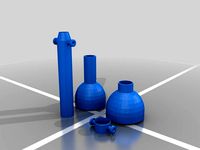
These are the molds for the (Hope) foreskin restoration device both sizes.
NOTE ## Print with a SLA printer only, commercial quality 3D SLA print service is best.
If you want to print on your own SLA printer use a strong low warp resin with very low shrinkage.
step 1 after printing
Use small files to clean up edges then use synthetic abrasive pads to manually smooth the surface to as smooth as possible.
Assemble the molds to ensure the inner pieces fit.
step 2
Use a small brush and 2 part table epoxy coating (not the glue) to brush over the entire surface of the molds allowing to cure completely.
This prevents the cured SLA resin from Inhibiting the cure of silicone later.
step 3
Repeat step 1 then 2
step 4
Aquire a vacuum pump and chamber
step 5
Simply google " skin safe platinum silicone rubber " and look for something in the 10-12 Shore A firmness.
MAKE SURE IT IS CERTIFIED SKIN SAFE ! THESE DEVICES ARE ONLY SAFE IF THE SILICONE IS SAFE FOR SKIN CONTACT.
You cannot find this type of silicone at your local hardware store, do NOT skip this important step.
step 6
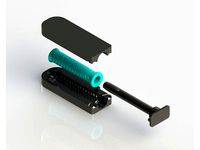
Assemble the outer molds placing a small piece of tape across the square holes in the bottom of each.
Now place the stems down from the top into the square recess and make sure they stick to the tape.
step 7
Mix the silicone (with gloves on), degass in the vacuum chamber , then pour very slowly allowing it to fall into the lowest point inside the mold possible.
step 8
Hold the inner molds together in sets of 2 at a time and slowly allow them to sink into the silicone applying light pressure at the end
to ensure they are seated flush into the outer mold rim.
step 9
After the cure is complete, remove the tape from the bottom of each mold. Insert a small flat screwdriver into the recess provided on the side
of the outer molds and gently push the outer portion away from the center to loosen the cured parts.
Now that they are loose, Grab the outer mold and pull it off the center portion top first then bottom.
step 10
Remove the stems from the parts and carefully roll the outer portion of the base (IE where it meets the inner molds) forward and invert it to
reveal the inner molds surface. Grab the inner mold and simply roll it away from the opposite piece to remove.
step 11
Use a pair of surgical scissors to trim the flashing or excess seam material from the mold parting lines.
This takes practice to avoid damaging the actual item.
step 12
Carefully invert the outer gripper portion and plunge the blade of an Exacto knife straight down in the center of the concave recess
until it barely reaches the end of the air channel.
This is actually the valve as the silicone itself seals shut when air is not being forced in from the outside.
step 13
CONGRATULATIONS ! You have now produced your first run of Hope foreskin restoration devices!
of men restoring their bodies to the natural state and function.
I cannot meet the growing demand for these devices, and since $$ profit was never the objective of designing these anyway; I am releasing
them knowing that the ever growing community of Intactivist and Foreskin Restoration people will cause the supply to grow at an ever
increasing rate.
This increase in supply will lower the selling price, encouraging more men to try restoration and ultimately result in a much faster end
to the INFANT GENITAL MUTILATION culture of the USA and eventually the world.
IF you are an individual that desires to print these molds and produce devices to sell or give away please consider the following.
Foreskin restoration is not difficult provided that the devices used are well designed and high quality.
Making devices from poor quality molds will result in frustration and ultimately hinder bringing about the end of Infant Genital Mutilation.
As such, Use only the highest quality prints and molds as this will impact the quality of every device you cast into them.
Go for perfection on the molds and you will have nothing to regret in the final product and impact on society.
These are the molds for the (Hope) foreskin restoration device both sizes.
NOTE ## Print with a SLA printer only, commercial quality 3D SLA print service is best.
If you want to print on your own SLA printer use a strong low warp resin with very low shrinkage.
step 1 after printing
Use small files to clean up edges then use synthetic abrasive pads to manually smooth the surface to as smooth as possible.
Assemble the molds to ensure the inner pieces fit.
step 2
Use a small brush and 2 part table epoxy coating (not the glue) to brush over the entire surface of the molds allowing to cure completely.
This prevents the cured SLA resin from Inhibiting the cure of silicone later.
step 3
Repeat step 1 then 2
step 4
Aquire a vacuum pump and chamber
step 5
Simply google " skin safe platinum silicone rubber " and look for something in the 10-12 Shore A firmness.
MAKE SURE IT IS CERTIFIED SKIN SAFE ! THESE DEVICES ARE ONLY SAFE IF THE SILICONE IS SAFE FOR SKIN CONTACT.
You cannot find this type of silicone at your local hardware store, do NOT skip this important step.
step 6
Assemble the outer molds placing a small piece of tape across the square holes in the bottom of each.
Now place the stems down from the top into the square recess and make sure they stick to the tape.
step 7
Mix the silicone (with gloves on), degass in the vacuum chamber , then pour very slowly allowing it to fall into the lowest point inside the mold possible.
step 8
Hold the inner molds together in sets of 2 at a time and slowly allow them to sink into the silicone applying light pressure at the end
to ensure they are seated flush into the outer mold rim.
step 9
After the cure is complete, remove the tape from the bottom of each mold. Insert a small flat screwdriver into the recess provided on the side
of the outer molds and gently push the outer portion away from the center to loosen the cured parts.
Now that they are loose, Grab the outer mold and pull it off the center portion top first then bottom.
step 10
Remove the stems from the parts and carefully roll the outer portion of the base (IE where it meets the inner molds) forward and invert it to
reveal the inner molds surface. Grab the inner mold and simply roll it away from the opposite piece to remove.
step 11
Use a pair of surgical scissors to trim the flashing or excess seam material from the mold parting lines.
This takes practice to avoid damaging the actual item.
step 12
Carefully invert the outer gripper portion and plunge the blade of an Exacto knife straight down in the center of the concave recess
until it barely reaches the end of the air channel.
This is actually the valve as the silicone itself seals shut when air is not being forced in from the outside.
step 13
CONGRATULATIONS ! You have now produced your first run of Hope foreskin restoration devices!
Similar models
thingiverse
free

Foreskin restoration device (not weighted) by Mike1701
...ter. smaller ball is 3/4" in diameter.
for more information on infant circumcision, please visit:http://intactamerica.org/
thingiverse
free
Improved Bike Grip Mold by Rconroy
...g/silicone-molding-2/
note: mold release agent does not need to be used, as silicone will have a tough time adhering to the mold.
cg_trader
$35
Mold for cast silicone model of the aortic root | 3D
... 30 a shore scale) to make easer release the mold after silicone polymerization use cover inner side of the mold by silicone oil.
cg_trader
$30
The mold for cast of healthy aortic root | 3D
... 30 a shore scale) to make easer release the mold after silicone polymerization use cover inner side of the mold by silicone oil.
cg_trader
$5

Lost wax casting liquid rubber RTV silicone mold pattern frame | 3D
...n frame box resin liquid rubber mold wax casting lost ring tools vulcanized sla dlp rtv silicone vacuum hobby diy hobby diy other
thingiverse
free
silicone mold for one way valve and pinch valve by alisonleanne
...rt. the heart valve is a duck bill valve. the other valve is for the 3 way pinch valve. next will be a servo driven heart (pump).
thingiverse
free
CR-6 SE Creality Silicone heat block case Mold by tred
...e)
then record the result and save it.
m301 pxx.xx ix.xx dxx.xx" - (xx.xx represent the kp ki and kd values)
m500 to save it
thingiverse
free

Remix of Martin_s E3D v6 Silicone Cover Mold, split mold. by DavieSprocket
...ly remixed the mold shell and not the inner mold piece, top piece or pull handle. those you will still need to get from martin_s.
grabcad
free

EgyVent -Covid-19 simple ventilator
...n molds for the inner and the outer bellows
*the inner bellows are used to separate the outer chambers from the mechanical parts
thingiverse
free

Han Solo in Chocolate! by dentikhval
...port, but keep some not to get the tiny hands stuck in silicone
cast silicone, let it cure
melt some chocolate and cast it
enjoy!
Foreskin
thingiverse
free

Vertical Foreskin
...vertical foreskin
thingiverse
requires two 35mm long m4 screws and two m4 nuts.
thingiverse
free
Foreskin restoration device (not weighted) by Mike1701
...ter. smaller ball is 3/4" in diameter.
for more information on infant circumcision, please visit:http://intactamerica.org/
thingiverse
free

Foreskin Restoration Inflatable Adapter by Syrus54
...t the size to fit the application.
item is not for sale, royalty free.
[ don't go selling it on ebay ]
you're welcome
thingiverse
free

Elastic Foreskin Tugger by ThatDrewLion
...on can be adjusted.
it's designed in mm and fits quite comfortably with platex wide mouth nipples as the gripper cut to fit.
thingiverse
free

Foreskin Restoration Prosthetic Device by Syrus54
...ize to fit the application.
item is not for sale, royalty free.
i better not see you selling it on ebay.
you're welcome.
thingiverse
free

Foreskin Restoration Prosthetic Device 2b by Syrus54
... fit the application.
item is not for sale, royalty free.
i better not see you selling it on ebay.
and again, you're welcome.
thingiverse
free

Foreskin Restoration Retainer 1b (High Poly version) by Syrus54
...application.
item is not for sale, royalty free.
i better not see you selling it on ebay.
and once again, you're welcome.
thingiverse
free

Foreskin Restoration Retainer 1a (low poly version) by Syrus54
...application.
item is not for sale, royalty free.
i better not see you selling it on ebay.
and once again, you're welcome.
thingiverse
free
Foreskin Restoration Prosthetic Device 2 by Syrus54
... the application.
item is not for sale, royalty free.
i better not see you selling it on ebay.
and again, you're welcome.
Restoration
3ddd
$1

Restoration Hardware
...restoration hardware
3ddd
restoration hardware
restoration hardware
3ddd
$1
RESTORATION HARDWARE
...restoration hardware
3ddd
restoration hardware , телескоп
restoration hardware
3ddd
$1

Restoration Hardware
...restoration hardware
3ddd
restoration hardware
restoration hardware, кресло,
3ddd
$1

Restoration Hardware
...restoration hardware
3ddd
restoration hardware , декоративный набор
restoration hardware
3ddd
$1

Restoration Hardware
...restoration hardware
3ddd
restoration hardware , декоративный набор
restoration hardware
3ddd
$1

Restoration Hardware
... hardware , боров , свинья
restoration hardware
3ddd
$1
Restoration Hardware
...ardware , корона , медведь
restoration hardware
3ddd
$1
Restoration Hardware
...ation hardware
3ddd
restoration hardware , тумба
тумба прикроватная restoration hardware
3ddd
free

Restoration Hardware
... кашпо , куст , свеча
restoration hardware
3ddd
free
Restoration Hardware
...restoration hardware
3ddd
restoration hardware
restoration hardware menlo table lamp
Molds
3ddd
$1
molding
...molding
3ddd
молдинг
molding
3ddd
$1

molding
...molding
3ddd
молдинг , резьба
molding
3d_export
$10

molding
...molding
3dexport
molding, casting, baguette, decoration
3d_export
$10

molding
...molding
3dexport
molding, casting, baguette, decoration
3d_export
$10

molding
...molding
3dexport
molding, casting, baguette, decoration
3d_export
$10

molding
...molding
3dexport
molding, casting, baguette, decoration
3d_export
$10

molding
...molding
3dexport
molding, casting, baguette, decoration
3d_export
$10

molding
...molding
3dexport
molding, casting, baguette, decoration
3d_export
$10

molding
...molding
3dexport
molding, casting, baguette, decoration
design_connected
$16
Mold
...mold
designconnected
eternit mold computer generated 3d model. designed by charlot, michel.
Device
3ddd
$1
device
...device
3ddd
device
3ddd
$1

device
...device
3ddd
device
turbosquid
$25

Device
...royalty free 3d model device for download as ma, max, and obj on turbosquid: 3d models for games, architecture, videos. (1431298)
archive3d
free

Device 3D Model
...device 3d model
archive3d
equipment device
device- 3d model for interior 3d visualization.
archive3d
free
Device 3D Model
... model
archive3d
device
device n050608 - 3d model (*.gsm+*.3ds) for interior 3d visualization.
archive3d
free
Device 3D Model
...e 3d model
archive3d
device gear
device - 3d model (*.gsm+*.3ds) for interior 3d visualization.
3d_export
$5
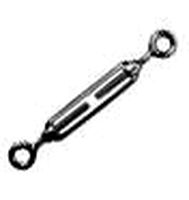
rope tighten device
...rope tighten device
3dexport
rope tighten device
3d_export
$5
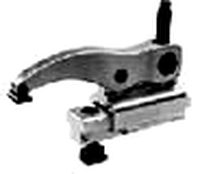
front clamping device
...front clamping device
3dexport
front clamping device
archive3d
free
Device 3D Model
...e3d
device kitchen ware
device n130208 - 3d model (*.gsm+*.3ds) for interior 3d visualization.
3d_ocean
$5
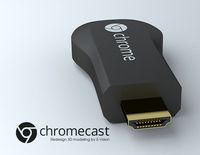
Google Chromecast device
...romecast device. if you want to know more about this device, please check url : http://www.google.com/chrome/devices/chromecast/
Hope
3ddd
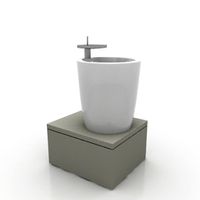
free
Luceplan - Hope
...luceplan - hope
3ddd
hope , luceplan
переделал из 3ds.
design_connected
$16

Hope suspension
...hope suspension
designconnected
luceplan hope suspension computer generated 3d model. designed by gomez paz, francisco.
design_connected
$16

Millenium Hope
...millenium hope
designconnected
cappellini millenium hope benches computer generated 3d model. designed by claudio silvestrin.
3ddd
$1

Hope-28
...hope-28
3ddd
r&l
люстра hope-28
2013,2016.max+ obj
vray
turbosquid
free

hope diamond
...nd
turbosquid
free 3d model hope diamond for download as stl on turbosquid: 3d models for games, architecture, videos. (1582433)
3d_export
$5

Hope Chest
...lar opened lid. 3d studio max 2017 version and also added 2014 version. 1:1 scale in real sizes. many file formats are available.
turbosquid
free

Beecher's Hope
...id
royalty free 3d model beecher's hope for download as on turbosquid: 3d models for games, architecture, videos. (1374181)
turbosquid
$10

Hope Chest
... available on turbo squid, the world's leading provider of digital 3d models for visualization, films, television, and games.
3ddd
$1

Forecast / Hope Collection
...forecast / hope collection
3ddd
forecast
forecast hope collection 14" wide ceiling light fixture
turbosquid
$12
Hope Dining Chair
... available on turbo squid, the world's leading provider of digital 3d models for visualization, films, television, and games.