Thingiverse
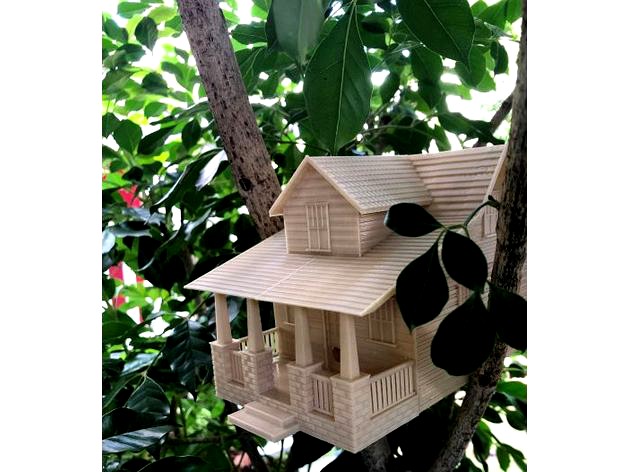
HomeSweetHome Bee Hive by Hodgo1
by Thingiverse
Last crawled date: 2 years, 10 months ago
Home Sweet Home...for native bees. This easily printable, minimum filament home for bees is the perfect addition to your garden. In fact, the whole home has been designed so it can be printed quickly and easily without supports!
It features threaded entry holes at the front and rear for easy, safe budding to create new hives. There is a recess to hold a perspex sheet between the base and roof which allows direct visualisation of the growing hive. This can be removed once the hive has grown to allow the bees access to a specially design honey storage section under the tiled roof.
I recommend printing the bee home in light-coloured PETG. This will help cool the hive, and also be strong enough to handle the elements. If you live in a warmer/cooler climate than the average, I suggest printing the base and roof parts with as little infill as your printer can handle (I used 2%). This will allow you to make small holes in the model and fill the inside with expanding foam from your local hardware store. This helps enormously with insulation and will make your bees happier on those colder mornings/warmer days. As with all native bee hives, a cool, shaded position that receives a bit of morning sun is best.
Print all pieces in the orientation they come in for best results. I've deliberately left most of the pieces in separate files. This allows you to print the fences, pillars, door and windows in different coloured filament incase you don't want to paint your bee home.
Print list:-
1) Roof Right-side x 1 (If your bed is >400mm you can print the whole roof at once, but I found printing the two halves is better anyway)
2) Roof Left-side x 1 (If your bed is >400mm you can print the whole roof at once, but I found printing the two halves is better anyway)
3) Base (If your bed is >300mm you can print the whole base at once. If not, just slice it down the middle and join afterwards)
4) Porch
5) Pillars x 4
6) Windows x 7 (or however many you want. I like 3 each side and one in the middle at the top but go for however many you like)
7) Door x 1 (Or two if you want a back door as well)
8) Front fence x 2 (depending on your printer, you may find it easier to print with supports, but not necessary)
9) Side fence x 2 (depending on your printer, you may find it easier to print with supports, but not necessary)
10) Plug (this is the cap to plug up the rear entry hole once your colony has grown)
11) Male joiner (to join to an existing hive, or for when you're ready to join on a new hive to your bee home)
12) Female joiner (as above. Print as many male/female joiners as you need to join the hives-a shorter distance is better)
Enjoy!
P.s, this print is fully scalable although I wouldn't go below 75% size as this may not give the bees enough room for adequate brood cells. Remember to scale the male and female joiners appropriately otherwise they won't screw in!
3D PRINTING SETTINGS
0.2mm layer height
50mm/s for all pieces
Supports not needed but may help on fence pieces
About 4-4.5days worth of printing total
I used 1.1kg of filament total, but this was with absolutely minimum/no infill on all pieces. You might find you want a bit more infill so I think 1.5kg is probably a safer estimate.
Similar models
thingiverse
free

Bee Hive Entrance Reducer by runner409
...o two pieces so that it can be printed on more printers (you need at least 7 inches in one direction unless you make it smaller).
thingiverse
free
Bee Hive Feeder Spout by morte615
...aker 2.0 a350
to print i flipped upside down and printed with supports. may print ok right side up with no supports but doubt it.
thingiverse
free

Yamaha DT Express frame joining piece by Captain_sq
...s the brain support tube to the left side of the frame. i guess this can be used anywhere on the drum kit with a broken t-joiner.
thingiverse
free
Bee lining box by jhtitan
...for no support needed printing.
small holes in sides are to attache leather or nylon straps for hanging on a pole, post or stake.
thingiverse
free

Bee Hive Stopper by crua9
... at given times.
btw if your filament is about $25 and you do the 5% infill as i suggested. this will cost close to $1 per stick.
thingiverse
free

Super Bee Entrance by sarbalyd
...sult in more pollen in the super. i may re work the design when i get a chance so super entrance becomes a pollen collector also.
thingiverse
free

MYSTERY MINIS FIGURES DISPLAY 3 TIER by Ivankahl
...ts flat side, i printed with 2 wall and not infill, not supports so it will only use about 20m of filament
please leave a like ;)
thingiverse
free

A table leg by vovcacik
...izer to prototype the slot width for your table. once the slot fits the table side board perfectly you can print the whole model.
thingiverse
free
Bee Feeder for inside Hive by sat481
...jar and refill the jar every few days. you could print several to fit in the hive to save regular fill ups.
print with supports.
thingiverse
free

Pool Skimmer Basket by JKSniper
...rts and it will take a lot of time.
i recommend printing with petg as it's very resistant to pool water and chemicals in it.
Homesweethome
cg_trader
$3

Table Flexible Lamp
...roughness, and metalness) lamp decorative light interior designs vintage homesweethome homedesign art homedecor fancy fur modern living room living...
grabcad
free

Unique Indian Art Design Table For Home Decor|IF You Want to buy Then Comment Your Email Address
...#decor #furniture #interiors #art #homedesign #decoration #interiordesigner #inspiration #luxury #homesweethome #r #designer #livingroom #interiorstyling #interiordecor #interi #handmade #style #vintage...
grabcad
free

Small Unique Indian Antique Design Table For Home Decor |IF You Want to buy Then Comment Your Email Address
...#decor #furniture #interiors #art #homedesign #decoration #interiordesigner #inspiration #luxury #homesweethome #r #designer #livingroom #interiorstyling #interiordecor #interi #handmade #style #vintage...
cg_trader
$119

LIVING ROOM AND DINING AREA
...#decor #furniture #interiors #art #homedesign #decoration #interiordesigner #inspiration #luxury #homesweethome #r #designer #livingroom #interiorstyling #interiordecor #interi #handmade #style #vintage...
3dwarehouse
free

homesweethome
...homesweethome
3dwarehouse
house
3dwarehouse
free

homesweethome
...homesweethome
3dwarehouse
its kool
3dwarehouse
free

HomeSweetHome
...homesweethome
3dwarehouse
mein derzeitiger wohnort
3dwarehouse
free

homesweethome
...homesweethome
3dwarehouse
home sweet home
3dwarehouse
free

HomeSweetHome
...homesweethome
3dwarehouse
just my current home... for fun !
Hive
design_connected
$18

Hive
...hive
designconnected
b&b italia hive computer generated 3d model. designed by atelier oi.
3d_export
$5

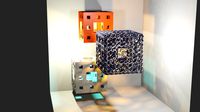
Hive cube
...hive cube
3dexport
hive cube grid
turbosquid
$19

Hive
... available on turbo squid, the world's leading provider of digital 3d models for visualization, films, television, and games.
3d_export
$5
Hive city
...hive city
3dexport
.blend, stl<br>hive city
turbosquid
$7

Hive Lamp
... available on turbo squid, the world's leading provider of digital 3d models for visualization, films, television, and games.
3ddd
$1
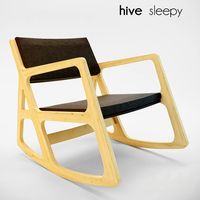
Hive sleepy oak chair
... hive , sleepy
крело hive sleepy oak. материалы corona render
3ds max 2014 + obj
3ddd
$1

Hive half pipe desk
... pipe , письменный
стол hive half pipe desk. материалы corona render
3ds max 2014 + obj
3ddd
$1
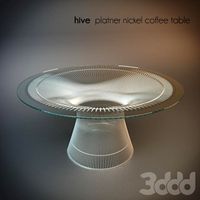
Hive platner nickel coffee table
... coffee , table
кофейный столик hive. материалы corona render
3ds max 2014 + obj.
3ddd
$1
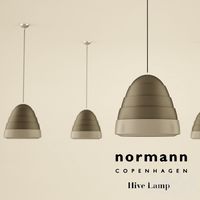
Normann Copenhagen / Hive lamp
...penhagen
люстра из последней коллекции все подробности тутhttp://www.normann-copenhagen.com/products/hive-lamp?v=502150
turbosquid
$12
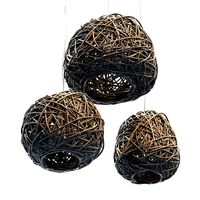
Lamp Rattan sphere hive n2
... free 3d model lamp rattan sphere hive n2 for download as max on turbosquid: 3d models for games, architecture, videos. (1698090)
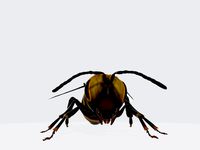
Bee
3d_export
free
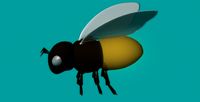
bee
...bee
3dexport
bee model
3d_export
$5
Bee
...bee
3dexport
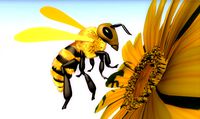
bee with flower. rigged
archibase_planet
free

Bee
...bee
archibase planet
bee fly insect
bee n040914 - 3d model (*.gsm+*.3ds) for 3d visualization.
3d_export
$7

Bee
...bee
3dexport
just a bee and a flower. separate parts (movable without bones). not centered
3d_export
$20

bee
...el bee, modeling in blender, texturing in substance painter, archive include low poly and high poly model, textures, bake, images
3d_ocean
$5
Bee
...bee
3docean
3d models animals bee insects and small animals
3d models, animals, insects and small animals
turbosquid
$105
bee
...bee
turbosquid
royalty free 3d model bee for download as obj on turbosquid: 3d models for games, architecture, videos. (1438776)
3d_export
free

LowPoly Bee
...lowpoly bee
3dexport
lowpoly bee
turbosquid
$29

bee
...alty free 3d model bee for download as c4d, obj, fbx, and 3ds on turbosquid: 3d models for games, architecture, videos. (1693929)
turbosquid
$10

Bee
...alty free 3d model bee for download as c4d, 3ds, obj, and stl on turbosquid: 3d models for games, architecture, videos. (1563269)