Thingiverse
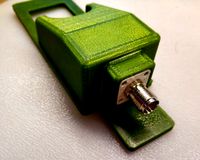
Holster for mk23 SOCOM TM/STTI by igdrassil
by Thingiverse
Last crawled date: 3 years, 4 months ago
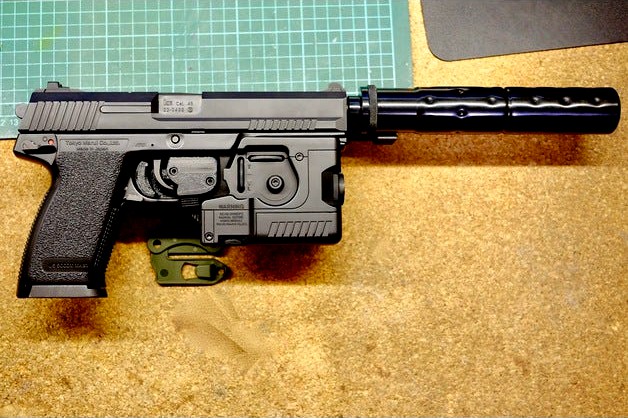
mk23 Airsoft Holster - Кобура для страйкбольного mk23
Русская версия
English
Description
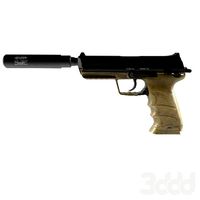
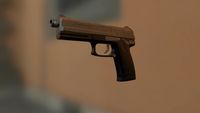
Holster for airsoft gun mk23 SOCOM by Tokyo Marui or STTI.
Holster was ispired by youtube video:
https://www.youtube.com/watch?v=67tAWwU9fT0
and this holster: https://www.thingiverse.com/thing:3934215
I started remixing the above holster, but ended drawing my own from the scratch.
Parts are unified for TM/STTI versions, the only different parts is main part and lock.
Holster has no attachments, it uses Blackhawk Serpa adapters.
Video (russian): https://youtu.be/oXulr7C7kEo
Parts list
Main part - Main TM.stl or Main STTI.stl
Lock part - Lock TM.stl or Lock STTI.stl
Top cover part - Top.stl
Base part - Base.stl
Pusher part - Pusher.stl
Spring insert part - Spring insert.stl
Spacers (print 3 pcs desired sufe) - Spacer 6.5 mm.stl or Spacer 6.5 mm.stl
Printer settings
material PETG;
nozzle 0.4 мм;
layer 0.2 мм;
infill 40% (use hexagonal if available);
top/bottom - 5;
wall width - 4.
BOM
Printed parts;
Lock spring, 5 mm diameter, 25-30 mm length, steel. 0.5 mm;
Pusher spring, 5 mm diameter, 35-45 mm length, steel. 0.5 mm;
М3 threaded stud, 30-35 mm (lock axle);
DIN912 screws (hexagonal socket, cylinder head) М3:
10 mm - 3 pcs;
12 мmmм - 4 pcs;
ISO7380 screws (hexagonal socket, hemispheric head, for attaching to BlackHawk Serpa adapter) M5 16-20 mm (depending on spacer used) - 3 шт;
Adapter from Blackhawk Serpa holster or chinese knockoffs.
Assembly guide
Remove burrings;
Polish rubbing surfaces of pusher and base (see pictures p1, p2)
Polish rubbing surfaces of main block and lock (pictures p3, p4)
Clean all orifices. You can clean М3 threaded holes first drilling with 2mm drill, then after removing debris tap them with M3 tap (first manual tap), but on on all depth, a 3-4mm is enough.
Main assembly:
drill lock hole with 3 - 3.1 mm drill;
Insert lock into main block, adding a spring (#2 BOM) into corresponding holes of both block and lock;
Screw stud (#4 BOM) so it enter the threaded hole on the other side (picture p5);
Check if lock moves smoothly and returns with the spring;
Base assembly;
Check if pusher inserts into base part slot perfectly and moves smoothly, polish if needed;
Thoroughly polish rubbing surfaces of the pusher and lock (pictures p7, p8 )
Put insert into base part (doesn't matter with end, it's symmetrical);
Insert spring (#3 BOM) into pusher's hole;
Insert pusher with spring into base part slot, aligning the spring so it enter hole in the insert part;
Check if pusher moves freely and smoothly and returns back (use your finger to ensure the spring doesn't jump out).
Put main assembly to base assembly, making sure insert parts got all the way into corresponding hole in the main assembly.;
Check if lock moves all the way into the main part when you push the pusher. Press main assembly to base while checking it;
Screw М3 screws (#5 BOM, see picture p6), into base, check it pusher still unlocks lock and retracts afterwards.
Put top cover on the main part and screw with М3х10 screws (#5.1 BOM).
Press Serpa adapter to holster base, align adapter so its mounting holes match with three M5 holes on base.
Put screws (#6 BOM) through Serpa adapter holes, and put desired spacers on screw end.
Screw Serpa adapter to holster bottom. Screw all three screws together by turning each 1-2 turns.
Polish sides of the main part where it contacts the gun if you find it hard to attach/detach gun .
Troubleshooting
After assembly (Assembly #9) unlocking failed. Solution: disassemble, grind and polush pusher top/bottom surpaces, assemble. Reteat if necessary.
Pusher moves unevenly, you can feel it stuck. Solution: polish rubbing surfaces.
The surfaces is not smooth enough after polishing. Solution: you can try thermal polishing (I haven't tried chemical polishing with PETG):
after mechanical polishing clean the parts, prepare wet cloth;
heat the surface with the heat gun or small torch until surface gleams (you can see bubbles if overheated);
gently run the wet cloth over the surface to smooth and cool it (move along the layers for side surfaces).
repeat steps 2-3 if necessary.
WARNING: use extreme caution, cause you can damage parts easily.
Russian
Описание
Кобура для страйкбольного пистолета mk23 SOCOM производства Tokyo Marui или STTI.
На разработку меня подвигло данное видео на youtube:
https://www.youtube.com/watch?v=67tAWwU9fT0
и вот эта кобура: https://www.thingiverse.com/thing:3934215
Попытался сделать ремикс из упомянутой кобуры, но сразу понял, что мне проще сделать с нуля, поэтому разработка полностью собственная.
Детали максимально унифицированы, отличаются только 2 шт - основная деталь, на которую надевается пистолет и крючок-фиксатор.
У кобуры отсутствуют крепления, вместо них прикручивается адаптер от кобуры Blackhawk Serpa.
Видео (на русском): https://youtu.be/oXulr7C7kEo
Детали
Основная часть - Main TM.stl или Main STTI.stl
Фиксатор - Lock TM.stl или Lock STTI.stl
Крышка основной части - Top.stl
Основа - Base.stl
Толкатель - Pusher.stl
Вкладыш пружины - Spring insert.stl
Проставки (печатать 3 шт) - Spacer 6.5 mm.stl или Spacer 6.5 mm.stl
Настройки Печати
материал PETG;
сопло 0.4 мм;
слой 0.2 мм;
заполнение 40% (использую сотовое);
верх/низ - 5 сплошных слоев;
стенки - 4 слоя.
Список материалов
Распечатанные детали;
Пружина фиксатора - диаметр 5 мм, длина 25-30 мм, сталь 0.5 мм;
Пружина толкателя - диаметр 5 мм, длина 35-45 мм, сталь 0.5 мм;
Шпилька М3, длина 30-35 мм (ось фиксатора);
Винты DIN912 (шестигранник, цилиндрическая головка) М3:
10 мм - 3 шт;
12 мм - 4 шт;
Винт ISO7380 (шестигранник, полукруглая головка, для крепления к основе BlackHawk Serpa) M5 16-20 мм (в зависимости от проставочных колец) - 3 шт;
Адаптер кобуры Blackhawk Serpa или китайская его реплика.
Последовательность сборки:
Тщательно убрать заусенцы;
Отполировать трущиеся поверхности основы и толкателя (рисунки p1, p2)
Отполировать трущиеся поверхности основной части и фиксатора (рисунки p3, p4)
Прочистить отверстия. Резьбовые отверстия М3 можно аккуратно пройти сверлом 2мм, удалить из них остатки поддержек, затем пройти метчиком (метчик №1, не на всю глубину).
Собрать основной механизм:
Пройти отверстие в фиксаторе сверлом 3 - 3.1 мм;
Установить фиксатор на положеное место, вложив в отверстия фиксатора и основной части пружину (№2 в списке деталей);
Вкрутить в отверстие основной части шпильку (№4 в списке деталей) так, чтобы она вошла в резьбу за фиксатором (рисунок p5);
Убедиться, что фиксатор свободно, без закусывания двигается и возаращается на место под действием пружины;
Собрать основу;
Убедиться, что толкатель легко ходит в основе, при необходимости отполировать;
Особенно тщательно отполировать поверхности соприкосновения толкателя и фикстатора (рисунки p7, p8)
Установить вкладыш в отверстие основы (все равно какой стороной, он симметричен);
Вложить пружину (№3 в списке деталей) в отверстие толкателя;
Вложить толкатель в паз основы, направив конец пружины в отверстие вкладыша;
Страхуя пружину от вылетания пальцем, проверить что толкатель движется без закусов и возвращается под действием пружины
Установить основной механизм на собранную основу, убедиться, что вкладыш полностью входит в отверстие в основе;
Убедиться, что при нажатии на толкатель фиксатор отводится. При проверке руками прижимать основной механизм к основе;
Вкрутить в основу винты М3 (№5 в списке деталей, см. рисунок p6), закрутить, убедиться что механзм работает.
Наложить крышку на отверстие основного механизма и прикрутить двумя винтами М3х10 (№5.1 в списке деталей).
Примерить крепление Serpa к нижней части основы, определиться через какие отвертия крепления пройдут винты.
Пропустить винты крепления (№6 в списке деталей) через крепление Serpa, надеть на них проставки необходимой длины.
Прикрутить полученную на шаге 10 конструкцию к основе. Закручивать все три винта по очереди на один-два оборота.
Отполировать соприкасающиеся с пистолетом детали до необходимого усилия посадки и снятия пистолета.
Проблемы и их решения
После сборки (п. 9) механизм перестает нормально работать. Решение: разобрать, сточить поверхности толкателя, собрать. При необходимости повторить.
Движение частей неравномерное, ощущается неравномерность хода. Решение: повторить шлифовку.
После шлифовки поверхность все равно недостаточно гладкая. Решение: можно попробовать термическую полировку (химическую с PETG не пробовал):
после шлифовки очищаем поверхность, готовим влажную тряпку;
нагреваем поверхность строительным феном или горелкой до стеклования поверхности (возможно появление пузырьков при перегреве);
с очень слабым нажимом проводим влажной тряпкой (для боковых поверхностей - вдоль слоев) чтобы сгладить и остудить поверхность.
при необходимости повторяем пункты 2-3.
ВНИМАНИЕ: выполнять с осторожностью, т.к. детали при этом легко повредить.
Русская версия
English
Description
Holster for airsoft gun mk23 SOCOM by Tokyo Marui or STTI.
Holster was ispired by youtube video:
https://www.youtube.com/watch?v=67tAWwU9fT0
and this holster: https://www.thingiverse.com/thing:3934215
I started remixing the above holster, but ended drawing my own from the scratch.
Parts are unified for TM/STTI versions, the only different parts is main part and lock.
Holster has no attachments, it uses Blackhawk Serpa adapters.
Video (russian): https://youtu.be/oXulr7C7kEo
Parts list
Main part - Main TM.stl or Main STTI.stl
Lock part - Lock TM.stl or Lock STTI.stl
Top cover part - Top.stl
Base part - Base.stl
Pusher part - Pusher.stl
Spring insert part - Spring insert.stl
Spacers (print 3 pcs desired sufe) - Spacer 6.5 mm.stl or Spacer 6.5 mm.stl
Printer settings
material PETG;
nozzle 0.4 мм;
layer 0.2 мм;
infill 40% (use hexagonal if available);
top/bottom - 5;
wall width - 4.
BOM
Printed parts;
Lock spring, 5 mm diameter, 25-30 mm length, steel. 0.5 mm;
Pusher spring, 5 mm diameter, 35-45 mm length, steel. 0.5 mm;
М3 threaded stud, 30-35 mm (lock axle);
DIN912 screws (hexagonal socket, cylinder head) М3:
10 mm - 3 pcs;
12 мmmм - 4 pcs;
ISO7380 screws (hexagonal socket, hemispheric head, for attaching to BlackHawk Serpa adapter) M5 16-20 mm (depending on spacer used) - 3 шт;
Adapter from Blackhawk Serpa holster or chinese knockoffs.
Assembly guide
Remove burrings;
Polish rubbing surfaces of pusher and base (see pictures p1, p2)
Polish rubbing surfaces of main block and lock (pictures p3, p4)
Clean all orifices. You can clean М3 threaded holes first drilling with 2mm drill, then after removing debris tap them with M3 tap (first manual tap), but on on all depth, a 3-4mm is enough.
Main assembly:
drill lock hole with 3 - 3.1 mm drill;
Insert lock into main block, adding a spring (#2 BOM) into corresponding holes of both block and lock;
Screw stud (#4 BOM) so it enter the threaded hole on the other side (picture p5);
Check if lock moves smoothly and returns with the spring;
Base assembly;
Check if pusher inserts into base part slot perfectly and moves smoothly, polish if needed;
Thoroughly polish rubbing surfaces of the pusher and lock (pictures p7, p8 )
Put insert into base part (doesn't matter with end, it's symmetrical);
Insert spring (#3 BOM) into pusher's hole;
Insert pusher with spring into base part slot, aligning the spring so it enter hole in the insert part;
Check if pusher moves freely and smoothly and returns back (use your finger to ensure the spring doesn't jump out).
Put main assembly to base assembly, making sure insert parts got all the way into corresponding hole in the main assembly.;
Check if lock moves all the way into the main part when you push the pusher. Press main assembly to base while checking it;
Screw М3 screws (#5 BOM, see picture p6), into base, check it pusher still unlocks lock and retracts afterwards.
Put top cover on the main part and screw with М3х10 screws (#5.1 BOM).
Press Serpa adapter to holster base, align adapter so its mounting holes match with three M5 holes on base.
Put screws (#6 BOM) through Serpa adapter holes, and put desired spacers on screw end.
Screw Serpa adapter to holster bottom. Screw all three screws together by turning each 1-2 turns.
Polish sides of the main part where it contacts the gun if you find it hard to attach/detach gun .
Troubleshooting
After assembly (Assembly #9) unlocking failed. Solution: disassemble, grind and polush pusher top/bottom surpaces, assemble. Reteat if necessary.
Pusher moves unevenly, you can feel it stuck. Solution: polish rubbing surfaces.
The surfaces is not smooth enough after polishing. Solution: you can try thermal polishing (I haven't tried chemical polishing with PETG):
after mechanical polishing clean the parts, prepare wet cloth;
heat the surface with the heat gun or small torch until surface gleams (you can see bubbles if overheated);
gently run the wet cloth over the surface to smooth and cool it (move along the layers for side surfaces).
repeat steps 2-3 if necessary.
WARNING: use extreme caution, cause you can damage parts easily.
Russian
Описание
Кобура для страйкбольного пистолета mk23 SOCOM производства Tokyo Marui или STTI.
На разработку меня подвигло данное видео на youtube:
https://www.youtube.com/watch?v=67tAWwU9fT0
и вот эта кобура: https://www.thingiverse.com/thing:3934215
Попытался сделать ремикс из упомянутой кобуры, но сразу понял, что мне проще сделать с нуля, поэтому разработка полностью собственная.
Детали максимально унифицированы, отличаются только 2 шт - основная деталь, на которую надевается пистолет и крючок-фиксатор.
У кобуры отсутствуют крепления, вместо них прикручивается адаптер от кобуры Blackhawk Serpa.
Видео (на русском): https://youtu.be/oXulr7C7kEo
Детали
Основная часть - Main TM.stl или Main STTI.stl
Фиксатор - Lock TM.stl или Lock STTI.stl
Крышка основной части - Top.stl
Основа - Base.stl
Толкатель - Pusher.stl
Вкладыш пружины - Spring insert.stl
Проставки (печатать 3 шт) - Spacer 6.5 mm.stl или Spacer 6.5 mm.stl
Настройки Печати
материал PETG;
сопло 0.4 мм;
слой 0.2 мм;
заполнение 40% (использую сотовое);
верх/низ - 5 сплошных слоев;
стенки - 4 слоя.
Список материалов
Распечатанные детали;
Пружина фиксатора - диаметр 5 мм, длина 25-30 мм, сталь 0.5 мм;
Пружина толкателя - диаметр 5 мм, длина 35-45 мм, сталь 0.5 мм;
Шпилька М3, длина 30-35 мм (ось фиксатора);
Винты DIN912 (шестигранник, цилиндрическая головка) М3:
10 мм - 3 шт;
12 мм - 4 шт;
Винт ISO7380 (шестигранник, полукруглая головка, для крепления к основе BlackHawk Serpa) M5 16-20 мм (в зависимости от проставочных колец) - 3 шт;
Адаптер кобуры Blackhawk Serpa или китайская его реплика.
Последовательность сборки:
Тщательно убрать заусенцы;
Отполировать трущиеся поверхности основы и толкателя (рисунки p1, p2)
Отполировать трущиеся поверхности основной части и фиксатора (рисунки p3, p4)
Прочистить отверстия. Резьбовые отверстия М3 можно аккуратно пройти сверлом 2мм, удалить из них остатки поддержек, затем пройти метчиком (метчик №1, не на всю глубину).
Собрать основной механизм:
Пройти отверстие в фиксаторе сверлом 3 - 3.1 мм;
Установить фиксатор на положеное место, вложив в отверстия фиксатора и основной части пружину (№2 в списке деталей);
Вкрутить в отверстие основной части шпильку (№4 в списке деталей) так, чтобы она вошла в резьбу за фиксатором (рисунок p5);
Убедиться, что фиксатор свободно, без закусывания двигается и возаращается на место под действием пружины;
Собрать основу;
Убедиться, что толкатель легко ходит в основе, при необходимости отполировать;
Особенно тщательно отполировать поверхности соприкосновения толкателя и фикстатора (рисунки p7, p8)
Установить вкладыш в отверстие основы (все равно какой стороной, он симметричен);
Вложить пружину (№3 в списке деталей) в отверстие толкателя;
Вложить толкатель в паз основы, направив конец пружины в отверстие вкладыша;
Страхуя пружину от вылетания пальцем, проверить что толкатель движется без закусов и возвращается под действием пружины
Установить основной механизм на собранную основу, убедиться, что вкладыш полностью входит в отверстие в основе;
Убедиться, что при нажатии на толкатель фиксатор отводится. При проверке руками прижимать основной механизм к основе;
Вкрутить в основу винты М3 (№5 в списке деталей, см. рисунок p6), закрутить, убедиться что механзм работает.
Наложить крышку на отверстие основного механизма и прикрутить двумя винтами М3х10 (№5.1 в списке деталей).
Примерить крепление Serpa к нижней части основы, определиться через какие отвертия крепления пройдут винты.
Пропустить винты крепления (№6 в списке деталей) через крепление Serpa, надеть на них проставки необходимой длины.
Прикрутить полученную на шаге 10 конструкцию к основе. Закручивать все три винта по очереди на один-два оборота.
Отполировать соприкасающиеся с пистолетом детали до необходимого усилия посадки и снятия пистолета.
Проблемы и их решения
После сборки (п. 9) механизм перестает нормально работать. Решение: разобрать, сточить поверхности толкателя, собрать. При необходимости повторить.
Движение частей неравномерное, ощущается неравномерность хода. Решение: повторить шлифовку.
После шлифовки поверхность все равно недостаточно гладкая. Решение: можно попробовать термическую полировку (химическую с PETG не пробовал):
после шлифовки очищаем поверхность, готовим влажную тряпку;
нагреваем поверхность строительным феном или горелкой до стеклования поверхности (возможно появление пузырьков при перегреве);
с очень слабым нажимом проводим влажной тряпкой (для боковых поверхностей - вдоль слоев) чтобы сгладить и остудить поверхность.
при необходимости повторяем пункты 2-3.
ВНИМАНИЕ: выполнять с осторожностью, т.к. детали при этом легко повредить.
Similar models
thingiverse
free
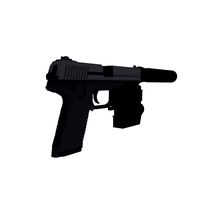
Slinghot Pistol for 6mm airsoft BB by SteamGun
... 100 % заполнением
обязательно обмотайте ствол резинкой, как на фотографии, сделайте демпфер, чтобы поршень не разбился от удара.
grabcad
free

Airsoft electric loader (in progress)
...я в зависимости от жесткости пружины).
примечание - я использую серву с усилием 21.8 кг.см, без проблем заряжаются механки dday).
thingiverse
free

hub rear rc car mmax rh1031 rh1035 remo hobby by d19codec
...рите 2 комплекта)
ну и сами cvd привода, если вдруг в россии перестали продавать,
подходят на m-max и 9emu: http://ali.pub/5hdxmu
grabcad
free

The Settlers of Catan game organizer / Органайзер для игры Колонизаторы
...но вообще, люди наоборот делают не выступ круглым, а само отверстие побольше, как оказалось) можете исправить у себя.
sw2019(?)
cg_trader
$25

Christian cross | 3D
...нсформировать и по отдельности печатать или фрезеровать . длина креста вмесе с ушком 67 мм на 37мм, камни 4 шт диаметром 2.25 мм.
3ddd
$2

штора
...штора
3ddd
масштаб в мм, все что на фото есть в архиве
cg_trader
$5

Video stabilizer
...в отделе велопродаж,
стоят копейки ).
размер:
внутренний диаметр 8 мм/0,31 ,
внешний диаметр 22 мм/0,87,
толщина 7 мм/0,28"
grabcad
free

Krimelte foamheater
... площадках не всегда есть возможность подключения к электросети). устройство простое в использовании и безопасно для потребителя.
thingiverse
free

phone holder for Bicycle Sony M by Alexsandr3D
...lder for bicycle sony m by alexsandr3d
thingiverse
держатель крепится на руль при помощи опоры для пластиковых труб, и винта м3.
3ddd
free

Смеситель Jacob Delafon FAIRFAX
...сителя - 256 мм, низкого - 172 мм. ссылка на коллекцию -http://www.jacobdelafon.ru/catalogue/collection/23807/list.html
Igdrassil
thingiverse
free

Element LLM01 flashlight front bezel by igdrassil
...asy to sand).
0.3 mm nozzle / 0.15 mm layer heigh.
лучше печатать из abs (проще обрабатывать).
ноззл 0.3 мм, высота слоя 0.15 мм.
thingiverse
free

SureFire flash hider by igdrassil
...ь, прочистить резьбу.
две версии на резьбу 14мм - левая (l) и правая (r) резьба (буквы l и r указаны в конце названия stl файла).
thingiverse
free

Element LLM01 mode switch knob by igdrassil
...учшенная в мои ручонки еще не попадала).
возможно, придется чуть подпилить ось переключателя для полной посадки.
печатал из petg.
thingiverse
free

Picattiny 19mm riser by igdrassil
... сопло 0.4 мм, стены/верх/низ 4-6, заполнение 40-45%. печать с поддержками, передней частью вверх (или, если вы верующий - вниз).
thingiverse
free

G&G auto-tracer unit back for -14mm thread by igdrassil
...ный задник с левой резьбой 14 мм для использования трассерной насадки g&g с разными страйкбольными приводами. печатал из abs.
thingiverse
free

Heavy gas block for canadian/british M4 by igdrassil
...печатал из abs. лишние отверстия для стевлоколоконных стержней или стальных шпилек.
мушку переставить со страйкбольного газблока.
thingiverse
free

R-187-P1 Azart - headset remote (PU) dummy by igdrassil
...му типа подключается проводом рация и к нему уже подключается гарнитура, а также внешние ништяки типа зарядника/внешнего питания.
thingiverse
free
M249 front sight post repair for airsoft (Classic Army) by igdrassil
...о поддержки.
зачистить после распечатки, пройти резьбы метчиками м3 и м5, перенести мушку и фиксирующий винт из сломанной стойки.
thingiverse
free
SF Self-locking silencer for airsoft by igdrassil
... мм;
слой 0.2 мм;
заполнение 40% (в идеале сотовое);
верх/низ - 5;
стены - 4.
сборка
прочистить резьбы, скрутить как на рисунках.
thingiverse
free
Azart - antenna relocator "Protivoves" by igdrassil
...есто пайки герметиком, иначе кабель будет насасывать воду при погружении в оную или под сильным дождем.
дальше см. по ссылке выше
Stti
thingiverse
free

stti mk23 suppressor end cap by anticolette
...ette
thingiverse
the size may need to be tweaked to fit perfectly !
here is the editable parametric fusion360 file via this link
thingiverse
free

STTi USP (NBB) Rail Adapter by Nain
...ner guillaume dethu https://grabcad.com/dethu.guillaume-1https://grabcad.com/library/hk-usp-match-gun-lara-croft-tombraider-gun-1
thingiverse
free

MK23 dual TDC for TM, STTI, SSX23 by berenyi
...n.
i use chep's cura profile to print this.
this is my first project (remix), i am only one week into 3d printing. be gentle!
thingiverse
free

STTi USP (NBB) Silencer by Nain
...hich you can also glue
/! be careful it is an airsoft accessory, it should not be used on a real weapon without risk of injury /!
thingiverse
free

STTi/ASG/TM Mk23 Socom LAM Kit (Dummy) by Nain
...f printer at my work to do it but i think you should have no problem for the print with fdm, please share the picture of yours ;)
thingiverse
free

MK 23 Cap - for no suppressor setup with thread by aziodale
...barrel for no suppressor setup with thread; tested on stti version tappo canna esterna per mk23 per configurazioni senza...
thingiverse
free

MK23 GUIDE FOLLOWER
...guide follower thingiverse mk23 guide follower for mag mk23 asg/stti . i did not have time to try on...
thingiverse
free

MK23 Follower by TacticalBros
...to 30 bb's in one mag. tested only with stti magazines. let me know if you try it with...
thingiverse
free

Silencieux MK23 avec chicane et filetage by GhostSniperFR
...chicane et filetage by ghostsniperfr thingiverse silencieux pour mk23 stti avec chicane et filetage. le silencieux est à imprimer...
Mk23
turbosquid
$2

MK23
... available on turbo squid, the world's leading provider of digital 3d models for visualization, films, television, and games.
turbosquid
$2

MK23
... available on turbo squid, the world's leading provider of digital 3d models for visualization, films, television, and games.
3ddd
$1
MK23
...mk23
3ddd
пистолет
3ds max 2014, vray 3, textures include
3d_export
$15

SOCOM Mk23 3D Model
...weapon special operations command army military combat handgun gun ballistic bullet shoot
socom mk23 3d model urgo 16463 3dexport
design_connected
$16

Marouk MK23 PopArt H Carpet
...marouk mk23 popart h carpet
designconnected
mischioff marouk mk23 popart h carpet computer generated 3d model.
3d_export
$19
Heckler Koch Mk23 3D Model
...le sniper machine gatling gun pistol handgun weapon game ready gameready
heckler koch mk23 3d model martialartist 22685 3dexport
turbosquid
$20

Heckler&Koch Mk23 SOCOM
... available on turbo squid, the world's leading provider of digital 3d models for visualization, films, television, and games.
3d_export
$28
Heckler Koch Mk23 SOCOM 3D Model
...per machine gatling gun pistol handgun weapon game ready gameready
heckler koch mk23 socom 3d model martialartist 22682 3dexport
3d_export
$15
HK Mk23 SOCOM 3D Model
...om 3d model
3dexport
usp pistol socom 45cal heckler&koch weapon gun
hk mk23 socom 3d model anton9421942322 92737 3dexport
3d_export
$25

Heckler Koch Mk23 LAM 3D Model
...niper machine gatling gun pistol handgun weapon game ready gameready
heckler koch mk23 lam 3d model martialartist 22683 3dexport
Socom
turbosquid
free
socom
... available on turbo squid, the world's leading provider of digital 3d models for visualization, films, television, and games.
turbosquid
free
socom.3DS
... available on turbo squid, the world's leading provider of digital 3d models for visualization, films, television, and games.
turbosquid
$60
Colt SOCOM OHWS
... 3d model colt socom ohws for download as blend, fbx, and obj on turbosquid: 3d models for games, architecture, videos. (1533361)
turbosquid
free
socom 9mm pistol
... available on turbo squid, the world's leading provider of digital 3d models for visualization, films, television, and games.
turbosquid
free

SOCOM MK 23
... available on turbo squid, the world's leading provider of digital 3d models for visualization, films, television, and games.
3d_export
$15
SOCOM Mk23 3D Model
...weapon special operations command army military combat handgun gun ballistic bullet shoot
socom mk23 3d model urgo 16463 3dexport
3d_export
$10
Gun Socom Maya 3D Model
... maya 3d model
3dexport
gun pistol socom 3d model maya mb highpoly hypoly
gun socom maya 3d model emailnikola23511 30739 3dexport
3d_export
$15
HK Mk23 SOCOM 3D Model
...om 3d model
3dexport
usp pistol socom 45cal heckler&koch weapon gun
hk mk23 socom 3d model anton9421942322 92737 3dexport
turbosquid
$20
Heckler&Koch Mk23 SOCOM
... available on turbo squid, the world's leading provider of digital 3d models for visualization, films, television, and games.
3d_export
$28
Heckler Koch Mk23 SOCOM 3D Model
...per machine gatling gun pistol handgun weapon game ready gameready
heckler koch mk23 socom 3d model martialartist 22682 3dexport
Holster
3d_export
$5

Knife Holster
...knife holster
3dexport
knife & holster
3d_export
$49
millitary belt with and holster
...millitary belt with and holster
3dexport
millitary belt with and holster 3d model
turbosquid
$13

Operational holster Gun
...oyalty free 3d model operational holster gun for download as on turbosquid: 3d models for games, architecture, videos. (1622037)
3d_export
$49

mauser k50 with holster
... no internal parts and moving parts. can only be used as a replica. even when 3d is printed, it is impossible to fire the bullet.
3d_export
$49

luger p08 wih holster
... no internal parts and moving parts. can only be used as a replica. even when 3d is printed, it is impossible to fire the bullet.
3d_ocean
$4
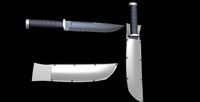
Army Knife
...weapon a model of an army knife with a holster for it. some basic materials are...
3d_export
$40

9mm handgun 3D Model
...handgun 3d model 3dexport weapon pistol gun handgun 9mm holster silencer 9mm handgun 3d model download .c4d .max .obj...
cg_studio
$40

9mm handgun3d model
...handgun3d model cgstudio weapon pistol gun handgun 9mm generic holster silencer .3ds .c4d .dae .dxf .fbx .obj - 9mm...
3d_export
$20
Colt Dragoon 1848 3D Model
...gun army military american civil war firearm weapon cavalry holster second model antique cowboy mexican colt dragoon 1848 3d...
3d_export
$150

US Military Lc2 gear 3D Model
...green berets rangers force troops gear equipment lc2 pouch holster sack us military lc2 gear 3d model timb120 65273...
Tm
3d_export
$16

7276 stool grupo tm
...7276 stool grupo tm
3dexport
7276 stool grupo tm
turbosquid
$129

TM concept30 bodykit
...ree 3d model tm concept30 bodykit for download as max and obj on turbosquid: 3d models for games, architecture, videos. (1539944)
3d_export
$50

Tms Fort02 3D Model
...tms fort02 3d model
3dexport
fort castle
tms fort02 3d model truemen.studio 6749 3dexport
3d_export
$50

Tms Fort03 3D Model
...tms fort03 3d model
3dexport
fort castle
tms fort03 3d model truemen.studio 6751 3dexport
3d_export
$50
Tms Fort05 3D Model
...tms fort05 3d model
3dexport
fort castle
tms fort05 3d model truemen.studio 6761 3dexport
3ddd
$1

OGGI TM LAMPADARI
...oggi tm lampadari
3ddd
mm lampadari
люстры
3d_export
$16

Cello(tm) pen 3D Model
...cello(tm) pen 3d model
3dexport
pen cello tm 3d model max mb ma
cello(tm) pen 3d model happy3d 3466 3dexport
3ddd
$1

Norsap TM 1500
...norsap tm 1500
3ddd
norsap
model included texture
кресло оператора
turbosquid
$25

2259 chair GRUPO TM
...royalty free 3d model 2259 chair grupo tm for download as max on turbosquid: 3d models for games, architecture, videos. (1697270)
turbosquid
$14

TMs Living Room Interior
...ty free 3d model tms living room interior for download as fbx on turbosquid: 3d models for games, architecture, videos. (1441667)