Thingiverse
HEPA/Carbon Air Cleaner / Scrubber by RJ_Make
by Thingiverse
Last crawled date: 3 years ago
UPDATE: 03/07/2016
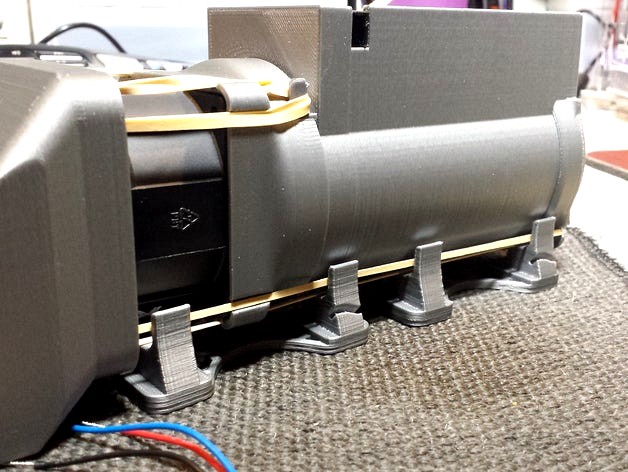
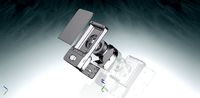
Found a flaw in the design. You need to glue in an extension piece to the carbon chamber. This extension keep air from by-passing the carbon at the front most lip. (See Picture)
UPDATE: 03/07/2016
Added Assembly Video Youtube
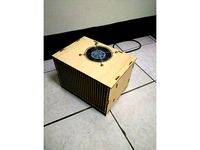
This is a fairly substantial remix of Rod Lairds Replicator 2/2x respirator filter air scrubber. You can find it here http://www.thingiverse.com/thing:125264
I want to say thanks to Rod for sharing, not only his design but experience. Without his spark of ingenuity and design talent this would not be possible.
The Reason for an Air Scrubber:
There has been a lot of talk about desktop 3D printing and it's effects inside the home. There are a few studies that show the emission rates of Ultra Fine Particles and VOC's from 3D printing rising to what could be considered harmful levels. Here is a recent study that was published about it. http://pubs.acs.org/doi/full/10.1021/acs.est.5b04983
After looking for a possible solution for an embedded filtration system for my Flashforge Creator Pro, I stumbled across Rod Laird's air scrubber couplings for use with a respirator (the kind found in breathing masks) and high pressure fan motor.
I thought perfect; so I ordered a High Pressure Axial Fan and printed up Rod's fantastic couplings. There's was a problem though, I could not obtain the resperator Rod uses in the US, so I purchased the Neiko R-621 on Amazon that was recommend in Rod's thingy comments.
The Problem:
So I had everything together and what I found was very disappointing. In order to move any appreciable amount of air through the R-621 respirator I had to max out the motor. Maxing out this motor creates a TON of noise, It's just WAY too loud.
@9v I could get about 155 FPM to move through the respirator and it was VERY loud!
@7.5v I could get about 115 FPM to move through the respirator, the noise was Ok!
Here is a video on my testing, (using an AMPROBE TMA40-4 Anemometer) of this respirator at Youtube
The bottom line is, unless you are willing to run the motor (the Delta in the link below) at 12v and deal with the noise, I doubt very seriously it's doing much of anything using the R-621 respirator.
The Quest for a Solution:
Well it's not a 100% perfect solution, and it does require a large investment of both time and money to convert a Flashforge Creator Pro or Like machine to get this to work well.
I will be posting a few video's for assembly and testing of my remix in the future so subscribe to either my Twitter and or YouTube account.
Things you will need to consider before proceeding:
1) If you own a Flashforge Creator Pro with the factory top you MUST replace it with the Makerbot top. I found there is no easy way to seal the existing top and the top to the frame of the printer. If the top of the FFCP is not sealed well, I doubt this or any other scrubber will work very well. (See Pictures)
2) You must seal up every seam in the top of the printer using some clear silicone. This includes sealing the carry handles with some covers. I also recommend sealing the bottom rear seam where the steel bottom meets the back wall. (See Pictures)
3) You will need to be able cut a square hole in the rear of the printer, it's pretty easy if you are handy with a Dremel. You will not be able to use the front cowl included in Rod's thingy as it reduces too much air flow. (See Pictures)
4) If your door does not close completely, you will need to superglue 2 magnets on either side to force the door closed. (See Pictures)
Supplies:
1)Silicon
2)High Pressure Fan
3)Adjustable 12vdc Power Supply
4)1/2" x 1/8" Neodymium Magnets for Printer Top and Door
5)Rubber Bands
6)Roomba 800 HEPA Filters (these are not OEM) You may need to cut one side of the filter key off (dims are slightly different filter to filter)
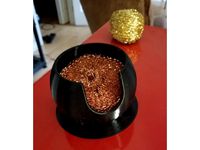
7)Activated Carbon Pellets
8) Super Glue
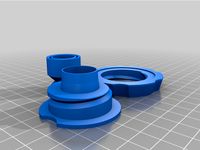
Printed Items: (Starting from the Front Cowl)(Most should load in correct orientation)
All Printed @ 35% Infill except Grates @ 100%. Speed 50 mm/s ABS
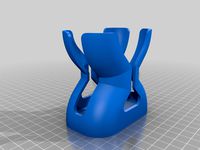
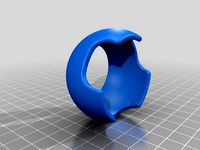
1)The Front_Cowl (1) should be printed with motor side down with minor supports
2)The Motor_Coupler_Insert (1) should be printed motor side up with minor supports
3)The Motor_Filter_Coupling (1) should be printed motor side down with minor supports
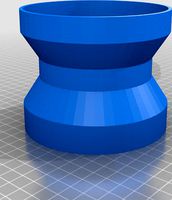
4)The Filter_Body_Top (1) should be printed with filter body down (glue end bottom)
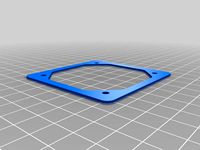
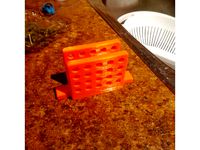
5)The Filter_Body_Grate (2) should be printed face down without any supports
6)The Filter_Body_Bottom (1) should be printed base down with minor supports and a tight brim.
7)The Filter_Body_End Cover (1) should be printed insert rim up with no supports
8)The Filter_Body_Stand (2) should be printed bottom side down with minor supports
9) Chamber_Extension (1) should be printed bottom side down without any supports
Assembly:
1) Superglue one Filter_Body_Grate into the Filter_Body_Top.
2) Superglue the Filter_Body_Top to the Filter_Body_Bottom making sure the area where the filter gasket will rest on is level on both sides.
3) Attach the Motor_Filter_Coupling to the Filter_Body_Top and seal the inside seam with silicone (Do not use super glue).
4) Superglue the 2nd Filter_Body_Grate (if you want to divide the carbon chamber) where you want it inside the chamber.
5) Superglue the Filter_Body_End-Cover to the bottom of the Filter_Body_Bottom.
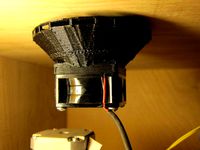
6) Attach The Motor_Filter_Coupling to the Motor
7) Attach the Motor_Coupler_Insert to the outlet of the motor (Wiring running through fitting)
8) Attach the rubber bands to hold everything in place (you may need to double your rubber bands on the bottom due to the weight of the body.
9) Attach the the Front_Cowl over the Motor_Coupler_Insert (Wiring running through fitting)
10) Install into printer (on right for FFCP) and line up everything keeping the Front Cowl right up against the 'steel' corner. Use a red,gold or silver maker and outline the Front Cowl to the rear wall of the printer. I just marked the top and left side and used the steel corner and steel bottom as my guide for those sides. (Remove air scrubber)
11) Carefully cut out marked area on back wall with a Dremel. Making the hole just large enough so the first few mm pass into the back wall. (cutting ON your line should allow for this)
12) Clean up all the plastic from the cutting process. ;-)
13) Re-install Filter Assm back into printer and attach to power supply.
UPDATED: You need to glue in an extension piece to the carbon chamber. (See Picture)
YOU ARE DONE!
In my testing 6v is the lowest voltage you can use to move ~190 FPM, but if you can handle the noise the filter worked better at 7.5v. I'm using mine at 6v.
Found a flaw in the design. You need to glue in an extension piece to the carbon chamber. This extension keep air from by-passing the carbon at the front most lip. (See Picture)
UPDATE: 03/07/2016
Added Assembly Video Youtube
This is a fairly substantial remix of Rod Lairds Replicator 2/2x respirator filter air scrubber. You can find it here http://www.thingiverse.com/thing:125264
I want to say thanks to Rod for sharing, not only his design but experience. Without his spark of ingenuity and design talent this would not be possible.
The Reason for an Air Scrubber:
There has been a lot of talk about desktop 3D printing and it's effects inside the home. There are a few studies that show the emission rates of Ultra Fine Particles and VOC's from 3D printing rising to what could be considered harmful levels. Here is a recent study that was published about it. http://pubs.acs.org/doi/full/10.1021/acs.est.5b04983
After looking for a possible solution for an embedded filtration system for my Flashforge Creator Pro, I stumbled across Rod Laird's air scrubber couplings for use with a respirator (the kind found in breathing masks) and high pressure fan motor.
I thought perfect; so I ordered a High Pressure Axial Fan and printed up Rod's fantastic couplings. There's was a problem though, I could not obtain the resperator Rod uses in the US, so I purchased the Neiko R-621 on Amazon that was recommend in Rod's thingy comments.
The Problem:
So I had everything together and what I found was very disappointing. In order to move any appreciable amount of air through the R-621 respirator I had to max out the motor. Maxing out this motor creates a TON of noise, It's just WAY too loud.
@9v I could get about 155 FPM to move through the respirator and it was VERY loud!
@7.5v I could get about 115 FPM to move through the respirator, the noise was Ok!
Here is a video on my testing, (using an AMPROBE TMA40-4 Anemometer) of this respirator at Youtube
The bottom line is, unless you are willing to run the motor (the Delta in the link below) at 12v and deal with the noise, I doubt very seriously it's doing much of anything using the R-621 respirator.
The Quest for a Solution:
Well it's not a 100% perfect solution, and it does require a large investment of both time and money to convert a Flashforge Creator Pro or Like machine to get this to work well.
I will be posting a few video's for assembly and testing of my remix in the future so subscribe to either my Twitter and or YouTube account.
Things you will need to consider before proceeding:
1) If you own a Flashforge Creator Pro with the factory top you MUST replace it with the Makerbot top. I found there is no easy way to seal the existing top and the top to the frame of the printer. If the top of the FFCP is not sealed well, I doubt this or any other scrubber will work very well. (See Pictures)
2) You must seal up every seam in the top of the printer using some clear silicone. This includes sealing the carry handles with some covers. I also recommend sealing the bottom rear seam where the steel bottom meets the back wall. (See Pictures)
3) You will need to be able cut a square hole in the rear of the printer, it's pretty easy if you are handy with a Dremel. You will not be able to use the front cowl included in Rod's thingy as it reduces too much air flow. (See Pictures)
4) If your door does not close completely, you will need to superglue 2 magnets on either side to force the door closed. (See Pictures)
Supplies:
1)Silicon
2)High Pressure Fan
3)Adjustable 12vdc Power Supply
4)1/2" x 1/8" Neodymium Magnets for Printer Top and Door
5)Rubber Bands
6)Roomba 800 HEPA Filters (these are not OEM) You may need to cut one side of the filter key off (dims are slightly different filter to filter)
7)Activated Carbon Pellets
8) Super Glue
Printed Items: (Starting from the Front Cowl)(Most should load in correct orientation)
All Printed @ 35% Infill except Grates @ 100%. Speed 50 mm/s ABS
1)The Front_Cowl (1) should be printed with motor side down with minor supports
2)The Motor_Coupler_Insert (1) should be printed motor side up with minor supports
3)The Motor_Filter_Coupling (1) should be printed motor side down with minor supports
4)The Filter_Body_Top (1) should be printed with filter body down (glue end bottom)
5)The Filter_Body_Grate (2) should be printed face down without any supports
6)The Filter_Body_Bottom (1) should be printed base down with minor supports and a tight brim.
7)The Filter_Body_End Cover (1) should be printed insert rim up with no supports
8)The Filter_Body_Stand (2) should be printed bottom side down with minor supports
9) Chamber_Extension (1) should be printed bottom side down without any supports
Assembly:
1) Superglue one Filter_Body_Grate into the Filter_Body_Top.
2) Superglue the Filter_Body_Top to the Filter_Body_Bottom making sure the area where the filter gasket will rest on is level on both sides.
3) Attach the Motor_Filter_Coupling to the Filter_Body_Top and seal the inside seam with silicone (Do not use super glue).
4) Superglue the 2nd Filter_Body_Grate (if you want to divide the carbon chamber) where you want it inside the chamber.
5) Superglue the Filter_Body_End-Cover to the bottom of the Filter_Body_Bottom.
6) Attach The Motor_Filter_Coupling to the Motor
7) Attach the Motor_Coupler_Insert to the outlet of the motor (Wiring running through fitting)
8) Attach the rubber bands to hold everything in place (you may need to double your rubber bands on the bottom due to the weight of the body.
9) Attach the the Front_Cowl over the Motor_Coupler_Insert (Wiring running through fitting)
10) Install into printer (on right for FFCP) and line up everything keeping the Front Cowl right up against the 'steel' corner. Use a red,gold or silver maker and outline the Front Cowl to the rear wall of the printer. I just marked the top and left side and used the steel corner and steel bottom as my guide for those sides. (Remove air scrubber)
11) Carefully cut out marked area on back wall with a Dremel. Making the hole just large enough so the first few mm pass into the back wall. (cutting ON your line should allow for this)
12) Clean up all the plastic from the cutting process. ;-)
13) Re-install Filter Assm back into printer and attach to power supply.
UPDATED: You need to glue in an extension piece to the carbon chamber. (See Picture)
YOU ARE DONE!
In my testing 6v is the lowest voltage you can use to move ~190 FPM, but if you can handle the noise the filter worked better at 7.5v. I'm using mine at 6v.
Similar models
thingiverse
free

Mini Air Scrubber by CoolNamesAllTaken
...m of the scrubber and expelled through the top (out the fan). the scrubber is intended to be screwed to a wall or other surface.
thingiverse
free

DB's Basic Respirator with replaceable filter by DanBuro
... foam
along the inside edge and edge. if you use silicone rubber,
let it cure fully otherwise you'll get a skin rash from it.
thingiverse
free

Air Filter/Scrubber by BillyK
...ly works well... and if you completely fill it, it should continue to filter for over a year depending on what you are filtering.
thingiverse
free
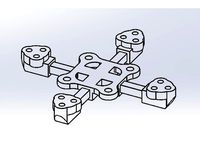
Adjustable micro quadcopter frame for 0703 motors by HerringTin
...of the carbon rods inside.
you wont be able to remove a motor without destroying the motor mount but its 3d printed so who cares.
thingiverse
free

3D Printer Enclosure Filter by czmorris
...e two attachment points at the top for mounting the filter. there is a tray which sits on the top for easily changing the filter.
thingiverse
free
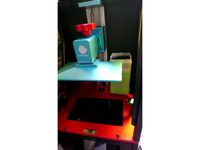
A passive filter box for anycubic photon printer by 1C1OOCC
...of the container to prevent the leakage of activated carbon pellets.
p.s. you still need to keep a good ventilation environment!
thingiverse
free
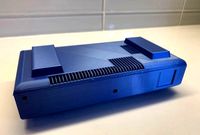
PocketTRS Enclosure by Waltermixxx
... these off after it prints. :) printed on a cr-10, but it less than 8" wide so most printers should be able to handle it. :)
thingiverse
free

Activated Carbon Air Filter - 3 fan USB powered by Deaner3D
...o import into anything and edit easily.
fyi - it uses 3x 5v axial fans to pull air from the top and spit it out the sides/bottom.
thingiverse
free

Screwdriver rack for desktop or pegboard by Everything_3D
.... no support needed, the gap in the middle will bridge fine.
if you have any changes you think i should make, please let me know!
thingiverse
free
HEPA air filter scrubber tower addons by GMagician
...ter seal fan from dirty air
grate need to be tested to see if air flow is good enough (i have no h/w to change fan pwm and test).
Scrubber
turbosquid
$29
face scrubber
... available on turbo squid, the world's leading provider of digital 3d models for visualization, films, television, and games.
3d_export
$29
ride on scrubber dryer
...t will enhance the detail and realism of any of your rendering projects.<br>available 3d file format: max2013, fbx, obj,3ds
3d_sky
free

Scrubber
...scrubber
3dsky
useful helper in kitchens
thingiverse
free

Scrubber Funnel by Ravenmouth
...ht as the filling line (at least on my scrubbers please do an individual test whether your scrubber was filled correctly or not).
thingiverse
free
Tawashi Scrubber Holder
...ber holder
thingiverse
a holder for the kamenoko tawashi scrub brush.
https://www.bonappetit.com/story/kamenoko-tawashi-scrubber
thingiverse
free
Solder Scrubber Pot by Rhackleford
...t even more anti spill.
i intend to use it for holding pot scrubbers to use as a solder scrubber.
i scaled down to fit a scrubber
thingiverse
free
Scrubber Dryer by dionnel
...s little holder will allow your dish-washing scrubber to dry until it is needed again. fits nicely between the sink and the wall.
thingiverse
free
Funnel for CCR Liberty scrubber by _iw0gz_
...funnel for ccr liberty scrubber by _iw0gz_
thingiverse
funnel for ccr liberty scrubber
thingiverse
free
Metal Scrubber Grip by jlanger
...rubbers for skillets art the best! but they get gross after a while, this is a gripper that fits a lot of different kinds! enjoy!
thingiverse
free
Fume Scrubber by unitconversion
...ended to go inside of a heated build environment and keep the interior fume levels down without wasting heat by blowing them out.
Hepa
3d_export
$10

HEPA filter air purifier
...xture format: .png .jpg<br>resolution: 1024*1024<br>pbr in substance painter<br>formats: .obj .gltf .fbx .blend
3d_export
$10
Dehumidifier H13 HEPA filter air purifier
...painter available for all software<br>ue4. ue5. blender. maya. 3d max. unity. c4d.<br>formats: .obj .gltf .fbx .blend
cg_studio
$30

Vacuum cleaner Electrolux3d model
...electronics home vacuum cleaner electrolux ultra silencer 1800 watt hepa filter wash dust collector dirty electronic clear hose brush...
3ddd
$1

Очиститель воздуха Zepter Therapy Air iOn
...модель- ap-1004ahzpt напряжение(напряжение в сети)- 220-240 в способ пылеочистки- hepa filter (тип h13) меры безопасности- автоматическое выключение размеры помещения-...
thingiverse
free

HEPA 13 Filter (not true hepa) by darkprinc
...s warned this is not safe as hepa by any standard... but that should be at your own discretion...
syntaxx thx for the observation
thingiverse
free
HEPA Filter by redwite
...er by redwite
thingiverse
this machine is for honeywell hepa filter (hpa 100),it can easily to assemibly and get good
clean air.
thingiverse
free
HEPA filter Respirator by NeverBe
...ter respirator by neverbe
thingiverse
all prints without supports.
may use with 2 hepa-filters or with one for economy, use cap.
thingiverse
free

HEPA Filter ZS203 by Brettarm
...filter zs203 by brettarm
thingiverse
hepa filter zs203 $5 on aliexpress
i'm using it to suck plastic fumes out of my printer
thingiverse
free

HEPA filter
...lter is done you just need to screw it to the surface you want and make ventilation hole :)
enjoy and share!!!
subscribe for info
thingiverse
free

Hepa Filter for 3d printer by dvilleneuve
...ust add 2 x 120mm fan and a hepa vilter for ivahap100 and you have a particule and odor filter to printer abs on your 3dprinter !
Rj
3d_export
$5

BBS RJ RG R16
...bbs rj rg r16
3dexport
двухсоставные колпачки для bbs rj rg r16
3ddd
$1
Irobot RJ
... пылесос
это что то вроде умного пылесоса :)модель придумана.можно использовать в robotic studio так как полигонов немного.
cg_studio
$49

Canadair RJ-700 Delta Connection3d model
...odel
cgstudio
.max - canadair rj-700 delta connection 3d model, royalty free license available, instant download after purchase.
3d_export
$35
RJ45 3D Model
...rj45 3d model
3dexport
rj45 net nets rj-45 connection jack ethernet
rj45 3d model deviacium 5819 3dexport
cg_studio
$129

BAe 146 a3d model
...bae 146 a3d model cgstudio aircraft avro rj rj bae 146 british bae146 uk aerospace euro eurowing germany...
3d_export
$20

bts bt21 hanbok seria set cookie forms
...or 7 centimeters in height<br>7 characters without van<br>koya, tata, rj shooky, chimmy, mang,...
3d_export
$10

patch panel
...it projects.<br>originally modelled in solidworks 2015.<br>-19 ", 1u, 24 rj45 ports.<br>-all colors can be easily modified.<br>-all materials are included.<br>-solidworks...
3d_export
$8

Acustic guitar low-poly PBR game ready
...pbr game ready 3dexport acustic guitar modeled after renome's rj series guitar. the model has <br> and <br>.<br>the texture...
thingiverse
free

RJ Cross by Jbech002
...rj cross by jbech002
thingiverse
it is a cross with an rj logo on it.
3dfindit
free
RJS & RJC
...rjs & rjc
3dfind.it
catalog: wmberg
Cleaner
archibase_planet
free
Cleaner
...cleaner
archibase planet
crane lift
fased cleaner - 3d model for interior 3d visualization.
3d_export
$12

vacuum cleaner
...vacuum cleaner
3dexport
vacuum cleaner fo houses
3ddd
$1

Vacuum Cleaner
...vacuum cleaner
3ddd
пылесос
vacuum cleaner + obj + textures
turbosquid
$4

Cleaner
...r 3d model for download as max, obj, c4d, fbx, dwg, and blend on turbosquid: 3d models for games, architecture, videos. (1514067)
archibase_planet
free

Vacuum cleaner
...cuum cleaner vacuum hoover exhauster
vacuum cleaner stefano galli n250213 - 3d model (*.gsm+*.3ds) for interior 3d visualization.
archive3d
free

Cleaner 3D Model
...archive3d
cleaner bathroom ware
cleaner - 3d model (*.gsm+*.3ds) for interior 3d visualization.
archive3d
free

Cleaner 3D Model
...e3d
brush cleaner sanitary ware
cleaner - 3d model (*.gsm+*.3ds) for interior 3d visualization.
archive3d
free

Cleaner 3D Model
...h cleaner sanitary ware
cleaner n210608 - 3d model (*.gsm+*.3ds) for interior 3d visualization.
3d_ocean
$17

Window Cleaner Platform
...tform rooftop window window cleaner platform
model of a window cleaner platform made in cinema 4d. files inlcuded: .c4d .obj .3ds
archive3d
free

Cleaner 3D Model
...ment
vacuum cleaner samsung vcc_sc 9560 - 3d model (*.gsm+*.3ds) for interior 3d visualization.
Carbon
3d_ocean
$2

Carbon Textures
...usty shiny tga tileable
a pack of 5 carbon textures. tileable. 512×512 pixel sized. jpg , tga image format given. stay connected
design_connected
$16

Carbon Chair
...carbon chair
designconnected
moooi carbon chair chairs computer generated 3d model. designed by marcel wanders.
3ddd
$1

Carbon touring desk
... tonino lamborghini casa , стол
tonino lamborghini casa carbon touring desk
turbosquid
$1
carbonic acid
...id
royalty free 3d model carbonic acid for download as blend on turbosquid: 3d models for games, architecture, videos. (1517834)
design_connected
$7

Carbon Shagreen Box
...carbon shagreen box
designconnected
carbon shagreen box computer generated 3d model.
turbosquid
$90
Carbon NanoSheet
... available on turbo squid, the world's leading provider of digital 3d models for visualization, films, television, and games.
turbosquid
$90
Carbon Nanotube
... available on turbo squid, the world's leading provider of digital 3d models for visualization, films, television, and games.
turbosquid
$40

carbon nanosheet
... available on turbo squid, the world's leading provider of digital 3d models for visualization, films, television, and games.
turbosquid
$38

Carbon Planet
... available on turbo squid, the world's leading provider of digital 3d models for visualization, films, television, and games.
turbosquid
$29

Carbon dioxide
... available on turbo squid, the world's leading provider of digital 3d models for visualization, films, television, and games.
Air
3ddd
$1
Calligaris air
...calligaris air
3ddd
air , calligaris
cтул calligaris air
3ddd
$1

Air freshener
...air freshener
3ddd
air freshener , освежитель
air freshener
design_connected
$16

Air
...air
designconnected
flexform air lounge chairs computer generated 3d model. designed by antonio citterio.
turbosquid
$250

Heat pump air air
... available on turbo squid, the world's leading provider of digital 3d models for visualization, films, television, and games.
3d_export
$5
air
...air
3dexport
3ddd
$1
Кухня AIR
...кухня air
3ddd
air , мария
кухня air фабрики "мария"
3ddd
$1
Лампа AIR
...лампа air
3ddd
boconcept , air
настольная лампа air, boconcept. в50½xø32см
3d_export
$40
air deflector
...air deflector
3dexport
air deflector
3d_export
$15
air purifier
...air purifier
3dexport
air purifier
3d_export
$5

macbook air
...macbook air
3dexport
macbook air
Make
3d_export
$5

make make planet
...make make planet
3dexport
turbosquid
$1

Make
...ke
turbosquid
royalty free 3d model make for download as obj on turbosquid: 3d models for games, architecture, videos. (1403181)
3ddd
free

make up
...make up
3ddd
косметика
makeup
turbosquid
$65

Make an interior
... available on turbo squid, the world's leading provider of digital 3d models for visualization, films, television, and games.
turbosquid
$5

Make Up Stand
...bosquid
royalty free 3d model make up stand for download as on turbosquid: 3d models for games, architecture, videos. (1542368)
turbosquid
$12

make up table
...quid
royalty free 3d model make up table for download as max on turbosquid: 3d models for games, architecture, videos. (1280789)
turbosquid
$1

Make up desk
...oyalty free 3d model make up desk for download as max and obj on turbosquid: 3d models for games, architecture, videos. (1222023)
turbosquid
$1
Make up desk
...oyalty free 3d model make up desk for download as max and obj on turbosquid: 3d models for games, architecture, videos. (1222007)
turbosquid
$29
Ammo making machine
...aking machine for download as max, unitypackage, fbx, and obj on turbosquid: 3d models for games, architecture, videos. (1572915)
turbosquid
$29
Making light Collection
... available on turbo squid, the world's leading provider of digital 3d models for visualization, films, television, and games.