Thingiverse

HC Maker 7 LCD case by scottypitcher
by Thingiverse
Last crawled date: 3 years, 3 months ago
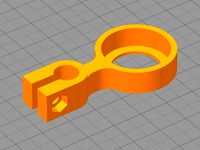
A 2 piece case that assembles onto the Z axis frame support's M10 threaded rod (see https://www.thingiverse.com/thing:4608956). Note I haven't uploaded my working model of the HC Maker 7 yet so you won't be able to preview the model with the threaded rod inserted.
Other parts required:
8 x M3 nuts.
4 x M3x12 pan head machine screws.
4 x M3x18 pan head machine screws.
M10 Nylock nut.
The HC Maker 7 LCD board. Remove the knob and leave it off until you've assembled the new cabinet.
CAUTION: Be careful when removing the LCD board from the black HC Maker 7 control box. There are live mains voltage terminals inside the box so please make sure you unplug the power lead from the wall before you open the box. IT IS NOT SUFFICIENT TO TURN OFF THE POWER WITH THE MAIN SWITCH ON THE BOX, YOU MUST UPLUG THE MAIN POWER CORD FROM THE WALL.
After printing the the base and the front cover:
Press the M10 Nyloc nut into the base piece. This will ensure that the case stays in place when threaded onto the M10 rod.
Press 4 x M3 nuts into the back of the base, and then bolt the LCD board down to the base.
Thread the base assembly onto the Z axis frame support's M10 threaded rod, up to the desired height.
Fit the LCD board to the base piece and secure it with 4 x M3x12 bolts.
Press the 4 x M3 nuts into the bosses on the top and bottom sides of the top cover. To make sure they are aligned properly, insert an M3 bolt into each boss and try to engage the threads.
Place the top cover over the circuit board and fit it to the base, ensuring that the 2 ribbon cables fit into the recess provided at the bottom of the base. Fix the top cover in place by inserting 4 x M3x18 bolts into the holes on the rear of the base and screwing them up tight.
Fit the knob back to the control shaft on the top cover and fix in place.
---FIN---
Similar models
thingiverse
free
Robo3D Z Rod Constraint by galaxius
...still has to slide onto the smooth rod.
slide onto the smooth rod and adjust so the threaded z rod is verticle.
tighten the bolt.
thingiverse
free

Mendel LCD Smart Display Controller Mount by rullmann
...ler mount. the cover was adjusted for the support distance and the supports were design to allow mounting onto the sells mendel.
thingiverse
free

TEVO Tarantula - Motherboard and LCD boxes by Elzariant
... not hesitate to leave me a little tip if you like the design. that helps me to pay the filament i waste when i print prototypes.
thingiverse
free

hand spinner by Saturdaypainters
...s to press the nuts slowly into place
3.glue the plugs into place on top of the nuts
4.sand smooth
5,add centre bearing and enjoy
cults
$1
Handle with M10 thread / Handle with M10 thread
...r the purpose of repairing a hydraulic press on which the handle had broken.
but this handle can be used in other applications.
thingiverse
free
Full Graphic Smart LCD Controller - Prusa i3 Hephestos - Support by Semml
...07.2015):
i added a second version of support because i want to place my rumba board and the threaded rod was blocking the space.
thingiverse
free

M2 Extruder Wiring Box by wcover91
... extruder motor hole with 2x m3x12 bolts 1x m3 captive nut.
4) the lid is secured to the box with 4x m3x8 button head cap screws.
thingiverse
free

CR-10 Frame Brace M10 No Bolts by TheSwaggamuffin
... the aluminium extrusion, no tee nuts or bolts needed.
recommend print out of petg for better fatigue properties compared to pla.
thingiverse
free
BrewPi Sensor Breakout Box
...ews into the holes on the case top, threading them into the square nuts previously inserted in the case body. do not overtighten!
thingiverse
free

Basic cover for power supply by plavan
...st heat the nut and insert to prepared hole for that. second, you should screw the cover to power supply with washers and screws.
Scottypitcher
thingiverse
free

HC Maker 7 foot extenders by scottypitcher
... the mounting blocks on the frame sit about 5mm below the feet, so i had to extend the feet slightly, hence these feet extenders.
thingiverse
free

Tp-link AC1600 (Archer VR1600v v2) wall mount bracket by scottypitcher
...k.
the model was produced with openscad. flip it upside down to print without suports.
the holes will take 6g countersunk screws.
thingiverse
free

HC Maker 7 Z frame supports by scottypitcher
...or the hc maker 7 model. you will have to comment that out to get it to render. i will upload the model separately at some stage.
thingiverse
free

HC Maker 7 Y axis bed stabiliser by scottypitcher
...t solution, we would have rebuilt the printer for that, but the linear bearings provide enough stabilisation for a good solution.
Hc
turbosquid
$37

HC-landFL-max
... available on turbo squid, the world's leading provider of digital 3d models for visualization, films, television, and games.
turbosquid
$20

HC-PV-1000
... available on turbo squid, the world's leading provider of digital 3d models for visualization, films, television, and games.
3ddd
free

Кровать GIANFRANCO FERRE' HC
...кровать gianfranco ferre' hc
3ddd
gianfranco ferre
кровать gianfranco ferre' hc
3ddd
$1

Комод GIANFRANCO FERRE' HC
...anfranco ferre' hc
3ddd
gianfranco ferre , комод
комод gianfranco ferre' hc
design_connected
$11
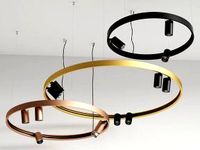
Superloop HC MDL Pendant Lamp
...superloop hc mdl pendant lamp
designconnected
delta light superloop hc mdl pendant lamp computer generated 3d model.
design_connected
$11

Superloop S HC MDL Pendant Lamp
...superloop s hc mdl pendant lamp
designconnected
delta light superloop s hc mdl pendant lamp computer generated 3d model.
3ddd
$1
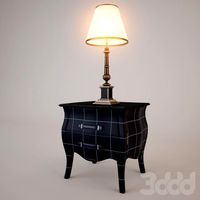
Прикроватная тумба GIANFRANCO FERRE' HC
... настольный светильник
прикроватная тумба gianfranco ferre' hc плюс прикроватная лампа
turbosquid
$50

AN-M8 HC Smoke Grenade LP
... available on turbo squid, the world's leading provider of digital 3d models for visualization, films, television, and games.
cg_studio
$99
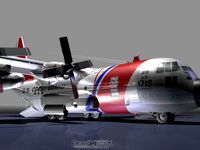
U.S. Coast Guard HC/1303d model
....lwo .ma .max .obj .xsi .c4d - u.s. coast guard hc/130 3d model, royalty free license available, instant download after purchase.
3ddd
$1
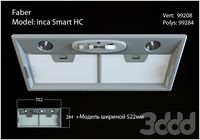
Faber INCA Smart HC
... faber
вытяжка кухонная фирмы faber.
в архиве модели шириной 702 и 522 миллиметра. пользуйтесь!
Lcd
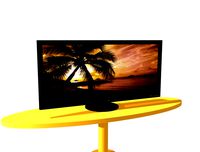
turbosquid
$20

lcd
... available on turbo squid, the world's leading provider of digital 3d models for visualization, films, television, and games.
turbosquid
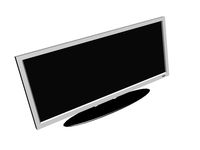
$15
LCD
... available on turbo squid, the world's leading provider of digital 3d models for visualization, films, television, and games.
turbosquid
$10

LCD
... available on turbo squid, the world's leading provider of digital 3d models for visualization, films, television, and games.
turbosquid
$10

LCD
... available on turbo squid, the world's leading provider of digital 3d models for visualization, films, television, and games.
turbosquid
$2

lcd
... available on turbo squid, the world's leading provider of digital 3d models for visualization, films, television, and games.
turbosquid
$1

lcd
... available on turbo squid, the world's leading provider of digital 3d models for visualization, films, television, and games.
turbosquid
free
lcd
... available on turbo squid, the world's leading provider of digital 3d models for visualization, films, television, and games.
turbosquid
free

LCD
... available on turbo squid, the world's leading provider of digital 3d models for visualization, films, television, and games.
3ddd
$1
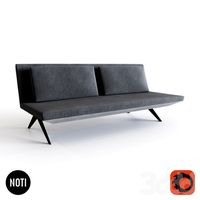
Noti Lcd Sofa
...noti lcd sofa
3ddd
noti , lcd
3d model of noti lcd sofa
3d_ocean
$7

Lcd tube wall
...hrome electronic electronic lcd tv videowall
lcd tube wall you can put in the lcd your own texture or movie in it and animate it.
Case
3d_export
$1

case
...case
3dexport
case
archibase_planet
free

Case
...case
archibase planet
showcase show-case glass case
glass-case + cakes - 3d model for interior 3d visualization.
archibase_planet
free

Case
...case
archibase planet
showcase show-case glass case
glass-case for chips - 3d model for interior 3d visualization.
archibase_planet
free

Case
...case
archibase planet
case shelving drawer
case - 3d model for interior 3d visualization.
archibase_planet
free

Case
...case
archibase planet
case rack locker
case - 3d model for interior 3d visualization.
archibase_planet
free

Case
...case
archibase planet
case drawer kitchen furniture
case - 3d model for interior 3d visualization.
archibase_planet
free

Case
...case
archibase planet
case cupboard shelving
glass case - 3d model for interior 3d visualization.
archibase_planet
free

Case
...case
archibase planet
case handbag suitcase
case - 3d model (*.gsm+*.3ds) for interior 3d visualization.
archibase_planet
free

Case
...case
archibase planet
case suitcase
case 5 - 3d model (*.gsm+*.3ds) for interior 3d visualization.
archibase_planet
free

Case
...case
archibase planet
locker case dresser
case - 3d model (*.gsm+*.3ds) for interior 3d visualization.
7
design_connected
$16
No 7
...no 7
designconnected
sibast no 7 computer generated 3d model. designed by sibast, helge.
3ddd
$1
Team 7
...team 7
3ddd
team 7
моделилось с кталога team 7
3d_export
$5
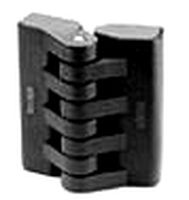
hinge 7
...hinge 7
3dexport
hinge 7
turbosquid
$9

IS-7
... available on turbo squid, the world's leading provider of digital 3d models for visualization, films, television, and games.
turbosquid
$12

Calligraphic Digit 7 Number 7
...hic digit 7 number 7 for download as max, obj, fbx, and blend on turbosquid: 3d models for games, architecture, videos. (1389338)
3ddd
free
team 7
...team 7
3ddd
team 7
стол фабрики team 7.
типы размеров /900,1000/x/1750,2000,2250/x/750/
раздвигается +600 или +1200
3ddd
$1

PLANTS 7
...plants 7
3ddd
цветы , горшок
plants 7.. hope u all enjoying the series
3ddd
$1

Pillows #7
...pillows #7
3ddd
подушка , pillows
pillows #7
3ds max 2011,fbx + textures
design_connected
$11
Domino 7
...domino 7
designconnected
zanotta domino 7 computer generated 3d model. designed by progetti, emaf.
3d_ocean
$18
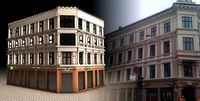
7-11 house
...7-11 house
3docean
7-11 norway oslo
7-11 building in oslo.
Maker
3d_ocean
$17
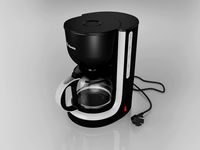
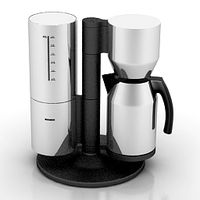
Coffee Maker
...coffee maker
3docean
breakfast coffee drip electric maker morning
detailed coffee maker and a plug.
3ddd
$1
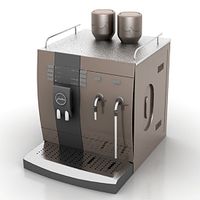
coffee maker
...coffee maker
3ddd
кофемашина
coffee maker
3d_export
$10
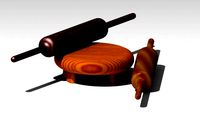
chapati maker
...chapati maker
3dexport
it is a indian traditional chapati maker
archibase_planet
free
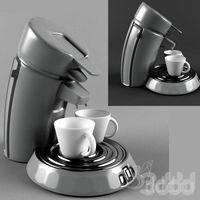
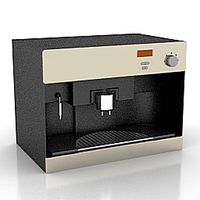
Coffee maker
...aker
archibase planet
percolator coffee-machine coffee maker
coffee maker - 3d model (*.gsm+*.3ds) for interior 3d visualization.
archibase_planet
free
Coffee maker
...aker
archibase planet
percolator coffee-machine coffee maker
coffee maker - 3d model (*.gsm+*.3ds) for interior 3d visualization.
archibase_planet
free
Coffee maker
...aker
archibase planet
percolator coffee-machine coffee maker
coffee maker - 3d model (*.gsm+*.3ds) for interior 3d visualization.
archibase_planet
free

Сoffee maker
...er
archibase planet
coffee maker percolator coffee-machine
сoffee maker n020112 - 3d model (*.3ds) for interior 3d visualization.
archibase_planet
free
Coffee maker
...aker
archibase planet
coffee maker percolator coffee-machine
coffee maker - 3d model (*.gsm+*.3ds) for interior 3d visualization.
3ddd
$1

Juice Maker
...juice maker
3ddd
соковыжималка
fully detailed kenwood juice maker
archibase_planet
free

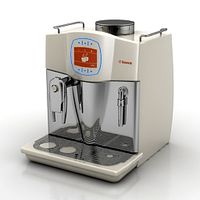
Coffee maker
...hibase planet
coffee maker percolator coffee-machine
coffee maker n140611 - 3d model (*.gsm+*.3ds) for interior 3d visualization.