Thingiverse
Hackbot Micro Pi Noon Bot by Cheltenham_Hackspace
by Thingiverse
Last crawled date: 3 years ago
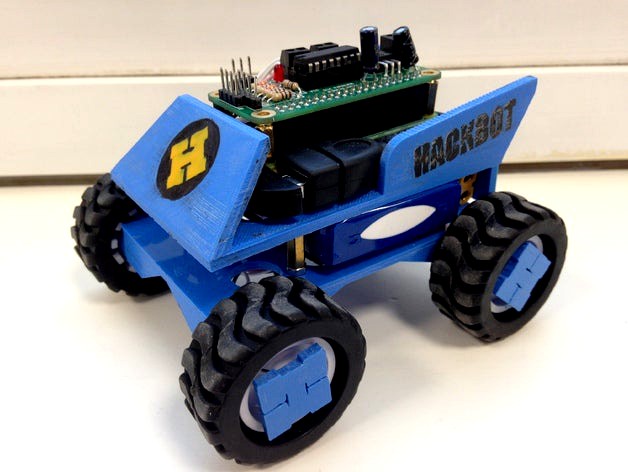
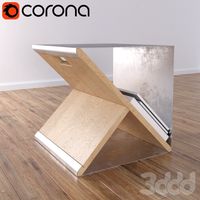
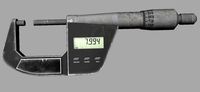
Here are the parts required to print the Micro Pi Noon Bot, chassis.
The post at the rear is designed to hold a metal coathanger formed to hold a balloon at the rear and a pin at the front of the bot, these are then used with the wiimote to joust, first person to pop the others balloon wins, usually a two person competition...
These were all printed on a Makerbot 2X
you will also need the following parts to complete the Pi Noon Bot
Pi Zero (various suppliers)
Bluetooth dongle (robot shop or similar)
4 x 50:1 metal gear motor/gearbox (pimoroni)
4 x wheels (pimoroni)
1 Astro Designs Pi-Z Moto motor control board
1 toggle switch (RS 317-645 or similar, hole size is 6mm)
Turnigy 1800mAh 2S 12C Lipo Battery Pack (hobbyking)
lipo battery checker (to see remaining charge on battery and check battery balance)
1 wiimote (ebay or amazon) !!! NOT THE WIIMOTE PLUS !!!
1 right angle micro usb to usb A, to plug the blue tooth dongle into the Pi (right angle fits better)
4 x 15 mm m3 pcb stand offs one end threaded stud and other end threaded hole
4 x 10 mm m3 pcb stand offs same as above
4 x 5 mm m3 pcb stand offs same as above
7 x m3 x 5mm pan head screws to fix chassis top to stand offs between main body and top, and to fix motor control board in place
1 x m3 x 10mm pan head screw to fix body down while holding battery clip in place
8 x m1.6 x 3mm screws to hold motors in place in chassis
if you wish to you can power this bot from 4 aa batteries, cheaper but less powerful.
Instructions for initial Bluetooth install here.....
http://www.brianhensley.net/2012/08/wii-controller-raspberry-pi-python.html
Similar models
thingiverse
free

Micro-Pi-Noon Bot by AstroDesigns
... which is only available from attending the cotswold raspberry jam or as a kit from myself. it may work with other motor drivers.
thingiverse
free

Tiny Raspberry Pi Zero Bot with Explorer pHat by 3djled
...s/zippy-flightmax-350mah-2s-20c.html
a little ubec module
wifi dongle
raspbian pixel with scratch and opencv servo face tracking.
thingiverse
free

Raspberry Pi 3 bot chassis by nathanialreed
...sed off the round robot chassis from adafruit.com this is a work in progress and needs more testing and will be updated over time
thingiverse
free

Micro Pi Noon Balloon Holder by Cheltenham_Hackspace
...ough base hole, in case you do not have a blunt instrument, i have included a "pusher" which seems to do the job nicely
grabcad
free

Go Kart Chassis
...go kart chassis
grabcad
go kart chassis
designed to hold 4 batteries, 1 motor and 1 person
thingiverse
free

Micro Pi Noon Balloon Holder by Cheltenham_Hackspace
...micro pi noon balloon holder by cheltenham_hackspace
thingiverse
updated version that is much easier to reload ballons
thingiverse
free

Balloon holder on stand by Cheltenham_Hackspace
...thingiverse
post for holding balloon for the pi zero bot assault course as featured in the cheltenham science festival this year
thingiverse
free

Micro Pi Noon Balloon Holder V2 by Cheltenham_Hackspace
...e
updated the balloon holder to be much easier to insert new balloons, and also be entirely 3d printed for a more uniform result
thingiverse
free
Quadcopter Lipo battery mount top or bottom 3000mA by chriseslick
...fine with this application. the outrigger screws mounts are used for a bottom mount configuration and require 4 x m3 10mm screws.
thingiverse
free
RCRUN RUN80 LC80 Battery door by xMATx
...ins and screwd them in to the reverse of the rear body mount holes.
no need to remove the body to change the battery.....whooop!!
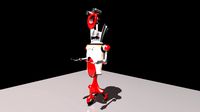
Hackbot
grabcad
free

2018 Hackbot
...2018 hackbot
grabcad
first robotics competition team 3414, the hackbots, robot for the 2018 season.
grabcad
free

2013 Hackbot
...
first robotics competition team 3414, the hackbots, robot for the 2013 season: bertha. model was a work in progress from 2013.
grabcad
free

2019 Hackbot: Draco
...2019 hackbot: draco
grabcad
first robotics competition team 3414, the hackbots, robot for the 2019 season: draco.
grabcad
free

2022 Rapid React Hackbot
...2022 rapid react hackbot
grabcad
team 3414 hackbots robot for the 2022 first robotics competition game rapid react
grabcad
free

2023 Charged Up Hackbot
...2023 charged up hackbot
grabcad
team 3414 hackbots robot for the 2023 first robotics competition game charged up
grabcad
free

2020/2021 Infinite Recharge Hackbot
...2020/2021 infinite recharge hackbot
grabcad
the hackbot's robot for the 2020/2021 frc game infinite rechage.
grabcad
free

3414 Hackbots 2019 Drive Train
...3414 hackbots 2019 drive train
grabcad
preseason project, hopefully would be used during the season.
grabcad
free

Parametric Belt-in-Tube Drivetrain
...parametric belt-in-tube drivetrain grabcad the latest revision of the hackbot' "hackdrive" belt-in-tube wcd style drivetrain. this drivetrain for first...
Hackspace
turbosquid
$9

Hackspace Capital black coin
...ree 3d model hackspace capital black coin for download as max on turbosquid: 3d models for games, architecture, videos. (1605770)
turbosquid
$9

Hackspace Capital gold coin
...free 3d model hackspace capital gold coin for download as max on turbosquid: 3d models for games, architecture, videos. (1605769)
thingiverse
free

Preston Hackspace logo by batemanm
...preston hackspace logo by batemanm
thingiverse
3d version of the preston hackspace logo.
thingiverse
free

Swindon Hackspace Logo by Swindon-Makerspace
...windon-makerspace
thingiverse
the 3d print files designed and printed by our member gyrobot for our hackspace, a badge of pride?
thingiverse
free

Hackspace Foundation Coin by Solexious
...n night.
this is a makerbot printable coin made with the svg used in the hackspace foundation (uk) logo.
http://hackspace.org.uk/
thingiverse
free

London Hackspace Doorbell by Solexious
...sage to the #london-hack-space irc channel.
this was made with the box-o-tron script, then tweeked and extra parts added in qcad.
thingiverse
free

Hackspace @ RFA - STL by 7777773
...ity, and i've found my laptop isn't quite up to the task of working on such models... perhaps it is time for an upgrade!
thingiverse
free

Cheltenham Hackspace Pi Zero Case by Cheltenham_Hackspace
...space pi zero case by cheltenham_hackspace
thingiverse
case for raspberry pi zero with holes for ports, to protect while in use
thingiverse
free
Hitchin Hackspace model by mark_m
.../grabcad.com/library/workbench-8
table: https://grabcad.com/library/table-114
long table: https://grabcad.com/library/workbench-6
thingiverse
free

H Lamp by BillyBag2
...lamp by billybag2 thingiverse a lamp that projects a hackspace ...
Cheltenham
turbosquid
$16

Cheltenham Bed
... available on turbo squid, the world's leading provider of digital 3d models for visualization, films, television, and games.
3ddd
$1
Laura Ashley divan cheltenham
... cheltenham
сайт производителяhttp://lauraashley.ru/shop/interer/mebel/mjagkaja-mebel-pod-zakaz/
3d_sky
free

Laura Ashley divan cheltenham
...ey divan cheltenham
3dsky
sofa divan laura ashley
webhttp://lauraashley.ru/shop/interer/mebel/mjagkaja-mebel-pod-zakaz/
thingiverse
free
Cheltenham Hackspace Pi Zero Case by Cheltenham_Hackspace
...space pi zero case by cheltenham_hackspace
thingiverse
case for raspberry pi zero with holes for ports, to protect while in use
3dbaza
$3

The Urban electric Co Cheltenham chandelier (114920)
...a 2.2, shaders and textures are included.<br>- correctly scale of the original objects, multi-submaterial, object at 0.0.0.
thingiverse
free
Balloon holder on stand by Cheltenham_Hackspace
...thingiverse
post for holding balloon for the pi zero bot assault course as featured in the cheltenham science festival this year
renderosity
$10

Moyra's Classics - Bedrooms 1
...complete products: guinevere's bower, a celtic queen's private chambers, cheltenham 1 and 2, an extensive, detailed and historically accurate...
cg_trader
$197

Whaddon Road - Cheltenham England
...ham england
cg trader
3d whaddon road - cheltenham england , formats obj, 3ds, fbx, dxf, dae, dwg, ready for 3d animation and ot
cg_trader
$19
The Urban electric Co - Cheltenham double
...ble
cg trader
the urban electric co - cheltenham double 3d , available in max, obj, 3ds, fbx, mtl, ready for 3d animation and ot
cg_trader
$19

Cheltenham Bed
...ndend model without any materials and textures and file with model with mapped vray shaders. model has been made in 3ds max 2009.
Noon
design_connected
$13
Noon 5
...noon 5
designconnected
zeitraum noon 5 computer generated 3d model. designed by el schmid.
design_connected
$11

Read Noon
...read noon
designconnected
zeitraum read noon computer generated 3d model. designed by el schmid.
3ddd
$1
Торшер Zeitraum High Noon
...шер zeitraum high noon
3ddd
торшер zeitraum high noon
торшер zeitraum high noon в комплекте напольный торшер и и настольная лампа
3ddd
$1
Стул-полка от Noon Studio
...олки.
габариты : 350*350*350
реферанс :https://hqroom.ru/stul-polka-ot-noon-studio.html
polys: 2 607
verts : 2 850
3d_ocean
$25

HDRI IBL 1215 Blue Noon Sky
...noon) - sun angle is 31.5 degrees (0° is on the horizon, 90° is straight overhead) - full spherical skydome panorama but every...
3d_ocean
$25

HDRI IBL 1219 Sunny Noon Sky
... noon) - sun angle is 49.3 degrees (0° is on the horizon, 90° is straight overhead) - full spherical skydome panorama but ever...
turbosquid
$12

El Schmid NOON 5 pendant
...el el schmid noon 5 pendant for download as max, obj, and fbx on turbosquid: 3d models for games, architecture, videos. (1498905)
turbosquid
$12

El Schmid Read Noon Floor
...d read noon floor for download as max, max, 3ds, fbx, and obj on turbosquid: 3d models for games, architecture, videos. (1578691)
3d_ocean
$25

HDRI spherical sky panorama -1434- sunny noon sky
...oon sky (time: 14:34). ideal for nice and day scenarios. the texture has a super high resolution of 10000×5000 pixel and can b...
3d_ocean
$25

HDRI spherical sky panorama -1439- sunny noon sky
...august noon sky with sun, blue sky & clouds (time: 14:39). texture has a high resolution of 10000×5000 pixel and can be us...
Bot
turbosquid
$19

Bot
... available on turbo squid, the world's leading provider of digital 3d models for visualization, films, television, and games.
turbosquid
free

Bot
... available on turbo squid, the world's leading provider of digital 3d models for visualization, films, television, and games.
3d_export
$10

scanner bot
...scanner bot
3dexport
cool scanner bot who scans for fixing things...
3d_ocean
$9

Apc Bot
...n bot games toys
an all-purpose-constructo-bot. for cartoon purposes. the model is not rigged. please use vray adv for rendering.
3d_export
$75
Bot 3D Model
...bot 3d model
3dexport
robot bot man kiborg character
bot 3d model evgen 19504 3dexport
turbosquid
free

Eye Bot
...eye bot
turbosquid
free 3d model eye bot for download as fbx on turbosquid: 3d models for games, architecture, videos. (1514059)
turbosquid
$29
Gorill-bot
...bosquid
royalty free 3d model gorill-bot for download as fbx on turbosquid: 3d models for games, architecture, videos. (1239456)
turbosquid
$25

Lamp Bot
...bosquid
royalty free 3d model lamp bot for download as blend on turbosquid: 3d models for games, architecture, videos. (1230121)
turbosquid
$10
Spectre Bot
...osquid
royalty free 3d model spectre bot for download as fbx on turbosquid: 3d models for games, architecture, videos. (1616378)
turbosquid
$8
Ultra Bot
...urbosquid
royalty free 3d model ultra bot for download as ma on turbosquid: 3d models for games, architecture, videos. (1330752)
Micro
3ddd
$1
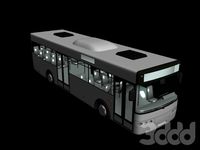
Micro
...micro
3ddd
автобус
turbosquid
$80

MICRO
...ty free 3d model micro for download as max, c4d, obj, and fbx on turbosquid: 3d models for games, architecture, videos. (1700743)
3ddd
$1
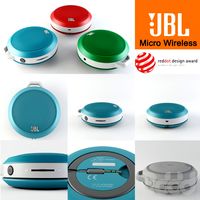
JBL Micro Wireless
... micro , колонка , плеер
jbl micro wireless
turbosquid
$10
Suppressor Micro
...quid
royalty free 3d model suppressor micro for download as on turbosquid: 3d models for games, architecture, videos. (1380433)
turbosquid
$20
Micro Meter
...osquid
royalty free 3d model micro meter for download as fbx on turbosquid: 3d models for games, architecture, videos. (1350448)
turbosquid
$7
NIghtstand Micro
...d
royalty free 3d model nightstand micro for download as max on turbosquid: 3d models for games, architecture, videos. (1248117)
3ddd
$1
Micro wind turbine
...micro wind turbine
3ddd
турбина
micro wind turbine for your green building projects
turbosquid
$29
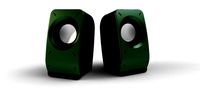
Micro Speakers
... available on turbo squid, the world's leading provider of digital 3d models for visualization, films, television, and games.
turbosquid
$29
Micro Servo.max
... available on turbo squid, the world's leading provider of digital 3d models for visualization, films, television, and games.
turbosquid
$20

Micro cells
... available on turbo squid, the world's leading provider of digital 3d models for visualization, films, television, and games.
Pi
design_connected
$11

Pi
...pi
designconnected
ligne roset pi chairs computer generated 3d model. designed by thibault desombre.
3d_export
$5

raspberry pi
...raspberry pi
3dexport
carcasa para la raspberry pi
turbosquid
$18

pied
... available on turbo squid, the world's leading provider of digital 3d models for visualization, films, television, and games.
3ddd
$1

Emme pi light
...emme pi light
3ddd
emme pi light
люста emme pi light
3ddd
$1

Emme pi light
...emme pi light
3ddd
emme pi light
бра классическое emme pi light
3ddd
$1

Emme Pi Light
...emme pi light
3ddd
emme pi light
3ddd
$1

Emme Pi Light
...emme pi light
3ddd
emme pi light
design_connected
$16

Pi-Air
...pi-air
designconnected
living divani pi-air lounge chairs computer generated 3d model. designed by harry & camila.
3d_ocean
$15

Manneken Pis
...picting a naked little boy urinating into a fountain’s basin. (wikipedia) the model was sculpted in blender 2.70a rendered wit...
3ddd
$1

Emme pi light
...emme pi light
3ddd
emme pi light
люстра классическая фирма: emme pi light
артикул: 3595/5/cot/12/wh