Thingiverse
Grade Crossing (Curved) for O Gauge Tubular Track V2 by SanDiegoMark
by Thingiverse
Last crawled date: 3 years ago
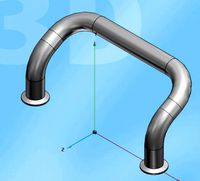
NOTE NOTE: the Thingiverse.com Customizer does not handle this file correctly, instead of creating a 6 inch grade crossing, it creates a complete 360 degree circle. You will have to download the OpenSCAD program and run it on your computer. I have emailed the support group at Thingiverse about the problem. ETON ETON
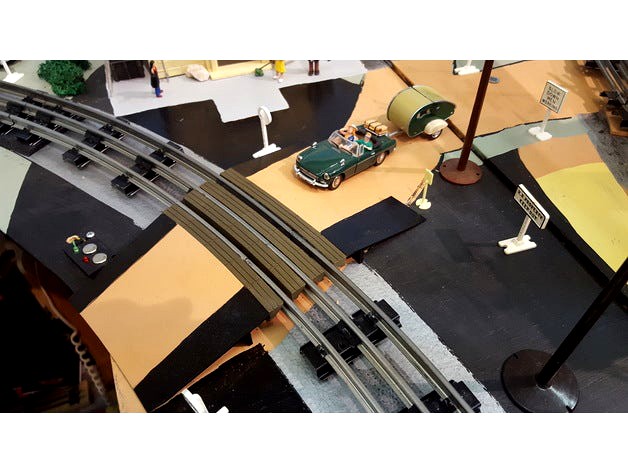
This thing is a wooden grade crossing designed for O gauge tubular track. The design consists of two OpenSCAD programs, one makes a crossing for straight track and the other makes a crossing for O-31, O-42, O-54 and O-72 curved track.
This thing is the curved crossing, for the straight version look here https://www.thingiverse.com/thing:2832224
The top of each piece represents wooden boards that are bolted together to make the crossing. Each crossing consists of four pieces. The two center pieces go along side
the center rail and the other two go on the outside of the outer rails. The curved crossing pieces are accurately curved to match the actual track. If you look in the OpenSCAD program, you can see what values I used for the diameters of the four different curves supported. I used the RR-Track program to measure the center rail to center rail diameter of a loop. This seemed to work pretty well as the finished curved crossing pieces can be glued directly to the center rail and to the outer rails.
Each piece of the crossing has a diagonal side to clear the ties and the center rail insulator.
The difficult dimension in this project was the 'space' left on the inside edges of the outer rails for the wheel flanges. I measured a bunch of track and there is about 0.55 inches between the inside edges of the rails. I ended up making the gap about 0.15 inches - which made the crossing pieces 0.4 inches wide. This seems to work on my layout with my mostly MTH rolling stock. You might need to make this dimension smaller to have a larger flange gap.
The grade crossing pieces should fall about 0.07 inches below the tops of the tubular rail.
In the OpenSCAD program, you select the length of the crossing. I found that 4.5 inches works well for rural (1 lane) roads and 6.0 inches works for town (2 lane) roads.
Even with the diagonal side, you should be able to print this thing without using support.
With V2 of the grade crossing, you can optionally print ramps that go up to the crossing. This makes the integration with scenery a little easier in some cases.
You can print either the grade crossing or the ramp. So if you want both, you have to create two stl files.
NOTE: the OpenSCAD preview here on Thingiverse shows the result of the curved grade crossing as a 360 degree circle. Running on my computer using the OpenSCAD IDE shows the curved grade crossing only as long around the circumference as you actually select. You can see that from the screen grab image.
Similar models
thingiverse
free
OpenSCAD train track library SE by MobyDisk
...added smaller radius turns (curved and straight track small)
4) works with connector thing http://www.thingiverse.com/thing:15165
3dwarehouse
free

Thomas The Tank Engine with track
.... this is my 2nd sketch up model so things are not as exact as i would like but it can help give you a somewhat realistic layout.
thingiverse
free

Rails for lego particle accelerator by fdavies
...make new stl files if your printer is better at holes than mine.
also see ideas.lego.com/projects/86253 if you are interested.
thingiverse
free

Cube in two parts by yoni
...ds.
how else you can teach what is diagonal? :)
outer cube is 120mm
inner cube is 100mm
printed in two pieces and snaps together.
3dwarehouse
free

15 Degree Curve Centered 2 Lane Road
...15 degree curve centered 2 lane road
3dwarehouse
curved piece #center #lane #road #turn
thingiverse
free

The Mystery Marble Box by baileyandzack
... two pieces, revealing a complex, curving inner track. the two pieces fit together with two pegs and sockets in opposite corners.
3dwarehouse
free

2 + 1 (HOV) Lane Road with Off-Ramp
...ne one and it screwed-up minorly. (if that is even a word). use at your own risk. #curve #hov #lane #marking #off #one #ramp #two
thingiverse
free
Parametric Code 83/100 HO track by pg3
...
included is a simple 6" straight piece, and a 24" radius curve in 12 segments. this is what would fit on my 8x8 bed.
thingiverse
free
Classic, curved rail buffer stop for LGB-rails by Beusekomse_Baan
...
glue the two buffers to the cross-beam and fit a lgb rail-joiner to a rail.
now you can and connect it to the end of your track.
thingiverse
free
Pitchcar Game Rails by lacerta1974
...toward the bottom that narrow to about 2.4mm. they straight rails are 21.5cm long and the curved rails about 26cm along the arc.
Sandiegomark
thingiverse
free

Yet Another Dremel Bit Tray by SanDiegoMark
...n in spots. i recommend printing with 4-5 top layers and perimeters.
print time on my original prusa mk2 was 7h 29m. i used pla.
thingiverse
free

P&LE Logo by SanDiegoMark
...he logo in black. that way, i didn't have to paint it.
to use this in n, ho or g scale, you will have to scale appropriately.
thingiverse
free

P&LE McKees Rocks Locomotive Shop Wall V2.1 by SanDiegoMark
...&le logo to thingiverse here:https://www.thingiverse.com/thing:2468652
my web page: http://www.silogic.com/trains/layout.html
Tubular
turbosquid
$5

Tubular Key
...royalty free 3d model tubular key for download as obj and fbx on turbosquid: 3d models for games, architecture, videos. (1489994)
turbosquid
$10

Tubular Bells
... available on turbo squid, the world's leading provider of digital 3d models for visualization, films, television, and games.
design_connected
$16

Tubular Horizontal Pendant
... horizontal pendant
designconnected
henge tubular horizontal pendant computer generated 3d model. designed by castagna, massimo.
turbosquid
$25

Brno Tubular Chair
... available on turbo squid, the world's leading provider of digital 3d models for visualization, films, television, and games.
turbosquid
$20

Clothes tubular Gondola
... available on turbo squid, the world's leading provider of digital 3d models for visualization, films, television, and games.
turbosquid
$12

Climbing tubular device
... available on turbo squid, the world's leading provider of digital 3d models for visualization, films, television, and games.
turbosquid
$3

Tubular Steel Shelf
... available on turbo squid, the world's leading provider of digital 3d models for visualization, films, television, and games.
turbosquid
$3
Tubular Steel Table
... available on turbo squid, the world's leading provider of digital 3d models for visualization, films, television, and games.
turbosquid
$2

Tubular Wood Chair
... available on turbo squid, the world's leading provider of digital 3d models for visualization, films, television, and games.
3d_export
$12
33m3 tubular heat exchanger diagram
...33m3 tubular heat exchanger diagram
3dexport
33m3 tubular heat exchanger diagram
Grade
3ddd
$1
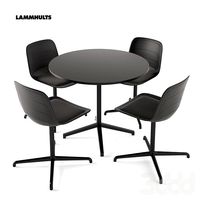
Lammhults Grade
...mhults , grade
размеры:http://www.lammhults.se/products/chairs-armchairs/grade
turbosquid
$1

grade obj
... available on turbo squid, the world's leading provider of digital 3d models for visualization, films, television, and games.
turbosquid
$19

Cartoony Grade School
...model cartoony grade school for download as max, obj, and fbx on turbosquid: 3d models for games, architecture, videos. (1240182)
3d_export
$9

Food Grading Machine
...food grading machine
3dexport
this 3d model is make in solidworks, render in keyshot.
3ddd
free
Lammhults Grade Chair+Archal table X
...www.lammhults.se/products/chairs-armchairs/grade
стол:http://www.lammhults.se/products/tables-trolleys/archal
3d_export
$39

Military Grade Acid Rifle 3D Model
...
3dexport
fantasy gun acid weapon rifle military goo alien scifi
military grade acid rifle 3d model progamemodeler 82946 3dexport
turbosquid
$19

Food Grade 5l Plastic Bucket Purple
... as max, c4d, lxo, 3dm, obj, 3ds, dae, dwg, dxf, fbx, and wrl on turbosquid: 3d models for games, architecture, videos. (1640611)
turbosquid
$19

Food Grade 5l Plastic Bucket Turquoise
..., 3dm, blend, c4d, lwo, lxo, 3ds, dae, dwg, dxf, fbx, and wrl on turbosquid: 3d models for games, architecture, videos. (1642245)
turbosquid
$88

Food Grade 5l Plastic Bucket All Colors(1)
... as max, 3dm, c4d, lxo, 3ds, dae, dwg, dxf, fbx, obj, and wrl on turbosquid: 3d models for games, architecture, videos. (1643097)
3d_export
$10

Winix official certification store 1st grade dehumidifier
...painter available for all software<br>ue4. ue5. blender. maya. 3d max. unity. c4d.<br>formats: .obj .gltf .fbx .blend
Gauge
3d_ocean
$10

Gauges
...rim to them. each gauge has an xpresso tag to give them an automatic animation without the need for keyframing and can be chan...
3d_export
$5

pressure gauge
...pressure gauge
3dexport
pressure gauge
3d_export
$5
gauge protector
...gauge protector
3dexport
gauge protector
3d_export
$5

Gauge 3D Model
...gauge 3d model
3dexport
gauge pressure gas air liquid
gauge 3d model fau 71180 3dexport
3d_export
$5

protected pressure gauge
...protected pressure gauge
3dexport
protected pressure gauge
3d_export
$5

hard gauge protector
...hard gauge protector
3dexport
hard gauge protector
turbosquid
$29
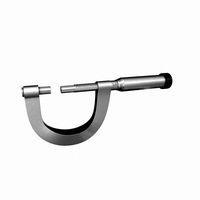
Screw Gauge
... available on turbo squid, the world's leading provider of digital 3d models for visualization, films, television, and games.
turbosquid
$29
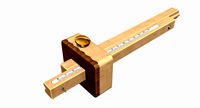
Marking Gauge
... available on turbo squid, the world's leading provider of digital 3d models for visualization, films, television, and games.
turbosquid
$20

Blade Gauge
... available on turbo squid, the world's leading provider of digital 3d models for visualization, films, television, and games.
3d_export
$5
12 Gauge 3D Model
...12 gauge 3d model
3dexport
shotgun shell gauge 12
12 gauge 3d model pirog 54511 3dexport
Track
design_connected
$11

Tracks
...tracks
designconnected
bonaldo tracks computer generated 3d model. designed by gilles, alain.
3d_export
$30

TRACK
...track
3dexport
turbosquid
$20

tracks
... available on turbo squid, the world's leading provider of digital 3d models for visualization, films, television, and games.
turbosquid
$5

Tracks
... available on turbo squid, the world's leading provider of digital 3d models for visualization, films, television, and games.
turbosquid
$5

Track
... available on turbo squid, the world's leading provider of digital 3d models for visualization, films, television, and games.
turbosquid
$2

Track
... available on turbo squid, the world's leading provider of digital 3d models for visualization, films, television, and games.
3d_export
$65

track
...track
3dexport
simple rendering of the scene file
3d_export
$65

track
...track
3dexport
simple rendering of the scene file
3d_export
$65

track
...track
3dexport
simple rendering of the scene file
3ddd
free

Стол Bonaldo Tracks
...onaldo , tracks , обеденный
стол bonaldo tracks
Curved
3d_export
free

curved sword
...curved sword
3dexport
a curved sword
3ddd
$1
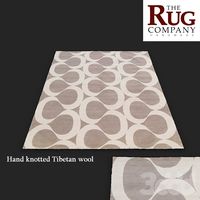
CURVE
...wave oscillates rhythmically across this rug.
hand knotted from tibetan wool, curve is available from stock in a range of sizes.
3ddd
$1

SYSTEMPOOL Serie Curve
..., serie curve , раковина
systempool serie curve
3ddd
$1
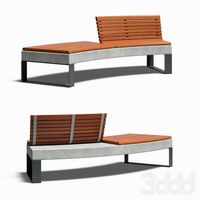
DIAMANTE Curved Bench
...diamante curved bench
3ddd
diamante curved bench скамья
diamante curved bench
3ddd
$1
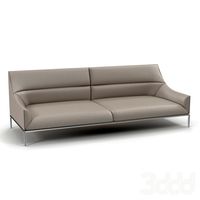
Enne Curve Sofa
...enne curve sofa
3ddd
enne , curve
диван enne curve, размеры -h800x920x2350mm
design_connected
$27
Curve Sofa
...curve sofa
designconnected
living divani curve sofa computer generated 3d model. designed by lissoni, piero.
3d_export
$5
curve base handle
...curve base handle
3dexport
curve base handle
3d_export
$5

simple curve handle
...simple curve handle
3dexport
simple curve handle
turbosquid
$2

Curved leaf
...urbosquid
royalty free 3d model curved leaf for download as on turbosquid: 3d models for games, architecture, videos. (1641948)
turbosquid
$2

Curved Mouse
...rbosquid
royalty free 3d model curved mouse for download as on turbosquid: 3d models for games, architecture, videos. (1314525)
V2
3d_export
free

Lamp v2
...lamp v2
3dexport
lamp v2 with solar panel
3d_export
$5

hammerhead v2
...hammerhead v2
3dexport
razer hammerhead v2 headphones, modeled in cinema 4d, render in corona
3d_export
$5

manometer v2
...manometer v2
3dexport
3d_export
$5

potato v2
...potato v2
3dexport
turbosquid
$52

Lifebuoys v2
...squid
royalty free 3d model lifebuoys v2 for download as fbx on turbosquid: 3d models for games, architecture, videos. (1560870)
turbosquid
$2

Mask v2
...turbosquid
royalty free 3d model mask v2 for download as stl on turbosquid: 3d models for games, architecture, videos. (1527741)
turbosquid
free

Flashlight V2
...d
free 3d model flashlight v2 for download as , obj, and fbx on turbosquid: 3d models for games, architecture, videos. (1663559)
turbosquid
$29

Thanos v2
...
royalty free 3d model thanos v2 for download as ztl and obj on turbosquid: 3d models for games, architecture, videos. (1651077)
turbosquid
$29

Titan v2
...d
royalty free 3d model titan v2 for download as ztl and obj on turbosquid: 3d models for games, architecture, videos. (1540228)
turbosquid
$29

Frieza v2
...
royalty free 3d model frieza v2 for download as ztl and obj on turbosquid: 3d models for games, architecture, videos. (1701238)
Crossing
3d_export
$5

Cross
...cross
3dexport
cross
archibase_planet
free

Cross
...cross
archibase planet
cross
church sanctuary cross - 3d model for interior 3d visualization.
3d_export
$25
golden cross cross 3d gold cross
...golden cross cross 3d gold cross
3dexport
archibase_planet
free

Cross
...cross
archibase planet
cross crucifix rood
cross n220513 - 3d model (*.3ds) for interior 3d visualization.
3d_export
$5

cross
...cross
3dexport
body cross jewelry 70мм * 50мм
design_connected
$16
Cross
...cross
designconnected
two.six cross computer generated 3d model. designed by ferreira, domingos.
turbosquid
$1

Cross
...cross
turbosquid
free 3d model cross for download as blend on turbosquid: 3d models for games, architecture, videos. (1319421)
turbosquid
$15

Cross
...s
turbosquid
royalty free 3d model cross for download as 3dm on turbosquid: 3d models for games, architecture, videos. (1203663)
turbosquid
$10

Cross
...s
turbosquid
royalty free 3d model cross for download as max on turbosquid: 3d models for games, architecture, videos. (1030743)
turbosquid
$3

Cross
...s
turbosquid
royalty free 3d model cross for download as max on turbosquid: 3d models for games, architecture, videos. (1555121)
O
design_connected
$13

O Tables
...o tables
designconnected
oxdenmarq o tables computer generated 3d model. designed by marquart, dennis.
design_connected
$11
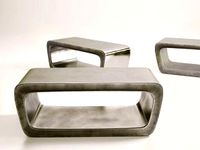
O Bench
...o bench
designconnected
robert kuo o bench computer generated 3d model. designed by kuo, robert.
design_connected
$9

Doble O
...doble o
designconnected
nomon doble o computer generated 3d model. designed by reina, josé maría.
design_connected
$11
O-Nest
...o-nest
designconnected
moroso o-nest seating objects computer generated 3d model. designed by tord boontje.
turbosquid
$2

skillet casseroles o sarten o caserola
... available on turbo squid, the world's leading provider of digital 3d models for visualization, films, television, and games.
3ddd
$1

Foscarini O-Space
...foscarini o-space
3ddd
foscarini , o-space
o-space, suspension
design luca nichetto
turbosquid
$20

Ring O
...
turbosquid
royalty free 3d model ring o for download as stl on turbosquid: 3d models for games, architecture, videos. (1353794)
turbosquid
$5

Letter O
...urbosquid
royalty free 3d model letter o for download as max on turbosquid: 3d models for games, architecture, videos. (1408519)
turbosquid
$5

Letter O
...urbosquid
royalty free 3d model letter o for download as max on turbosquid: 3d models for games, architecture, videos. (1408496)
turbosquid
$5

Letter o
...urbosquid
royalty free 3d model letter o for download as max on turbosquid: 3d models for games, architecture, videos. (1408493)