Thingiverse
GoPro Egg / Kitchen Timer by Coder-Tronics
by Thingiverse
Last crawled date: 4 years, 7 months ago
This isn't a remix but definitely influenced by previous kitchen timer GoPro mods, in particular this one. http://www.thingiverse.com/thing:108263
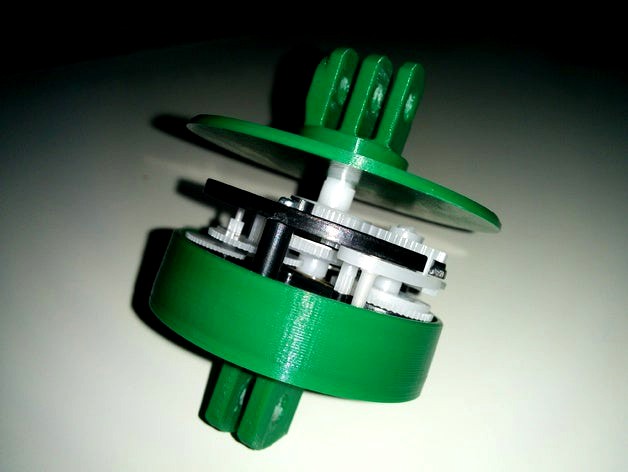
I had a pretty crappy timer to start with which laid on its side and seemed too cumbersome to modify, so took it apart. What I found was the kitchen timer mechanism seems to be almost a standard, after looking online. I had a couple of objectives:
1) Try and keep it as universal as possible.
2) Use the top part to try and protect the mechnism against rain (it will corrode eventually), but this should ensure good operation if used in the rain. Larger top part has a 58mm diameter and the base is 52mm.
3) Make it straight forward to print without support (hence why it's 3 parts).
4) Allow the base to be fixed using any existing GoPro mounting system.
5) Remove the metal outer shell which acts like a bell chamber, as we will use this when camping and have no need for it.
The base part is fixed into place with the 3 small screws, then the other pieces just press together and lock firmly.
I have also made a couple of smaller BASE and TOP parts labelled as BASIC e.g. without the rain shield and reduced the base assembly size, this should cater for other peoples needs.