Thingiverse
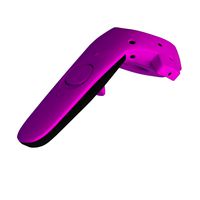
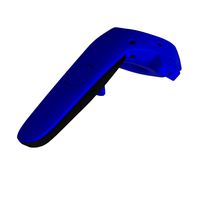
GearVR to Vive Lens Adapter by GrodenVR
by Thingiverse
Last crawled date: 3 years, 1 month ago
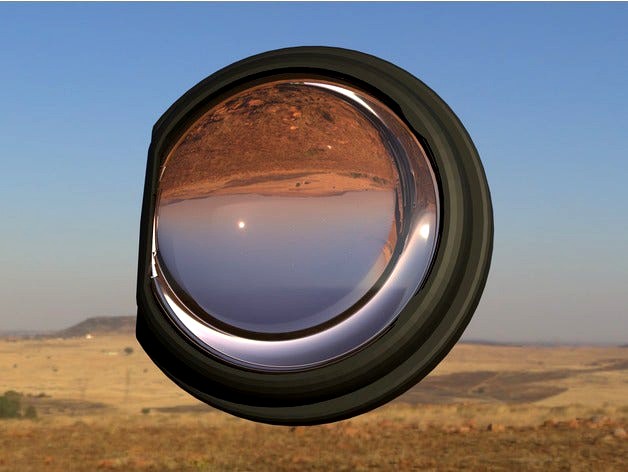
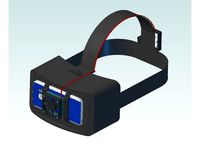
This is an adapter to fit Samsung GearVR (2016 and 2017) 42 mm lenses onto an HTC Vive or Vive Pro (may work with Cosmos). It's for people that hate the Fresnel lenses of the Vive, which can produce "god-rays" in high contrast areas.Note: don't order a GearVR with a white body - it is a 2015 model with smaller lenses that don't fit.
UPDATES
2020-05-13 V4 Redesigned to be better for the Vive-PRO (mixed results on Cosmos, should try v3.3). Lens distance to screen adjusted to reduce distortion. Works well now on the vive-pro without editing the distortion file. Lighter design. Lenses are now easier to install and also more secure.You don't need to slide the lens under the nubs anymore, just line it up, push down along the edges to press it into place.
V3.3 For regular Vive (slight comfort improvements over v3.2). [print 1 for each eye]
Added a version for the prescription inserts from VR Lens Lab (also fits VR Optician) There are separate files for left and right eye. May need to print with supports enabled.**
Added -2 mm low ipd (version V3.31_-2mm_low_IPD_pair or ViveProAdapterV4_ipd-2mm_pair.stl). This is or people like myself with lower ipd than the vive can go; otherwise you should use the regular V4 or V3.3. scottmuecke did a remix for low ipd, but the offset was not working for me. I've been using my own version for awhile that shifts the lenses towards the nose by 1 mm each side. I've been happy with it, so I decided to include it here. This brings the vive minimum down to 58 mm from 60. The screen image also needs to be shifted to account for this, so edit:C:\Program Files (x86)\Steam\config\steamvr.vrsettings
and add the ipd offset line under the section that starts with
"steamvr" : {
"background" : "#FF000000",
"ipdOffset" : -0.002,
(note that the ipdOffset value is in metres, so 0.002 = 2 mm)
Installation Notes
Great detailed installation video here by cbutters tech. Installation is similar for the vive pro.
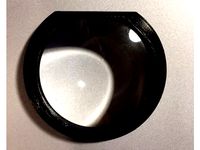
Version 3.3 installation. The tolerance on the fit of the GearVR lens in the adapter is pretty tight. You may have difficulty getting it in depending on your print. With the flat part of the lens facing you, slide the top end under the 2 little nubs near the top of the adapter (only for v3.3). You need to have the flat part of the lens perfectly parallel with the flat part of the adapter, then push in at the bottom and it should just snap in place without too much force. Note that the bulgy side of the lens faces the screen. Its really distorted if you have it upside down!
Version 4 installation. The lens just presses into place with a bit of force. It is easier if you line up the flat edge first then press the sides in with your thumbs. Bulgy side of the lens will face the screen.
Clarity is much better than the stock Fresnel lenses. Bigger sweet spot, no reflections from the ridges, no god rays.
There is some barrel distortion. The pre-lens distortion parameters, which are stored in a json file, need to be adjusted to account for the different lens shape. slikk66 has posted a fix with instructions here to account for the barrel distortion. There are separate versions for the Vive Pro (may not be needed with adapter V4, try without first). ProV12 or ProV14. NEW ProV24 and ProV25 are created with the new distortion tool. This is a work in progress.
Judging from reports, it's important to note that there appears to be some significant variance between lens batches and also lens alignment within the Vive. That unfortunately means the pre-lens distortion file does not work as well for some users and in some cases could be uncomfortable and even cause eyestrain. If that happens you will have to revert to stock or else modify the distortion file yourself.
A new distortion adjustment tool is available by sensercoltu on Github which can be used to fine tune the distortion parameters. It can produce good results and also removes chromatic aberration if you take your time and are methodical (it took me 2 hours the first time I used it). It is worth doing if you want to tweak it for your setup.
Thanks slikk66 and wescotte for working on the distortion parameters.
Thanks to ACkellySlater for posting about the lens swap he did, which inspired the need for lens adapters.
UPDATES
2020-05-13 V4 Redesigned to be better for the Vive-PRO (mixed results on Cosmos, should try v3.3). Lens distance to screen adjusted to reduce distortion. Works well now on the vive-pro without editing the distortion file. Lighter design. Lenses are now easier to install and also more secure.You don't need to slide the lens under the nubs anymore, just line it up, push down along the edges to press it into place.
V3.3 For regular Vive (slight comfort improvements over v3.2). [print 1 for each eye]
Added a version for the prescription inserts from VR Lens Lab (also fits VR Optician) There are separate files for left and right eye. May need to print with supports enabled.**
Added -2 mm low ipd (version V3.31_-2mm_low_IPD_pair or ViveProAdapterV4_ipd-2mm_pair.stl). This is or people like myself with lower ipd than the vive can go; otherwise you should use the regular V4 or V3.3. scottmuecke did a remix for low ipd, but the offset was not working for me. I've been using my own version for awhile that shifts the lenses towards the nose by 1 mm each side. I've been happy with it, so I decided to include it here. This brings the vive minimum down to 58 mm from 60. The screen image also needs to be shifted to account for this, so edit:C:\Program Files (x86)\Steam\config\steamvr.vrsettings
and add the ipd offset line under the section that starts with
"steamvr" : {
"background" : "#FF000000",
"ipdOffset" : -0.002,
(note that the ipdOffset value is in metres, so 0.002 = 2 mm)
Installation Notes
Great detailed installation video here by cbutters tech. Installation is similar for the vive pro.
Version 3.3 installation. The tolerance on the fit of the GearVR lens in the adapter is pretty tight. You may have difficulty getting it in depending on your print. With the flat part of the lens facing you, slide the top end under the 2 little nubs near the top of the adapter (only for v3.3). You need to have the flat part of the lens perfectly parallel with the flat part of the adapter, then push in at the bottom and it should just snap in place without too much force. Note that the bulgy side of the lens faces the screen. Its really distorted if you have it upside down!
Version 4 installation. The lens just presses into place with a bit of force. It is easier if you line up the flat edge first then press the sides in with your thumbs. Bulgy side of the lens will face the screen.
Clarity is much better than the stock Fresnel lenses. Bigger sweet spot, no reflections from the ridges, no god rays.
There is some barrel distortion. The pre-lens distortion parameters, which are stored in a json file, need to be adjusted to account for the different lens shape. slikk66 has posted a fix with instructions here to account for the barrel distortion. There are separate versions for the Vive Pro (may not be needed with adapter V4, try without first). ProV12 or ProV14. NEW ProV24 and ProV25 are created with the new distortion tool. This is a work in progress.
Judging from reports, it's important to note that there appears to be some significant variance between lens batches and also lens alignment within the Vive. That unfortunately means the pre-lens distortion file does not work as well for some users and in some cases could be uncomfortable and even cause eyestrain. If that happens you will have to revert to stock or else modify the distortion file yourself.
A new distortion adjustment tool is available by sensercoltu on Github which can be used to fine tune the distortion parameters. It can produce good results and also removes chromatic aberration if you take your time and are methodical (it took me 2 hours the first time I used it). It is worth doing if you want to tweak it for your setup.
Thanks slikk66 and wescotte for working on the distortion parameters.
Thanks to ACkellySlater for posting about the lens swap he did, which inspired the need for lens adapters.
Similar models
thingiverse
free

GEAR VR to VIVE - LENS LAB (/ VR Optician) ADAPTER by Bju
...r thing:3175279. it does now match the mandatory gap to adapt lens lab lenses and as replied by sketchy7 also vr optician inserts
thingiverse
free

Vive Pro EYE GearVR Lens Adapter by kusomaigo
...ent if it was damaged/scratched.
print 1 for each eye, making sure to mirror one to keep the notch at the top for easier access.
thingiverse
free
GearVR to Vive Lens Adapter (Refined) by horendus
...contact with the plastic
gearvr lens now have a tighter fit which locks them in lightly to prevent them coming loose during play
thingiverse
free

Vive Pro 2 Zenni #550021 Lens Adapter by byancey
...le name.
i use the vpla_offset.stl version, and i recommend you start with the same, and then try the other variations if needed.
thingiverse
free

HTC Vive 43mm prescription eyeglass lens adapter by im_a_bus_yo
... stock face gasket it allows to use vive at closest distace without touching my face.
printed with pla without supports on cr-10.
thingiverse
free

HP Reverb G2 Zenni #550021 adapter by mongo56
...quot; sketch and alter the offset for your ipd.
you can also increase the lens gap if needed (edit the "lensgapplane").
thingiverse
free

Lens Holder for Big Lenses by UC2
...rom 0,5 mm to 10 mm
open the file in customizer to adapt it for your lens.
for smaller lenses check out the generic lens holder
grabcad
free

62 IPD RIFT VR LENS ADAPTER.STL
...62 ipd rift vr lens adapter.stl
grabcad
oculus rift vr lens adapter for 62 ipd.
thingiverse
free

Prescription Lens Holder for Windows Mixed Reality Headsets by mmdoogie
...eadset than they do in the zenni frames. my ipd is close to the wmr default 63mm, so i have not tested it in this configuration.
thingiverse
free

GoPro Hero 4 Lens Shade for 4.35mm (no distortion) 72° lens by KDan
...ebay. they are typically $10-$20 on ebay (i paid $10.50 for mine) for what appears to be the same quality that costs $99 at peau.
Grodenvr
thingiverse
free

Vacuum-Cleaner Wall Mounts by GrodenVR
...me with only a rack to hang the hose, but nothing for the rest of the parts. these simple wall brackets helped tidy the place up.
thingiverse
free
Vive Wireless Dongle Hanger by GrodenVR
...le that comes with the htc vive tracking puck. allows you to mount the dongle under your desk or on the wall using 1 or 2 screws.
thingiverse
free
Vive Pro Wall Hanger by GrodenVR
...he head-strap sits on the hanger.
the hanger has holes for two mounting screws. i used 1.25 inch #5 screws with drywall anchors.
thingiverse
free

Oven leg extensions by GrodenVR
...ough to support the oven. over-sized with slight curve on bottom to slide over tile floors without getting caught in the grooves.
thingiverse
free

Swiveling Drum Clamp by GrodenVR
...y is with four 20mm m5 bolts with socket head caps and an m5x16 mm centre bolt. there is space for a washer under the bolt heads.
thingiverse
free

Vive System Button Blocker by GrodenVR
...).
attach with two small pieces of thin double-sided tape (such as scotch 136na) or glue it on if you're feeling reckless.
thingiverse
free

HP Reverb G2 Breakout Box Hanger by GrodenVR
... screws. the holes are sized to fit screws between 3 to 4 mm in diameter (1/8" - 5/32") with a conical head (pictured).
thingiverse
free

Reverb G2 Top Strap Attachment by GrodenVR
...5 pound weight.
this is sized to fit the strap of the hp reverb g2. it would be easy to resize for headsets with a thicker strap.
thingiverse
free

Coffee chute for Breville BCG600 coffee grinder by GrodenVR
...on the static electricity that makes grinding so messy. surprisingly, the grinds don't seem to stick to the pla chute either.
thingiverse
free

Bose Companion 3 speaker stand / bracket by GrodenVR
...es that are about 3-4 mm (1/8") longer because of the thickness of the bracket. attach the brackets using the longer screws.
Gearvr
3d_export
$11

polyquest worlds full pack
...for low & high-end mobile devices<br>• ready for oculus, gearvr vive, daydream<br>• great for rpg, fps & top down...
thingiverse
free

S6 GearVR Touchpad Protector by cahorton
...r the touchpad so the user can hold the gearvr naturally without causing problems. note that this is designed for the s6 gearvr.
thingiverse
free

GearVR v2 Faceplate Cover
...ting overheating of the phone. the gearvr v2 however doesn't allow this, so this provides enough space to insert an ice pack.
thingiverse
free
GearVR to Vive Lens Adapter (Refined) by horendus
...contact with the plastic
gearvr lens now have a tighter fit which locks them in lightly to prevent them coming loose during play
thingiverse
free
Vive Pro EYE GearVR Lens Adapter by kusomaigo
...ent if it was damaged/scratched.
print 1 for each eye, making sure to mirror one to keep the notch at the top for easier access.
thingiverse
free

Leapmotion Tilting mount for GearVR
... a more loose fit.
note** i have not yet tested this with extended play. i will update this only if i run into stability issues.
thingiverse
free
GearVR cooling for Samsung s6, s7,s8 etc. by Zemciko
...parts for different phones but i have not tested them (only s7 vith gearvr 2016 -v-223) so please tell me if other sizes fits ok.
thingiverse
free
GEAR VR to VIVE - LENS LAB (/ VR Optician) ADAPTER by Bju
...case you want to have a slim design of "gearvr to vive lens adapter" (thing:2837804) with advantage of getting...
thingiverse
free

OpenGear Virtual Reality for Note4 by skyworxx
...is a virtual reality headset which emulates the samsung gearvr headtracker. it is an open source project, with the...
Vive
turbosquid
$40

HTC vive headset
...model htc vive headset for download as 3ds, max, obj, and fbx on turbosquid: 3d models for games, architecture, videos. (1174451)
turbosquid
$19
HTC Vive Lighthouse
... available on turbo squid, the world's leading provider of digital 3d models for visualization, films, television, and games.
turbosquid
$19

Natuzzi Re-Vive
... available on turbo squid, the world's leading provider of digital 3d models for visualization, films, television, and games.
turbosquid
$69
HTC Vive VR headset
... 3d model htc vive for download as ma, max, obj, fbx, and dae on turbosquid: 3d models for games, architecture, videos. (1242503)
turbosquid
$23
E3D -HTC Vive Tracker
...model e3d -htc vive tracker for download as max, obj, and c4d on turbosquid: 3d models for games, architecture, videos. (1190728)
turbosquid
$14
HTC Vive Joystick Rose
...htc vive joystick rose for download as max, 3ds, fbx, and obj on turbosquid: 3d models for games, architecture, videos. (1520802)
turbosquid
$14
HTC Vive Joystick Blue
...htc vive joystick blue for download as max, 3ds, fbx, and obj on turbosquid: 3d models for games, architecture, videos. (1520789)
turbosquid
$24

Loreal Elseve Shampoo Color Vive 400ml
...el loreal elseve shampoo color vive 400ml for download as max on turbosquid: 3d models for games, architecture, videos. (1400713)
3d_export
$15

VR HTC VIVE COSMOS GEAR REPAIR
... vive cosmos gear repair mechanical element for restoring the helmet mount stl format: rar archive print nylon or abs layer 0,1mm
3ddd
$1
плитка Vives - Special Pieces Titan
...литки.
ссылка на производителя:http://www.vivesceramica.com/en/products/floor-tiles/porcelain-clay/serie.html?sid=521
Lens
3d_ocean
$16
Lens
...lens
3docean
camera film lens video widescreen
a standard camera lens with reflections.
3d_export
$15

Lens optical lens 3D Model
...odel
3dexport
lens optical accessories for the tablet accessories electronics
lens optical lens 3d model sergio108 76763 3dexport
turbosquid
$1

Lens
... available on turbo squid, the world's leading provider of digital 3d models for visualization, films, television, and games.
3ddd
free
Massive / Len
...massive / len
3ddd
massive , встроенный
светильник потолочный massive len
3d_ocean
$9
50mm Canon lens
...50mm canon lens
3docean
50mm canon foto lens photo
canon lens 50mm 1.8 the most practical affordable lens to start with
turbosquid
$20
Camera Lens
...osquid
royalty free 3d model camera lens for download as c4d on turbosquid: 3d models for games, architecture, videos. (1414988)
turbosquid
$2

Axicon Lens
...osquid
royalty free 3d model axicon lens for download as max on turbosquid: 3d models for games, architecture, videos. (1169215)
turbosquid
free

Camera Lens
...quid
royalty free 3d model camera lens for download as blend on turbosquid: 3d models for games, architecture, videos. (1546983)
turbosquid
$2

MAGNIFYING LENS
...y free 3d model magnifying lens for download as blend and fbx on turbosquid: 3d models for games, architecture, videos. (1633553)
turbosquid
$1

MAGNIFYING LENS
...y free 3d model magnifying lens for download as blend and fbx on turbosquid: 3d models for games, architecture, videos. (1633707)
Adapter
3d_export
$10
Adapter 3D Model
...adapter 3d model
3dexport
adapter
adapter 3d model mur 20260 3dexport
archive3d
free
Adapter socket 3D Model
...dapter socket adapter
adapter socket n090211 - 3d model (*.3ds) for interior 3d visualization.
turbosquid
$400

cell adaptation
...
royalty free 3d model cell adaptation for download as blend on turbosquid: 3d models for games, architecture, videos. (1701655)
archive3d
free
Adapter 3D Model
...ups pc equipment
adapter extron n180813 - 3d model (*.gsm+*.3ds) for interior 3d visualization.
turbosquid
$5
usb adapter
...royalty free 3d model usb adapter for download as ige and stl on turbosquid: 3d models for games, architecture, videos. (1582234)
turbosquid
$15
Power adapter
...free 3d model power adapter for download as max, obj, and fbx on turbosquid: 3d models for games, architecture, videos. (1510024)
turbosquid
$8
USB adapter
...e 3d model usb adapter for download as max, fbx, obj, and dwg on turbosquid: 3d models for games, architecture, videos. (1713542)
turbosquid
$30
adapter.3ds
... available on turbo squid, the world's leading provider of digital 3d models for visualization, films, television, and games.
turbosquid
$15
Nokia Adapter
... available on turbo squid, the world's leading provider of digital 3d models for visualization, films, television, and games.
turbosquid
$15
Universal adapter
... available on turbo squid, the world's leading provider of digital 3d models for visualization, films, television, and games.