GrabCAD
GE CP0
by GrabCAD
Last crawled date: 1 year, 11 months ago
"GE CP 0"
Catch us :
Email : onefuturesolutions@gmail.com
Instagram : https://www.instagram.com/1futuresolution/
Youtube : http://bit.ly/ytc-onefuturesolution
FB : https://www.facebook.com/1futuresolution/
"GE CP 0"
Designed by Ridwan S ( https://www.instagram.com/ridwan.sept/ )
Modeled with SolidWorks 2014
Rendered & Animated with KeyShot 5
File Types : .SLDPRT, .SLDASM, .SLDDRW, .IGS, .OBJ, .STL.
Vertices : 48780
Polygons : 97604
I designed this model for https://grabcad.com/challenges/ge-quick-connect-challenge
In my experience that is now working in public street lighting company, I've made a sealing for our company and it's products successfully in a test dive in the sea reaches a depth of about 36 meters (but ultimately plastic ABS which we use as the main material of body cracks) that are not could be deeper at that time.
I use a seal with a simple profile with screw locking method (because our products are round), so that the method inspired me in making this current design.
To produce a good sealing, the seal needs to be pressed with a precise and powerful, and I think snapfit method less suitable, so I decided to use the M3 countersink screws for locking.
Description:
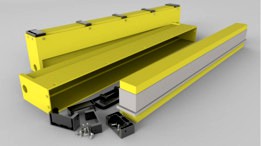
"QUICK CONNECTOR & QUICK CONNECTOR CORNER"
1. Using the method Die Casting (Aluminum) for the mass production process.
2. Formation of simple geometry and is very easy to do with the process of "Die Casting".
3. Processed tapping M3 for locking.
3. Lightweight but strong.
4. To finish coated with anti-rust sort of fluid that is not easy to rust.
This component serves to suppress and position the "Brick". "Brick" will hit the seal underneath.
I positioned this component not only on cut but also amid to generate pressure on the "SEAL" balanced. Reduce the possibility of leaks in the middle of construction.
"BRICK"
No changes to these components (as default)
"SEAL"
1. Using the method "RUBBER INJECTION MOLD" the material "NBR".
2. Formation of simple geometry, only 5mm diameter circular profile.
3. Easily mounted to the component "Brick".
4. I do not loose the "BRICK" so it can be terrifying "BRICK" to produce a better sealing.
"CAVITY"
1. Created by injection mold process.
2. Just as the default specification.
3. Just added profile to cradle the head bolt M3 Counter Sink, so the existing molding live repaired to add this profile
"GE CP 0"
Easily installed and removed , and a width of not more than 49 + 1 mm .
Construction of components installed neatly , no component is annoying when used to lower the risk of " Quick Connector " nudged when used .
You can download this model for "Free", but you should to hit "♥" button as the payment :).
Cheers,
Ridwan S
Catch us :
Email : onefuturesolutions@gmail.com
Instagram : https://www.instagram.com/1futuresolution/
Youtube : http://bit.ly/ytc-onefuturesolution
FB : https://www.facebook.com/1futuresolution/
"GE CP 0"
Designed by Ridwan S ( https://www.instagram.com/ridwan.sept/ )
Modeled with SolidWorks 2014
Rendered & Animated with KeyShot 5
File Types : .SLDPRT, .SLDASM, .SLDDRW, .IGS, .OBJ, .STL.
Vertices : 48780
Polygons : 97604
I designed this model for https://grabcad.com/challenges/ge-quick-connect-challenge
In my experience that is now working in public street lighting company, I've made a sealing for our company and it's products successfully in a test dive in the sea reaches a depth of about 36 meters (but ultimately plastic ABS which we use as the main material of body cracks) that are not could be deeper at that time.
I use a seal with a simple profile with screw locking method (because our products are round), so that the method inspired me in making this current design.
To produce a good sealing, the seal needs to be pressed with a precise and powerful, and I think snapfit method less suitable, so I decided to use the M3 countersink screws for locking.
Description:
"QUICK CONNECTOR & QUICK CONNECTOR CORNER"
1. Using the method Die Casting (Aluminum) for the mass production process.
2. Formation of simple geometry and is very easy to do with the process of "Die Casting".
3. Processed tapping M3 for locking.
3. Lightweight but strong.
4. To finish coated with anti-rust sort of fluid that is not easy to rust.
This component serves to suppress and position the "Brick". "Brick" will hit the seal underneath.
I positioned this component not only on cut but also amid to generate pressure on the "SEAL" balanced. Reduce the possibility of leaks in the middle of construction.
"BRICK"
No changes to these components (as default)
"SEAL"
1. Using the method "RUBBER INJECTION MOLD" the material "NBR".
2. Formation of simple geometry, only 5mm diameter circular profile.
3. Easily mounted to the component "Brick".
4. I do not loose the "BRICK" so it can be terrifying "BRICK" to produce a better sealing.
"CAVITY"
1. Created by injection mold process.
2. Just as the default specification.
3. Just added profile to cradle the head bolt M3 Counter Sink, so the existing molding live repaired to add this profile
"GE CP 0"
Easily installed and removed , and a width of not more than 49 + 1 mm .
Construction of components installed neatly , no component is annoying when used to lower the risk of " Quick Connector " nudged when used .
You can download this model for "Free", but you should to hit "♥" button as the payment :).
Cheers,
Ridwan S
Similar models
grabcad
free

GE QUICK CONNECT CONCEPT
...ls:
- brick: urethane
- cavity : injection molded abs plastic,
- seal: molded silicone
- lock and pusher : pa 6, 25% glass fiber
grabcad
free

~ GE Quick Connect ~
...cation do not exceed 0,5 mm. applied labyrinth construction seals ensure tightness of the scale of deformation.
greetings to all
grabcad
free

Tree
...u can download this model for "free", but you should to hit "♥" button as the payment :).
cheers,
ridwan s
grabcad
free

GE Quick Connect Challange
... aplicated plastic locking system to cavity, so can quick connect and release the brick from the cavity and also has a tight seal
grabcad
free

Bicycle Frame
...u can download this model for "free", but you should to hit "♥" button as the payment :).
cheers,
ridwan s
grabcad
free

Antena
...u can download this model for "free", but you should to hit "♥" button as the payment :).
cheers,
ridwan s
grabcad
free

Clamp Range 0 MM - 75 MM
...u can download this model for "free", but you should to hit "♥" button as the payment :).
cheers,
ridwan s
grabcad
free

R Buffet
...u can download this model for "free", but you should to hit "♥" button as the payment :).
cheers,
ridwan s
grabcad
free

Canopy
...u can download this model for "free", but you should to hit "♥" button as the payment :).
cheers,
ridwan s
grabcad
free

Soda Can
...u can download this model for "free", but you should to hit "♥" button as the payment :).
cheers,
ridwan s

Ge
turbosquid
$100

GE locomotive
...free 3d model ge locomotive for download as max, obj, and fbx on turbosquid: 3d models for games, architecture, videos. (1379061)
turbosquid
$15

GE Dishwasher
...free 3d model ge dishwasher for download as obj, fbx, and dae on turbosquid: 3d models for games, architecture, videos. (1270825)
turbosquid
$69

GE 70t
... available on turbo squid, the world's leading provider of digital 3d models for visualization, films, television, and games.
3ddd
$1
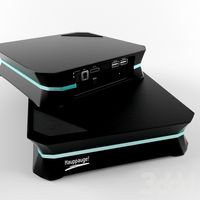
Hd pvr 2 ge plus
...hd pvr 2 ge plus
3ddd
hd pvr 2 ge plus
hd pvr 2 ge plus
turbosquid
$100

GE locomotive KCS
... 3d model ge locomotive kcs for download as max, obj, and fbx on turbosquid: 3d models for games, architecture, videos. (1510371)
turbosquid
$50

GE Monogram Ventilation
... available on turbo squid, the world's leading provider of digital 3d models for visualization, films, television, and games.
3ddd
$1

GE Profile Dishwasher
...сутствует файл макс 2012.http://products.geappliances.com/applproducts/dispatcher?request=specpage&sku;=pdt760ssfss
turbosquid
$99

4A-GE Toyota engine
...royalty free 3d model 4a-ge toyota engine for download as max on turbosquid: 3d models for games, architecture, videos. (1332851)
3ddd
free
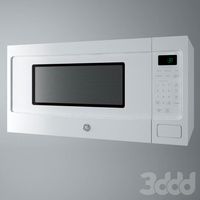
GE встроенная микроволновка
...
микроволновая печь , микроволновка
встроенная микроволновка. панелька сделана текстурой
turbosquid
$30

GE Black Microwave Oven
... available on turbo squid, the world's leading provider of digital 3d models for visualization, films, television, and games.