Thingiverse
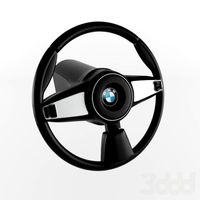
GAUGE POD for BMW 2002 e10 by Gearbox22
by Thingiverse
Last crawled date: 3 years ago
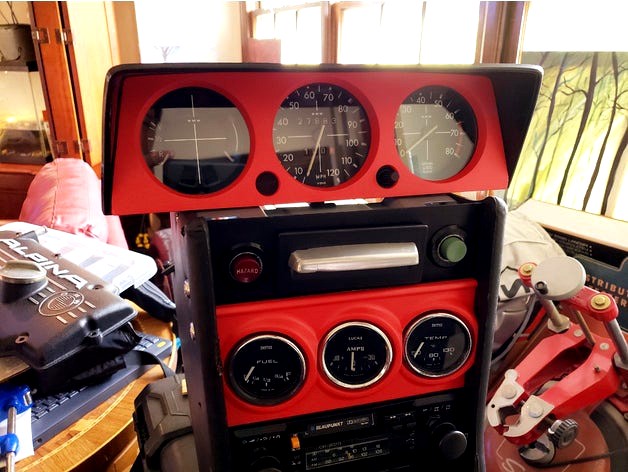
This is my adaptation of the BMW console I made that will fit three 52mm gauges and support a standard period Blaupunkt radio. I also printed the shifter surround but not included in this post as most of you must already have one (I didn't). Important to note is that I have incorporated the OEM ashtray and hazard switch assembly which is necessary for this build. I also 3D printed the rear brace with another part that will hold and support the back of the radio but also did not include it in this post as most of you will already have the rear OEM brace and depending on the radio, the dimensions will be different for the support. But you must make some kind of support as the vibrations of the car and bounces will undoubtedly crack the radio surround. I am sharing these files with the community for individual use but not allowing any commercial use of these files.
With all that being said, the panels are extremely robust but will require time and effort to finish them to OEM standards. I printed the parts using my Makerbot Replicator 2X and ABS filament. The strength will be provided by using 4 shells and this way you can get away with a 15% infill. But it will still take about 23 hours to print with full supports and rafts.
The unit is developed in 2 parts, the upper gauge pod and the lower radio surround as the size for a single complete unit exceeded my print area. I suggest that you get the parts sanded and smooth prior to gluing the two parts together. I used 240 grit sandpaper to knock down all the print lines and then filler primer. You may have to do this procedure a number of times to get a perfect finish. Once you are happy with the result, I used 800-1200 wet sandpaper to polish the primer to uncover any other possible surface defects. Again, you may have to do this a couple of times of re priming and sanding. Any deep marks can be addressed with some automotive bondo. But the better you prepare the surface, the better the part will come out.
Next is to glue the two parts together. The Gel type of crazy glue works great and I have been having some very good results with the "Gorilla" crazy glue, not the standard gorilla glue, that stuff will expand too much. Just test fit the parts and sand so it will have a perfect fit. I also developed the parts so you can use those small spring clamps on the back to hold the parts together while the glue is drying, and it does set quickly, so have everything ready.
Final finishing depends on your objective, pure stock or something different. I elected to make my console to match my Turbo dash pod, so I finished the gauge pod section to a perfectly flat and smooth surface and painted it to match. The radio and shifter surround I used a SEM textured paint and then an interior paint, Landau Black, which if applied correctly, gives you a near OEM look. I developed a bead over the 3 gauges to cover the gap between it and the ashtray panel as these consoles all have some give and take in positioning, so be aware of that. I am also thinking of using some chrome vinyl wrap on just the bead just to make it pop a bit more, especially if you decide to use the chrome bezel gauges which looks very impressive as opposed to the all black VDO gauges which I guess would be more period correct, but hey, do what you like. The screws on the side are number 8 interior screws with the cupped washers you can get from most auto supply houses and "U" speed nuts.
I am happy to share all my files and assist anyone with help with making these parts for for your own cars, but please do not use them commercially. And please let me know how these files worked out for you and hit me up on FB with some pictures of the finished product. Love to see them. The fun just never stops. Cheers Allan
Similar models
thingiverse
free
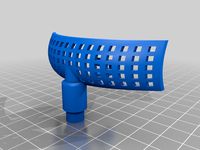
Roll Bar Gauge Pod
...print, i got the final finish by putting the parts in a fryer w/ some acetone and "melted" the outer layer of the parts
thingiverse
free

Sanding Tools by 314159
...lender if you need a customised sanding tool for a model. you may also be able to get the concave tool to print out in one piece.
thingiverse
free

Chevy Silverado Gauge Pod by GorillaGizmoz
...gned this for use in a 2003 chevy silverado. its an overhead console gauge pod. it will fit 2" gauge pods.
printed with petg
thingiverse
free

Ghostbusters Radio walkie talkie by daniel_nelms
...ments and perhaps some detailed pictures i could do a better job.
you should be able to print the parts and glue them together.
thingiverse
free

Koto Bridge by ninjafox
...se it to smooth out the bottom part of the bridge. you might have to use a needle file to make the groove for the strings deeper.
thingiverse
free

Volvo 240 Triple Gauge Pod by MesquiteAutomotive
...e revised 240 dash and radio in the lower postilion. you can move the radio to the lower spot on 86-93 240s like i have in my 89.
grabcad
free

Gauge pods
...gauge pods
grabcad
lotus elige gauge pods, central close to shifter. for 3d printing.
thingiverse
free
Fiero Shifter Surround Skeleton by Stricken
...in one piece, so i split it. you may have better luck than me. remove the vinyl from your old skeleton and glue it onto this one.
thingiverse
free

Sanding disk for drill using old orbital sander pads by ldparenteau
...uch at being exactly at right angle with the surface being sanded. cool, i recommend it since it works great, but not essential.
thingiverse
free

Ashtray Cover CAE Short Shifter Aschenbecher Abdeckung for BMW vehicles by zockerbender
...t. just glue it on with some superglue and it should work.
the parts are not rotated properly just print them flat on the bottom.
Gearbox22
thingiverse
free

Megasquirt JimStim Housing by Gearbox22
... removed should you need to add jumpers or re configure the jimstim. good luck with your project and the fun just never stops :d
thingiverse
free

LOTUS EUROPA AND ELAN PLUS 2 STEERING COLUMN SURROUND by Gearbox22
...t smooth as the rafts and supports adds a lot of unwanted artifacts, but it will be unseen and wrapped when finished. good luck.
E10
design_connected
$13

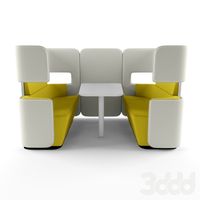
Armchair E10
...armchair e10
designconnected
richard lampert armchair e10 armchairs computer generated 3d model. designed by egon eiermann.
turbosquid
$9

Late WW2 German project E10 anty tank
... available on turbo squid, the world's leading provider of digital 3d models for visualization, films, television, and games.
3ddd
$1

iriver
...iriver 3ddd плеер , iriver iriver e10 ...
thingiverse
free
E10 by JARLANG
...e10 by jarlang
thingiverse
e10 german - 1:72
3dfindit
free

EASC-E10
...easc-e10
3dfind.it
catalog: festo
3dfindit
free

EASC-E10
...easc-e10
3dfind.it
catalog: festo
3dfindit
free

E10/16
...e10/16
3dfind.it
catalog: te connectivity
thingiverse
free
Radar Extruder Anet E10
...radar extruder anet e10
thingiverse
radar extruder anet e10
thingiverse
free
TABLET WALLMOUNT LENOVO E10
...tablet wallmount lenovo e10
thingiverse
wallmount for lenovo e10 tablet.
3dfindit
free

EAHM-E10-TH
...eahm-e10-th
3dfind.it
catalog: festo
2002
3d_export
$10
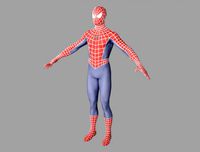
spiderman 2002
...spiderman 2002
3dexport
spiderman 2002 3d model high quality for animation
turbosquid
$15

human-2002
...turbosquid
royalty free 3d model human-2002 for download as on turbosquid: 3d models for games, architecture, videos. (1174920)
3d_export
$49

Koenigsegg CC8S 2002 3D Model
...koenigsegg cc8s 2002 3d model
3dexport
koenigsegg cc8s 2002
koenigsegg cc8s 2002 3d model dimary3 72301 3dexport
3d_export
$99
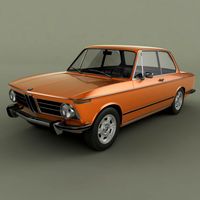
BMW 2002 3D Model
...t
car classic vehicle 3d model 1968 1972 bmw 2002 touring tii old antique coupe sport
bmw 2002 3d model desmonster 98298 3dexport
turbosquid
$75
2002 Nissan Sentra
... available on turbo squid, the world's leading provider of digital 3d models for visualization, films, television, and games.
turbosquid
$69

2002 Volkswagen Beetle
... available on turbo squid, the world's leading provider of digital 3d models for visualization, films, television, and games.
3d_export
$29
Ford Expedition 2002 3D Model
... 2002 3d model
3dexport
ford expedition 2000 2001 2002 door utility cars
ford expedition 2002 3d model 3dlogicline 39487 3dexport
3d_export
$99

Citroen C8 2002 3D Model
...port
citroen c8 2002 2010 2011 2012 2013 2014 mpv van minivan bus france french
citroen c8 2002 3d model humster3d 83919 3dexport
3d_export
$99

Ferrari Enzo 2002 3D Model
... 2003 2004 2005 2006 supercar sportcar sport racing car super pininfarina v12
ferrari enzo 2002 3d model humster3d 44650 3dexport
3d_export
$99

Lexus 2054 2002 3D Model
...ort movie steven spielberg 2002 2-door coupe sport luxury japan japanese toyota
lexus 2054 2002 3d model humster3d 83232 3dexport
Bmw
3ddd
$1
BMW
...bmw
3ddd
bmw , машина
высокополигональная модель bmw z4
3ddd
$1
BMW
...bmw
3ddd
bmw
авто бмв
3ddd
$1

bmw
...bmw
3ddd
bmw
3d max 2009,vray 1.5 sp2.fbx
3ddd
$1
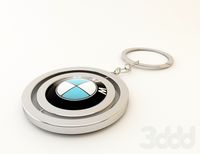
Брелок BMW
...брелок bmw
3ddd
брелок , bmw
брелок bmw
3ddd
$1
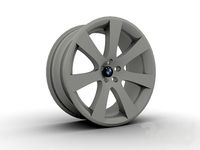
Диск BMW
...диск bmw
3ddd
bmw , диск
литой диск bmw
3d_ocean
$39

BMW M3
...bmw m3
3docean
3d model bmw m3 car
bmw m3
3ddd
$1
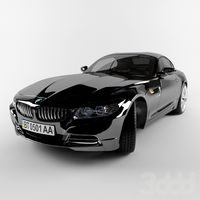
BMW z4
...bmw z4
3ddd
bmw
средне-детализированный bmw z4 coupe.
342500 полигонов
3d_ocean
$49
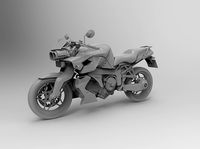
BMW K1300R
...bmw k1300r
3docean
bike bmw k1300r motorcycle vehicle
3d model of bmw k1300 bike.
3d_ocean
$60

bmw
...bmw
3docean
bmw1 high poly model interior
high poly model of a series 1 bmw with interior and render scene
3ddd
$1
Руль BMW
...руль bmw
3ddd
руль
руль автомобиля bmw.
Pod
design_connected
$13

Pod
...pod
designconnected
niche modern pod computer generated 3d model. designed by pyles, jeremy.
3d_export
$5

engine pod
...engine pod
3dexport
engine pod
turbosquid
$80
POD
...pod
turbosquid
royalty free 3d model pod for download as 3ds on turbosquid: 3d models for games, architecture, videos. (1234976)
3ddd
$1
Pod 325
...pod 325
3ddd
пуф
pod 325
turbosquid
$4
PODS
...oyalty free 3d model pods for download as blend, fbx, and obj on turbosquid: 3d models for games, architecture, videos. (1563118)
3d_export
$5

coworking pods
...coworking pods
3dexport
private pods for workspaces, offices
3ddd
$1
Pod Meeting
...pod meeting
3ddd
pod meeting , martela
146cm x 205cm
design_connected
$16

Pod 325
...pod 325
designconnected
department pod 325 computer generated 3d model.
3d_ocean
$5

Ariel Power Pod
...model ariel power pod ariel power pod, modeled in cinema 4d r14 and all materials are included. if you like it, please rate this
3ddd
$1

POD 325
...pod 325
3ddd
кресло мешок
кресло мешок pod 325, room 21 85x50x100cm.
Gauge
3d_ocean
$10
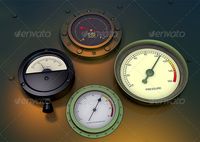
Gauges
...rim to them. each gauge has an xpresso tag to give them an automatic animation without the need for keyframing and can be chan...
3d_export
$5

pressure gauge
...pressure gauge
3dexport
pressure gauge
3d_export
$5
gauge protector
...gauge protector
3dexport
gauge protector
3d_export
$5
Gauge 3D Model
...gauge 3d model
3dexport
gauge pressure gas air liquid
gauge 3d model fau 71180 3dexport
3d_export
$5

protected pressure gauge
...protected pressure gauge
3dexport
protected pressure gauge
3d_export
$5

hard gauge protector
...hard gauge protector
3dexport
hard gauge protector
turbosquid
$29
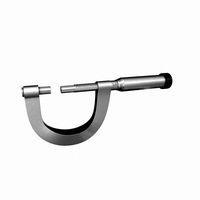
Screw Gauge
... available on turbo squid, the world's leading provider of digital 3d models for visualization, films, television, and games.
turbosquid
$29
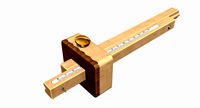
Marking Gauge
... available on turbo squid, the world's leading provider of digital 3d models for visualization, films, television, and games.
turbosquid
$20

Blade Gauge
... available on turbo squid, the world's leading provider of digital 3d models for visualization, films, television, and games.
3d_export
$5
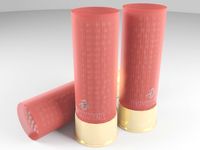
12 Gauge 3D Model
...12 gauge 3d model
3dexport
shotgun shell gauge 12
12 gauge 3d model pirog 54511 3dexport